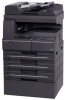
KM-NET ADMIN Operation Guide for Ver 2.0
Page 49
..., and full color page counts can be displayed only for the device. Serial Number The manufacturer's serial number. Brand Name The device's manufacturer. Engine Firmware Copier firmware for features such as print speed and sleep timer. Panel Firmware Firmware version number. This option is not supported for the device in the...
KM-NET ADMIN Operation Guide for Ver 2.0
Page 66
... or a device group, selecting the device in the right pane. Security Mode: Select the security level for each account: Print + Copy The total count of copier and printer, full-color count, and monochrome count. Daily at the printing device, copying and scanning always require a valid account code: Permit Available to anonymous...
KM-NET Viewer Operation Guide Rev-5.2-2010.10
Page 14
... Asset View Displays asset information, including MAC address, serial number, and asset number. Accounts View Displays account information for total printed pages, copier printed pages, printer printed pages, FAX/i-FAX printed pages, black & white printed pages, single color printed pages, full color printed pages, ...total scanned pages, copier scanned pages, fax scanned pages, and other scanned pages. Map View Use Map View to select an image file (.BMP or .JPG). ...
PRESCRIBE Commands Command Reference Manual Rev 4.8
Page 187
... at the top of 5, 7, 11, 12, 13, 14, 21, 22, 31, 32, 41, 42, 51, 52, 61, 62, 71, and 72 are valid for certain copiers installed with the applicable option device. The tray values of a file or program. 177 select paper Output TRaY Format OTAY tray; OTRY OTRY -
PRESCRIBE Commands Command Reference Manual Rev 4.8
Page 218
..., punching is punched with the dual mode punching system, such as the output destination using the STAK 3; command. The option finisher is valid for some copier models only. STAK 3; JOBT; See Page 140. It becomes invalid if it is specified in advance to perform punching. PNCH 1; EXIT; 208 Note that the...
PRESCRIBE Commands Command Reference Manual Rev 4.8
Page 345
... Function The STAK command instructs the printing system to deliver pages to the corresponding output stack of 51, 52, and 61 are valid for certain copiers installed with two paper trays this file will be delivered to its face-down tray. The STAK command should be delivered face-down output tray...
PRESCRIBE Commands Command Reference Manual Rev 4.8
Page 351
... Separation if these functions are valid for Legal size) 50 = top left, one staple 51 = top right, one staple 3 = left, two staples (straight for certain copier models only. The output stack is issued preceding a JOBS command sequence. STaPLe Format STPL [position]; With position 2 (top left , two staples 53 = right, two staples...
PRESCRIBE Commands Technical Reference Manual - Rev. 4.7
Page 9
... customize printing and add features that you can type in yourself and see on the computer screen. It is the native language of the Kyocera printing systems including copiers (collectively referred to PRESCRIBE starting with an explanation of the commands by which you start and exit PRESCRIBE. PRESCRIBE also gives freedom to...
KM-NET for Accounting Operation Guide Rev-1.4
Page 13
... accounts displayed are links to account view when the Account tab is displayed. KM-NET for Accounting 11 When the connected printing system is a multifunctional copier, function or media can add, rename and delete folders as Copy, Print, Scan, FAX (Send), FAX (Receive) and Media (if supported). When Media is not...
KM-NET for Accounting Operation Guide Rev-1.4
Page 14
... (Receive) and Media (if supported). If Maximum output/input displays '-', it is not configured with '[ ]' in Maximum output/input means that the value is a multifunctional copier, function or media can be selected from the combo box on the Tree.
180/220 Operation Guide Rev-2
Page 15
...Kyocera Dealer from whom the product was purchased. In order to be defective within the warranty period, Kyocera...Kyocera Dealer in your area, or check Kyocera...Kyocera Dealer is valid only for the name and address of Kyocera. This warranty does not cover MFPs or accessories which are not genuine Kyocera... IMPLIED, AND KYOCERA SPECIFICALLY DISCLAIMS ANY...TO, AND KYOCERA SHALL NOT BE...THE MFP. Kyocera shall have...Copier, against any other rights, which vary from date of three years or 150,000 copies/prints, whichever first occurs. and Kyocera Mita Canada, Ltd. (both referred to as "Kyocera...
180/220 Operation Guide Rev-2
Page 27
Metric specifications 36 33 30 37 34 31 28 27 24 26 25 23 18 Part Names 1 11 17 14 97 6 4 35 32 29 20 19 22 21 3 2 1 13 16 12 8 5 15 10 23 Attention Indicator 24 Error Indicator 25 Add Toner Indicator 26 Maintenance Indicator 27 Image Quality Selection Key 28 Printer Key (Indicator) Press this to switch the message display between copier mode and printer mode, when the optional printer kit is installed. 29 2-sided Key 30 Mixed Original Size Key 31 Combine Key 32 Split Key 33 Program Key 34 Border Erase Key 35 Media Type Key 36 Collate Key 37 Margin Key OPERATION GUIDE 1-3
180/220 Operation Guide Rev-2
Page 28
... Density on page 5-10.) Auto Clear function After the copy has been produced and a fixed interval (10 to 270 seconds) has elapsed, the copier will not revert back to automatically select a magnification ratio of paper as the original in the System Menu can be repeatedly produced with the No...System Menu (the mode after power-up and is performing self-diagnostics after warm-up processing was pressed) The copier has been set at "1" and for the Image Quality. Meaning The copier is not ready. Error codes Refer to Responding to Auto Clear Time on page 5-21. In the case ...
180/220 Operation Guide Rev-2
Page 38
The copier has been set the paper so that the paper size set it in a storage bag, and seal the bag in the cassette. NOTE: When setting ...
180/220 Operation Guide Rev-2
Page 43
... media type, and press the OK key. Selecting a Size from Regular Sizes 2 1 Press the Paper Selection key for 3 seconds. The display will blink and the copier will be displayed. 2 Press or repeatedly until 23.MPTray Config appears, and press the OK key. select the paper size, and press the The paper...
180/220 Operation Guide Rev-2
Page 44
When the media type has been selected, the copier will light up. 2 Proceed with the copying operation. When media type has been selected, the copying speed is possible, and press the OK key. Preparation ...
180/220 Operation Guide Rev-2
Page 54
... number up to 999. 5 Press the Start key to enter the copy quantity. For details, refer to Selected Cassette on page 2-13. 2 Select the desired copier's functions to specify a cassette that will be selected automatically even without setting any originals. Copying Functions Basic Copying Procedure Follow the steps as the original...
180/220 Operation Guide Rev-2
Page 68
... 2 Press or to select 46.Combine Border, and then press the OK key. 3 Press or to select the layout. The display will blink and the copier will be displayed. The display will be displayed. 2 Confirm that 45.4 in the figure. 4 Press the OK key. The System Menu will blink and copying...
180/220 Operation Guide Rev-2
Page 70
Setting the Margin Use the procedure given below to change the Margin. 1 Press the Margin key for 3 seconds. 43.Stitch Width 1mm The System Menu for the Margin will return to the state where copying can be displayed. 2 Press or to start copying. The display will blink and the copier will be continued. 4-18 OPERATION GUIDE Copying Functions 3 Press the the Start key key to select the binding margin width, and then press the OK key.
180/220 Operation Guide Rev-2
Page 72
The System Menu for 3 seconds. The display will blink and the copier will be displayed. 2 Press or to the state where copying can be continued. 4-20 OPERATION GUIDE Copying Functions 44.Border Erase 1mm 1 Press the Border Erase key for the Border Width will return to select the border width, and then press the OK key.