Kyocera FS C5030N Waste Toner - Color LED Printer
Kyocera FS C5030N Waste Toner
Related Manual Pages


Similar Questions


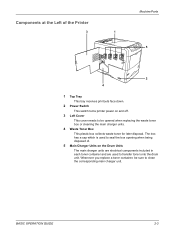
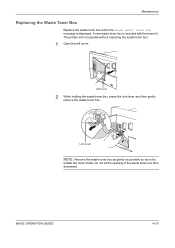
Where Is The Waste Toner Box Located
where is the waste toner box located
where is the waste toner box located
(Posted by bgula 11 years ago)

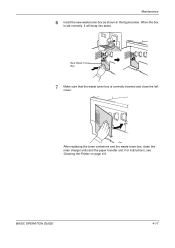
How Do I Empty The How Waste Toner Box On A Fs-1028mfp/fs
how do I empty the how waste toner box on a fs-1028mfp/fs
how do I empty the how waste toner box on a fs-1028mfp/fs
(Posted by wllrj 12 years ago)

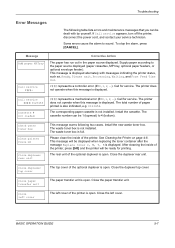
Says To 'check Waste Toner Box', I've Done This, But Still Not Printing
(Posted by Anonymous-27091 13 years ago)

Kyocera Fs-c5030n Printer Issue
I had to replace the printer cartridge K and now it prints completely black pages.
I had to replace the printer cartridge K and now it prints completely black pages.
(Posted by wilsonn 13 years ago)