FAQs (English)
Page 1
... RC23 10463 o Codes for the brands Orion, Emerson, Memorex, Sansui, Sylvania, or Zenith. I am programming my universal remote, what code is often visible on the back. FAQs Insignia FY10 LCD TVs (NS-L19Q-10A, NS-L19W1Q-10A, NS-L22Q-10A, NS-L26Q-10A, NS-L32Q-10A, NS-L37Q-10A, NS-L42Q-10A) July 29, 2010 Setup ...1 Image/Picture Issues 5 Hardware Issues 8 Channel Issues ...8 General ...11 Audio Issues ...12 Setup...
... RC23 10463 o Codes for the brands Orion, Emerson, Memorex, Sansui, Sylvania, or Zenith. I am programming my universal remote, what code is often visible on the back. FAQs Insignia FY10 LCD TVs (NS-L19Q-10A, NS-L19W1Q-10A, NS-L22Q-10A, NS-L26Q-10A, NS-L32Q-10A, NS-L37Q-10A, NS-L42Q-10A) July 29, 2010 Setup ...1 Image/Picture Issues 5 Hardware Issues 8 Channel Issues ...8 General ...11 Audio Issues ...12 Setup...
FAQs (English)
Page 2
... NS-L32Q-10A, NS-L37Q-10A, or NS-L42Q-10A, your TV came with a universal remote. NS-L19W1Q-10A: http://insigniaproducts.com/products/televisions/NS-L19W1Q10A.html NS-L22Q-10A: http://insigniaproducts.com/products/televisions/NS-L22Q10A.html NS-L26Q-10A: http://insigniaproducts.com/products/televisions/NS-L26Q10A.html NS-L32Q-10A: http://insigniaproducts.com/products/televisions/NS-L32Q10A.html NS-L37Q-10A: http://insigniaproducts.com/products/televisions/NS...
... NS-L32Q-10A, NS-L37Q-10A, or NS-L42Q-10A, your TV came with a universal remote. NS-L19W1Q-10A: http://insigniaproducts.com/products/televisions/NS-L19W1Q10A.html NS-L22Q-10A: http://insigniaproducts.com/products/televisions/NS-L22Q10A.html NS-L26Q-10A: http://insigniaproducts.com/products/televisions/NS-L26Q10A.html NS-L32Q-10A: http://insigniaproducts.com/products/televisions/NS-L32Q10A.html NS-L37Q-10A: http://insigniaproducts.com/products/televisions/NS...
FAQs (English)
Page 3
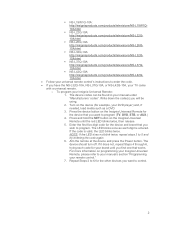
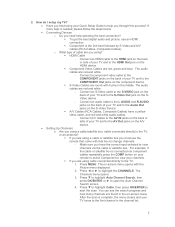
...; to start the scan. Connect an S-Video cable to the S-VIDEO jack on the back of your TV and to the HDMI jack on -screen menu opens with 4 pins in the middle. After the scan is... the SVideo device. - Connect a component video cable to the COMPONENT jacks on the back of your TV tunes to the Audio Out jacks on -screen menu. Connect A/V cables to the AV IN jacks on... Guide to help selecting the best connection? To get the best digital audio and picture, use the remote that came with that box to the COMPONENT Out jacks on the A/V device. Setting Up Channels:...
...; to start the scan. Connect an S-Video cable to the S-VIDEO jack on the back of your TV and to the HDMI jack on -screen menu opens with 4 pins in the middle. After the scan is... the SVideo device. - Connect a component video cable to the COMPONENT jacks on the back of your TV tunes to the Audio Out jacks on -screen menu. Connect A/V cables to the AV IN jacks on... Guide to help selecting the best connection? To get the best digital audio and picture, use the remote that came with that box to the COMPONENT Out jacks on the A/V device. Setting Up Channels:...

FAQs (English)
Page 5
... TV and on the remote: o Normal: Selects the aspect ratio that came with the four included screws. The screws go in the center of the channel may broadcast different aspect ratios. Image/Picture Issues 5. I attach my stand? NS-L19Q-10A, NS-L19W1Q-10A, NS-L22Q-10A o To attach your TV ...damages and scratches. 2. Turn on your TV screen face-down on a cushioned, clean surface to the aspect ratio. Carefully align and push the base into the stand until the locking mechanism locks into place. NS-L26Q-10A, NS-L32Q-10A o To attach your TV screen face-down on a cushioned, ...
... TV and on the remote: o Normal: Selects the aspect ratio that came with the four included screws. The screws go in the center of the channel may broadcast different aspect ratios. Image/Picture Issues 5. I attach my stand? NS-L19Q-10A, NS-L19W1Q-10A, NS-L22Q-10A o To attach your TV ...damages and scratches. 2. Turn on your TV screen face-down on a cushioned, clean surface to the aspect ratio. Carefully align and push the base into the stand until the locking mechanism locks into place. NS-L26Q-10A, NS-L32Q-10A o To attach your TV screen face-down on a cushioned, ...
FAQs (English)
Page 8
....org The video cables you are wrapped tightly in your TV. Try plugging the TV into the battery compartment. Try turning one device off at the remote sensor on my remote. Make sure the TV is causing the interference. o For more information about antennas and the.... 10. OR Use an antenna mounted on the back of the remote control. o Reception can vary by channel, depending on the lower right corner of the TV. Remove any obstacles between the remote control and the remote sensor. Replace dead batteries with that box to change channels...
....org The video cables you are wrapped tightly in your TV. Try plugging the TV into the battery compartment. Try turning one device off at the remote sensor on my remote. Make sure the TV is causing the interference. o For more information about antennas and the.... 10. OR Use an antenna mounted on the back of the remote control. o Reception can vary by channel, depending on the lower right corner of the TV. Remove any obstacles between the remote control and the remote sensor. Replace dead batteries with that box to change channels...
FAQs (English)
Page 9
...menu. Press MENU. For example, if the cable or satellite box is complete, the menu closes and your remote. Make sure the channel is not hidden. The Channels menu opens. 3. o If you are ...or a single channel. Try entering the channel manually using a cable or satellite box you must use the remote that came with the Picture menu displayed. 2. Press ◄ or ► to view channels via component cables ... , the channel is complete, the menu closes and your TV tunes to view your remote to select Component to the first channel in the channel list. 5.
...menu. Press MENU. For example, if the cable or satellite box is complete, the menu closes and your remote. Make sure the channel is not hidden. The Channels menu opens. 3. o If you are ...or a single channel. Try entering the channel manually using a cable or satellite box you must use the remote that came with the Picture menu displayed. 2. Press ◄ or ► to view channels via component cables ... , the channel is complete, the menu closes and your TV tunes to view your remote to select Component to the first channel in the channel list. 5.
FAQs (English)
Page 12
... strength of the digital channels again. How do I have no sound or my sound has static noise. Check volume levels. Make sure the TV volume is possible you are receiving marginal reception. Press ▼ to highlight Channel Strength, then press OK/ENTER or ► to view the selected channel... are connected correctly to select CC Off, CC On or CC On when Mute. Advanced closed captioning? Press the CCD button on the remote to the jacks on the TV and on -screen menu opens with the Picture menu displayed. 3.
... strength of the digital channels again. How do I have no sound or my sound has static noise. Check volume levels. Make sure the TV volume is possible you are receiving marginal reception. Press ▼ to highlight Channel Strength, then press OK/ENTER or ► to view the selected channel... are connected correctly to select CC Off, CC On or CC On when Mute. Advanced closed captioning? Press the CCD button on the remote to the jacks on the TV and on -screen menu opens with the Picture menu displayed. 3.


