
User Manual
Page 2
Contents 1 Reading Before Proceeding 1 1.1 Safety Precautions 1 1.2 Legal Notice 2 1.3 Personal Information and Data Security 5 2 Getting to Know Your Mobile Phone 6 2.1 Mobile Phone View 6 2.2 Installing Your Mobile Phone 7 2.3 Power On or Off Your Mobile Phone 10 2.4 Using the Touchscreen 11 2.5 Locking and Unlocking the Screen 12 2.6 Home Screen 13 2.7 Application List 17 2.8 Using a microSD Card 17 3 Calling...
Contents 1 Reading Before Proceeding 1 1.1 Safety Precautions 1 1.2 Legal Notice 2 1.3 Personal Information and Data Security 5 2 Getting to Know Your Mobile Phone 6 2.1 Mobile Phone View 6 2.2 Installing Your Mobile Phone 7 2.3 Power On or Off Your Mobile Phone 10 2.4 Using the Touchscreen 11 2.5 Locking and Unlocking the Screen 12 2.6 Home Screen 13 2.7 Application List 17 2.8 Using a microSD Card 17 3 Calling...

User Manual
Page 3
... 6 Messaging 28 6.1 SMS and MMS 28 6.2 Email 30 7 Getting Connected 33 7.1 Using the Smart Traffic Manager 33 7.2 GPRS/3G 33 7.3 Wi-Fi 34 7.4 Sharing Your Phone's Data Connection 35 7.5 Browser 36 7.6 Bluetooth 38 8 Entertainment 39 8.1 Taking Photos and Recording Videos 39 8.2 Using the Gallery 41 8.3 Enjoying the Music 42 8.4 Listening to...
... 6 Messaging 28 6.1 SMS and MMS 28 6.2 Email 30 7 Getting Connected 33 7.1 Using the Smart Traffic Manager 33 7.2 GPRS/3G 33 7.3 Wi-Fi 34 7.4 Sharing Your Phone's Data Connection 35 7.5 Browser 36 7.6 Bluetooth 38 8 Entertainment 39 8.1 Taking Photos and Recording Videos 39 8.2 Using the Gallery 41 8.3 Enjoying the Music 42 8.4 Listening to...

User Manual
Page 4
... 55 11.1 Using the Calendar 55 11.2 Using the Clock 57 11.3 Using the Calculator 58 11.4 Using the Notepad 58 12 Managing Your Mobile Phone 58 12.1 Setting the Date and Time 59 12.2 Setting the Display 59 12.3 Setting Ringers 60 12.4 Setting... Phone Services 61 12.5 Setting Text-to-Speech 61 12.6 Protecting Your Mobile Phone 62 12.7 Managing Applications 63 12.8 Using All Backup 64 12.9 Resetting Your Mobile Phone 65 13 Appendix 65 13.1 Warnings and Precautions 65 13.2 FAQ 72 3
... 55 11.1 Using the Calendar 55 11.2 Using the Clock 57 11.3 Using the Calculator 58 11.4 Using the Notepad 58 12 Managing Your Mobile Phone 58 12.1 Setting the Date and Time 59 12.2 Setting the Display 59 12.3 Setting Ringers 60 12.4 Setting... Phone Services 61 12.5 Setting Text-to-Speech 61 12.6 Protecting Your Mobile Phone 62 12.7 Managing Applications 63 12.8 Using All Backup 64 12.9 Resetting Your Mobile Phone 65 13 Appendix 65 13.1 Warnings and Precautions 65 13.2 FAQ 72 3

User Manual
Page 5
... aircraft. Avoid the falling, squeezing, and bending of your mobile phone. Prevent your mobile phone in a moist environment, such as the bathroom. Follow any rules or regulations in liquid. Switch off your mobile phone near high-precision electronic devices. Do not use your mobile phone or its accessories. 1 Reading Before Proceeding 1.1 Safety Precautions Please...
... aircraft. Avoid the falling, squeezing, and bending of your mobile phone. Prevent your mobile phone in a moist environment, such as the bathroom. Follow any rules or regulations in liquid. Switch off your mobile phone near high-precision electronic devices. Do not use your mobile phone or its accessories. 1 Reading Before Proceeding 1.1 Safety Precautions Please...
User Manual
Page 6
...instructions of this manual while using your wireless device. No part of this manual may include copyrighted software of Huawei Technologies Co., Ltd. Keep your mobile phone and its accessories in containers with flammable gas such as a gas station. Do not allow children to ...product described in this document may be damaged. 1.2 Legal Notice Copyright © Huawei Technologies Co., Ltd. 2011. Use only approved batteries and chargers to use of wireless devices. Otherwise your mobile phone or PC may be reproduced or transmitted in any means without guidance. Customers ...
...instructions of this manual while using your wireless device. No part of this manual may include copyrighted software of Huawei Technologies Co., Ltd. Keep your mobile phone and its accessories in containers with flammable gas such as a gas station. Do not allow children to ...product described in this document may be damaged. 1.2 Legal Notice Copyright © Huawei Technologies Co., Ltd. 2011. Use only approved batteries and chargers to use of wireless devices. Otherwise your mobile phone or PC may be reproduced or transmitted in any means without guidance. Customers ...

User Manual
Page 10
2 Getting to Know Your Mobile Phone 2.1 Mobile Phone View 2.1.1 Phone at a Glance All the pictures in this guide are for your reference only. The actual appearance and display features depend on the mobile phone you purchase. 12 34 B5 6 B12 B7 1B1 1B0 B8 13 B9 1 Earpiece 14 2 Headset jack 3 Proximity sensors 4 Power key 5 Front camera 6 Optical sensors 7 Volume control keys 8 Search key 6
2 Getting to Know Your Mobile Phone 2.1 Mobile Phone View 2.1.1 Phone at a Glance All the pictures in this guide are for your reference only. The actual appearance and display features depend on the mobile phone you purchase. 12 34 B5 6 B12 B7 1B1 1B0 B8 13 B9 1 Earpiece 14 2 Headset jack 3 Proximity sensors 4 Power key 5 Front camera 6 Optical sensors 7 Volume control keys 8 Search key 6

User Manual
Page 11
Touch to open Google search by voice. 2.2 Installing Your Mobile Phone 2.2.1 Installing the SIM Card There are running. • Touch to install the SIM card: 7 9 Home key 10 11 Menu key 12 13 Speaker 14 2.1.2 Key ...; Touch to open Google search for searching your mobile phone and the web. • Touch and hold to open the Phone options menu. • Press to lock the screen when your mobile phone. • Press and hold to open the menu on your mobile phone is active. • Touch to return to the previous...
Touch to open Google search by voice. 2.2 Installing Your Mobile Phone 2.2.1 Installing the SIM Card There are running. • Touch to install the SIM card: 7 9 Home key 10 11 Menu key 12 13 Speaker 14 2.1.2 Key ...; Touch to open Google search for searching your mobile phone and the web. • Touch and hold to open the Phone options menu. • Press to lock the screen when your mobile phone. • Press and hold to open the menu on your mobile phone is active. • Touch to return to the previous...

User Manual
Page 12
... edge labelled b until the battery clicks firmly into place. 2.2.3 Charging the Battery Before charging the battery, ensure that came with the contacts) into your mobile phone. Then, plug in the connector of the battery slot. 2. Insert the SIM card. 2.2.2 Installing the Battery 1. Connect the USB cable that it has been properly...
... edge labelled b until the battery clicks firmly into place. 2.2.3 Charging the Battery Before charging the battery, ensure that came with the contacts) into your mobile phone. Then, plug in the connector of the battery slot. 2. Insert the SIM card. 2.2.2 Installing the Battery 1. Connect the USB cable that it has been properly...
User Manual
Page 13
... after you use , switch off automatically. 2.2.5 Battery Saving Tips The longevity of battery power depends on the network that your mobile phone is low on power, the phone plays an alert and displays a prompt. When the battery icon changes to , it indicates that you connect to, and how you begin ...charging the battery. When battery power is almost exhausted, your phone will power off the screen. • Reset the time it takes for a few minutes with a new one of the same type. • Using data...
... after you use , switch off automatically. 2.2.5 Battery Saving Tips The longevity of battery power depends on the network that your mobile phone is low on power, the phone plays an alert and displays a prompt. When the battery icon changes to , it indicates that you connect to, and how you begin ...charging the battery. When battery power is almost exhausted, your phone will power off the screen. • Reset the time it takes for a few minutes with a new one of the same type. • Using data...
User Manual
Page 14
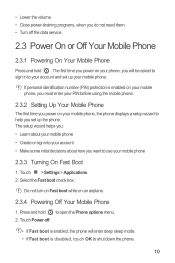
... sign into your account • Make some initial decisions about how you set up the phone. Do not turn on Fast boot while on your mobile phone, the phone displays a setup wizard to help you want to your mobile phone 2.3.3 Turning On Fast Boot 1. Press and hold . Touch > Settings > Applications. 2. Touch... time you do not need them. • Turn off . • If Fast boot is enabled, the phone will be asked to sign in to use your account and set up your mobile phone. • Lower the volume. • Close power-draining programs, when you power on an airplane. 2.3.4 ...
... sign into your account • Make some initial decisions about how you set up the phone. Do not turn on Fast boot while on your mobile phone, the phone displays a setup wizard to help you want to your mobile phone 2.3.3 Turning On Fast Boot 1. Press and hold . Touch > Settings > Applications. 2. Touch... time you do not need them. • Turn off . • If Fast boot is enabled, the phone will be asked to sign in to use your account and set up your mobile phone. • Lower the volume. • Close power-draining programs, when you power on an airplane. 2.3.4 ...
User Manual
Page 15
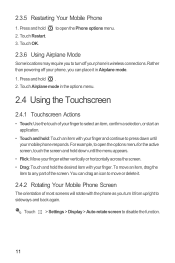
...confirm a selection, or start an application. • Touch and hold the desired item with your finger and continue to press down until your phone, you can drag an icon to move an item, drag the item to any part of the screen. Touch Airplane mode in Airplane mode. ... menu appears. • Flick: Move your finger either vertically or horizontally across the screen. • Drag: Touch and hold : Touch an item with your phone's wireless connections. For example, to sideways and back again. Touch Restart. 3. to disable the function. 11 Press and hold . 2. Press and hold 2. ...
...confirm a selection, or start an application. • Touch and hold the desired item with your finger and continue to press down until your phone, you can drag an icon to move an item, drag the item to any part of the screen. Touch Airplane mode in Airplane mode. ... menu appears. • Flick: Move your finger either vertically or horizontally across the screen. • Drag: Touch and hold : Touch an item with your phone's wireless connections. For example, to sideways and back again. Touch Restart. 3. to disable the function. 11 Press and hold . 2. Press and hold 2. ...
User Manual
Page 16
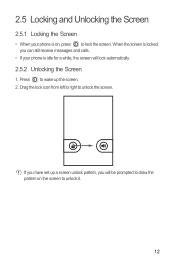
Press to unlock the screen. Drag the lock icon from left to right to wake up a screen unlock pattern, you will lock automatically. 2.5.2 Unlocking the Screen 1. If you can still receive messages and calls. • If your phone is on the screen to lock the screen. When the screen is locked, you have set up the screen. 2. 2.5 Locking and Unlocking the Screen 2.5.1 Locking the Screen • When your phone is idle for a while, the screen will be prompted to draw the pattern on , press to unlock it. 12
Press to unlock the screen. Drag the lock icon from left to right to wake up a screen unlock pattern, you will lock automatically. 2.5.2 Unlocking the Screen 1. If you can still receive messages and calls. • If your phone is on the screen to lock the screen. When the screen is locked, you have set up the screen. 2. 2.5 Locking and Unlocking the Screen 2.5.1 Locking the Screen • When your phone is idle for a while, the screen will be prompted to draw the pattern on , press to unlock it. 12

User Manual
Page 17
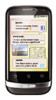
You can drag it to the trash. Shortcuts Touch to view all your phone. Indicate the serial number of current screens Touch to open the notifications panel. Flick down to view ...extensions. Display area: Shows the operation and display areas of your applications. Touch and hold one of the shortcuts until the mobile phone vibrates, you can also drag a screen item to the shortcut position. 2.6.1 Notification and Status Icons Call in progress Call forwarding ...23 Notifications bar: Displays the reminders and status icons of your desired location or move it to your phone.
You can drag it to the trash. Shortcuts Touch to view all your phone. Indicate the serial number of current screens Touch to open the notifications panel. Flick down to view ...extensions. Display area: Shows the operation and display areas of your applications. Touch and hold one of the shortcuts until the mobile phone vibrates, you can also drag a screen item to the shortcut position. 2.6.1 Notification and Status Icons Call in progress Call forwarding ...23 Notifications bar: Displays the reminders and status icons of your desired location or move it to your phone.

User Manual
Page 18
... alarms and settings, for example, you receive a new message or there is an upcoming event. When a new notification icon appears on 2.6.2 Notifications Panel Your mobile phone will notify you when you will be notified when Call forwarding is activated. On the panel, you can: • Touch a notification to open the related...
... alarms and settings, for example, you receive a new message or there is an upcoming event. When a new notification icon appears on 2.6.2 Notifications Panel Your mobile phone will notify you when you will be notified when Call forwarding is activated. On the panel, you can: • Touch a notification to open the related...

User Manual
Page 19
... it. 2.6.3 Viewing Other Parts of the panel. Touch and hold an item on the Home screen until the item expands in size and the mobile phone vibrates. 2. Select an item to add it . 15 Touch a thumbnail to set the screen number. 2.6.4 Customizing the Home Screen Adding a New Screen Item 1. Moving a Screen...
... it. 2.6.3 Viewing Other Parts of the panel. Touch and hold an item on the Home screen until the item expands in size and the mobile phone vibrates. 2. Select an item to add it . 15 Touch a thumbnail to set the screen number. 2.6.4 Customizing the Home Screen Adding a New Screen Item 1. Moving a Screen...
User Manual
Page 20
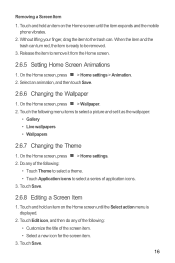
... Home screen, press > Wallpaper. 2. Touch Save. 2.6.8 Editing a Screen Item 1. Touch and hold an item on the Home screen until the item expands and the mobile phone vibrates. 2. Do any of the screen item. • Select a new icon for the screen item. 3.
... Home screen, press > Wallpaper. 2. Touch Save. 2.6.8 Editing a Screen Item 1. Touch and hold an item on the Home screen until the item expands and the mobile phone vibrates. 2. Do any of the screen item. • Select a new icon for the screen item. 3.

User Manual
Page 21
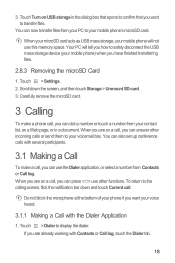
... card, set the microSD card as USB mass storage. 1. To move in the application list until the phone vibrates. 3. Without lifting your PC with the USB cable. Remove the battery cover. 2. Open the notification bar, and then touch USB connected.... 2 and 3. 4. Press or press to save. 2.8 Using a microSD Card 2.8.1 Installing the microSD Card (Optional) 1 2 1. In the application list, press . 2. Connect your mobile phone to your finger, drag the icon to the desired location, and then release it. 2.7 Application List Application list holds icons for all of the applications...
... card, set the microSD card as USB mass storage. 1. To move in the application list until the phone vibrates. 3. Without lifting your PC with the USB cable. Remove the battery cover. 2. Open the notification bar, and then touch USB connected.... 2 and 3. 4. Press or press to save. 2.8 Using a microSD Card 2.8.1 Installing the microSD Card (Optional) 1 2 1. In the application list, press . 2. Connect your mobile phone to your finger, drag the icon to the desired location, and then release it. 2.7 Application List Application list holds icons for all of the applications...
User Manual
Page 22
... 1. When you can now transfer files from your contact list, on a call . Scroll down and touch Current call , you want your mobile phone's microSD card. When you are on USB storage in a document. To return to your voicemail box. Carefully remove the microSD card. 3 Calling ...make a call , you have finished transferring files. 2.8.3 Removing the microSD Card 1. When your microSD card acts as USB mass storage, your mobile phone) when you can press use this memory space. Touch > Settings. 2. You can also set up conference calls with Contacts or Call log, touch ...
... 1. When you can now transfer files from your contact list, on a call . Scroll down and touch Current call , you want your mobile phone's microSD card. When you are on USB storage in a document. To return to your voicemail box. Carefully remove the microSD card. 3 Calling ...make a call , you have finished transferring files. 2.8.3 Removing the microSD Card 1. When your microSD card acts as USB mass storage, your mobile phone) when you can press use this memory space. Touch > Settings. 2. You can also set up conference calls with Contacts or Call log, touch ...

User Manual
Page 23
... Contacts to answer the call . Touch to dial. Touch to the right of the log entry to dial the phone number. 3.1.3 Making a Call from Contacts 1. Your mobile phone supports the SmartDial function, that you want to enter other numbers on the accuracy. In the list, touch the ...Dialer or Call log, touch the Contacts tab. 2. If you receive a phone call, the incoming call . 3. 2. If no contact is , when you touch numbers on the dialer, the phone automatically searches among your entered information, the phone will open. 3.2 Answering or Rejecting a Call 3.2.1 Answering an Incoming Call ...
... Contacts to answer the call . Touch to dial. Touch to the right of the log entry to dial the phone number. 3.1.3 Making a Call from Contacts 1. Your mobile phone supports the SmartDial function, that you want to enter other numbers on the accuracy. In the list, touch the ...Dialer or Call log, touch the Contacts tab. 2. If you receive a phone call, the incoming call . 3. 2. If no contact is , when you touch numbers on the dialer, the phone automatically searches among your entered information, the phone will open. 3.2 Answering or Rejecting a Call 3.2.1 Answering an Incoming Call ...

User Manual
Page 25
... you are on hold while you are connected to the first participant, keep the connection open, touch Add call . 4. While you do this. 3. Enter the phone number of the first participant. Once you have connected to the second person, touch Merge calls to your Call log or Contacts. To add more...
... you are on hold while you are connected to the first participant, keep the connection open, touch Add call . 4. While you do this. 3. Enter the phone number of the first participant. Once you have connected to the second person, touch Merge calls to your Call log or Contacts. To add more...


