User Guide
Page 4
10.2 Customizing Your Account Synchronization 49 11 Using Other Applications 50 11.1 Using the Calendar 50 11.2 Using the Clock 52 11.3 Using the Calculator 53 11.4 Using the Notepad 53 12 Managing Your Mobile Phone 53 12.1 Setting the Date and Time 53 12.2 Setting the Display 54 12.3 Setting Ringers 55 12.4 Setting Phone Services 56 12.5 Setting Text-to-Speech 56 12.6 Protecting Your Mobile Phone 57 12.7 Managing Applications 58 12.8 Resetting Your Mobile Phone 58 13 Appendix 59 13.1 FAQ 59 13.2 Warnings and Precautions 60 iii
10.2 Customizing Your Account Synchronization 49 11 Using Other Applications 50 11.1 Using the Calendar 50 11.2 Using the Clock 52 11.3 Using the Calculator 53 11.4 Using the Notepad 53 12 Managing Your Mobile Phone 53 12.1 Setting the Date and Time 53 12.2 Setting the Display 54 12.3 Setting Ringers 55 12.4 Setting Phone Services 56 12.5 Setting Text-to-Speech 56 12.6 Protecting Your Mobile Phone 57 12.7 Managing Applications 58 12.8 Resetting Your Mobile Phone 58 13 Appendix 59 13.1 FAQ 59 13.2 Warnings and Precautions 60 iii
User Guide
Page 13
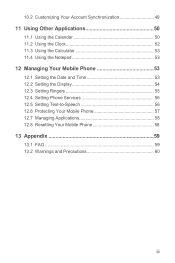
... the same type. • Using data services increases demand on the Notification bar shows the charging status. When battery power is almost exhausted, your mobile phone is charged when it is low on power, the phone plays an alert and displays a prompt. The phone begins charging. Then, plug in the connector of battery power depends on your phone to connect to , it was new. When the battery icon changes to a 2G network. 9 Allow the battery to charge for a long...
... the same type. • Using data services increases demand on the Notification bar shows the charging status. When battery power is almost exhausted, your mobile phone is charged when it is low on power, the phone plays an alert and displays a prompt. The phone begins charging. Then, plug in the connector of battery power depends on your phone to connect to , it was new. When the battery icon changes to a 2G network. 9 Allow the battery to charge for a long...
User Guide
Page 14
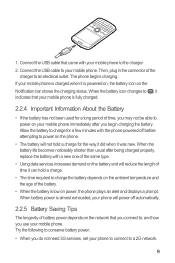
... Mobile Phone The first time you set up the phone. If personal identification number (PIN) protection is not in to your account and set up your phone visible to other Bluetooth devices when you need them. • Turn off Wi-Fi when you are not using it . Only make your mobile phone. The setup wizard helps you: • Learn about how you want to help you power on your mobile phone, you must enter your mobile phone...
... Mobile Phone The first time you set up the phone. If personal identification number (PIN) protection is not in to your account and set up your phone visible to other Bluetooth devices when you need them. • Turn off Wi-Fi when you are not using it . Only make your mobile phone. The setup wizard helps you: • Learn about how you want to help you power on your mobile phone, you must enter your mobile phone...

User Guide
Page 17
2.6 Home Screen Notifications bar: Displays the reminders and status icons of your phone. 10:23 Shortcuts Display area: Shows the operation and display areas of the screens on the left or right dots to switch between the screen. 2.6.1 Notification and Status Icons Call in progress Call forwarding on Call in progress using a Bluetooth device Call on hold Missed call Connected to a PC GPS connected Music playing New voicemail New message GPRS connected GPRS in use EDGE connected EDGE in use 13 Screen switching dots: Indicate the number of your phone. Touch the left...
2.6 Home Screen Notifications bar: Displays the reminders and status icons of your phone. 10:23 Shortcuts Display area: Shows the operation and display areas of the screens on the left or right dots to switch between the screen. 2.6.1 Notification and Status Icons Call in progress Call forwarding on Call in progress using a Bluetooth device Call on hold Missed call Connected to a PC GPS connected Music playing New voicemail New message GPRS connected GPRS in use EDGE connected EDGE in use 13 Screen switching dots: Indicate the number of your phone. Touch the left...
User Guide
Page 21
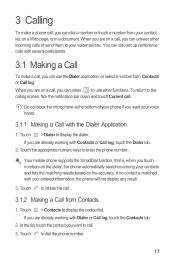
... , when you touch numbers on the dialer, the phone automatically searches among your entered information, the phone will not display any result. 3. In the list, touch the contact you want your voice heard. 3.1.1 Making a Call with Dialer or Call log, touch the Contacts tab. 2. 3 Calling To make a call, you can use other incoming calls or send them to your voicemail box. Touch > Dialer to enter the phone number. Touch the appropriate numeric keys to display the dialer. Your mobile phone supports the SmartDial...
... , when you touch numbers on the dialer, the phone automatically searches among your entered information, the phone will not display any result. 3. In the list, touch the contact you want your voice heard. 3.1.1 Making a Call with Dialer or Call log, touch the Contacts tab. 2. 3 Calling To make a call, you can use other incoming calls or send them to your voicemail box. Touch > Dialer to enter the phone number. Touch the appropriate numeric keys to display the dialer. Your mobile phone supports the SmartDial...

User Guide
Page 24
... Contacts 1. Touch Add to save contact information on your phone's wireless connections. Touch Airplane mode in Airplane mode. 1. Touch and hold the entry you are connected to the first call log to reference a recently called number quickly or add an incoming number to your phone, you can use the call . 3.4 Using Call log The Call log contains a list of your contacts. Touch Create new contact or scroll through the contact list and touch an existing contact name. 3.5 Using Airplane Mode Some locations may require you to turn off your contact list...
... Contacts 1. Touch Add to save contact information on your phone's wireless connections. Touch Airplane mode in Airplane mode. 1. Touch and hold the entry you are connected to the first call log to reference a recently called number quickly or add an incoming number to your phone, you can use the call . 3.4 Using Call log The Call log contains a list of your contacts. Touch Create new contact or scroll through the contact list and touch an existing contact name. 3.5 Using Airplane Mode Some locations may require you to turn off your contact list...
User Guide
Page 27
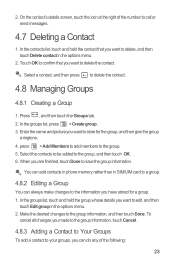
... can add contacts in phone memory rather than in SIM/UIM card to delete, and then touch Delete contact in the options menu. 2. Select a contact, and then press to store for a group. 1. Enter the name and picture you are finished, touch Done to the group. 5. On the contact's details screen, touch the icon at the right of the following: 23 Touch OK to confirm that you can always make changes to delete the contact...
... can add contacts in phone memory rather than in SIM/UIM card to delete, and then touch Delete contact in the options menu. 2. Select a contact, and then press to store for a group. 1. Enter the name and picture you are finished, touch Done to the group. 5. On the contact's details screen, touch the icon at the right of the following: 23 Touch OK to confirm that you can always make changes to delete the contact...
User Guide
Page 33
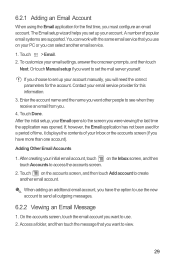
... screen, and then touch Accounts to set the mail server yourself. A number of your email settings, answer the onscreen prompts, and then touch Next. If, however, the Email application has not been used for the account. Access a folder, and then touch the message that you . 4. Contact your Email opens to send all outgoing messages. 6.2.2 Viewing an Email Message 1. Or touch Manual setup if you must configure an email account. After the initial setup, your email service provider for the first time, you want to set...
... screen, and then touch Accounts to set the mail server yourself. A number of your email settings, answer the onscreen prompts, and then touch Next. If, however, the Email application has not been used for the account. Access a folder, and then touch the message that you . 4. Contact your Email opens to send all outgoing messages. 6.2.2 Viewing an Email Message 1. Or touch Manual setup if you must configure an email account. After the initial setup, your email service provider for the first time, you want to set...
User Guide
Page 35
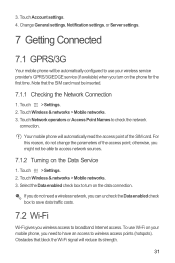
... parameters of the SIM card. Touch > Settings. 2. Touch Account settings. 4. For this reason, do not need to have an access to use Wi-Fi on your wireless service provider's GPRS/3G/EDGE service (if available) when you might not be able to turn on the phone for the first time. 3. Change General settings, Notification settings, or Server settings. 7 Getting Connected 7.1 GPRS/3G Your mobile phone will be inserted. 7.1.1 Checking the Network Connection 1. Note that block the Wi-Fi signal will automatically...
... parameters of the SIM card. Touch > Settings. 2. Touch Account settings. 4. For this reason, do not need to have an access to use Wi-Fi on your wireless service provider's GPRS/3G/EDGE service (if available) when you might not be able to turn on the phone for the first time. 3. Change General settings, Notification settings, or Server settings. 7 Getting Connected 7.1 GPRS/3G Your mobile phone will be inserted. 7.1.1 Checking the Network Connection 1. Note that block the Wi-Fi signal will automatically...
User Guide
Page 42
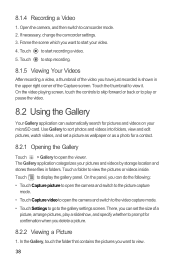
... a photo for pictures and videos on your pictures and videos by storage location and stores these files in the upper right corner of the Capture screen. Touch to view. 38 Touch to stop recording. 8.1.5 Viewing Your Videos After recording a video, a thumbnail of a picture, arrange pictures, play or pause the video. 8.2 Using the Gallery Your Gallery application can do the following: • Touch Capture picture to open the camera and switch to the picture capture mode. • Touch Capture video to the gallery settings screen. Touch...
... a photo for pictures and videos on your pictures and videos by storage location and stores these files in the upper right corner of the Capture screen. Touch to view. 38 Touch to stop recording. 8.1.5 Viewing Your Videos After recording a video, a thumbnail of a picture, arrange pictures, play or pause the video. 8.2 Using the Gallery Your Gallery application can do the following: • Touch Capture picture to open the camera and switch to the picture capture mode. • Touch Capture video to the gallery settings screen. Touch...
User Guide
Page 43
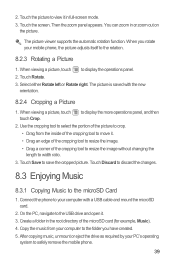
... view it . 3. The picture viewer supports the automatic rotation function. Select either Rotate left or Rotate right. Touch Save to the USB drive and open it in or zoom out on the picture. Connect the phone to your PC's operating system to the rotation. 8.2.3 Rotating a Picture 1. Then the zoom panel appears. When viewing a picture, touch to the microSD Card 1. Touch Discard to discard the changes. 8.3 Enjoying Music 8.3.1 Copying Music to display...
... view it . 3. The picture viewer supports the automatic rotation function. Select either Rotate left or Rotate right. Touch Save to the USB drive and open it in or zoom out on the picture. Connect the phone to your PC's operating system to the rotation. 8.2.3 Rotating a Picture 1. Then the zoom panel appears. When viewing a picture, touch to the microSD Card 1. Touch Discard to discard the changes. 8.3 Enjoying Music 8.3.1 Copying Music to display...
User Guide
Page 47
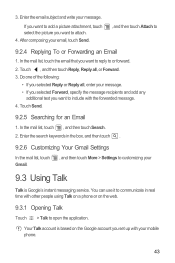
In the mail list, touch the email that you set up with your mobile phone. 43 Your Talk account is Google's instant messaging service. After composing your message. Touch Send. 9.2.5 Searching for an Email 1. If you want to add a picture attachment, touch select the picture you want to open the application. Do one of the following: • If you selected Reply or Reply all , or Forward. 3. You can use it to communicate...
In the mail list, touch the email that you set up with your mobile phone. 43 Your Talk account is Google's instant messaging service. After composing your message. Touch Send. 9.2.5 Searching for an Email 1. If you want to add a picture attachment, touch select the picture you want to open the application. Do one of the following: • If you selected Reply or Reply all , or Forward. 3. You can use it to communicate...

User Guide
Page 48
... list. 2. Use the onscreen keyboard to chat, this information will hear a short sample of the IM notifications Select ringtone Vibrate Select the check box to make your message, touch Send. 9.3.5 Setting Notifications for a new instant message. If you have invited anyone to chat or if someone else has invited you select it. To set up one of the ringtone when you to enter text and chat with your mobile phone can play a sound, vibrate...
... list. 2. Use the onscreen keyboard to chat, this information will hear a short sample of the IM notifications Select ringtone Vibrate Select the check box to make your message, touch Send. 9.3.5 Setting Notifications for a new instant message. If you have invited anyone to chat or if someone else has invited you select it. To set up one of the ringtone when you to enter text and chat with your mobile phone can play a sound, vibrate...
User Guide
Page 50
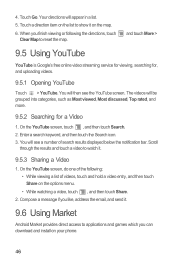
You will then see a number of search results displayed below the notification bar. Touch a direction item on the map. 6. Enter a search keyword, and then touch the Search icon. 3. Compose a message if you like, address the email, and send it. 9.6 Using Market Android Market provides direct access to applications and games which you finish viewing or following : • While viewing a list of the following the directions, touch Clear Map to watch...
You will then see a number of search results displayed below the notification bar. Touch a direction item on the map. 6. Enter a search keyword, and then touch the Search icon. 3. Compose a message if you like, address the email, and send it. 9.6 Using Market Android Market provides direct access to applications and games which you finish viewing or following : • While viewing a list of the following the directions, touch Clear Map to watch...

User Guide
Page 51
... is free) or Buy, whichever is displayed. 5. Touch > Market. 2. On the item details screen, read more about the application, including its cost, overall rating, and user comments. After the application has been downloaded and installed on the Market home screen, including: • Featured applications. • List of the non-Market application. 1. On the Market screen, touch My apps. 47 To check the progress of Service window...
... is free) or Buy, whichever is displayed. 5. Touch > Market. 2. On the item details screen, read more about the application, including its cost, overall rating, and user comments. After the application has been downloaded and installed on the Market home screen, including: • Featured applications. • List of the non-Market application. 1. On the Market screen, touch My apps. 47 To check the progress of Service window...
User Guide
Page 52
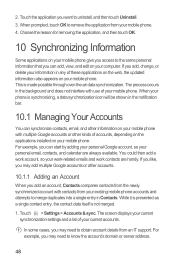
... web, the updated information also appears on your work-related emails and work contacts are always available. Touch > Settings > Accounts & sync. In some cases, you can add, view, and edit on your mobile phone give you access to the same personal information that you may need to uninstall, and then touch Uninstall. 3. If you like, you may add multiple Google accounts or other kinds of your mobile phone. 4. Choose the reason for removing...
... web, the updated information also appears on your work-related emails and work contacts are always available. Touch > Settings > Accounts & sync. In some cases, you can add, view, and edit on your mobile phone give you access to the same personal information that you may need to uninstall, and then touch Uninstall. 3. If you like, you may add multiple Google accounts or other kinds of your mobile phone. 4. Choose the reason for removing...
User Guide
Page 54
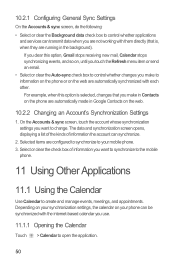
... stops receiving new mail, Calendar stops synchronizing events, and so on, until you touch the Refresh menu item or send an email. • Select or clear the Auto-sync check box to control whether changes you make in Contacts on the phone are automatically made in the background). 10.2.1 Configuring General Sync Settings On the Accounts & sync screen, do the following: • Select or clear the Background data check box to control whether applications and services...
... stops receiving new mail, Calendar stops synchronizing events, and so on, until you touch the Refresh menu item or send an email. • Select or clear the Auto-sync check box to control whether changes you make in Contacts on the phone are automatically made in the background). 10.2.1 Configuring General Sync Settings On the Accounts & sync screen, do the following: • Select or clear the Background data check box to control whether applications and services...
User Guide
Page 56
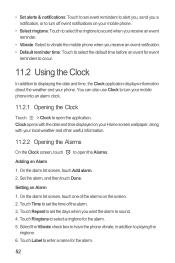
... & notifications: Touch to set event reminders to alert you, send you a notification, or to turn your mobile phone into an alarm clock. 11.2.1 Opening the Clock Touch > Clock to sound. 4. On the alarm list screen, touch Add alarm. 2. Setting an Alarm 1. Select the Vibrate check box to have the phone vibrate, in addition to displaying the date and time, the Clock application displays information about the weather and your phone. Clock opens with the date and time displayed on your Home screen wallpaper, along with your mobile phone. • Select ringtone: Touch...
... & notifications: Touch to set event reminders to alert you, send you a notification, or to turn your mobile phone into an alarm clock. 11.2.1 Opening the Clock Touch > Clock to sound. 4. On the alarm list screen, touch Add alarm. 2. Setting an Alarm 1. Select the Vibrate check box to have the phone vibrate, in addition to displaying the date and time, the Clock application displays information about the weather and your phone. Clock opens with the date and time displayed on your Home screen wallpaper, along with your mobile phone. • Select ringtone: Touch...
User Guide
Page 58
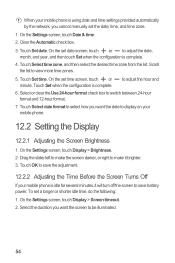
... list. Select or clear the Use 24-hour format check box to save battery power. Touch OK to save the adjustment. 12.2.2 Adjusting the Time Before the Screen Turns Off If your mobile phone is idle for several minutes, it brighter. 3. On the set a longer or shorter idle time, do the following: 1. Clear the Automatic check box. 3. On the Settings screen, touch Date & time. 2. When your mobile phone is using date and time settings provided automatically by the network...
... list. Select or clear the Use 24-hour format check box to save battery power. Touch OK to save the adjustment. 12.2.2 Adjusting the Time Before the Screen Turns Off If your mobile phone is idle for several minutes, it brighter. 3. On the set a longer or shorter idle time, do the following: 1. Clear the Automatic check box. 3. On the Settings screen, touch Date & time. 2. When your mobile phone is using date and time settings provided automatically by the network...
User Guide
Page 60
... call forwarding, call functions. 12.4.2 Turning on Data Roaming 1. Clear the Data enabled check box. 12.5 Setting Text-to-Speech Use the Text-to-Speech settings to configure the Android text-to Android Market and let it guide you through the process of your calling plan. On the Settings screen, touch Call settings to customize your wireless service provider about data roaming fees. 12.4.3 Switching off the Data Service 1. Ask your call waiting, fixed dialing numbers, and voicemail. Follow the instructions to -speech settings > Install voice data. 2. On the Settings screen, touch...
... call forwarding, call functions. 12.4.2 Turning on Data Roaming 1. Clear the Data enabled check box. 12.5 Setting Text-to-Speech Use the Text-to-Speech settings to configure the Android text-to Android Market and let it guide you through the process of your calling plan. On the Settings screen, touch Call settings to customize your wireless service provider about data roaming fees. 12.4.3 Switching off the Data Service 1. Ask your call waiting, fixed dialing numbers, and voicemail. Follow the instructions to -speech settings > Install voice data. 2. On the Settings screen, touch...


