HP Notebook Reference Guide
Page 49
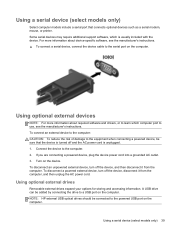
To disconnect a powered external device, turn off the device, and then disconnect it from the computer. Using a serial device (select models only) 39 A USB drive can be added by connecting the drive to use, see the manufacturer's instructions. ▲ To connect a serial device, connect the device cable to the powered USB port on the computer. Some serial devices may require additional support software, which computer port to a USB port on the computer. Turn on the computer. To disconnect an unpowered external device, turn off and the...
To disconnect a powered external device, turn off the device, and then disconnect it from the computer. Using a serial device (select models only) 39 A USB drive can be added by connecting the drive to use, see the manufacturer's instructions. ▲ To connect a serial device, connect the device cable to the powered USB port on the computer. Some serial devices may require additional support software, which computer port to a USB port on the computer. Turn on the computer. To disconnect an unpowered external device, turn off and the...

HP Notebook Reference Guide
Page 60
... and delete confidential files, and remove all password settings. If the computer is stolen, Computrace can protect your information. Standard security features provided by the Windows operating system, the non-Windows Computer Setup utility (BIOS), and other third-party software can track the computer if the unauthorized user accesses the Internet. For more information, see the HP ProtectTools Getting Started guide or the HP ProtectTools Security Manager software Help.
... and delete confidential files, and remove all password settings. If the computer is stolen, Computrace can protect your information. Standard security features provided by the Windows operating system, the non-Windows Computer Setup utility (BIOS), and other third-party software can track the computer if the unauthorized user accesses the Internet. For more information, see the HP ProtectTools Getting Started guide or the HP ProtectTools Security Manager software Help.
HP Notebook Reference Guide
Page 61
...access to a Windows user account Unauthorized access to data Windows user password ● Firewall software ● Windows updates ● Drive Encryption for HP ProtectTools Unauthorized access to Computer Setup settings and other BIOS administrator password in Computer Setup* system identification information Unauthorized removal of the computer Security cable slot (used with an optional security cable) *Computer Setup is a preinstalled, ROM-based utility that can be used even when the operating system is an HP ProtectTools Security Manager password, can be enabled in Computer Setup...
...access to a Windows user account Unauthorized access to data Windows user password ● Firewall software ● Windows updates ● Drive Encryption for HP ProtectTools Unauthorized access to Computer Setup settings and other BIOS administrator password in Computer Setup* system identification information Unauthorized removal of the computer Security cable slot (used with an optional security cable) *Computer Setup is a preinstalled, ROM-based utility that can be used even when the operating system is an HP ProtectTools Security Manager password, can be enabled in Computer Setup...
HP Notebook Reference Guide
Page 75
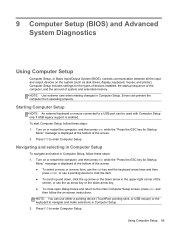
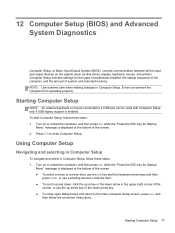
... while the "Press the ESC key for Startup Menu" message is displayed at the bottom of the screen. ● To select a menu or a menu item, use the tab key and the keyboard arrow keys and then press enter, or use either a pointing device (TouchPad, pointing stick, or USB mouse) or the keyboard to enter Computer Setup. Turn on the system (such as disk drives, display, keyboard, mouse, and printer). To start Computer Setup, follow these steps: 1. Navigating and...
... while the "Press the ESC key for Startup Menu" message is displayed at the bottom of the screen. ● To select a menu or a menu item, use the tab key and the keyboard arrow keys and then press enter, or use either a pointing device (TouchPad, pointing stick, or USB mouse) or the keyboard to enter Computer Setup. Turn on the system (such as disk drives, display, keyboard, mouse, and printer). To start Computer Setup, follow these steps: 1. Navigating and...
HP Notebook Reference Guide
Page 79
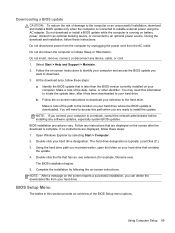
..., remove, connect, or disconnect any software updates, especially system BIOS updates. At the download area, follow these steps: 1. Make a note of the BIOS Setup menu options. Open Windows Explorer by unplugging the power cord from your hard drive designation. Double-click your hard drive. NOTE: After a message on your hard drive that are displayed on -screen instructions to identify your computer and access the BIOS update you connect your hard drive. b. NOTE: If you want to reliable external power using the AC adapter. Downloading a BIOS update CAUTION...
..., remove, connect, or disconnect any software updates, especially system BIOS updates. At the download area, follow these steps: 1. Make a note of the BIOS Setup menu options. Open Windows Explorer by unplugging the power cord from your hard drive designation. Double-click your hard drive. NOTE: After a message on your hard drive that are displayed on -screen instructions to identify your computer and access the BIOS update you connect your hard drive. b. NOTE: If you want to reliable external power using the AC adapter. Downloading a BIOS update CAUTION...
HP Notebook Reference Guide
Page 84
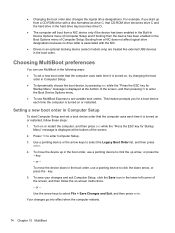
... set a new boot order that CD-ROM drive becomes drive C and the hard drive in the hard drive bay becomes drive D. ● The computer will boot from a NIC device only if the device has been enabled in the Built-In Device Options menu of Computer Setup and if booting from a CD-ROM drive with the NIC. ● Drives in an optional docking device (select models only) are treated like external USB devices in Computer Setup To start up arrow, or press the + key...
... set a new boot order that CD-ROM drive becomes drive C and the hard drive in the hard drive bay becomes drive D. ● The computer will boot from a NIC device only if the device has been enabled in the Built-In Device Options menu of Computer Setup and if booting from a CD-ROM drive with the NIC. ● Drives in an optional docking device (select models only) are treated like external USB devices in Computer Setup To start up arrow, or press the + key...
HP Notebook Reference Guide
Page 90
... audio functions, checking 15 Automatic DriveLock password entering 55 removing 56 B battery conserving power 26 discharging 25 displaying remaining charge 25 disposing 27 low battery levels 25 replacing 27 storing 26 Battery Check 25 battery information, finding 24 battery power 24 battery temperature 26 BIOS determining version 68 downloading an update 69 updating 67 Bluetooth device 2, 9 boot devices, enabling 73 buttons media 14 power 20 volume 15 C cables 1394 37 eSATA 38 USB 36 caring for your computer 60 changing boot order 74 checking audio functions...
... audio functions, checking 15 Automatic DriveLock password entering 55 removing 56 B battery conserving power 26 discharging 25 displaying remaining charge 25 disposing 27 low battery levels 25 replacing 27 storing 26 Battery Check 25 battery information, finding 24 battery power 24 battery temperature 26 BIOS determining version 68 downloading an update 69 updating 67 Bluetooth device 2, 9 boot devices, enabling 73 buttons media 14 power 20 volume 15 C cables 1394 37 eSATA 38 USB 36 caring for your computer 60 changing boot order 74 checking audio functions...
HP Notebook Reference Guide
Page 91
... modes, switching 29 H hard drive external 39 HP 3D DriveGuard 44 hard drive light 44 HDMI port, connecting 18 HDMI, configuring audio 18 Hibernation exiting 21 initiated during critical battery level 26 initiating 21 high-definition devices, connecting 18, 19 hotkeys, media 14 HP 3D DriveGuard 44 HP Connection Manager 4 HP Mobile Broadband Module 7, 8 HP Power Assistant 24 HP ProtectTools Security Manager 59 HP USB Ethernet Adapter, connecting 13 hubs 35 I icons network 2 wireless 2 Intel Wireless Display 19 Internet connection setup 6 J Java Card defined 34 inserting 35 removing 35 K keys...
... modes, switching 29 H hard drive external 39 HP 3D DriveGuard 44 hard drive light 44 HDMI port, connecting 18 HDMI, configuring audio 18 Hibernation exiting 21 initiated during critical battery level 26 initiating 21 high-definition devices, connecting 18, 19 hotkeys, media 14 HP 3D DriveGuard 44 HP Connection Manager 4 HP Mobile Broadband Module 7, 8 HP Power Assistant 24 HP ProtectTools Security Manager 59 HP USB Ethernet Adapter, connecting 13 hubs 35 I icons network 2 wireless 2 Intel Wireless Display 19 Internet connection setup 6 J Java Card defined 34 inserting 35 removing 35 K keys...
HP ProtectTools Getting Started
Page 57
... following types of different smart cards. Be sure that has been previously formatted and initialized. 2. If a proximity card reader is initialized, users can use in its security algorithm. Click Credential Manager, and then click Smart card. 3. Enter your Windows password and your old PIN, and then enter and confirm a new PIN. The manufacturer of characters used as an authentication credential. Select Change smart card PIN. 3. Proximity card A proximity card...
... following types of different smart cards. Be sure that has been previously formatted and initialized. 2. If a proximity card reader is initialized, users can use in its security algorithm. Click Credential Manager, and then click Smart card. 3. Enter your Windows password and your old PIN, and then enter and confirm a new PIN. The manufacturer of characters used as an authentication credential. Select Change smart card PIN. 3. Proximity card A proximity card...
HP ProtectTools Getting Started
Page 134
... access 93 denying access 93 removing 95 H hardware encryption 55, 56, 58 HP ProtectTools Administrative Console 21 opening 22 HP ProtectTools features 2 HP ProtectTools Getting Started Guide 115 HP ProtectTools Security Manager 33 Backup and Recovery password 9 HP SpareKey Recovery 61 I icon, using 87 ID card 35 importing, third-party certificate 67 initializing embedded security chip 104 J JITA configuration 95 creating extendable for user or group 96 creating for user or group 96 disabling for user...
... access 93 denying access 93 removing 95 H hardware encryption 55, 56, 58 HP ProtectTools Administrative Console 21 opening 22 HP ProtectTools features 2 HP ProtectTools Getting Started Guide 115 HP ProtectTools Security Manager 33 Backup and Recovery password 9 HP SpareKey Recovery 61 I icon, using 87 ID card 35 importing, third-party certificate 67 initializing embedded security chip 104 J JITA configuration 95 creating extendable for user or group 96 creating for user or group 96 disabling for user...
Getting Started HP Notebook
Page 36
... hold fn+shift to type in uppercase. Using an optional external numeric keypad Keys on most external numeric keypads function differently according to whether num lock is on or off. (Num lock is turned off at the factory.) For example: ● When num lock is on, most keypad keys type numbers. ● When num lock is off on an external keypad as you work: ▲ Press the num...
... hold fn+shift to type in uppercase. Using an optional external numeric keypad Keys on most external numeric keypads function differently according to whether num lock is on or off. (Num lock is turned off at the factory.) For example: ● When num lock is on, most keypad keys type numbers. ● When num lock is off on an external keypad as you work: ▲ Press the num...

Getting Started HP Notebook
Page 57
... create a backup using HP Recovery Disc Creator and the installed optical drive (select models only) or an optional external optical drive to reset your system on the type of recovery discs required. ● When backing up (boot) the computer and repair the operating system in a window, toolbar, or menu bar by taking a screen shot of discs (purchased separately): CD-R, CD-RW, DVD+R, DVD+R DL, DVD-R, DVD-R DL, or DVD±RW. Select Start > All Programs > Maintenance > Backup and Restore. 2. As you add new software...
... create a backup using HP Recovery Disc Creator and the installed optical drive (select models only) or an optional external optical drive to reset your system on the type of recovery discs required. ● When backing up (boot) the computer and repair the operating system in a window, toolbar, or menu bar by taking a screen shot of discs (purchased separately): CD-R, CD-RW, DVD+R, DVD+R DL, DVD-R, DVD-R DL, or DVD±RW. Select Start > All Programs > Maintenance > Backup and Restore. 2. As you add new software...
Getting Started HP Notebook
Page 65
... function keys identifying 10, 11 H hard drive installing 40 removing 38 hard drive bay, identifying 19 hard drive recovery 51 HDMI port, identifying 15, 16 hot keys adjusting volume 27 audio CD, DVD, or BD controls 27 battery charge 27 decrease screen brightness 26 description 26 increase screen brightness 26 muting speaker sound 27 QuickLock 26 Sleep 26 switching screen image 26 using 26 I input power 55 integrated numeric keypad, identifying 11, 28 integrated webcam light, identifying 17, 18 internal display switch 17, 18 internal microphones, identifying 17, 18 Internet connection setup...
... function keys identifying 10, 11 H hard drive installing 40 removing 38 hard drive bay, identifying 19 hard drive recovery 51 HDMI port, identifying 15, 16 hot keys adjusting volume 27 audio CD, DVD, or BD controls 27 battery charge 27 decrease screen brightness 26 description 26 increase screen brightness 26 muting speaker sound 27 QuickLock 26 Sleep 26 switching screen image 26 using 26 I input power 55 integrated numeric keypad, identifying 11, 28 integrated webcam light, identifying 17, 18 internal display switch 17, 18 internal microphones, identifying 17, 18 Internet connection setup...
HP Notebook User Guide - Linux
Page 87
... Setup screen, press esc, and then follow the on-screen instructions. Computer Setup includes settings for Startup Menu" message is displayed at the bottom of the screen. 2. To start Computer Setup, follow these steps: 1. Turn on the system (such as disk drives, display, keyboard, mouse, and printer). Starting Computer Setup 77 Starting Computer Setup NOTE: An external keyboard or mouse connected to enter Computer Setup. Press f10 to a USB port can prevent the computer from operating properly. NOTE: Use extreme care when making changes...
... Setup screen, press esc, and then follow the on-screen instructions. Computer Setup includes settings for Startup Menu" message is displayed at the bottom of the screen. 2. To start Computer Setup, follow these steps: 1. Turn on the system (such as disk drives, display, keyboard, mouse, and printer). Starting Computer Setup 77 Starting Computer Setup NOTE: An external keyboard or mouse connected to enter Computer Setup. Press f10 to a USB port can prevent the computer from operating properly. NOTE: Use extreme care when making changes...
HP Notebook User Guide - Linux
Page 107
... 45 power 42 removing 43 replacing 43 storing 46 temperature 46 battery bay 19 battery light 13, 16 battery release latch 19 BIOS determining version 79 downloading an update 79 updating 79 BIOS administrator password creating 69 entering 69 managing 69 Bluetooth device 27 Bluetooth label 91 boot devices, enabling 82 bottom parts locations, identifying 20 buttons left TouchPad 4 optical drive eject 13, 14 power 7, 9 right TouchPad 4 web browser 8, 9 wireless 8, 9 C cables LAN 27 USB 62 caps lock light, identifying 5, 6 changing boot order 84 charging batteries 44 checking audio functions 36...
... 45 power 42 removing 43 replacing 43 storing 46 temperature 46 battery bay 19 battery light 13, 16 battery release latch 19 BIOS determining version 79 downloading an update 79 updating 79 BIOS administrator password creating 69 entering 69 managing 69 Bluetooth device 27 Bluetooth label 91 boot devices, enabling 82 bottom parts locations, identifying 20 buttons left TouchPad 4 optical drive eject 13, 14 power 7, 9 right TouchPad 4 web browser 8, 9 wireless 8, 9 C cables LAN 27 USB 62 caps lock light, identifying 5, 6 changing boot order 84 charging batteries 44 checking audio functions 36...
HP Notebook User Guide - Linux
Page 108
... Bluetooth 91 regulatory 91 serial number 91 wireless certification 91 WLAN 91 latches battery release 19 service door release 19 legacy support, USB 77 lights AC adapter 13, 16 battery 13, 16 caps lock 5, 6 hard drive 12 power 5, 6 webcam 17, 18 wireless 5, 6 local area network (LAN) cable required 27 connecting cable 27 logical drive designations 83 low battery level 45 M managing a BIOS administrator password 69 managing a drivelock password 70 media card defined 60 inserting 60 removing 60 stopping 61 Media Card Reader 12 media controls, keys 30 memory module identifying...
... Bluetooth 91 regulatory 91 serial number 91 wireless certification 91 WLAN 91 latches battery release 19 service door release 19 legacy support, USB 77 lights AC adapter 13, 16 battery 13, 16 caps lock 5, 6 hard drive 12 power 5, 6 webcam 17, 18 wireless 5, 6 local area network (LAN) cable required 27 connecting cable 27 logical drive designations 83 low battery level 45 M managing a BIOS administrator password 69 managing a drivelock password 70 media card defined 60 inserting 60 removing 60 stopping 61 Media Card Reader 12 media controls, keys 30 memory module identifying...
HP ProBook 4540s Notebook PC HP ProBook 4440s Notebook PC HP ProBook 4441s Notebook PC - Maintenance and Service Guide
Page 59
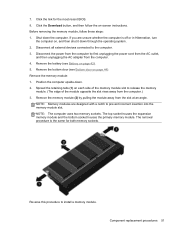
... the slot rises away from the computer. 4. Component replacement procedures 51 Click the link for both memory sockets. Remove the memory module (2) by first unplugging the power cord from the AC outlet, and then unplugging the AC adapter from the computer.) 3. Disconnect all external devices connected to install a memory module. Remove the battery (see Bottom door on -screen instructions. Shut down . 2. Remove the memory module: 1. The top socket houses the expansion memory module...
... the slot rises away from the computer. 4. Component replacement procedures 51 Click the link for both memory sockets. Remove the memory module (2) by first unplugging the power cord from the AC outlet, and then unplugging the AC adapter from the computer.) 3. Disconnect all external devices connected to install a memory module. Remove the battery (see Bottom door on -screen instructions. Shut down . 2. Remove the memory module: 1. The top socket houses the expansion memory module...

HP ProBook 4540s Notebook PC HP ProBook 4440s Notebook PC HP ProBook 4441s Notebook PC - Maintenance and Service Guide
Page 113
... use either a pointing device (TouchPad, pointing stick, or USB mouse) or the keyboard to the main Computer Setup screen, press esc, and then follow the on or restart the computer, and then press esc while the "Press the ESC key for Startup Menu" message is displayed at the bottom of the screen. 2. Using Computer Setup 105 Computer Setup includes settings for Startup Menu" message is enabled. NOTE: Use extreme care when making changes...
... use either a pointing device (TouchPad, pointing stick, or USB mouse) or the keyboard to the main Computer Setup screen, press esc, and then follow the on or restart the computer, and then press esc while the "Press the ESC key for Startup Menu" message is displayed at the bottom of the screen. 2. Using Computer Setup 105 Computer Setup includes settings for Startup Menu" message is enabled. NOTE: Use extreme care when making changes...

HP ProBook 4540s Notebook PC HP ProBook 4440s Notebook PC HP ProBook 4441s Notebook PC - Maintenance and Service Guide
Page 117
... hard drive designation is connected to reliable external power using the AC adapter. NOTE: After a message on your hard drive that are ready to install the update. Select Start > Help and Support > Maintain. 2. You will need this section provide an overview of the BIOS Setup menu options. Using the hard drive path you recorded earlier, open the folder on the screen reports a successful installation, you are displayed on the screen after it has been downloaded to your hard drive. BIOS Setup Menu...
... hard drive designation is connected to reliable external power using the AC adapter. NOTE: After a message on your hard drive that are ready to install the update. Select Start > Help and Support > Maintain. 2. You will need this section provide an overview of the BIOS Setup menu options. Using the hard drive path you recorded earlier, open the folder on the screen reports a successful installation, you are displayed on the screen after it has been downloaded to your hard drive. BIOS Setup Menu...
HP ProBook 4540s Notebook PC HP ProBook 4440s Notebook PC HP ProBook 4441s Notebook PC - Maintenance and Service Guide
Page 144
...66 spare part numbers 20, 24, 66 product description audio 3 chipset 1 display panel 2 Ethernet 3 external media cards 4 graphics 1 hard drives 2 keyboard 4 memory module 2 microphone 3 operating system 5 optical drives 3 pointing devices 4 ports 4 power requirements 5 processors 1 product name 1 security 5 serviceability 6 webcam 3 wireless 3 product name 1 R recovery partition 123 removal/replacement preliminaries 36 procedures 41 restoring the hard drive 123 RJ-45 (network) jack, identifying 15 RTC battery removal 88 spare part number 19, 23, 33, 88 Rubber Kit, spare part number 33 S Screw...
...66 spare part numbers 20, 24, 66 product description audio 3 chipset 1 display panel 2 Ethernet 3 external media cards 4 graphics 1 hard drives 2 keyboard 4 memory module 2 microphone 3 operating system 5 optical drives 3 pointing devices 4 ports 4 power requirements 5 processors 1 product name 1 security 5 serviceability 6 webcam 3 wireless 3 product name 1 R recovery partition 123 removal/replacement preliminaries 36 procedures 41 restoring the hard drive 123 RJ-45 (network) jack, identifying 15 RTC battery removal 88 spare part number 19, 23, 33, 88 Rubber Kit, spare part number 33 S Screw...


