Reference Guide
Page 1
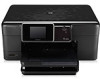
HP PHOTOSMART PLUS e-ALL-IN-ONE B210 series Start setup here... 1 Verify box contents Inside... Web Services 5 Networked printer setup and use 6 Setup troubleshooting 2 Get to know your HP Photosmart 3 Print, copy, scan features and tips 4 What's new?
HP PHOTOSMART PLUS e-ALL-IN-ONE B210 series Start setup here... 1 Verify box contents Inside... Web Services 5 Networked printer setup and use 6 Setup troubleshooting 2 Get to know your HP Photosmart 3 Print, copy, scan features and tips 4 What's new?
Reference Guide
Page 4
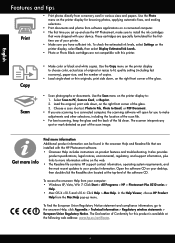
...thin originals, print side down , on the right front corner of the glass. 3. In the Help Viewer, choose HP Product Help from your computer: •• Windows XP, Vista, Win 7: Click Start > All Programs > HP > Photosmart Plus B210 series > Help. •• Mac OS X v10.5 and v10.6: Click Help > Mac Help. Use the ... keep the glass and the back of the software CD. To access the onscreen Help from the Mac Help pop-up and use of your printer. •• Make sure you to Email, or PDF Document. •• If you are not compatible with this product is available at...
...thin originals, print side down , on the right front corner of the glass. 3. In the Help Viewer, choose HP Product Help from your computer: •• Windows XP, Vista, Win 7: Click Start > All Programs > HP > Photosmart Plus B210 series > Help. •• Mac OS X v10.5 and v10.6: Click Help > Mac Help. Use the ... keep the glass and the back of the software CD. To access the onscreen Help from the Mac Help pop-up and use of your printer. •• Make sure you to Email, or PDF Document. •• If you are not compatible with this product is available at...
Reference Guide
Page 6
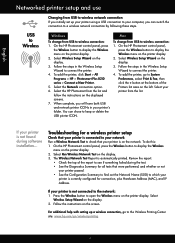
... on the display. 3. Select Wireless Setup Wizard on the printer display. To change from the list. For additional help with setting up your printer using a USB connection to your printer is on the printer display. 2. To add the printer, click Start > All Programs > HP > Photosmart Plus B210 series > Connect a New Printer. 5. Select the Network connection option. 6. The Wireless Network Test...
... on the display. 3. Select Wireless Setup Wizard on the printer display. To change from the list. For additional help with setting up your printer using a USB connection to your printer is on the printer display. 2. To add the printer, click Start > All Programs > HP > Photosmart Plus B210 series > Connect a New Printer. 5. Select the Network connection option. 6. The Wireless Network Test...
User Guide
Page 3
Contents Contents 1 HP Photosmart Plus e-All-in-One B210 series Help 3 2 Get to know the HP Photosmart Printer parts...5 Control panel features...8 Apps Manager...8 3 How do I?...11 5 Print Print from anywhere...19 Tips for print success...20 6 Copy and scan Scan to a computer......31 Clean printhead automatically 32 Check the estimated ink levels 32 Tips for working with ink...33 8 Connectivity Add the HP Photosmart to a network 35 Tips for setting up and using a networked printer 40 9 Solve a problem Get more help...41 Improve print quality...41 Clear the paper jam from the rear access ...
Contents Contents 1 HP Photosmart Plus e-All-in-One B210 series Help 3 2 Get to know the HP Photosmart Printer parts...5 Control panel features...8 Apps Manager...8 3 How do I?...11 5 Print Print from anywhere...19 Tips for print success...20 6 Copy and scan Scan to a computer......31 Clean printhead automatically 32 Check the estimated ink levels 32 Tips for working with ink...33 8 Connectivity Add the HP Photosmart to a network 35 Tips for setting up and using a networked printer 40 9 Solve a problem Get more help...41 Improve print quality...41 Clear the paper jam from the rear access ...
User Guide
Page 35
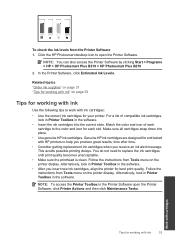
... all cartridges snap down into the correct slots. In the Printer Software, click Estimated Ink Levels. Alternatively, look in Printer Toolbox in the Printer Software open the Printer Software. NOTE: You can also access the Printer Software by clicking Start > Programs > HP > HP Photosmart Plus B210 > HP Photosmart Plus B210 2. NOTE: To access the Printer Toolbox in the software. • Insert the ink cartridges into...
... all cartridges snap down into the correct slots. In the Printer Software, click Estimated Ink Levels. Alternatively, look in Printer Toolbox in the Printer Software open the Printer Software. NOTE: You can also access the Printer Software by clicking Start > Programs > HP > HP Photosmart Plus B210 > HP Photosmart Plus B210 2. NOTE: To access the Printer Toolbox in the software. • Insert the ink cartridges into...
User Guide
Page 48
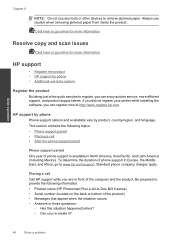
To determine the duration of the computer and the product. If you did not register your printer while installing the software, you are in front of phone support in North America, Asia Pacific, and Latin America (including Mexico). Be ...Chapter 9 NOTE: Do not use caution when removing jammed paper from inside the product. This section contains the following information: • Product name (HP Photosmart Plus e-All-in-One B210 series) • Serial number (located on the back or bottom of phone support is available in Europe, the Middle East, and Africa, go to...
To determine the duration of the computer and the product. If you did not register your printer while installing the software, you are in front of phone support in North America, Asia Pacific, and Latin America (including Mexico). Be ...Chapter 9 NOTE: Do not use caution when removing jammed paper from inside the product. This section contains the following information: • Product name (HP Photosmart Plus e-All-in-One B210 series) • Serial number (located on the back or bottom of phone support is available in Europe, the Middle East, and Africa, go to...


