HP USB Digital Drive
Page 4
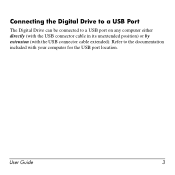
User Guide 3 Connecting the Digital Drive to a USB Port The Digital Drive can be connected to the documentation included with the USB connector cable extended). Refer to a USB port on any computer either directly (with the USB connector cable in its unextended position) or by extension (with your computer for the USB port location.
User Guide 3 Connecting the Digital Drive to a USB Port The Digital Drive can be connected to the documentation included with the USB connector cable extended). Refer to a USB port on any computer either directly (with the USB connector cable in its unextended position) or by extension (with your computer for the USB port location.
HP USB Digital Drive
Page 5
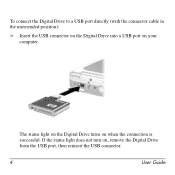
To connect the Digital Drive to a USB port directly (with the connector cable in the unextended position): » Insert the USB connector on the Digital Drive into a USB port on , remove the Digital Drive from the USB port, then reinsert the USB connector. 4 User Guide If the status light does not turn on your computer. The status light on the Digital Drive turns on when the connection is successful.
To connect the Digital Drive to a USB port directly (with the connector cable in the unextended position): » Insert the USB connector on the Digital Drive into a USB port on , remove the Digital Drive from the USB port, then reinsert the USB connector. 4 User Guide If the status light does not turn on your computer. The status light on the Digital Drive turns on when the connection is successful.

HP USB Digital Drive
Page 6
User Guide 5 Rotate the USB connector cable out of its extended position): 1. To connect the Digital Drive to a USB port by extension (with the USB cable in its track gently until it is fully extended.
User Guide 5 Rotate the USB connector cable out of its extended position): 1. To connect the Digital Drive to a USB port by extension (with the USB cable in its track gently until it is fully extended.
HP USB Digital Drive
Page 7
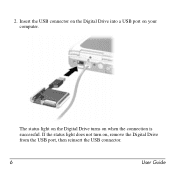
Insert the USB connector on the Digital Drive into a USB port on , remove the Digital Drive from the USB port, then reinsert the USB connector. 6 User Guide If the status light does not turn on your computer. 2. The status light on the Digital Drive turns on when the connection is successful.
Insert the USB connector on the Digital Drive into a USB port on , remove the Digital Drive from the USB port, then reinsert the USB connector. 6 User Guide If the status light does not turn on your computer. 2. The status light on the Digital Drive turns on when the connection is successful.

HP USB Digital Drive
Page 9
Disconnecting the Digital Drive ✎ Do not attempt to Remove Hardware" message appears on your screen. 3. A dialog box displays a list of connected devices. 2. Gently unplug the Digital Drive from the USB port. ✎ If the USB connector cable is flashing. 1. Select the Digital Drive and wait until the "Safe to remove the Digital Drive when the status light on the Digital Drive is in the extended position, return it on its track for safe storage. 8 User Guide Select the "Safely Remove Hardware" icon on your taskbar.
Disconnecting the Digital Drive ✎ Do not attempt to Remove Hardware" message appears on your screen. 3. A dialog box displays a list of connected devices. 2. Gently unplug the Digital Drive from the USB port. ✎ If the USB connector cable is flashing. 1. Select the Digital Drive and wait until the "Safe to remove the Digital Drive when the status light on the Digital Drive is in the extended position, return it on its track for safe storage. 8 User Guide Select the "Safely Remove Hardware" icon on your taskbar.
HP Mobile Remote Control (Select Models Only) - Windows Vista and Windows 7
Page 11
4 Troubleshooting Try the following solutions if your remote control does not function properly: ● Be sure that you have a clear line of sight from the remote control to the infrared port on the computer or optional docking device. ● Be sure that you are within range of the infrared port on the computer or optional docking device. ● Be sure that you are using the remote control with a supported computer or optional docking device. 7 Replace the battery if necessary. ● Be sure that the battery is properly installed and has a charge.
4 Troubleshooting Try the following solutions if your remote control does not function properly: ● Be sure that you have a clear line of sight from the remote control to the infrared port on the computer or optional docking device. ● Be sure that you are within range of the infrared port on the computer or optional docking device. ● Be sure that you are using the remote control with a supported computer or optional docking device. 7 Replace the battery if necessary. ● Be sure that the battery is properly installed and has a charge.

HP ScrollSmart Mobile Remote Control (Select Models Only) - Windows Vista and Windows 7
Page 11
Replace the battery if necessary. ● Be sure that you are within range of sight from the remote control to the infrared port on the computer or optional docking device. ● Be sure that the battery is properly installed and has a charge. 4 Troubleshooting Try the following solutions if your remote control does not function properly: ● Be sure that you have a clear line of the infrared port on the computer or optional docking device. ● Be sure that you are using the remote control with a supported computer or optional docking device. 7
Replace the battery if necessary. ● Be sure that you are within range of sight from the remote control to the infrared port on the computer or optional docking device. ● Be sure that the battery is properly installed and has a charge. 4 Troubleshooting Try the following solutions if your remote control does not function properly: ● Be sure that you have a clear line of the infrared port on the computer or optional docking device. ● Be sure that you are using the remote control with a supported computer or optional docking device. 7

Drives - Windows 7
Page 19
Hard drives in the primary hard drive bay or in optional docking devices or connected to USB ports are protected by HP ProtectSmart Hard Drive Protection. A short time after the end of one of the following conditions: ● You drop the computer. ● You ...move the computer with the display closed while the computer is unnecessary. For more information, refer to normal operation. 5 Using HP ProtectSmart Hard Drive Protection HP ProtectSmart Hard Drive Protection protects the hard drive by parking the drive and halting I/O requests under either of these events...
Hard drives in the primary hard drive bay or in optional docking devices or connected to USB ports are protected by HP ProtectSmart Hard Drive Protection. A short time after the end of one of the following conditions: ● You drop the computer. ● You ...move the computer with the display closed while the computer is unnecessary. For more information, refer to normal operation. 5 Using HP ProtectSmart Hard Drive Protection HP ProtectSmart Hard Drive Protection protects the hard drive by parking the drive and halting I/O requests under either of these events...

External Devices - Windows 7
Page 3
Table of contents 1 Using a USB device Connecting a USB device ...2 Removing a USB device ...2 2 Using an eSATA device Connecting an eSATA device ...3 Removing an eSATA device ...4 3 Using a 1394 device Connecting a 1394 device ...6 Removing a 1394 device ...6 4 Using the expansion port Index ...8 iii
Table of contents 1 Using a USB device Connecting a USB device ...2 Removing a USB device ...2 2 Using an eSATA device Connecting an eSATA device ...3 Removing an eSATA device ...4 3 Using a 1394 device Connecting a 1394 device ...6 Removing a 1394 device ...6 4 Using the expansion port Index ...8 iii
External Devices - Windows 7
Page 5
For more USB ports, connect an optional hub or expansion product. 1 1 Using a USB device A USB port connects an optional external device, such as a USB keyboard, mouse, drive, printer, scanner, or hub, to the computer or to the manufacturer's instructions. Depending on the model, the computer may require additional support software, which support USB 1.0, USB 1.1, and USB 2.0 devices. Some USB devices may have up to 4 USB ports, which is usually included with the device. To add more information about device-specific software, refer to an optional expansion product.
For more USB ports, connect an optional hub or expansion product. 1 1 Using a USB device A USB port connects an optional external device, such as a USB keyboard, mouse, drive, printer, scanner, or hub, to the computer or to the manufacturer's instructions. Depending on the model, the computer may require additional support software, which support USB 1.0, USB 1.1, and USB 2.0 devices. Some USB devices may have up to 4 USB ports, which is usually included with the device. To add more information about device-specific software, refer to an optional expansion product.

External Devices - Windows 7
Page 6
... area). 2. Remove the device. 2 Chapter 1 Using a USB device Connecting a USB device CAUTION: To prevent damage to a USB connector, use the following procedure to the USB port. Click the name of the taskbar. You will hear a sound when the device has been detected. CAUTION: To prevent damage to a USB connector, do not...
... area). 2. Remove the device. 2 Chapter 1 Using a USB device Connecting a USB device CAUTION: To prevent damage to a USB connector, use the following procedure to the USB port. Click the name of the taskbar. You will hear a sound when the device has been detected. CAUTION: To prevent damage to a USB connector, do not...
External Devices - Windows 7
Page 7
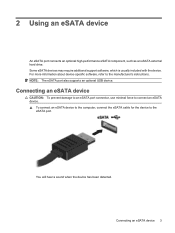
.... ▲ To connect an eSATA device to the computer, connect the eSATA cable for the device to the manufacturer's instructions. NOTE: The eSATA port also supports an optional USB device. Connecting an eSATA device 3 You will hear a sound when the device has been detected. Some eSATA devices may... require additional support software, which is usually included with the device. For more information about device-specific software, refer to the eSATA port. 2 Using an eSATA device An eSATA port connects an optional high-performance eSATA component, such as an eSATA external hard drive.
.... ▲ To connect an eSATA device to the computer, connect the eSATA cable for the device to the manufacturer's instructions. NOTE: The eSATA port also supports an optional USB device. Connecting an eSATA device 3 You will hear a sound when the device has been detected. Some eSATA devices may... require additional support software, which is usually included with the device. For more information about device-specific software, refer to the eSATA port. 2 Using an eSATA device An eSATA port connects an optional high-performance eSATA component, such as an eSATA external hard drive.
External Devices - Windows 7
Page 9
Scanners, digital cameras, and digital camcorders often require a 1394 connection. The 1394 port also supports IEEE 1394a devices. 5 For more information about device-specific software, refer to the computer. Some 1394 devices may require additional support software, which is a hardware interface that connects a high-speed multimedia or data storage device to the manufacturer's instructions. 3 Using a 1394 device IEEE 1394 is usually included with the device.
Scanners, digital cameras, and digital camcorders often require a 1394 connection. The 1394 port also supports IEEE 1394a devices. 5 For more information about device-specific software, refer to the computer. Some 1394 devices may require additional support software, which is a hardware interface that connects a high-speed multimedia or data storage device to the manufacturer's instructions. 3 Using a 1394 device IEEE 1394 is usually included with the device.

External Devices - Windows 7
Page 10
... device to remove the hardware device. 3. Removing a 1394 device CAUTION: To prevent loss of the taskbar. Connecting a 1394 device CAUTION: To prevent damage to a 1394 port connector, use the following procedure to remove the 1394 device. 1. NOTE: You are prompted that it is safe to the 1394...
... device to remove the hardware device. 3. Removing a 1394 device CAUTION: To prevent loss of the taskbar. Connecting a 1394 device CAUTION: To prevent damage to a 1394 port connector, use the following procedure to remove the 1394 device. 1. NOTE: You are prompted that it is safe to the 1394...

External Devices - Windows 7
Page 11
The term expansion port 3 describes the type of expansion port. 7 NOTE: The computer has only one expansion port. 4 Using the expansion port The expansion port connects the computer to an optional docking device or expansion product, so that additional ports and connectors can be used with the computer.
The term expansion port 3 describes the type of expansion port. 7 NOTE: The computer has only one expansion port. 4 Using the expansion port The expansion port connects the computer to an optional docking device or expansion product, so that additional ports and connectors can be used with the computer.

Notebook Tour - Windows 7
Page 16
Right-side components NOTE: Your computer may look slightly different from the illustration in (microphone) jack (2) Audio-out (headphone) jacks (2) (3) USB ports (2) (4) Optical drive (5) Optical drive light (6) TV antenna/cable jack (select models only) (7) Power connector Description Connects an optional computer headset microphone, stereo array microphone, or ...
Right-side components NOTE: Your computer may look slightly different from the illustration in (microphone) jack (2) Audio-out (headphone) jacks (2) (3) USB ports (2) (4) Optical drive (5) Optical drive light (6) TV antenna/cable jack (select models only) (7) Power connector Description Connects an optional computer headset microphone, stereo array microphone, or ...

Notebook Tour - Windows 7
Page 17
NOTE: The computer has only one expansion port. NOTE: The security cable is designed to the computer. Connects an optional video or audio device, such as an eSATA external hard drive, or... as a highdefinition television, or any compatible digital or audio component. Left-side components Component (1) Security cable slot (2) External monitor port (3) Expansion port 3 (4) RJ-45 (network) jack (5) HDMI port (6) eSATA/USB port (7) USB port (8) 1394 port (9) ExpressCard slot Description Attaches an optional security cable to act as a deterrent, but it may not prevent the computer from...
NOTE: The computer has only one expansion port. NOTE: The security cable is designed to the computer. Connects an optional video or audio device, such as an eSATA external hard drive, or... as a highdefinition television, or any compatible digital or audio component. Left-side components Component (1) Security cable slot (2) External monitor port (3) Expansion port 3 (4) RJ-45 (network) jack (5) HDMI port (6) eSATA/USB port (7) USB port (8) 1394 port (9) ExpressCard slot Description Attaches an optional security cable to act as a deterrent, but it may not prevent the computer from...

Notebook Tour - Windows 7
Page 22
...8 Digital Media Slot, identifying 8 display switch, identifying 7 drive light, identifying 4 E eSATA/USB port, identifying 11 esc key, identifying 6 expansion port, identifying 11 ExpressCard slot, identifying 11 external monitor port, identifying 11 F fingerprint reader, identifying 5 fn key, identifying 6 function keys, identifying 6 H ...hard drive bay, identifying 12 HDMI port, identifying 11 headphone (audio-out) jacks 10 I infrared lens, identifying 8 integrated webcam light, identifying 7 integrated ...
...8 Digital Media Slot, identifying 8 display switch, identifying 7 drive light, identifying 4 E eSATA/USB port, identifying 11 esc key, identifying 6 expansion port, identifying 11 ExpressCard slot, identifying 11 external monitor port, identifying 11 F fingerprint reader, identifying 5 fn key, identifying 6 function keys, identifying 6 H ...hard drive bay, identifying 12 HDMI port, identifying 11 headphone (audio-out) jacks 10 I infrared lens, identifying 8 integrated webcam light, identifying 7 integrated ...
Notebook Tour - Windows 7
Page 23
..., identifying 5 memory module 12 microphone (audio-in) jack 10 Microsoft Certificate of Authenticity label 15 Mini Card compartment, identifying 12 monitor port, external 11 mute button, identifying 5 mute light, identifying 3 N next/fast forward button, identifying 5 num lock light, identifying ...identifying 5 treble up light, identifying 3 treble/bass button, identifying 5 TV antenna, identifying 14 TV antenna/cable jack, identifying 10 U USB ports, identifying 10, 11 V vents, identifying 9, 12 volume down light, identifying 3 volume mute button, identifying 5 volume mute light, identifying 3 ...
..., identifying 5 memory module 12 microphone (audio-in) jack 10 Microsoft Certificate of Authenticity label 15 Mini Card compartment, identifying 12 monitor port, external 11 mute button, identifying 5 mute light, identifying 3 N next/fast forward button, identifying 5 num lock light, identifying ...identifying 5 treble up light, identifying 3 treble/bass button, identifying 5 TV antenna, identifying 14 TV antenna/cable jack, identifying 10 U USB ports, identifying 10, 11 V vents, identifying 9, 12 volume down light, identifying 3 volume mute button, identifying 5 volume mute light, identifying 3 ...

Pointing Devices and Keyboard - Windows 7
Page 6
... pointing devices, such as button configuration, click speed, and pointer options. A USB mouse can connect an external USB mouse to the computer using the ports on an external mouse. Use the left and right TouchPad buttons like the corresponding buttons on an optional docking device or expansion product. 2 Chapter 1 ...direction you want the pointer to go. Connecting an external mouse You can also be connected to the system by using one of the USB ports on the computer. NOTE: If you are using the TouchPad scroll zone, slide your finger up and down using the TouchPad to move the...
... pointing devices, such as button configuration, click speed, and pointer options. A USB mouse can connect an external USB mouse to the computer using the ports on an external mouse. Use the left and right TouchPad buttons like the corresponding buttons on an optional docking device or expansion product. 2 Chapter 1 ...direction you want the pointer to go. Connecting an external mouse You can also be connected to the system by using one of the USB ports on the computer. NOTE: If you are using the TouchPad scroll zone, slide your finger up and down using the TouchPad to move the...


