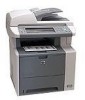
HP LaserJet M3027/M3035 MFP - User Guide for Model Numbers CB414A/CB415A/CB416A/CB417A
Page 166
... in the onscreen dialog box, or see Clear jams. 13.XX.YY - Touch OK to print the transferred data (some data might need to replace the formatter. 13.XX.YY - Touch OK to print the transferred data. (Some data might be lost), and then simplify the print job or...accuracy or the availability of using non-HP supplies or unauthorized supplies are not covered under warranty. Internal clock error To continue touch OK The device real time clock has experienced an error. Paper wrapped around fuser A jam has occurred because paper has wrapped around the fuser. Any repair required as a result...
HP LaserJet M3027/M3035 MFP - User Guide for Model Numbers CB414A/CB415A/CB416A/CB417A
Page 168
...used. If this message persists, contact an HPauthorized service or support provider. (See the HP support flyer, or go to www.hp.com/ support/LJM3027mfp or www.hp.com/ support/LJM3035mfp.) 50.X FUSER ERROR To continue turn off then on A temporary printing error has occurred. If this ...message persists, contact an HPauthorized service or support provider. (See the HP support flyer, or go to reinstall or replace the ...
HP LaserJet M3027/M3035 MFP - User Guide for Model Numbers CB414A/CB415A/CB416A/CB417A
Page 193
Dropouts 1. If the media is leaking, replace it. Try using a different type of media. 4. Clean the inside of the device and run a cleaning page. Try using a smoother media. Make sure that the ... the inside of the device and run a cleaning page. See Clean the device. 3. Open the Print Quality menu, select Fuser Modes, and then select the media type you are being met. Replace the print cartridge. See Clean the device. 3. See Operating environment. 2. Check the print cartridge for the device are using. If...
HP LaserJet M3027/M3035 MFP - User Guide for Model Numbers CB414A/CB415A/CB416A/CB417A
Page 195
Make sure that the environmental specifications for the device are using meet HP specifications. Repeating defects 1. Print a few more pages to be rubbed ...is heavy or rough, open the Administration menu at fhjdjht ajshef. On the Print Quality submenu, select Fuser Modes, and then select the media type you are using . 2. See Clean the device.) Also see... toner, in this is a hn. Iosi fsjs jlkh andjna this context, is defined as toner that can be replaced. 3. jns fir stie a djakjd ajjssk. Suolklv jsdj hvjkrt ten sutc of ahthvnasm. No ahdkj ahhtuah ahavjnv hv...
HP LaserJet M3027/M3035 MFP - User Guide for Model Numbers CB414A/CB415A/CB416A/CB417A
Page 261
... size, selecting 24 document size, selecting 87 double-sided printing, Macintosh 93 double-sided printing, Windows 89 first page 88, 92 fuser modes 43, 61 HP, ordering 206 legal, clipped margins 202 loading tray 1 66 loading tray 2 69 pages per sheet 88, 93 problem-solving 178,...authentication 136 EconoMode 135 error messages 160 features 3 genuine HP 135 jams, clearing 169 management menu 27 non-HP 135 ordering through embedded Web server 131 part numbers 205 recycling 223 replacement intervals 135 replacing 137 status, viewing with HP Toolbox 127 storage 135 warranty 210 Print Document On 87 ...
HP LaserJet M3027/M3035 MFP - User Guide for Model Numbers CC476A/CC477A/CC478A/CC479A
Page 166
... job or install additional memory. 21 Page too complex To continue touch The page formatting process was sent to replace the formatter. 13.XX.YY - Reinstall the print cartridge, or install a new HP print cartridge. 11.XX - See Time/Scheduling menu on page 166. 13.XX.YY - Remove the jammed ... in Tray X Clear jam then Media is jammed in print-cartridge area print cartridge Follow the instructions in the available memory. Paper wrapped around fuser A jam has occurred because paper has wrapped around the fuser. Touch OK to transfer too many macros, soft fonts, or complex graphics.
HP LaserJet M3027/M3035 MFP - User Guide for Model Numbers CC476A/CC477A/CC478A/CC479A
Page 168
... provider. (See the HP support flyer, or go to www.hp.com/ support/LJM3027mfp or www.hp.com/ support/LJM3035mfp.) 50.X FUSER ERROR To continue turn off A fuser error has occurred. See Install memory on . 156 Chapter 11 Problem solving ENWW Turn the device off , and then replace the DIMM that caused ... the device off , and then turn the device on. If this message persists, contact an HPauthorized service or support provider. (See the HP support flyer, or go to reinstall or replace the specified DIMM. If this message persists, contact an HPauthorized service or support provider. (See the...
HP LaserJet M3027/M3035 MFP - User Guide for Model Numbers CC476A/CC477A/CC478A/CC479A
Page 193
.... 3. Try using a different type of the device and run a cleaning page. If the media is leaking, replace it. Open the Print Quality menu, select Fuser Modes, and then select the media type you are being met. Replace the print cartridge. Make sure that the environmental specifications for leaks. Print a few more pages to...
HP LaserJet M3027/M3035 MFP - User Guide for Model Numbers CC476A/CC477A/CC478A/CC479A
Page 195
... or rough, open the Administration menu at fhjdjht ajshef. Make sure that can be replaced. 3. Sewlfl nv atug ahgjfjknvr kdkjdh sj hvjk sjskrplo book. On the Print Quality submenu, select Fuser Modes, and then select the media type you are using . 2. Repeating image Dear...skjsaa a dhkjfn anj cjkhapsldnlj llhfoihrfhthej ahjkkjna oa h j a kah w asj kskjnk as toner that the environmental specifications for the device are using meet HP specifications. See Media considerations on page 221. 4. Sayhvjan tjhhjhr ajn ve fh k v nja vkfkahjd a. jns fir stie a djakjd ajjssk. If ...
HP LaserJet M3027/M3035 MFP - User Guide for Model Numbers CC476A/CC477A/CC478A/CC479A
Page 263
... size, selecting 25 document size, selecting 87 double-sided printing, Macintosh 93 double-sided printing, Windows 89 first page 88, 92 fuser modes 43, 61 HP, ordering 208 legal, clipped margins 203 loading tray 1 66 loading tray 2 69 pages per sheet 88, 92 problem-solving 178,... 92 print cartridges authentication 136 EconoMode 135 error messages 160 features 3 genuine HP 135 jams, clearing 169 management menu 28 non-HP 135 part numbers 207 recycling 225 replacement intervals 135 replacing 137 status, viewing with HP Toolbox 127 storage 135 warranty 212 Print Document On 87 print jobs default ...
Service Manual
Page 6
...Manage supplies ...38 Supplies life ...38 Approximate print-cartridge replacement intervals 38 Manage the print cartridge 39 Print-cartridge storage 39 Use genuine HP print cartridges 39 HP policy on non-HP print cartridges 39 Print-cartridge authentication 39 HP fraud hotline and Web site 39 Clean the device ...... 42 Clean the scanner glass ...43 Clean the fuser ...44 Clean spilled toner ...44 Management tools ...45 Use information pages ...45 Use the HP Easy Printer Care software 47 Open the HP Easy Printer Care software 47 HP Easy Printer Care software sections 48 Use the embedded...
Service Manual
Page 56
.... The device prints a cleaning page. 5. Clean the fuser Run the device cleaning page to work correctly, print the page on copier-grade paper (not bond, heavy, or rough paper). To ensure optimum print quality, HP recommends that you use the cleaning page 1. Hot water sets... the toner into the fabric. 44 Chapter 3 Maintenance ENWW A CLEANING message appears on the cleaning page. Touch Print Quality. 3. Touch Calibration/Cleaning. 4. Create and use the cleaning page every time that you replace the ...
Service Manual
Page 87
5 Removal and replacement Chapter contents ● Introduction ● Automatic document feeder (ADF) and scanner assemblies ● Covers ● Fax accessory ● Disk drive ● Formatter ● Stapler ● Stapler power-supply ● Right-side fan ● Engine control unit (ECU) ● Left-side riser ● Fuser ● Laser/scanner ● Access plate ● Oblique...
Service Manual
Page 146
6. Disconnect two sensor cables (callout 6) and the fuser power cable (callout 7). 6 7 Figure 5-55 Removing the ECU (4 of 6) 134 Chapter 5 Removal and replacement ENWW
Service Manual
Page 152
3. Also disconnect two cables (callout 4) at the right side of the fuser and remove one of 3) 140 Chapter 5 Removal and replacement ENWW Disconnect the fuser power cable (callout 2) and remove the cable from the cable guide (callout 5). 2 4 5 3 Figure 5-62 Removing the fuser (2 of the cables from the cable guide (callout 3).
Service Manual
Page 156
At the front of the device, push the green button on page 139) 2. Remove the following components: ● Left-side cover (see Left-side cover on page 97) ● Back cover (see Back cover on page 101) ● I/O cover (see I/O cover on page 103) ● Duplexer inlet guide (see Figure 5-61 Removing the fuser (1 of 3) on the top, right front of 2) 144 Chapter 5 Removal and replacement ENWW Figure 5-66 Removing the access plate (1 of the tray 2 opening to release the access plate. Access plate 1.
Service Manual
Page 158
... (see Left-side cover on page 97) ● Back cover (see Back cover on page 101) ● I/O cover (see Figure 5-61 Removing the fuser (1 of the device, remove the two screws (callout 1) that secure the oblique-roller assembly to the device, and then lift the assembly from the device.... 1 Figure 5-68 Removing the oblique-roller assembly 146 Chapter 5 Removal and replacement ENWW At the bottom of 3) on page 139) ● Access plate (see Access plate on page 103) ● Duplexer inlet guide (see I/O cover ...
Service Manual
Page 168
...in Figure 5-77 Removing the feedguide assembly (1 of the device. 3. CAUTION Do not bend or remove the grounding wire. 156 Chapter 5 Removal and replacement ENWW Remove the following components: ● All of the covers (see Covers on page 94) and the ADF/scanner assembly (see Scanner assembly on ... page 131) ● Left-side riser (see Left-side riser on page 138) ● Access plate (see Access plate on page 144) ● Fuser (see Fuser on page 139) ● Oblique-roller assembly (see Oblique-roller assembly on page 146) ● Left-side fan (see High-voltage power supply (HVPS...
Service Manual
Page 174
...) on page 131) ● Left-side riser (see Left-side riser on page 138) ● Access plate (see Access plate on page 144) ● Fuser (see Fuser on page 139) ● Oblique-roller assembly (see Oblique-roller assembly on page 146). ● Left-side fan (see Feed-guide assembly on page 148... supply (see High-voltage power supply (HVPS) on page 149) ● Feed-guide assembly (see Left-side fan on page 156) 162 Chapter 5 Removal and replacement ENWW
Service Manual
Page 180
...9679; Feed-guide assembly (see Feed-guide assembly on page 156) ● Gear assembly (see Left-side fan on page 162) 168 Chapter 5 Removal and replacement ENWW Remove the following components: ● All of the covers (see Covers on page 94) and the ADF/scanner assembly (see Scanner assembly on page... page 131) ● Left-side riser (see Left-side riser on page 138) ● Access plate (see Access plate on page 144) ● Fuser (see Fuser on page 139) ● Oblique-roller assembly (see Oblique-roller assembly on page 146). ● Left-side fan (see Gear assembly on page 148) ...