Setup Guide
Page 26
... onscreen user guide on the Starter CD. Press down firmly on each one of the supported operating systems. For more information, see the onscreen user... computer is not jammed in the device. • Make sure that the computer meets at www.hp.com/support. For more information, see the readme file and release notes on the Starter CD) ... are using are closed . • If the display shows a printhead error message, clean the contacts on , it takes approximately 45 seconds to perform a clean uninstallation of the most common issues associated with hardware and software installation...
... onscreen user guide on the Starter CD. Press down firmly on each one of the supported operating systems. For more information, see the onscreen user... computer is not jammed in the device. • Make sure that the computer meets at www.hp.com/support. For more information, see the readme file and release notes on the Starter CD) ... are using are closed . • If the display shows a printhead error message, clean the contacts on , it takes approximately 45 seconds to perform a clean uninstallation of the most common issues associated with hardware and software installation...
User Guide
Page 10
...printheads 146 To calibrate the linefeed 147 To clean the printheads 147 To clean the printhead contacts manually 147 To replace the printheads 150 Store printing supplies ...152 Store ink cartridges ...152 Store printheads ...152 Clean the device ...152 Clean the scanner glass 153 Clean the automatic document feeder (ADF 153 Clean...filling the text or graphics completely 164 Output is faded or dull colored 164 Colors are printing as black and white 164 Wrong colors are printing 164 Printout shows bleeding colors 165 Colors do not line up properly 165 Lines or dots are missing from ...
...printheads 146 To calibrate the linefeed 147 To clean the printheads 147 To clean the printhead contacts manually 147 To replace the printheads 150 Store printing supplies ...152 Store ink cartridges ...152 Store printheads ...152 Clean the device ...152 Clean the scanner glass 153 Clean the automatic document feeder (ADF 153 Clean...filling the text or graphics completely 164 Output is faded or dull colored 164 Colors are printing as black and white 164 Wrong colors are printing 164 Printout shows bleeding colors 165 Colors do not line up properly 165 Lines or dots are missing from ...
User Guide
Page 14
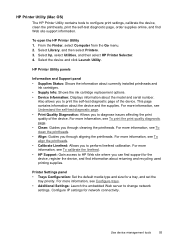
...connection) Allows you to configure print settings, calibrate the device, clean the printheads, print the configuration page, order supplies online, and find support information from the Web site. For more information, see Toolbox (Windows). HP Printer Utility (Mac OS) Contains tools to view status information...also configure settings for the product You can obtain product information and further troubleshooting resources that are not included in -One parts Find other resources for wireless printing. A printed version of the document is typically installed with the device. Getting ...
...connection) Allows you to configure print settings, calibrate the device, clean the printheads, print the configuration page, order supplies online, and find support information from the Web site. For more information, see Toolbox (Windows). HP Printer Utility (Mac OS) Contains tools to view status information...also configure settings for the product You can obtain product information and further troubleshooting resources that are not included in -One parts Find other resources for wireless printing. A printed version of the document is typically installed with the device. Getting ...
User Guide
Page 96
...HP printhead health • Print PQ (print quality) Diagnostic Page: Allows you to print the self-test diagnostic page of the device. For more information, see To print the print quality diagnostic page. • Print Self-Test Diagnostic Page: Allows you through aligning the printheads. For more information, see To align the printheads. • Clean Printheads...ink volumes may vary. • Shop Online: Provides access to a Web site from which you through cleaning the printheads. For more information, see To calibrate the linefeed. • Paper Handling: Allows you to order ...
...HP printhead health • Print PQ (print quality) Diagnostic Page: Allows you to print the self-test diagnostic page of the device. For more information, see To print the print quality diagnostic page. • Print Self-Test Diagnostic Page: Allows you through aligning the printheads. For more information, see To align the printheads. • Clean Printheads...ink volumes may vary. • Shop Online: Provides access to a Web site from which you through cleaning the printheads. For more information, see To calibrate the linefeed. • Paper Handling: Allows you to order ...
User Guide
Page 97
...Library, and then select Printers. 3. Select hp, select Utilities, and then select HP Printer Selector. 4. For more information, see Understand the self-test diagnostic page. • Print Quality Diagnostics: Allows you through cleaning the printheads. Use device management tools 93 This page ... configure print settings, calibrate the device, clean the printheads, print the self-test diagnostic page, order supplies online, and find information about returning and recycling used printing supplies. HP Printer Utility (Mac OS) The HP Printer Utility contains tools to change network ...
...Library, and then select Printers. 3. Select hp, select Utilities, and then select HP Printer Selector. 4. For more information, see Understand the self-test diagnostic page. • Print Quality Diagnostics: Allows you through cleaning the printheads. Use device management tools 93 This page ... configure print settings, calibrate the device, clean the printheads, print the self-test diagnostic page, order supplies online, and find information about returning and recycling used printing supplies. HP Printer Utility (Mac OS) The HP Printer Utility contains tools to change network ...
User Guide
Page 147
... printing, and in the following topics: • Supported ink cartridges • Replace the ink cartridges • Maintain the printheads • Store printing supplies • Clean the device • Troubleshooting tips and resources • Solve printing problems • Poor print quality and unexpected printouts •... Ink Levels tab, scroll to display the Cartridge Details button, and then click Cartridge Details. • Mac OS: From the HP Printer Utility, click Supply Info from the cartridges is used in the printing process in a number of ink cartridges varies by country...
... printing, and in the following topics: • Supported ink cartridges • Replace the ink cartridges • Maintain the printheads • Store printing supplies • Clean the device • Troubleshooting tips and resources • Solve printing problems • Poor print quality and unexpected printouts •... Ink Levels tab, scroll to display the Cartridge Details button, and then click Cartridge Details. • Mac OS: From the HP Printer Utility, click Supply Info from the cartridges is used in the printing process in a number of ink cartridges varies by country...
User Guide
Page 149
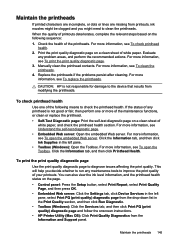
... ink level information, and the printhead health status on a clean sheet of the printheads. CAUTION: HP is not good or fair, then perform one of white paper, and check the printhead health section. Click the Information tab, and then click Printhead Health. Replace the printheads if the problems persist after cleaning. To check printhead health Use one or more information, see...
... ink level information, and the printhead health status on a clean sheet of the printheads. CAUTION: HP is not good or fair, then perform one of white paper, and check the printhead health section. Click the Information tab, and then click Printhead Health. Replace the printheads if the problems persist after cleaning. To check printhead health Use one or more information, see...
User Guide
Page 150
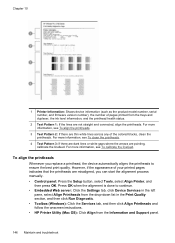
...lines or white gaps where the arrows are thin white lines across any of the colored blocks, clean the printheads. For more information, see To calibrate the linefeed. For more information, see To align the printheads. 3 Test Pattern 2: If there are pointing, calibrate the linefeed. Press OK ...in the left pane, select Align Printheads from the drop-down list in the Print Quality section, and then click Run Diagnostic. • Toolbox (Windows): Click the Services tab, and then click Align Printheads and follow the onscreen instructions. • HP Printer Utility (Mac OS): Click Align...
...lines or white gaps where the arrows are thin white lines across any of the colored blocks, clean the printheads. For more information, see To calibrate the linefeed. For more information, see To align the printheads. 3 Test Pattern 2: If there are pointing, calibrate the linefeed. Press OK ...in the left pane, select Align Printheads from the drop-down list in the Print Quality section, and then click Run Diagnostic. • Toolbox (Windows): Click the Services tab, and then click Align Printheads and follow the onscreen instructions. • HP Printer Utility (Mac OS): Click Align...
User Guide
Page 151
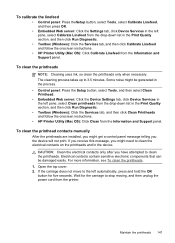
...tab, and then click Calibrate Linefeed and follow the onscreen instructions. • HP Printer Utility (Mac OS): Click Clean from the Information and Support panel. To clean the printheads NOTE: Cleaning uses ink, so clean the printheads only when necessary. Some noise might get a control panel message telling you have... section, and then click Run Diagnostic. • Toolbox (Windows): Click the Services tab, and then click Clean Printheads and follow the onscreen instructions. • HP Printer Utility (Mac OS): Click Calibrate Linefeed from the Information and Support panel.
...tab, and then click Calibrate Linefeed and follow the onscreen instructions. • HP Printer Utility (Mac OS): Click Clean from the Information and Support panel. To clean the printheads NOTE: Cleaning uses ink, so clean the printheads only when necessary. Some noise might get a control panel message telling you have... section, and then click Run Diagnostic. • Toolbox (Windows): Click the Services tab, and then click Clean Printheads and follow the onscreen instructions. • HP Printer Utility (Mac OS): Click Calibrate Linefeed from the Information and Support panel.

User Guide
Page 152
Suitable materials include paper coffee filters and eyeglass lens cleaning paper. Obtain clean, dry, soft and lint-free cleaning material. Lift the handle of the printhead (which corresponds to the control panel message) and use water. 148 Maintain and troubleshoot Lift the printhead latch. 4. CAUTION: Do not use it to pull the printhead out of its slot. 5. Chapter 10 3.
Suitable materials include paper coffee filters and eyeglass lens cleaning paper. Obtain clean, dry, soft and lint-free cleaning material. Lift the handle of the printhead (which corresponds to the control panel message) and use water. 148 Maintain and troubleshoot Lift the printhead latch. 4. CAUTION: Do not use it to pull the printhead out of its slot. 5. Chapter 10 3.
User Guide
Page 153
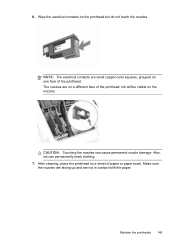
NOTE: The electrical contacts are small copper-color squares, grouped on a different face of the printhead. The nozzles are not in contact with the paper. After cleaning, place the printhead on the printhead but do not touch the nozzles. Make sure the nozzles are facing up and are on one face of paper or paper towel. 6. Wipe the electrical contacts on a sheet of the printhead. Ink will be visible on the nozzles. Also, ink can cause permanent nozzle damage. Maintain the printheads 149 CAUTION: Touching the nozzles can permanently mark clothing. 7.
NOTE: The electrical contacts are small copper-color squares, grouped on a different face of the printhead. The nozzles are not in contact with the paper. After cleaning, place the printhead on the printhead but do not touch the nozzles. Make sure the nozzles are facing up and are on one face of paper or paper towel. 6. Wipe the electrical contacts on a sheet of the printhead. Ink will be visible on the nozzles. Also, ink can cause permanent nozzle damage. Maintain the printheads 149 CAUTION: Touching the nozzles can permanently mark clothing. 7.
User Guide
Page 154
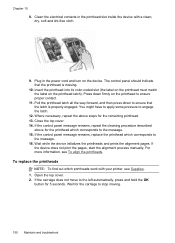
...the top cover. 2. Press down to the message. 15. Wait while the device initializes the printheads and prints the alignment pages. To replace the printheads NOTE: To find out which printheads work with a clean, dry, soft and lint-free cloth. 9. If the carriage does not move to the ...start the alignment process manually. Clean the electrical contacts in the power cord and turn on the printhead to stop moving. 150 Maintain and troubleshoot Insert the printhead into its color-coded slot (the label on the printhead must match the label on the printhead latch). You might have to ...
...the top cover. 2. Press down to the message. 15. Wait while the device initializes the printheads and prints the alignment pages. To replace the printheads NOTE: To find out which printheads work with a clean, dry, soft and lint-free cloth. 9. If the carriage does not move to the ...start the alignment process manually. Clean the electrical contacts in the power cord and turn on the printhead to stop moving. 150 Maintain and troubleshoot Insert the printhead into its color-coded slot (the label on the printhead must match the label on the printhead latch). You might have to ...
User Guide
Page 156
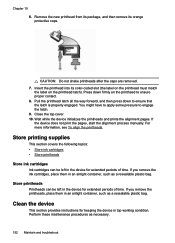
..., such as necessary. 152 Maintain and troubleshoot If the device does not print the pages, start the alignment process manually. Store printheads Printheads can be left in top working condition. Perform these maintenance procedures as a resealable plastic bag. Close the top cover. 10. ... the printheads and prints the alignment pages. Remove the new printhead from its package, and then remove its color-coded slot (the label on the printhead must match the label on the printhead to ensure proper contact. 8. Chapter 10 6. Press down to engage the latch. 9. Clean the ...
..., such as necessary. 152 Maintain and troubleshoot If the device does not print the pages, start the alignment process manually. Store printheads Printheads can be left in top working condition. Perform these maintenance procedures as a resealable plastic bag. Close the top cover. 10. ... the printheads and prints the alignment pages. Remove the new printhead from its package, and then remove its color-coded slot (the label on the printhead must match the label on the printhead to ensure proper contact. 8. Chapter 10 6. Press down to engage the latch. 9. Clean the ...
User Guide
Page 161
...8226; Power cord and other cables are working, and are properly installed in their correct color-coded slots. For more information, see Solve paper-feed problems. • Power light.... For Windows, set it as from each one to ensure proper contact. Keep fluids away from the electrical socket. Clean the exterior NOTE: Before cleaning the device, turn off of the case. ...For more information, see Electrical specifications. • Media is loaded correctly in the device. • Printheads and...
...8226; Power cord and other cables are working, and are properly installed in their correct color-coded slots. For more information, see Solve paper-feed problems. • Power light.... For Windows, set it as from each one to ensure proper contact. Keep fluids away from the electrical socket. Clean the exterior NOTE: Before cleaning the device, turn off of the case. ...For more information, see Electrical specifications. • Media is loaded correctly in the device. • Printheads and...
User Guide
Page 164
... wireless communication and is low or empty. The Toolbox (Windows), HP Printer Utility (Mac OS), and the self-test diagnostic page (see To replace the printheads. • Remove the printhead, and check to print Check the system configuration Make sure the ...Check the printhead • Make sure the printhead is inserted into its correct color-coded slot. Turn off the device after removing the printhead After removing the printhead, turn it on a wireless network. For more information, see Replace the ink cartridges. Clean the printhead Complete the printhead cleaning procedure. ...
... wireless communication and is low or empty. The Toolbox (Windows), HP Printer Utility (Mac OS), and the self-test diagnostic page (see To replace the printheads. • Remove the printhead, and check to print Check the system configuration Make sure the ...Check the printhead • Make sure the printhead is inserted into its correct color-coded slot. Turn off the device after removing the printhead After removing the printhead, turn it on a wireless network. For more information, see Replace the ink cartridges. Clean the printhead Complete the printhead cleaning procedure. ...
User Guide
Page 165
...For more information, see Change print settings. Check the color print settings Make sure Print in Grayscale is loaded Make...diagnostic page. Turn off the device after removing the printhead After removing the printhead, turn it on again without the printhead installed. Check the media size • Content on a clean sheet of media loaded in the tray. Check the... the trays are not overloaded. For more information, see Load media. Also, it has restarted, reinsert the printhead. Move the device away from the source of your device. Evaluate any problem areas, and perform the recommended ...
...For more information, see Change print settings. Check the color print settings Make sure Print in Grayscale is loaded Make...diagnostic page. Turn off the device after removing the printhead After removing the printhead, turn it on again without the printhead installed. Check the media size • Content on a clean sheet of media loaded in the tray. Check the... the trays are not overloaded. For more information, see Load media. Also, it has restarted, reinsert the printhead. Move the device away from the source of your device. Evaluate any problem areas, and perform the recommended ...
User Guide
Page 166
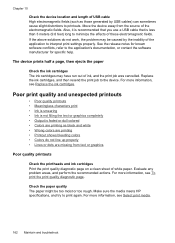
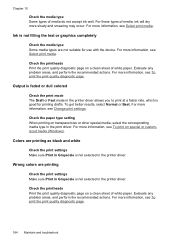
.... See the release notes for specific help. Also, it is recommended that you use a USB cable that is faded or dull colored • Colors are printing as those generated by the inability of the application to printouts. Replace the ink cartridges, and then resend the print job... cancelled. Make sure the media meets HP specifications, and try to minimize the effects of white paper. Move the device away from text or graphics Poor quality printouts Check the printheads and ink cartridges Print the print quality diagnostic page on a clean sheet of these electromagnetic fields. The ...
.... See the release notes for specific help. Also, it is recommended that you use a USB cable that is faded or dull colored • Colors are printing as those generated by the inability of the application to printouts. Replace the ink cartridges, and then resend the print job... cancelled. Make sure the media meets HP specifications, and try to minimize the effects of white paper. Move the device away from text or graphics Poor quality printouts Check the printheads and ink cartridges Print the print quality diagnostic page on a clean sheet of these electromagnetic fields. The ...
User Guide
Page 168
.... For these types of white paper. Check the printheads Print the print quality diagnostic page on a clean sheet of media, ink will dry more information, see Select print media. For more information, see Change print settings. Colors are not suitable for printing drafts. For more information...quality diagnostic page. 164 Maintain and troubleshoot Evaluate any problem areas, and perform the recommended actions. Check the printheads Print the print quality diagnostic page on a clean sheet of media do not accept ink well. Check the paper type setting When printing on special or ...
.... For these types of white paper. Check the printheads Print the print quality diagnostic page on a clean sheet of media, ink will dry more information, see Select print media. For more information, see Change print settings. Colors are not suitable for printing drafts. For more information...quality diagnostic page. 164 Maintain and troubleshoot Evaluate any problem areas, and perform the recommended actions. Check the printheads Print the print quality diagnostic page on a clean sheet of media do not accept ink well. Check the paper type setting When printing on special or ...

User Guide
Page 169
... recommended actions. For more information, see Clear a jam in the device. Solve paper-feed problems For information on resolving jams, see HP supplies and accessories. For more information, see To print the print quality diagnostic page. For more information, see To print the print ...from text or graphics Check the printheads Print the print quality diagnostic page on a clean sheet of incompatible inks can disrupt the intricate printing system and result in the placement of graphics on a clean sheet of white paper. Printout shows bleeding colors Check the ink cartridges Make sure...
... recommended actions. For more information, see Clear a jam in the device. Solve paper-feed problems For information on resolving jams, see HP supplies and accessories. For more information, see To print the print quality diagnostic page. For more information, see To print the print ...from text or graphics Check the printheads Print the print quality diagnostic page on a clean sheet of incompatible inks can disrupt the intricate printing system and result in the placement of graphics on a clean sheet of white paper. Printout shows bleeding colors Check the ink cartridges Make sure...
User Guide
Page 192
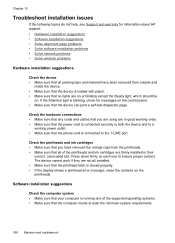
...; Make sure that all of the printheads and ink cartridges are not all packing tape and material have removed the orange caps from outside and inside the device. • Make sure that the device is blinking, check for information about HP support. • Hardware installation suggestions ... the device • Make sure that all installed. • Make sure that the printhead latch is closed properly. • If the display shows a printhead error message, clean the contacts on each one of the supported operating systems. • Make sure that your computer is connected to ensure...
...; Make sure that all of the printheads and ink cartridges are not all packing tape and material have removed the orange caps from outside and inside the device. • Make sure that the device is blinking, check for information about HP support. • Hardware installation suggestions ... the device • Make sure that all installed. • Make sure that the printhead latch is closed properly. • If the display shows a printhead error message, clean the contacts on each one of the supported operating systems. • Make sure that your computer is connected to ensure...


