HP L1740 - 17" LCD Monitor Research
Related Manual Pages


Related Videos

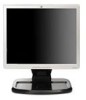
HP Flat Panel Monitor L1740
Duration: :52
Total Views: 4,485
Duration: :52
Total Views: 4,485
For Sale 205 x HP L1950G / L1950 / L1940T / L1955 / LP1965 / L1740 / L1755 TFT Monitors
Duration: :19
Total Views: 502
Duration: :19
Total Views: 502
Similar Questions

How To Load L 1810 Lcd Monitor Drivers Without In Built Hp Hard Disk
(Posted by Anonymous-112312 10 years ago)

Auto Adjustment In Progress
I have HP 1740 LCD Monitor, an box of "auto adjustment in progress" is coming the LCD screen after b...
I have HP 1740 LCD Monitor, an box of "auto adjustment in progress" is coming the LCD screen after b...
(Posted by khimanandsharma 12 years ago)

How To Update Hp L1810 Lcd Monitor Drivers
(Posted by RAVI 12 years ago)

How To Shut Off Auto Adjustment In Progress
a white square with "Auto Adjustment in Progress" is on screen constantly, and blinks off and on. Al...
a white square with "Auto Adjustment in Progress" is on screen constantly, and blinks off and on. Al...
(Posted by kgepner 13 years ago)

Hp L1740 Display Issues
My hpL1740 17" LCD MONITOR HAS TWO INPUTS FOR SIGNALS.WHEN I CONNECT THE VGA,IT DISPLAYS VGA ACTIVE,...
My hpL1740 17" LCD MONITOR HAS TWO INPUTS FOR SIGNALS.WHEN I CONNECT THE VGA,IT DISPLAYS VGA ACTIVE,...
(Posted by shedkimeu 13 years ago)
Related Terms
The following terms were also used when searching for HP L1740 - 17" LCD Monitor Research:- hp l1740 lcd
- hp l1740 monitor
- hp l1740 17
- hp l1740 lcd monitor
- hp l1740 flat panel
- l1740 monitor
- l1740 flat panel
- l1740 driver
- hp l1740 tft
- l1740 review
- l1740 lcd monitor
- hp l1740 driver
- hp l1740 review
- hp l1740 flat panel monitor
- l1740 specifications
- l1740 manual
- hp l1740 lcd monitor driver
- l1740 flat panel monitor
- l1740 repair
- l1740 price
- l1740 17 inch tft monitor
- l1740 specs
- l1740 17 inch lcd monitor
- l1740 lcd monitor driver
- l1740 lcd monitor driver windows 7
- l1740 lcd monitor price
- l1740 lcd monitor specifications
- l1740 hp
- l1740 hp monitor
- l1740 manuale
- l1740 price in india
- l1740 lcd
- l1740 monitor driver
- l1740 schematic
- pl766a8 warranty
- pl766a8 specs
- l1740 user manual
- l1740 user guide
- l1740 usb ports
- l1740 tft monitor
- l1740 tft
- l1740 stand
- l1740 service manual
- l1740 monitor driver windows 7
- l1740 resolution
- l1740 product number
- l1740 problem
- l1740
- l1740 monitor specs
- l1740 monitor problems
- l1740 monitor price
- l1740 monitor manual
- l1740 monitor drivers
- hp l1740 lcd flat panel monitor
- hp l1740 monitor manual
- hp l1740 monitor drivers
- hp l1740 monitor driver windows 7
- hp l1740 monitor driver
- hp l1740 manuale
- hp l1740 manual
- hp l1740 lcd monitor specifications
- hp l1740 lcd monitor price
- hp l1740 lcd monitor driver windows 7
- hp l1740 monitor price
- hp l1740 driver windows 7
- hp l1740 17-inch lcd monitor
- hp l1740 17 lcd monitor
- hp l1740 17 inch tft monitor
- hp l1740 17 inch lcd monitor
- hp l1740 17 inch
- hp l1740 17 in tft lcd monitor pl766a8 a
- hp l1740
- hewlett packard l1740 review
- hp l1740 specs
- l1740 17-inch lcd monitor
- l1740 17 lcd monitor
- l1740 17 inch
- hewlett packard l1740
- hp l1740.icm
- hp l1740 user manual
- hp l1740 usb ports
- hp l1740 usb
- hp l1740 stand
- l1740 driver windows 7
- hp l1740 specifications
- hp l1740 service manual
- hp l1740 schematic
- hp l1740 resolution
- hp l1740 repair
- hp l1740 price in india
- hp l1740 price
- hp l1740 monitor specs
- hp l1740 monitor problems