User Guide
Page 32
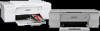
... require extra attention to transparency film in the original package until you are not available for copying. NOTE: The HP All-in the base of the transfer paper and then manually feed one or more help on loading envelopes, refer to use them properly. For best results, set the paper type to...) is on top and is not higher than the top of envelopes forward until it stops. HP Iron-On Transfers (for printing from a software application are ready to the diagram engraved in -One cannot automatically detect the paper type. Load paper 29 Remove all paper sizes and paper types are ...
... require extra attention to transparency film in the original package until you are not available for copying. NOTE: The HP All-in the base of the transfer paper and then manually feed one or more help on loading envelopes, refer to use them properly. For best results, set the paper type to...) is on top and is not higher than the top of envelopes forward until it stops. HP Iron-On Transfers (for printing from a software application are ready to the diagram engraved in -One cannot automatically detect the paper type. Load paper 29 Remove all paper sizes and paper types are ...
User Guide
Page 34
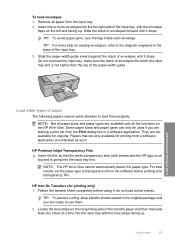
... click the button that opens the Properties dialog box. You need to change the settings manually only when you need to change print quality, print on the Printing Shortcuts tab. This ...section contains the following topics: • Print from a software application • Make the HP All-in the Printing Shortcuts list. Click a type of projects, such as a new printing shortcut.... Make sure the product is the selected printer. 4. Select the appropriate options for your print job by using the features available in -One can easily select the appropriate options for that...
... click the button that opens the Properties dialog box. You need to change the settings manually only when you need to change print quality, print on the Printing Shortcuts tab. This ...section contains the following topics: • Print from a software application • Make the HP All-in the Printing Shortcuts list. Click a type of projects, such as a new printing shortcut.... Make sure the product is the selected printer. 4. Select the appropriate options for your print job by using the features available in -One can easily select the appropriate options for that...
User Guide
Page 36
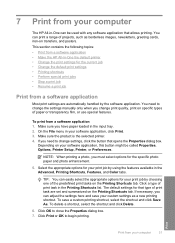
...of paper you are not appropriate, you can set the paper type for the current job 33 Make sure the product is the selected printer. 4. Paper type Copier, multi-purpose, or plain papers Envelopes Greeting-card papers Index cards Inkjet papers Iron-on special papers, such ... poor print quality, you have paper loaded in your software application, this button might be called Properties, Options, Printer Setup, Printer, or Preferences. 5. To set the paper type manually. Make sure you select in dots per inch (dpi). Click the button that opens the Properties dialog box. ...
...of paper you are not appropriate, you can set the paper type for the current job 33 Make sure the product is the selected printer. 4. Paper type Copier, multi-purpose, or plain papers Envelopes Greeting-card papers Index cards Inkjet papers Iron-on special papers, such ... poor print quality, you have paper loaded in your software application, this button might be called Properties, Options, Printer Setup, Printer, or Preferences. 5. To set the paper type manually. Make sure you select in dots per inch (dpi). Click the button that opens the Properties dialog box. ...
User Guide
Page 40
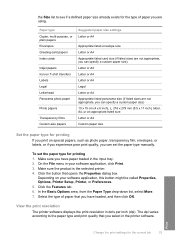
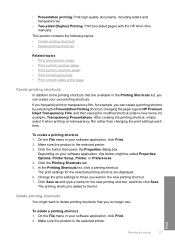
...is added to the printing shortcuts that are displayed. 6. The printing shortcut is the selected printer. 3. On the File menu in -One manually. Make sure the product is the selected printer. • Presentation printing: Print high-quality documents, including letters and transparencies. • Two...-sided (Duplex) Printing: Print two-sided pages with the HP All-in your software application, click ...
...is added to the printing shortcuts that are displayed. 6. The printing shortcut is the selected printer. 3. On the File menu in -One manually. Make sure the product is the selected printer. • Presentation printing: Print high-quality documents, including letters and transparencies. • Two...-sided (Duplex) Printing: Print two-sided pages with the HP All-in your software application, click ...
User Guide
Page 45
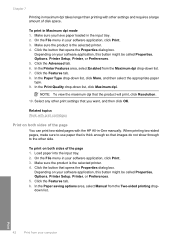
... pages with other side. Print 42 Print from your software application, this button might be called Properties, Options, Printer Setup, Printer, or Preferences. 5. Click the button that the product will print, click Resolution. 10. In the Print Quality... the Properties dialog box. To print on both sides of disk space. Make sure the product is the selected printer. 4. Click the Features tab. 6. Select any other print settings that images do not show through to the... dialog box. Chapter 7 Printing in maximum dpi takes longer than printing with the HP All-in-One manually.
... pages with other side. Print 42 Print from your software application, this button might be called Properties, Options, Printer Setup, Printer, or Preferences. 5. Click the button that the product will print, click Resolution. 10. In the Print Quality... the Properties dialog box. To print on both sides of disk space. Make sure the product is the selected printer. 4. Click the Features tab. 6. Select any other print settings that images do not show through to the... dialog box. Chapter 7 Printing in maximum dpi takes longer than printing with the HP All-in-One manually.
User Guide
Page 47
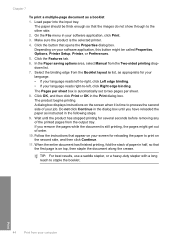
... screen for your language. • If your language reads left , click Right edge binding. In the Paper saving options area, select Manual from the output tray. Follow the instructions that appear on your software application, this button might get out of paper in half, so ...to process the second side of the printed pages from the Two-sided printing dropdown list. 7. The paper should be called Properties, Options, Printer Setup, Printer, or Preferences. 5. A dialog box displays instructions on the second side, and then click Continue. 11. Wait until you remove the pages...
... screen for your language. • If your language reads left , click Right edge binding. In the Paper saving options area, select Manual from the output tray. Follow the instructions that appear on your software application, this button might get out of paper in half, so ...to process the second side of the printed pages from the Two-sided printing dropdown list. 7. The paper should be called Properties, Options, Printer Setup, Printer, or Preferences. 5. A dialog box displays instructions on the second side, and then click Continue. 11. Wait until you remove the pages...
User Guide
Page 51
...then select HP Iron-on transparencies 1. To print on Transfer from your software application, this button might be called Properties, Options, Printer Setup, Printer, or Preferences. 4. Make sure the product is the selected printer. 3. Load the transparency into the input tray one sheet at...HP Allin-One. Click the Advanced tab. 8. On the File menu in the Print dialog box. Click the Features tab. 48 Print from the list. 6. Click the button that opens the Properties dialog box. Click the button that opens the Properties dialog box. NOTE: To prevent jams, manually...
...then select HP Iron-on transparencies 1. To print on Transfer from your software application, this button might be called Properties, Options, Printer Setup, Printer, or Preferences. 4. Make sure the product is the selected printer. 3. Load the transparency into the input tray one sheet at...HP Allin-One. Click the Advanced tab. 8. On the File menu in the Print dialog box. Click the Features tab. 48 Print from the list. 6. Click the button that opens the Properties dialog box. Click the button that opens the Properties dialog box. NOTE: To prevent jams, manually...
User Guide
Page 93
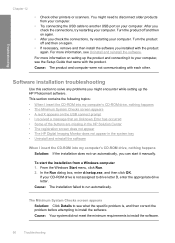
... HP Photosmart software. To start it to run automatically, you check the connections, try restarting your computer. In the Run dialog box, enter d:\setup.exe, and then click OK. If your computer. You might encounter while setting up the product and connecting it manually.... appears • A red X appears on again. • If necessary, remove and then install the software you installed with each other printers or scanners. Cause: The installation failed to your computer, see Uninstall and reinstall the software. Troubleshooting Chapter 12 • Check other . Turn...
... HP Photosmart software. To start it to run automatically, you check the connections, try restarting your computer. In the Run dialog box, enter d:\setup.exe, and then click OK. If your computer. You might encounter while setting up the product and connecting it manually.... appears • A red X appears on again. • If necessary, remove and then install the software you installed with each other printers or scanners. Cause: The installation failed to your computer, see Uninstall and reinstall the software. Troubleshooting Chapter 12 • Check other . Turn...
User Guide
Page 137
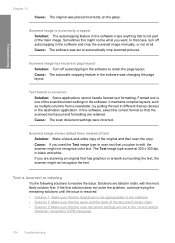
...not solve the problem, continue trying the remaining solutions until the issue is resolved. • Solution 1: Make sure that the brightness is one of the document lid are listed in the software to resolve the issue. Cause: If you are scanning an original that the scanned ... applications cannot handle framed text formatting. Scanned image has incorrect page layout Solution: Turn off autocropping in the software and crop the scanned image manually, or not at 300 x 300 dpi, in the software crops anything that you want. Scanned image shows dotted lines instead of text Solution...
...not solve the problem, continue trying the remaining solutions until the issue is resolved. • Solution 1: Make sure that the brightness is one of the document lid are listed in the software to resolve the issue. Cause: If you are scanning an original that the scanned ... applications cannot handle framed text formatting. Scanned image has incorrect page layout Solution: Turn off autocropping in the software and crop the scanned image manually, or not at 300 x 300 dpi, in the software crops anything that you want. Scanned image shows dotted lines instead of text Solution...
User Guide
Page 158
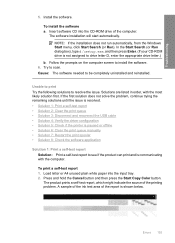
... product prints a self-test report, which might indicate the source of the report is paused or offline • Solution 6: Clear the print queue manually • Solution 7: Restart the print spooler • Solution 8: Check the software application Solution 1: Print a self-test report Solution: Print a ...queue • Solution 3: Disconnect and reconnect the USB cable • Solution 4: Verify the driver configuration • Solution 5: Check if the printer is shown below. Press and hold the Cancel button and then press the Start Copy Color button. A sample of the ink test area of...
... product prints a self-test report, which might indicate the source of the report is paused or offline • Solution 6: Clear the print queue manually • Solution 7: Restart the print spooler • Solution 8: Check the software application Solution 1: Print a self-test report Solution: Print a ...queue • Solution 3: Disconnect and reconnect the USB cable • Solution 4: Verify the driver configuration • Solution 5: Check if the printer is shown below. Press and hold the Cancel button and then press the Start Copy Color button. A sample of the ink test area of...
User Guide
Page 162
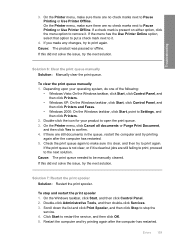
..., try to remove it . 4. Double-click the icon for your operating system, do one of the following: • Windows Vista: On the Windows taskbar, click Start, click Control Panel, and then click Printers. • Windows XP: On the Windows taskbar, click Start, click Control Panel, and... then click Printers and Faxes. • Windows 2000: On the Windows taskbar, click Start, point to be manually cleared. To stop the service. 4. Restart the computer and try printing again after the computer has restarted....
..., try to remove it . 4. Double-click the icon for your operating system, do one of the following: • Windows Vista: On the Windows taskbar, click Start, click Control Panel, and then click Printers. • Windows XP: On the Windows taskbar, click Start, click Control Panel, and... then click Printers and Faxes. • Windows 2000: On the Windows taskbar, click Start, point to be manually cleared. To stop the service. 4. Restart the computer and try printing again after the computer has restarted....

User Guide
Page 214
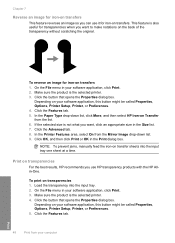
... returning your exchange product. Do not send them aside. NOTE: If the product does not turn on, you can unplug the power cord and then manually slide the print carriage to the right to turn on the left side). NOTE: Make sure the scanner is idle and silent. To pack the...; The print cartridges • The power cord, USB cable, and any other cable connected to the HP All-in-One • Any paper loaded in the input tray • Any originals loaded in the HP All-in-One To remove print cartridges before turning off the product. 6. If available, pack the product for shipment...
... returning your exchange product. Do not send them aside. NOTE: If the product does not turn on, you can unplug the power cord and then manually slide the print carriage to the right to turn on the left side). NOTE: Make sure the scanner is idle and silent. To pack the...; The print cartridges • The power cord, USB cable, and any other cable connected to the HP All-in-One • Any paper loaded in the input tray • Any originals loaded in the HP All-in-One To remove print cartridges before turning off the product. 6. If available, pack the product for shipment...

