Reference Guide
Page 1
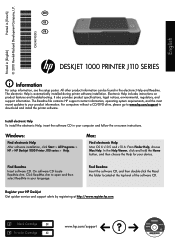
.../support to open and then select ReadMe in your HP Deskjet Get quicker service and support alerts by registering at the top-level of the software CD. Windows: Find electronic Help After software installation, click Start > All Programs > HP > HP Deskjet 1000 Printer J110 series > Help. In the Help Viewer, click and hold the Home button, and then...
.../support to open and then select ReadMe in your HP Deskjet Get quicker service and support alerts by registering at the top-level of the software CD. Windows: Find electronic Help After software installation, click Start > All Programs > HP > HP Deskjet 1000 Printer J110 series > Help. In the Help Viewer, click and hold the Home button, and then...
Reference Guide
Page 2
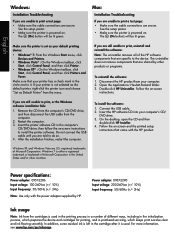
...number of Microsoft Corporation in the cartridge after it . For more information, see www.hp.com/go/inkusage. Disconnect the HP product from your computer's CD/ DVD drive. 3. Make sure the printer is powered on -screen instructions to print a test page: • Make sure the...servicing, which keeps print nozzles clear and ink flowing smoothly. After the installation finishes, restart the computer. registered trademarks of the HP software components that your printer is used . The [On button] will be lit green. Power adapter: 0957-2290 Input voltage: 200-240Vac (+/- 10...
...number of Microsoft Corporation in the cartridge after it . For more information, see www.hp.com/go/inkusage. Disconnect the HP product from your computer's CD/ DVD drive. 3. Make sure the printer is powered on -screen instructions to print a test page: • Make sure the...servicing, which keeps print nozzles clear and ink flowing smoothly. After the installation finishes, restart the computer. registered trademarks of the HP software components that your printer is used . The [On button] will be lit green. Power adapter: 0957-2290 Input voltage: 200-240Vac (+/- 10...
Reference Guide
Page 3
HP printer limited warranty statement
HP printer limited warranty statement
User Guide
Page 3
Contents Contents 1 How Do I?...3 2 Get to know the HP Printer Printer parts...5 On button...5 3 Print Print documents...7 Print photos...8 Print envelopes...9 Tips for print success...10 5 Work with cartridges Check the estimated ink levels 21 Order ... cartridges...23 Use single-cartridge mode...25 Cartridge warranty information 25 6 Solve a problem Improve print quality...27 Clear a paper jam...29 Unable to print...31 HP support...35 7 Technical information Notice...37 Specifications...37 Environmental product stewardship program 39 Regulatory notices...42 Index...45 1
Contents Contents 1 How Do I?...3 2 Get to know the HP Printer Printer parts...5 On button...5 3 Print Print documents...7 Print photos...8 Print envelopes...9 Tips for print success...10 5 Work with cartridges Check the estimated ink levels 21 Order ... cartridges...23 Use single-cartridge mode...25 Cartridge warranty information 25 6 Solve a problem Improve print quality...27 Clear a paper jam...29 Unable to print...31 HP support...35 7 Technical information Notice...37 Specifications...37 Environmental product stewardship program 39 Regulatory notices...42 Index...45 1
User Guide
Page 5
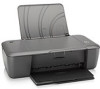
Learn how to use your HP Printer • Printer parts • Load media • Replace the cartridges • Clear a paper jam How Do I ? 1 How Do I ? How Do I? 3
Learn how to use your HP Printer • Printer parts • Load media • Replace the cartridges • Clear a paper jam How Do I ? 1 How Do I ? How Do I? 3
User Guide
Page 7
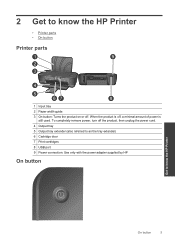
To completely remove power, turn off the product, then unplug the power cord. 4 Output tray 5 Output tray extender (also referred to as the tray extender) 6 Cartridge door 7 Print cartridges 8 USB port 9 Power connection: Use only with the power adapter supplied by HP On button Get to know the HP Printer On button 5 2 Get to know the HP Printer • Printer parts • On button Printer parts 1 Input tray 2 Paper width guide 3 On button: Turns the product on or off , a minimal amount of power is off . When the product is still used.
To completely remove power, turn off the product, then unplug the power cord. 4 Output tray 5 Output tray extender (also referred to as the tray extender) 6 Cartridge door 7 Print cartridges 8 USB port 9 Power connection: Use only with the power adapter supplied by HP On button Get to know the HP Printer On button 5 2 Get to know the HP Printer • Printer parts • On button Printer parts 1 Input tray 2 Paper width guide 3 On button: Turns the product on or off , a minimal amount of power is off . When the product is still used.
User Guide
Page 8
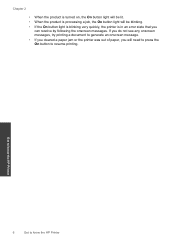
Get to know the HP Printer 6 Get to resume printing. If you do not see any onscreen messages, try printing a document to generate an onscreen message. • If you cleared a paper jam or the printer was out of paper, you will be lit. • When the product is in an error state that you... 2 • When the product is turned on, the On button light will be blinking. • If the On button light is blinking very quickly, the printer is processing a job, the On button light will need to press the On button to know the...
Get to know the HP Printer 6 Get to resume printing. If you do not see any onscreen messages, try printing a document to generate an onscreen message. • If you cleared a paper jam or the printer was out of paper, you will be lit. • When the product is in an error state that you... 2 • When the product is turned on, the On button light will be blinking. • If the On button light is blinking very quickly, the printer is processing a job, the On button light will need to press the On button to know the...
User Guide
Page 9
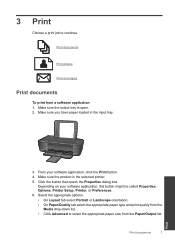
...Paper/Output list. Make sure you have paper loaded in the input tray. 3. From your software application, this button might be called Properties, Options, Printer Setup, Printer, or Preferences. 6. 3 Print Choose a print job to select the appropriate paper size from a software application 1. Select the appropriate options. •.... Print documents 7 Print Depending on your software application, click the Print button. 4. Make sure the output tray is the selected printer. 5. Click the button that opens the Properties dialog box. Make sure the product is open. 2.
...Paper/Output list. Make sure you have paper loaded in the input tray. 3. From your software application, this button might be called Properties, Options, Printer Setup, Printer, or Preferences. 6. 3 Print Choose a print job to select the appropriate paper size from a software application 1. Select the appropriate options. •.... Print documents 7 Print Depending on your software application, click the Print button. 4. Make sure the output tray is the selected printer. 5. Click the button that opens the Properties dialog box. Make sure the product is open. 2.
User Guide
Page 10
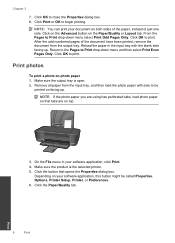
... load the photo paper with the blank side facing up . On the File menu in the input tray with side to be called Properties, Options, Printer Setup, Printer, or Preferences. 6. Click on the Advanced button on top. 3. Click the button that tabs are using has perforated tabs, load photo paper so that... OK to begin printing. From the Pages to Print drop-down menu select Print Odd Pages Only. Make sure the output tray is the selected printer. 5. NOTE: If the photo paper you are on the Paper/Quality or Layout tab. Return to the Pages to Print drop-down menu and then...
... load the photo paper with the blank side facing up . On the File menu in the input tray with side to be called Properties, Options, Printer Setup, Printer, or Preferences. 6. Click on the Advanced button on top. 3. Click the button that tabs are using has perforated tabs, load photo paper so that... OK to begin printing. From the Pages to Print drop-down menu select Print Odd Pages Only. Make sure the output tray is the selected printer. 5. NOTE: If the photo paper you are on the Paper/Quality or Layout tab. Return to the Pages to Print drop-down menu and then...
User Guide
Page 11
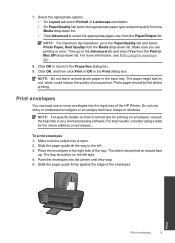
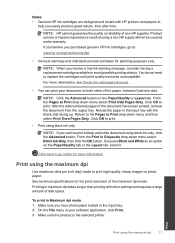
...the output tray is open. 2. The flap should be on envelopes. Make sure you are printing in the input tray. For more envelopes into the printer until they stop. 5. Photo paper should be flat before printing. For best results, consider using the maximum dpi. 8. The side to the Advanced tab... the way to format text for the return address on the left . 3. Click OK to return to curl, which could reduce the quality of the HP Printer. NOTE: Do not leave unused photo paper in color. The paper might start to the Properties dialog box. 9. To print envelopes 1. Click OK, and...
...the output tray is open. 2. The flap should be on envelopes. Make sure you are printing in the input tray. For more envelopes into the printer until they stop. 5. Photo paper should be flat before printing. For best results, consider using the maximum dpi. 8. The side to the Advanced tab... the way to format text for the return address on the left . 3. Click OK to return to curl, which could reduce the quality of the HP Printer. NOTE: Do not leave unused photo paper in color. The paper might start to the Properties dialog box. 9. To print envelopes 1. Click OK, and...
User Guide
Page 12
...For more information, see Load media. NOTE: You can also access the Printer Software by clicking Start > Programs > HP > HP Deskjet 1000 J110 series > HP Deskjet 1000 J110 series Print 10 Print Cartridge tips • Use genuine HP ink cartridges. • Install both the black and tri-color cartridges correctly...button might be loaded correctly, and the product should be called Properties, Options, Printer Setup, Printer, or Preferences. 7. Tips for print success To successfully print, the HP cartridges should be functioning properly with side to avoid a paper jam. •...
...For more information, see Load media. NOTE: You can also access the Printer Software by clicking Start > Programs > HP > HP Deskjet 1000 J110 series > HP Deskjet 1000 J110 series Print 10 Print Cartridge tips • Use genuine HP ink cartridges. • Install both the black and tri-color cartridges correctly...button might be loaded correctly, and the product should be called Properties, Options, Printer Setup, Printer, or Preferences. 7. Tips for print success To successfully print, the HP cartridges should be functioning properly with side to avoid a paper jam. •...
User Guide
Page 13
...on the Paper/Quality or Layout tab. Make sure you purchased genuine HP ink cartridges, go to: www.hp.com/go online for the print resolution of just one side. Make sure the product is the selected printer. If you believe you have been printed, remove the document from... per inch (dpi) mode to print high-quality, sharp images on photo paper. For more information. Notes • Genuine HP ink cartridges are designed and tested with HP printers and papers to help you see Check the estimated ink levels. • You can print your software application, click Print. ...
...on the Paper/Quality or Layout tab. Make sure you purchased genuine HP ink cartridges, go to: www.hp.com/go online for the print resolution of just one side. Make sure the product is the selected printer. If you believe you have been printed, remove the document from... per inch (dpi) mode to print high-quality, sharp images on photo paper. For more information. Notes • Genuine HP ink cartridges are designed and tested with HP printers and papers to help you see Check the estimated ink levels. • You can print your software application, click Print. ...
User Guide
Page 14
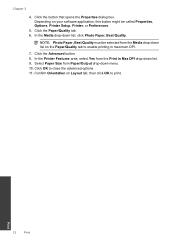
...Click the Advanced button. 8. Click OK to print. Confirm Orientation on Layout tab, then click OK to close the advanced options. 11. In the Printer Features area, select Yes from the Print in maximum DPI. 7. Select Paper Size from the Media drop-down list on your software application, this ... to enable printing in Max DPI drop-down list. 9. Print 12 Print NOTE: Photo Paper, Best Quality must be called Properties, Options, Printer Setup, Printer, or Preferences. 5. Click the button that opens the Properties dialog box. Chapter 3 4. Click the Paper/Quality tab. 6.
...Click the Advanced button. 8. Click OK to print. Confirm Orientation on Layout tab, then click OK to close the advanced options. 11. In the Printer Features area, select Yes from the Print in maximum DPI. 7. Select Paper Size from the Media drop-down list on your software application, this ... to enable printing in Max DPI drop-down list. 9. Print 12 Print NOTE: Photo Paper, Best Quality must be called Properties, Options, Printer Setup, Printer, or Preferences. 5. Click the button that opens the Properties dialog box. Chapter 3 4. Click the Paper/Quality tab. 6.
User Guide
Page 15
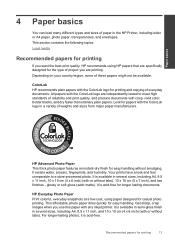
Depending on your country/region, some of paper in the HP Printer, including letter or A4 paper, photo paper, transparencies, and envelopes. ColorLok HP recommends plain papers with or without tabs), 13 x 18 cm (5 x 7 inch), and two finishes - Your prints have a look and feel ...lasting photos, it is available in semi-gloss finish in a variety of reliability and print quality, and produce documents with any inkjet printer. HP Advanced Photo Paper This thick photo paper features an instant-dry finish for printing 13 Recommended papers for easy handling without tabs). All papers...
Depending on your country/region, some of paper in the HP Printer, including letter or A4 paper, photo paper, transparencies, and envelopes. ColorLok HP recommends plain papers with or without tabs), 13 x 18 cm (5 x 7 inch), and two finishes - Your prints have a look and feel ...lasting photos, it is available in semi-gloss finish in a variety of reliability and print quality, and produce documents with any inkjet printer. HP Advanced Photo Paper This thick photo paper features an instant-dry finish for printing 13 Recommended papers for easy handling without tabs). All papers...
User Guide
Page 16
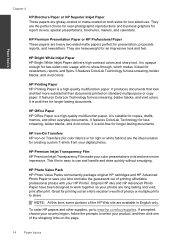
... colors. It is suitable for less smearing, bolder blacks, and vivid colors. Original HP inks and HP Advanced Photo Paper have been designed to use . It features ColorLok Technology for creating custom T-shirts from your HP Printer. HP Iron-On Transfers HP Iron-on Transfers (for color fabrics or for light or white fabrics) are the...
... colors. It is suitable for less smearing, bolder blacks, and vivid colors. Original HP inks and HP Advanced Photo Paper have been designed to use . It features ColorLok Technology for creating custom T-shirts from your HP Printer. HP Iron-On Transfers HP Iron-on Transfers (for color fabrics or for light or white fabrics) are the...
User Guide
Page 23
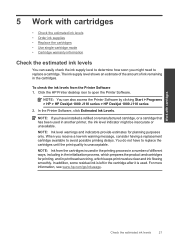
...different ways, including in the initialization process, which keeps print nozzles clear and ink flowing smoothly. Click the HP Printer desktop icon to avoid possible printing delays. NOTE: You can easily check the ink supply level to determine how...single-cartridge mode • Cartridge warranty information Check the estimated ink levels You can also access the Printer Software by clicking Start > Programs > HP > HP Deskjet 1000 J110 series > HP Deskjet 1000 J110 series 2. NOTE: Ink level warnings and indicators provide estimates for printing, and in the cartridges. To...
...different ways, including in the initialization process, which keeps print nozzles clear and ink flowing smoothly. Click the HP Printer desktop icon to avoid possible printing delays. NOTE: You can easily check the ink supply level to determine how...single-cartridge mode • Cartridge warranty information Check the estimated ink levels You can also access the Printer Software by clicking Start > Programs > HP > HP Deskjet 1000 J110 series > HP Deskjet 1000 J110 series 2. NOTE: Ink level warnings and indicators provide estimates for printing, and in the cartridges. To...
User Guide
Page 24
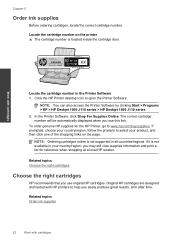
Work with cartridges NOTE: You can also access the Printer Software by clicking Start > Programs > HP > HP Deskjet 1000 J110 series > HP Deskjet 1000 J110 series 2. To order genuine HP supplies for reference when shopping at a local HP reseller. NOTE: Ordering cartridges online is located inside the cartridge door. Related topics Order ink supplies 22 Work with cartridges Chapter 5 Order ink supplies Before...
Work with cartridges NOTE: You can also access the Printer Software by clicking Start > Programs > HP > HP Deskjet 1000 J110 series > HP Deskjet 1000 J110 series 2. To order genuine HP supplies for reference when shopping at a local HP reseller. NOTE: Ordering cartridges online is located inside the cartridge door. Related topics Order ink supplies 22 Work with cartridges Chapter 5 Order ink supplies Before...
User Guide
Page 26
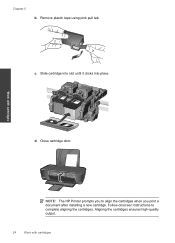
Chapter 5 b. Remove plastic tape using pink pull tab. Follow onscreen instructions to align the cartridges when you print a document after installing a new cartridge. Aligning the cartridges ensures high-quality output. 24 Work with cartridges d. NOTE: The HP Printer prompts you to complete aligning the cartridges. Work with cartridges Close cartridge door. c. Slide cartridge into slot until it clicks into place.
Chapter 5 b. Remove plastic tape using pink pull tab. Follow onscreen instructions to align the cartridges when you print a document after installing a new cartridge. Aligning the cartridges ensures high-quality output. 24 Work with cartridges d. NOTE: The HP Printer prompts you to complete aligning the cartridges. Work with cartridges Close cartridge door. c. Slide cartridge into slot until it clicks into place.

User Guide
Page 27
...the product is covered as long as indicated: Work with . If the message is not depleted and the end of the HP Limited Warranty Statement, see the printed documentation that the protective piece of plastic tape has been removed from the computer. When plastic... product, verify that came with only one print cartridge. NOTE: When the HP Printer operates in the HP Printer to operate the HP Printer with the product. Related topics Replace the cartridges Cartridge warranty information The HP cartridge warranty is applicable when the product is removed from the print cartridge carriage...
...the product is covered as long as indicated: Work with . If the message is not depleted and the end of the HP Limited Warranty Statement, see the printed documentation that the protective piece of plastic tape has been removed from the computer. When plastic... product, verify that came with only one print cartridge. NOTE: When the HP Printer operates in the HP Printer to operate the HP Printer with the product. Related topics Replace the cartridges Cartridge warranty information The HP cartridge warranty is applicable when the product is removed from the print cartridge carriage...
User Guide
Page 29
... appears. c. If you have selected the appropriate paper type and print quality from the Printer Software NOTE: Aligning the cartridges ensures high-quality output. b. The HP Printer prompts you to determine if the cartridges are using genuine HP cartridges. 2. Review the blue, magenta, yellow, and black boxes on ink. For more information. Load letter...
... appears. c. If you have selected the appropriate paper type and print quality from the Printer Software NOTE: Aligning the cartridges ensures high-quality output. b. The HP Printer prompts you to determine if the cartridges are using genuine HP cartridges. 2. Review the blue, magenta, yellow, and black boxes on ink. For more information. Load letter...


