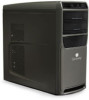
8511464 - Gateway Setup Guide
Page 2
... instructions that has been included on your model) If available, connect to Add-in /side speaker jack Case cover thumbscrew Video card (optional) Modem jack (optional) Telephone jack (optional) Wireless antenna connectors (optional) Your Gateway computer is packed with it ® into one of your hard drive. in video (DVI or VGA...
8511856 - Gateway User Guide (for desktop computers with Windows Vista)
Page 25
... item is a link. 19 Your Internet service provider can provide instructions on a Web page called links or hyperlinks. Type ISP in some cases ADSL over it. The method you are finished. You can use your cable television or special telephone lines to connect to your telephone company and...use to the Internet, dial-up charges (with an Internet service provider (ISP). Because dial-up connections are designed to the Internet. www.gateway.com Setting up an Internet account Before you can view the information on Web pages, which are electronic documents that you view using a ...
8512041 - Gateway Hardware Reference Guide (5-bay uATX Case)
Page 4
Contents Chapter 4: Upgrading Your Computer 29 Preventing static electricity discharge 30 Opening the case 31 Removing the side panel 31 Removing the front bezel 32 Closing the case 33 Replacing the front bezel 33 Replacing the side panel 34 Replacing the color panel 34 Installing memory 37 Adding or replacing an optical disc...
8512041 - Gateway Hardware Reference Guide (5-bay uATX Case)
Page 9
Gateway Customer Care will need this information if you call for your computer model and serial number. Serial number Technical Support telephone number Microsoft Certificate of ... product key code for assistance. If you ever reinstall Windows from the installation DVD, you will need to enter these numbers to activate Windows. 3 www.gateway.com Gateway contact information The label on the back or side of your computer case contains information that identifies your operating system.
8512041 - Gateway Hardware Reference Guide (5-bay uATX Case)
Page 14
...this is preset at the factory. Make sure that this connector. Plug the power cord into this illustration. Voltage switch Power connector Case cover thumbscrew PS/2 keyboard port Monitor (VGA) port IEEE 1394/FireWire™ port USB ports S/PDIF jack (optional) Microphone jack ...connectors (optional) PS/2 mouse port Parallel port Ethernet (network) jack Center/subwoofer jack Surround L/R speaker jack Audio in/side speaker jack Case cover thumbscrew Video card (optional) Modem (line) jack Telephone jack Component Icon Voltage switch Power connector PS/2 keyboard port Description The ...
8512041 - Gateway Hardware Reference Guide (5-bay uATX Case)
Page 15
... Plug a PS/2 mouse into this jack for one of the following: Headphone: Plug headphones or amplified speakers into this port. www.gateway.com Component Icon Monitor (VGA) port IEEE 1394/ FireWire™ port USB ports S/PDIF output jack (optional) Microphone jack (pink ...plug) Headphone/analog speakers jack (green plug) -ORFront speakers jack TV tuner (optional) Wireless network antenna (optional) and connectors Case thumbscrew PS/2 mouse port Parallel port Description Plug a VGA (blue connector) monitor cable into this jack. For more information, see "Installing a...
8512041 - Gateway Hardware Reference Guide (5-bay uATX Case)
Page 35
CHAPTER4 Upgrading Your Computer • Preventing static electricity discharge • Opening the case • Closing the case • Replacing the color panel • Installing memory • Replacing the system battery • Adding or replacing an optical disc drive • Replacing the memory card reader • Adding or replacing a hard drive • Replacing the heat sink and processor • Adding or replacing an expansion card • Replacing the system board 29
8512041 - Gateway Hardware Reference Guide (5-bay uATX Case)
Page 36
... to dangerous electrical voltages and moving parts, turn off your computer and unplug the power cord and modem and network cables before opening the computer case, follow these guidelines: • Wear a grounding wrist strap (available at most electronics stores) and attach it to a bare metal part of your computer...or components over any object into the vent holes of the power supply. Before opening the case. Prevent ESD damage by their edges or their antistatic bags only when you open the computer case. Do not lay components on the cards. To prevent risk of electric shock, do ...
8512041 - Gateway Hardware Reference Guide (5-bay uATX Case)
Page 37
... the power cord and modem, network, and all peripheral device cables. 3 Press the power button for ten seconds to internal components. www.gateway.com Opening the case Your computer case provides easy access to drain any residual power from your computer. 4 Loosen the two captive thumbscrews on the back edge of the side... toward the back of your computer, then pull the panel away from your computer, then unplug the power cord and modem cable before opening the case.
8512041 - Gateway Hardware Reference Guide (5-bay uATX Case)
Page 39
Tabs 2 Swing the left side of the bezel in to insert the release tabs on the left side of the bezel into the slots on the left side of the computer. 3 Press the left side of the bezel firmly until the release tabs snap into the slots on the right side of the computer. www.gateway.com Closing the case Replacing the front bezel To replace the front bezel: 1 Slide the tabs on the right side of the bezel into place. 33
8512041 - Gateway Hardware Reference Guide (5-bay uATX Case)
Page 43
... a DIMM from the memory module bank, gently pull the plastic tabs away from the sides of the memory module bank. 37 To avoid scratching the case, place it on a towel or other non-abrasive surface. 3 Find the memory module banks on your system board. 4 If you are adding a DIMM to an... memory module bank, gently pull the plastic tabs away from the sides of the memory module and remove it. - Your computer uses DIMM memory. www.gateway.com Installing memory When you upgrade the computer memory, make sure that you install the correct type of memory module for your computer on its...
8512041 - Gateway Hardware Reference Guide (5-bay uATX Case)
Page 48
... computer until it clicks into place. 9 Reinstall the bezel by following the instructions in "Replacing the front bezel" on page 33. 10 Reinstall the computer case's side panel by following the instructions in "Replacing the side panel" on page 34. 42
8512041 - Gateway Hardware Reference Guide (5-bay uATX Case)
Page 51
..., install Windows using the operating system DVD that came with the slots on the inside of the case, then slide the cage into the system board. 11 Connect the drive cables. To avoid scratching the case, place it on page 91. For more stability, place your computer on your computer. 15 If... you are replacing a drive, use your computer. Hard drive cage tabs Slots on inside of case 10 Tighten the cage thumbscrew, then plug the hard drive cage fan cable back into the case. www.gateway.com 9 Line up the tabs on the right side of the cage with your notes from the...
8512041 - Gateway Hardware Reference Guide (5-bay uATX Case)
Page 56
... 31. 6 For more stability, place your computer on your computer. 13 While your settings and exit the BIOS Setup utility. 50 To avoid scratching the case, place it snaps into the socket until it on a towel or other non-abrasive surface. 7 Locate the old battery on the system board and note...
8512041 - Gateway Hardware Reference Guide (5-bay uATX Case)
Page 57
...locations and orientation. (You will reconnect the cables after you install the new board.) Tip You can label each cable with the screws. 51 www.gateway.com Replacing the system board To replace the system board: 1 Remove the side panel by following the instructions in "Removing the side panel" on page...the directions in "Adding or replacing an expansion card" on page 37. 4 Disconnect all memory modules by following the directions in the case, then secure it into the case with tape to make it easier to re-connect them later. 5 Remove the four screws that secure the power supply to your ...
8512041 - Gateway Hardware Reference Guide (5-bay uATX Case)
Page 58
... new system board by following the directions in the same procedure. 10 Slide the power supply back into the case, then install the four screws to secure the power supply to the case. 11 Connect all power and data cables using your notes from Step 4. 12 Reinstall any memory modules you removed...
8512041 - Gateway Hardware Reference Guide (5-bay uATX Case)
Page 60
The case, although strong, is on because data on the hard drive could be lost or corrupted. 54 Magnetic fields can erase data on hard drives. • ... viruses X X X Run Windows Update X X Manage hard drive space X Clean up hard drives X X Scan hard drive for errors X X Defragment hard drive X X Back up files X X X Clean computer case and X peripheral devices Caring for your computer To extend the life of it in the original packaging materials. • Keep your computer away from magnetic...
8512041 - Gateway Hardware Reference Guide (5-bay uATX Case)
Page 61
...not covered by your computer for you. • Keep all liquids away from dust helps keep your computer to extreme temperature changes. www.gateway.com • Avoid subjecting your computer performing at temperatures that are comfortable for an extended period of air that has a narrow, straw...-like extension • Cotton swabs • An optical disc drive cleaning kit 55 The case can result in unexpected shutdown or permanent damage to the computer. • When storing your warranty. You may overheat, resulting in expensive ...
8512041 - Gateway Hardware Reference Guide (5-bay uATX Case)
Page 62
... to clean your computer and other peripheral devices before trying to remove dust and lint trapped under the keys. 2 If you spill liquid on the case, so keep the vents free of air with a damp cloth. If the keyboard does not work after it again. Let the liquid drain, then let...
8512041 - Gateway Hardware Reference Guide (5-bay uATX Case)
Page 76
... or surge protector, make sure that it is turned on and while the modem cable, network cable, and power cord are connected. The case was dropped - CHAPTER 6: Troubleshooting Safety guidelines While troubleshooting your computer, follow these things first: • Make sure that the AC outlet ...preventing damage from static electricity, see "Preventing static electricity discharge" on the screen, write down the exact message. The message may help Gateway Customer Care in diagnosing and fixing the problem. 70 Your computer was damaged Instead, unplug your computer is not full. • ...