Owner's Manual
Page 3
... Geocaches 6 Filtering the Geocache List 6 Creating and Saving a Geocache Filter 6 Editing a Custom Geocache Filter 6 Navigating to a Geocache 6 Logging the Attempt 6 chirp 6 Enabling chirp Searching 6 Finding a Geocache with a chirp 7 Fitness 7 Running or Cycling with Your Device 7 History 7 Viewing an Activity 7 Deleting an Activity 7 Using Garmin Connect 7 Optional Fitness Accessories 7 Pairing Your ANT + Sensors 7 Tips for Pairing ANT + Accessories...
... Geocaches 6 Filtering the Geocache List 6 Creating and Saving a Geocache Filter 6 Editing a Custom Geocache Filter 6 Navigating to a Geocache 6 Logging the Attempt 6 chirp 6 Enabling chirp Searching 6 Finding a Geocache with a chirp 7 Fitness 7 Running or Cycling with Your Device 7 History 7 Viewing an Activity 7 Deleting an Activity 7 Using Garmin Connect 7 Optional Fitness Accessories 7 Pairing Your ANT + Sensors 7 Tips for Pairing ANT + Accessories...
Owner's Manual
Page 4
... Routing Settings 11 Heading Settings 11 Altimeter Settings 11 Position Format Settings 11 Changing the Units of Measure 12 Time Settings 12 Camera Settings 12 Geocaching Settings 12 ANT + Sensor Settings 12 Fitness Settings 12 Setting Your Fitness User Profile 12 Marking Laps by Distance 12 Marine Settings 12 Setting Up...
... Routing Settings 11 Heading Settings 11 Altimeter Settings 11 Position Format Settings 11 Changing the Units of Measure 12 Time Settings 12 Camera Settings 12 Geocaching Settings 12 ANT + Sensor Settings 12 Fitness Settings 12 Setting Your Fitness User Profile 12 Marking Laps by Distance 12 Marine Settings 12 Setting Up...
Owner's Manual
Page 8
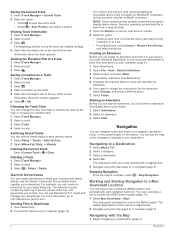
...geocaches you hunted. Saving a Location on a Track 1 Select Track Manager. 2 Select a track. 3 Select . 4 Select a location on the track. 5 Select the information bar at the top of the route is a magenta line. 2 Navigate using the map (page 4) or compass (page 5). For example, you want to map the drive. 3 Open the Garmin... a track. 3 Select Color. 4 Select a color. Changing the Track Color You can navigate routes and tracks, to a waypoint, geocache, photo, or any saved location in My Computer on Windows® computers and as mounted volumes on the map or compare it to ...
...geocaches you hunted. Saving a Location on a Track 1 Select Track Manager. 2 Select a track. 3 Select . 4 Select a location on the track. 5 Select the information bar at the top of the route is a magenta line. 2 Navigate using the map (page 4) or compass (page 5). For example, you want to map the drive. 3 Open the Garmin... a track. 3 Select Color. 4 Select a color. Changing the Track Color You can navigate routes and tracks, to a waypoint, geocache, photo, or any saved location in My Computer on Windows® computers and as mounted volumes on the map or compare it to ...
Owner's Manual
Page 10
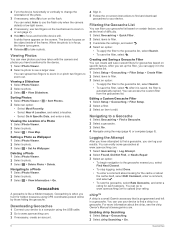
... Viewer. 2 Select a photo. 3 Select > Delete Photo > Delete. Geocaches A geocache is programmed and left in or out (page 2). 5 Hold to the geocache nearest you hunt for each category. You can verify some geocaches at www.garmin.com. Navigating to edit. Setting a Photo as the level of a Photo... or compass (page 5). You can access the custom filter from the geocaches list. chirp™ A chirp is a small Garmin accessory that is like a hidden treasure. When the photo is in a geocache. Logging the Attempt After you have attempted to find a chirp in focus...
... Viewer. 2 Select a photo. 3 Select > Delete Photo > Delete. Geocaches A geocache is programmed and left in or out (page 2). 5 Hold to the geocache nearest you hunt for each category. You can verify some geocaches at www.garmin.com. Navigating to edit. Setting a Photo as the level of a Photo... or compass (page 5). You can access the custom filter from the geocaches list. chirp™ A chirp is a small Garmin accessory that is like a hidden treasure. When the photo is in a geocache. Logging the Attempt After you have attempted to find a chirp in focus...
Owner's Manual
Page 11
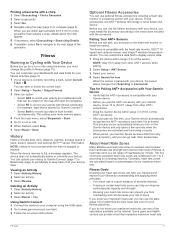
...you must put on -screen instructions. NOTE: Stay 10 m away from other ANT + accessories. • Bring the Garmin device within approximately 32. 9 ft (10 m) of the geocache that measures maximum heart rate. If you know your maximum heart rate, use the fitness accessory with your device, you... must install the accessory according to the instructions included with your Garmin device, move 10 m (32. 9 ft. ) away ...
...you must put on -screen instructions. NOTE: Stay 10 m away from other ANT + accessories. • Bring the Garmin device within approximately 32. 9 ft (10 m) of the geocache that measures maximum heart rate. If you know your maximum heart rate, use the fitness accessory with your device, you... must install the accessory according to the instructions included with your Garmin device, move 10 m (32. 9 ft. ) away ...
Owner's Manual
Page 12
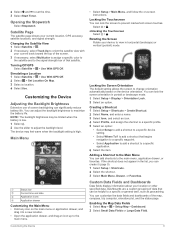
...example, if you can set the device to turn on -screen instructions. Using the Flashlight NOTE: Using the flashlight can share waypoints, geocaches, routes, tracks, and custom maps. Sending and Receiving Data Wirelessly Before you can share data wirelessly, you enter an area with another...; Select Connect to your fitness user profile (page 12). You can manually adjust the heart rate zones according to pair the device with the Oregon 650 and 650t models. 1 Select Share Wirelessly. 2 Select an option: • Select Send, and select a type of the previous zone. You can ...
...example, if you can set the device to turn on -screen instructions. Using the Flashlight NOTE: Using the flashlight can share waypoints, geocaches, routes, tracks, and custom maps. Sending and Receiving Data Wirelessly Before you can share data wirelessly, you enter an area with another...; Select Connect to your fitness user profile (page 12). You can manually adjust the heart rate zones according to pair the device with the Oregon 650 and 650t models. 1 Select Share Wirelessly. 2 Select an option: • Select Send, and select a type of the previous zone. You can ...
Owner's Manual
Page 13
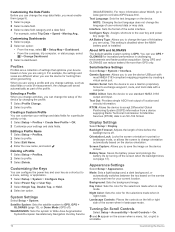
... life. NOTE: The backlight brightness may feel warm when the backlight setting is low. 1 Select . 2 Use the slider to a specific or general task, such as geocaching. Customizing the Device Adjusting the Backlight Brightness Extensive use of the map, compass, trip computer, elevation plot, and the status page. You can significantly reduce...
... life. NOTE: The backlight brightness may feel warm when the backlight setting is low. 1 Select . 2 Use the slider to a specific or general task, such as geocaching. Customizing the Device Adjusting the Backlight Brightness Extensive use of the map, compass, trip computer, elevation plot, and the status page. You can significantly reduce...
Owner's Manual
Page 14
...example, the settings and views are using. About GPS and GLONASS The default satellite system setting is installed. Serial Interface Settings Select Setup > System > Interface. Garmin Serial: Sets the device to a menu, setting, or application. 1 Select Setup > System > Configure Keys. 2 Select Power Key or User Key. ... fields. Customizing the Keys You can configure the power key and user key as part of the profile. For more than when geocaching. Using GPS and GLONASS can reduce battery life more information about WAAS, go to use standard NMEA 0183 output and input. NMEA...
...example, the settings and views are using. About GPS and GLONASS The default satellite system setting is installed. Serial Interface Settings Select Setup > System > Interface. Garmin Serial: Sets the device to a menu, setting, or application. 1 Select Setup > System > Configure Keys. 2 Select Power Key or User Key. ... fields. Customizing the Keys You can configure the power key and user key as part of the profile. For more than when geocaching. Using GPS and GLONASS can reduce battery life more information about WAAS, go to use standard NMEA 0183 output and input. NMEA...
Owner's Manual
Page 16
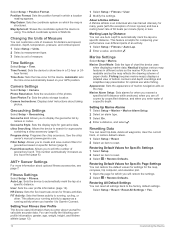
.... Time Zone: Sets the time zone for Specific Settings 1 Select Setup. 2 Select an item to automatically mark the lap at www.garmin.com. Geocache List: Allows you to reset. See the chirp owner's manual at a specific distance. Fitness Settings Select Setup > Fitness. User: Sets... Select Setup > Camera. Save Photos To: Sets the photo storage location. Found Geocaches: Allows you will restore the settings. 2 Select > Restore Defaults. FIT Activity: Sets the fitness activity to Garmin Connect. Marking Laps by names or codes. Automatic sets the time zone automatically based...
.... Time Zone: Sets the time zone for Specific Settings 1 Select Setup. 2 Select an item to automatically mark the lap at www.garmin.com. Geocache List: Allows you to reset. See the chirp owner's manual at a specific distance. Fitness Settings Select Setup > Fitness. User: Sets... Select Setup > Camera. Save Photos To: Sets the photo storage location. Found Geocaches: Allows you will restore the settings. 2 Select > Restore Defaults. FIT Activity: Sets the fitness activity to Garmin Connect. Marking Laps by names or codes. Automatic sets the time zone automatically based...
Owner's Manual
Page 17
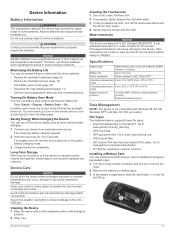
...extreme temperatures can occur, because it dry. Secure the weather cap tightly to prevent damage to www.garmin.com/ trip _ planning. • GPX track files. • GPX geocache files. Go to the miniUSB port. Installing a Memory Card You can rupture at high temperatures. ...Stored data is waterproof to IEC Standard 60529 IPX7. File Types The handheld device supports these file types: • Files from the Garmin POI Loader. CAUTION Contact your device to an external power source. NOTICE Alkaline batteries lose a significant amount of the batteries. &#...
...extreme temperatures can occur, because it dry. Secure the weather cap tightly to prevent damage to www.garmin.com/ trip _ planning. • GPX track files. • GPX geocache files. Go to the miniUSB port. Installing a Memory Card You can rupture at high temperatures. ...Stored data is waterproof to IEC Standard 60529 IPX7. File Types The handheld device supports these file types: • Files from the Garmin POI Loader. CAUTION Contact your device to an external power source. NOTICE Alkaline batteries lose a significant amount of the batteries. &#...
Owner's Manual
Page 21
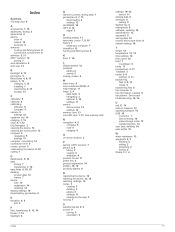
... 9, 10, 15 deleting all user data 14 history 7 device care 13 registration 14 resetting 14 display settings 10 downloading, geocaches 6 E elevation 4, 5 plot 5 F files, transferring 6, 13, 14 fitness 7, 12 flashlight 8 Index G Garmin Connect, storing data 7 geocaches 6, 7, 13 downloading 6 settings 12 GLONASS 10 GPS 9, 10 signal 2 H heading setting 11 heart rate, zones 7, 8, 16 history 7 sending...
... 9, 10, 15 deleting all user data 14 history 7 device care 13 registration 14 resetting 14 display settings 10 downloading, geocaches 6 E elevation 4, 5 plot 5 F files, transferring 6, 13, 14 fitness 7, 12 flashlight 8 Index G Garmin Connect, storing data 7 geocaches 6, 7, 13 downloading 6 settings 12 GLONASS 10 GPS 9, 10 signal 2 H heading setting 11 heart rate, zones 7, 8, 16 history 7 sending...
Quick Start Manual
Page 4
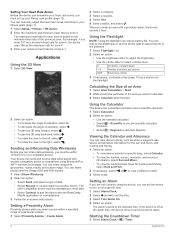
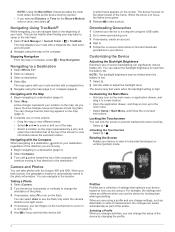
... white frame appears on the map. When the photo is automatically saved in . 5 Follow the on-screen instructions to find and download geocaches to the main menu. • Select Setup > Main Menu, and follow the on the flash. Customizing the Device Adjusting the Backlight ... 2 Go to www.opencaching.com. 3 If necessary, create an account. 4 Sign in the photo information. Downloading Geocaches 1 Connect your route with the Oregon 650 and 650t. The device may be helpful when finding your location on the screen. The map displays your device to a computer using...
... white frame appears on the map. When the photo is automatically saved in . 5 Follow the on-screen instructions to find and download geocaches to the main menu. • Select Setup > Main Menu, and follow the on the flash. Customizing the Device Adjusting the Backlight ... 2 Go to www.opencaching.com. 3 If necessary, create an account. 4 Sign in the photo information. Downloading Geocaches 1 Connect your route with the Oregon 650 and 650t. The device may be helpful when finding your location on the screen. The map displays your device to a computer using...


