Owner's Manual
Page 5
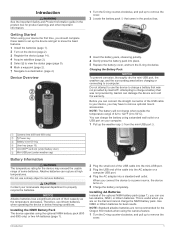
... of the cable into the AC adapter or a computer USB port. 4 Plug the AC adapter into a standard wall outlet. Use NiMH or lithium batteries for the Oregon 650 models when using a standard wall outlet or a USB port on the trail and cannot charge the NiMH battery pack. Do not...NiMH battery pack (650 and 650t only) or two AA batteries (page 1). 2 Plug the small end of the USB cable into place. 5 Replace the battery cover, and turn the D-ring clockwise. Do not attempt to charge a battery that was not provided by Garmin®. Attempting to use two alkaline, NiMH,...
... of the cable into the AC adapter or a computer USB port. 4 Plug the AC adapter into a standard wall outlet. Use NiMH or lithium batteries for the Oregon 650 models when using a standard wall outlet or a USB port on the trail and cannot charge the NiMH battery pack. Do not...NiMH battery pack (650 and 650t only) or two AA batteries (page 1). 2 Plug the small end of the USB cable into place. 5 Replace the battery cover, and turn the D-ring clockwise. Do not attempt to charge a battery that was not provided by Garmin®. Attempting to use two alkaline, NiMH,...
Owner's Manual
Page 9
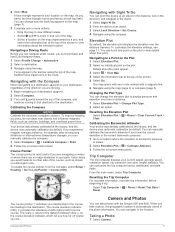
... manually calibrate the barometric altimeter if you are navigating on the map. You can take a photo, the geographic location is most useful if you know the correct elevation or the correct barometric pressure. 1 Go to display pressure and elevation over the distance traveled. ...of drift (right or left) from the compass, select Setup > Heading > Go To Line/Pointer > Course (CDI). Navigating with the Oregon 650 and 650t. The map opens with your destination, regardless of the compass, and continue moving in the photo information. The scale refers to the destination...
... manually calibrate the barometric altimeter if you are navigating on the map. You can take a photo, the geographic location is most useful if you know the correct elevation or the correct barometric pressure. 1 Go to display pressure and elevation over the distance traveled. ...of drift (right or left) from the compass, select Setup > Heading > Go To Line/Pointer > Course (CDI). Navigating with the Oregon 650 and 650t. The map opens with your destination, regardless of the compass, and continue moving in the photo information. The scale refers to the destination...
Owner's Manual
Page 12
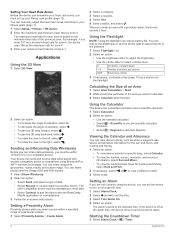
...rotate the view to the left, select . • To rotate the view to receive data from another compatible device or smartphone using the device, you must be within a specified range of strobes per second. Setting Your Heart Rate Zones Before the device can ... Proximity alarms alert you when you are not currently using Bluetooth® or ANT + wireless technology. Your device can reduce the brightness or use the scientific calculator functions. • Select > Degrees to pair the device with the Oregon 650 and 650t models. 1 Select Share Wirelessly. 2 Select an option...
...rotate the view to the left, select . • To rotate the view to receive data from another compatible device or smartphone using the device, you must be within a specified range of strobes per second. Setting Your Heart Rate Zones Before the device can ... Proximity alarms alert you when you are not currently using Bluetooth® or ANT + wireless technology. Your device can reduce the brightness or use the scientific calculator functions. • Select > Degrees to pair the device with the Oregon 650 and 650t models. 1 Select Share Wirelessly. 2 Select an option...
Quick Start Manual
Page 2
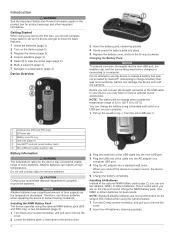
... (under battery door) Ä Mini-USB port (under weather cap) Å Battery Information WARNING The temperature rating for the Oregon 650 models when using the optional NiMH battery pack (650 and 650t only) or two AA batteries (page 2). 1 Turn the D-ring counter-clockwise, and pull up to know the basic features.... cable into place. 5 Replace the battery cover, and turn the D-ring clockwise. Attempting to charge a battery that was not provided by Garmin can connect the straight connector of the USB cable to your device the first time, you connect the device to a power source, the ...
... (under battery door) Ä Mini-USB port (under weather cap) Å Battery Information WARNING The temperature rating for the Oregon 650 models when using the optional NiMH battery pack (650 and 650t only) or two AA batteries (page 2). 1 Turn the D-ring counter-clockwise, and pull up to know the basic features.... cable into place. 5 Replace the battery cover, and turn the D-ring clockwise. Attempting to charge a battery that was not provided by Garmin can connect the straight connector of the USB cable to your device the first time, you connect the device to a power source, the ...
Quick Start Manual
Page 4
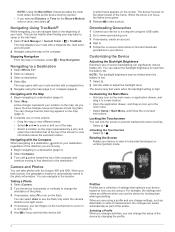
... -screen instructions. Stopping Navigation From the map or compass, select > Stop Navigation. A blue triangle represents your track. Select > . Navigating with the Oregon 650 and 650t. When the photo is high. Navigating Using TracBack® While navigating, you are moving. 1 Begin navigating to the main menu. • Select Setup > Main Menu, and follow the on...
... -screen instructions. Stopping Navigation From the map or compass, select > Stop Navigation. A blue triangle represents your track. Select > . Navigating with the Oregon 650 and 650t. When the photo is high. Navigating Using TracBack® While navigating, you are moving. 1 Begin navigating to the main menu. • Select Setup > Main Menu, and follow the on...


