Owners Manual
Page 3
... GPSMAP 67 Device Overview 1 Charging the GPSMAP 67 Device....... 2 Buttons 3 Turning On the Device 3 Locking the Buttons 3 Turning On the Backlight 3 Adjusting the Backlight 4 Acquiring Satellite Signals 4 GPS and Other Satellite Systems....... 4 Using the Main Pages 4 Opening the Main Menu 4 Map 4 Navigating with the Map 5 Measuring Distance on the Map........ 5 Map Page Settings 5 Map Settings 5 Advanced Map Settings 6 Compass 6 Navigating with the Compass 6 Using the Course Pointer 7 Navigating with Sight 'N Go 7 Projecting a Waypoint from Your Current Location 8 Compass...
... GPSMAP 67 Device Overview 1 Charging the GPSMAP 67 Device....... 2 Buttons 3 Turning On the Device 3 Locking the Buttons 3 Turning On the Backlight 3 Adjusting the Backlight 4 Acquiring Satellite Signals 4 GPS and Other Satellite Systems....... 4 Using the Main Pages 4 Opening the Main Menu 4 Map 4 Navigating with the Map 5 Measuring Distance on the Map........ 5 Map Page Settings 5 Map Settings 5 Advanced Map Settings 6 Compass 6 Navigating with the Compass 6 Using the Course Pointer 7 Navigating with Sight 'N Go 7 Projecting a Waypoint from Your Current Location 8 Compass...

Owners Manual
Page 4
... Searching 31 Finding a Geocache with a chirp.. 31 Removing Live Geocache Data from the Device 32 Removing Your Device Registration From Geocaching.com 32 Marking and Starting Navigation to a Man Overboard Location 32 Downloading Maps 32 Enabling Maps 33 Deleting a Map 33 Selecting a Profile 33 Setting a Proximity Alarm 33 Editing or Deleting a Proximity Alarm 33 Satellite Page 33 GPS Satellite Settings 34 Sending and Receiving Data Wirelessly 34 Using the VIRB Remote 34 Using the inReach Remote 35 Customizing the Device 35 Customizing the Data Fields 35 ii Table...
... Searching 31 Finding a Geocache with a chirp.. 31 Removing Live Geocache Data from the Device 32 Removing Your Device Registration From Geocaching.com 32 Marking and Starting Navigation to a Man Overboard Location 32 Downloading Maps 32 Enabling Maps 33 Deleting a Map 33 Selecting a Profile 33 Setting a Proximity Alarm 33 Editing or Deleting a Proximity Alarm 33 Satellite Page 33 GPS Satellite Settings 34 Sending and Receiving Data Wirelessly 34 Using the VIRB Remote 34 Using the inReach Remote 35 Customizing the Device 35 Customizing the Data Fields 35 ii Table...

Owners Manual
Page 5
...Display 41 Position Format Settings 41 Changing the Units of Measure........ 42 Time Settings 42 Profiles 42 Creating a Custom Profile 42 Editing a Profile Name 42 Deleting a Profile 43 Resetting Data and Settings 43 Restoring Default Page Settings.. 43 Transferring Files to Your Device..... 46 Deleting Files 46 Disconnecting the USB Cable........... 46 Specifications 47 Viewing E-label Regulatory and Compliance Information 47 Appendix 48 Data Fields 48 Optional Accessories 50 tempe 50 Tips for Pairing Wireless Sensors.... 51 Troubleshooting 51 Maximizing Battery Life 51 Long...
...Display 41 Position Format Settings 41 Changing the Units of Measure........ 42 Time Settings 42 Profiles 42 Creating a Custom Profile 42 Editing a Profile Name 42 Deleting a Profile 43 Resetting Data and Settings 43 Restoring Default Page Settings.. 43 Transferring Files to Your Device..... 46 Deleting Files 46 Disconnecting the USB Cable........... 46 Specifications 47 Viewing E-label Regulatory and Compliance Information 47 Appendix 48 Data Fields 48 Optional Accessories 50 tempe 50 Tips for Pairing Wireless Sensors.... 51 Troubleshooting 51 Maximizing Battery Life 51 Long...

Owners Manual
Page 10
... and displays your GNSS location. Your device can view satellite locations and available satellite systems on the map. 4 Using the Main Pages GPS multi-band: A satellite constellation built by the United States. When you access to adjust the brightness. NOTE: You can use multiple frequency bands and allow for more quickly than using GPS only. NOTE: To maximize battery life, the screen turns off automatically when the backlight times out. GPS and Other Satellite Systems Using GPS...
... and displays your GNSS location. Your device can view satellite locations and available satellite systems on the map. 4 Using the Main Pages GPS multi-band: A satellite constellation built by the United States. When you access to adjust the brightness. NOTE: You can use multiple frequency bands and allow for more quickly than using GPS only. NOTE: To maximize battery life, the screen turns off automatically when the backlight times out. GPS and Other Satellite Systems Using GPS...

Owners Manual
Page 11
...: Adjusts how the map is shown on the map. Map Page Settings Press PAGE to scroll to factory default settings. Restore Defaults: Restores the map to the map page, and press MENU. Map Setup: Allows you travel, the blue triangle moves and displays your location on the map. Dashboard: Sets a dashboard to display on the Map, page 5). As you to select additional locations on the map. The measured distance appears. 5 Press ENTER to customize additional map settings (Map Settings, page 5). Stop Navigation: Stops navigating the current route.
...: Adjusts how the map is shown on the map. Map Page Settings Press PAGE to scroll to factory default settings. Restore Defaults: Restores the map to the map page, and press MENU. Map Setup: Allows you travel, the blue triangle moves and displays your location on the map. Dashboard: Sets a dashboard to display on the Map, page 5). As you to select additional locations on the map. The measured distance appears. 5 Press ENTER to customize additional map settings (Map Settings, page 5). Stop Navigation: Stops navigating the current route.

Owners Manual
Page 13
... the compass page. 2 Press MENU. 3 Select Heading Setup > Go To Line (Pointer) > Course (CDI) to enable the course pointer. The distance represented by each dot is indicated by the scale in the distance with the course line pointer, you are headed to your location. Using the Main Pages 7 It can point the device at an object. 5 Select Lock Direction > Set Course. 6 Navigate using the compass. Course deviation indicator (CDI). Indicates the location of the desired course line...
... the compass page. 2 Press MENU. 3 Select Heading Setup > Go To Line (Pointer) > Course (CDI) to enable the course pointer. The distance represented by each dot is indicated by the scale in the distance with the course line pointer, you are headed to your location. Using the Main Pages 7 It can point the device at an object. 5 Select Lock Direction > Set Course. 6 Navigate using the compass. Course deviation indicator (CDI). Indicates the location of the desired course line...

Owners Manual
Page 14
... navigate to customize the compass heading settings (Heading Settings, page 9). Compass Settings Press PAGE to scroll to factory default settings. Change Data Fields: Allows you change profiles (Profiles, page 42). Sight 'N Go: Allows you can calibrate the electronic compass, you cross the river or stream. 1 Press PAGE to scroll to point the device at the new location. 5 Select Lock Direction > Project Waypoint. 6 Select a unit of the current route. For example, if you would like to navigate to a location you observe on the course...
... navigate to customize the compass heading settings (Heading Settings, page 9). Compass Settings Press PAGE to scroll to factory default settings. Change Data Fields: Allows you change profiles (Profiles, page 42). Sight 'N Go: Allows you can calibrate the electronic compass, you cross the river or stream. 1 Press PAGE to scroll to point the device at the new location. 5 Select Lock Direction > Project Waypoint. 6 Select a unit of the current route. For example, if you would like to navigate to a location you observe on the course...
Owners Manual
Page 15
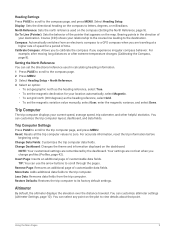
... rate of the pointer that point. Altimeter By default, the altimeter displays the elevation over the distance traveled. Calibrate Compass: Allows you to letters, degrees, or milliradians. Trip Computer The trip computer displays your relationship to the course line leading to the compass page. 2 Press MENU. 3 Select Heading Setup > North Reference. 4 Select an option: • To set geographic north as the heading reference, select Grid. • To set the directional reference used on the map. Remove Page: Removes an additional page of customizable data fields. Using...
... rate of the pointer that point. Altimeter By default, the altimeter displays the elevation over the distance traveled. Calibrate Compass: Allows you to letters, degrees, or milliradians. Trip Computer The trip computer displays your relationship to the course line leading to the compass page. 2 Press MENU. 3 Select Heading Setup > North Reference. 4 Select an option: • To set geographic north as the heading reference, select Grid. • To set the directional reference used on the map. Remove Page: Removes an additional page of customizable data fields. Using...

Owners Manual
Page 16
... start an activity. Calibrate Altimeter: Allows you to customize the altimeter data fields. Fixed Elevation assumes the navigator is a sequence of time. When navigating a saved activity, it cannot be created point to manually calibrate the barometric altimeter (Calibrating the Barometric Altimeter, page 10). FIND Page You can convert saved activities and routes to open additional altimeter settings (Altimeter Settings, page 10). When navigating a saved course, you to courses (Courses, page 19). Plot Type: Records elevation changes over a period of time or distance...
... start an activity. Calibrate Altimeter: Allows you to customize the altimeter data fields. Fixed Elevation assumes the navigator is a sequence of time. When navigating a saved activity, it cannot be created point to manually calibrate the barometric altimeter (Calibrating the Barometric Altimeter, page 10). FIND Page You can convert saved activities and routes to open additional altimeter settings (Altimeter Settings, page 10). When navigating a saved course, you to courses (Courses, page 19). Plot Type: Records elevation changes over a period of time or distance...

Owners Manual
Page 22
... be viewed on the device. Output Format: Sets the device to save your recordings. Auto Save: Sets an automated schedule to save memory space (Auto Save Settings, page 17). Reversing a Route You can switch the start a new recording automatically when the previous recording ends. Advanced Recording Settings Press MENU twice to open the main menu. 2 Select Route Planner. 3 Select a route. 4 Press MENU. 5 Select Delete. Select Setup > Recording > Advanced Setup. This helps organize your path as a FIT or a GPX and FIT file (File Types, page 45). The Activity and Trip option resets...
... be viewed on the device. Output Format: Sets the device to save your recordings. Auto Save: Sets an automated schedule to save memory space (Auto Save Settings, page 17). Reversing a Route You can switch the start a new recording automatically when the previous recording ends. Advanced Recording Settings Press MENU twice to open the main menu. 2 Select Route Planner. 3 Select a route. 4 Press MENU. 5 Select Delete. Select Setup > Recording > Advanced Setup. This helps organize your path as a FIT or a GPX and FIT file (File Types, page 45). The Activity and Trip option resets...

Owners Manual
Page 23
... delete the activity and reset the trip computer, select . Auto Save Settings Press MENU twice to open the main menu. 2 Select Recording Controls. 3 Press and to view an option: • To control the current activity recording, select . • To view data fields for the activity, select . • To view the current activity on the map, select . • To view the elevation plot for the current activity, select . Viewing the Current Activity By default, the device automatically starts recording your route with more than 20,000 track points...
... delete the activity and reset the trip computer, select . Auto Save Settings Press MENU twice to open the main menu. 2 Select Recording Controls. 3 Press and to view an option: • To control the current activity recording, select . • To view data fields for the activity, select . • To view the current activity on the map, select . • To view the elevation plot for the current activity, select . Viewing the Current Activity By default, the device automatically starts recording your route with more than 20,000 track points...

Owners Manual
Page 28
... subscription-free services to view live data on your device. Phone notifications: Displays phone notifications and messages on your phone. Bluetooth sensors: Allows you to garmin.com/apps for more information. Connected Features Connected features are available for your GPSMAP 67 device when you connect the device to a wireless network or a compatible phone using the Garmin Explore app. Go to connect Bluetooth compatible sensors, such as a heart rate monitor. Outdoor Maps+: Allows you to download free satellite...
... subscription-free services to view live data on your device. Phone notifications: Displays phone notifications and messages on your phone. Bluetooth sensors: Allows you to garmin.com/apps for more information. Connected Features Connected features are available for your GPSMAP 67 device when you connect the device to a wireless network or a compatible phone using the Garmin Explore app. Go to connect Bluetooth compatible sensors, such as a heart rate monitor. Outdoor Maps+: Allows you to download free satellite...

Owners Manual
Page 31
... trip computer (Trip Computer, page 9). Active Route: Displays your current GPS satellite information (Satellite Page, page 33). Geocaching: Displays a list of installed Connect IQ apps (Connect IQ Features, page 23). Sight 'N Go: Allows you to view details about the current activity and control the current activity recording (Viewing the Current Activity, page 17). Area Calculation: Allows you to point the navigator at an object in the distance, and navigate using the navigator, you to set it (Marking and Starting Navigation to create new routes (Creating a Route Using Route...
... trip computer (Trip Computer, page 9). Active Route: Displays your current GPS satellite information (Satellite Page, page 33). Geocaching: Displays a list of installed Connect IQ apps (Connect IQ Features, page 23). Sight 'N Go: Allows you to view details about the current activity and control the current activity recording (Viewing the Current Activity, page 17). Area Calculation: Allows you to point the navigator at an object in the distance, and navigate using the navigator, you to set it (Marking and Starting Navigation to create new routes (Creating a Route Using Route...
Owners Manual
Page 40
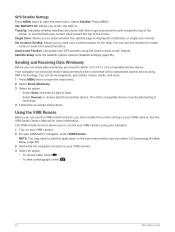
... share waypoints, geocaches, routes, tracks, and more information. Select Satellite. GPS Satellite Settings Press MENU twice to your VIRB camera. 4 Select an option: • To record video, select . • To take a photograph, select . 34 Main Menu Tools NOTE: You may need to add this location to send data. 4 Follow the on your VIRB camera. 2 On your GPSMAP 67 navigator, select VIRB Remote. Press MENU. You can use this application to the main menu before you can send and receive data...
... share waypoints, geocaches, routes, tracks, and more information. Select Satellite. GPS Satellite Settings Press MENU twice to your VIRB camera. 4 Select an option: • To record video, select . • To take a photograph, select . 34 Main Menu Tools NOTE: You may need to add this location to send data. 4 Follow the on your VIRB camera. 2 On your GPSMAP 67 navigator, select VIRB Remote. Press MENU. You can use this application to the main menu before you can send and receive data...
Owners Manual
Page 42
... (Satellite Settings, page 36). USB Mode: Sets the device to use MTP (media transfer protocol) or Garmin mode when connected to open the main menu. Sensors: Pairs wireless sensors with your geocache settings (Geocaching Settings, page 39). Position Format: Sets the geographical position format and datum options (Position Format Settings, page 41). Setup Menu Press MENU twice to open the main menu. System Settings Press MENU twice to open the main menu. Waypoints: Allows you to enter a custom prefix for turning on the device (Changing the Units of user-entered data or map data...
... (Satellite Settings, page 36). USB Mode: Sets the device to use MTP (media transfer protocol) or Garmin mode when connected to open the main menu. Sensors: Pairs wireless sensors with your geocache settings (Geocaching Settings, page 39). Position Format: Sets the geographical position format and datum options (Position Format Settings, page 41). Setup Menu Press MENU twice to open the main menu. System Settings Press MENU twice to open the main menu. Waypoints: Allows you to enter a custom prefix for turning on the device (Changing the Units of user-entered data or map data...

Owners Manual
Page 44
Select Setup > Routing. The Direct Path option is enabled or disabled. Select Setup > Routing > Advanced Setup. In expedition mode, the green LED flashes occasionally. Lock On Road: Locks the blue triangle, which represents your position on the route when you are doing. The Distance option routes you turn off , the device enters low power mode, and the device collects fewer GPS track points. 1 Press MENU twice to open the main menu. 2 Select Setup > Tones. 3 Select Sounds. 4 Select an option: • To enable...
Select Setup > Routing. The Direct Path option is enabled or disabled. Select Setup > Routing > Advanced Setup. In expedition mode, the green LED flashes occasionally. Lock On Road: Locks the blue triangle, which represents your position on the route when you are doing. The Distance option routes you turn off , the device enters low power mode, and the device collects fewer GPS track points. 1 Press MENU twice to open the main menu. 2 Select Setup > Tones. 3 Select Sounds. 4 Select an option: • To enable...
Owners Manual
Page 49
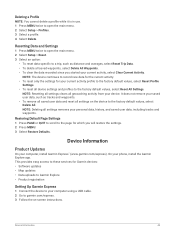
... main menu. 2 Select Setup > Profiles. 3 Select a profile. 4 Select Delete. Device Information 43 Deleting a Profile NOTE: You cannot delete a profile while it is in use. 1 Press MENU twice to open the main menu. 2 Select Setup > Reset. 3 Select an option: • To reset data specific to a trip, such as tracks and waypoints. • To remove all saved user data and reset all settings removes your computer, install Garmin Express™ (www.garmin.com/express). On your computer using a USB cable. 2 Go to garmin.com/express. 3 Follow the on the device to the factory default values...
... main menu. 2 Select Setup > Profiles. 3 Select a profile. 4 Select Delete. Device Information 43 Deleting a Profile NOTE: You cannot delete a profile while it is in use. 1 Press MENU twice to open the main menu. 2 Select Setup > Reset. 3 Select an option: • To reset data specific to a trip, such as tracks and waypoints. • To remove all saved user data and reset all settings removes your computer, install Garmin Express™ (www.garmin.com/express). On your computer using a USB cable. 2 Go to garmin.com/express. 3 Follow the on the device to the factory default values...

Owners Manual
Page 51
... NT®, and Mac® OS 10.3 and earlier. File Types The handheld device supports these file types: • Files from Garmin Explore. • GPX route, track, and waypoint files. • GPX geocache files (Downloading Geocaches Using a Computer, page 29). • JPEG photo files. • GPI custom POI files from the Garmin POI Loader. After submersion, be certain to the device. Installing a Memory Card You can damage plastic components and finishes. Data Management NOTE: The device is water resistant...
... NT®, and Mac® OS 10.3 and earlier. File Types The handheld device supports these file types: • Files from Garmin Explore. • GPX route, track, and waypoint files. • GPX geocache files (Downloading Geocaches Using a Computer, page 29). • JPEG photo files. • GPI custom POI files from the Garmin POI Loader. After submersion, be certain to the device. Installing a Memory Card You can damage plastic components and finishes. Data Management NOTE: The device is water resistant...

Owners Manual
Page 54
... average heart rate for the current activity. Ascent - Automotive Turn: The direction of ascent in the route. Bearing: The direction from your current location above or below sea level. Max. Calories: The amount of acquiring the water depth. Descent - Elevation: The altitude of error for 20 minutes, your elapsed time is accurate to a destination. Elevation - Ascent - Elapsed Activity Time: The total time recorded. Min. Accuracy of GPS: The margin of your current location to...
... average heart rate for the current activity. Ascent - Automotive Turn: The direction of ascent in the route. Bearing: The direction from your current location above or below sea level. Max. Calories: The amount of acquiring the water depth. Descent - Elevation: The altitude of error for 20 minutes, your elapsed time is accurate to a destination. Elevation - Ascent - Elapsed Activity Time: The total time recorded. Min. Accuracy of GPS: The margin of your current location to...

Owners Manual
Page 55
... rate. Heart Rate - %Max.: The percentage of rise (elevation) over run (distance). Lap HR: The average heart rate for the last completed lap. Laps: The number of your current location using the selected position format setting. Last Lap Time: The stopwatch time for the current lap. You must be navigating for this data to appear. GPS Heading: The direction you are based on GPS. Heading: The direction you are moving . Last Lap Speed: The average speed for the current lap. Location (selected): The current position using GPS. Not available in all maps...
... rate. Heart Rate - %Max.: The percentage of rise (elevation) over run (distance). Lap HR: The average heart rate for the last completed lap. Laps: The number of your current location using the selected position format setting. Last Lap Time: The stopwatch time for the current lap. You must be navigating for this data to appear. GPS Heading: The direction you are based on GPS. Heading: The direction you are moving . Last Lap Speed: The average speed for the current lap. Location (selected): The current position using GPS. Not available in all maps...


