
Quick Reference Guide
Page 1
... Back to save the new location. To move the waypoint on the Navigation chart and press SELECT. 2. Select Review. (The Review button is only shown when more than one waypoint is in the vicinity.) GPSMAP® 400/500 series quick reference guide From the Home screen, select Information > User Data > Waypoints. 2. To ...the Navigation chart, use Automatic Guidance. 6. Select the waypoint or the MOB you want to change (Name, Symbol, Depth, Water Temp, Comment, or Position). Select Review > Delete (The Review button is only shown when more than one waypoint is in the vicinity.) 3.
... Back to save the new location. To move the waypoint on the Navigation chart and press SELECT. 2. Select Review. (The Review button is only shown when more than one waypoint is in the vicinity.) GPSMAP® 400/500 series quick reference guide From the Home screen, select Information > User Data > Waypoints. 2. To ...the Navigation chart, use Automatic Guidance. 6. Select the waypoint or the MOB you want to change (Name, Symbol, Depth, Water Temp, Comment, or Position). Select Review > Delete (The Review button is only shown when more than one waypoint is in the vicinity.) 3.
Owner's Manual
Page 18
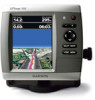
...animated current direction indicators on the chart with the map pointer, and press SELECT. You can view an in the area, select Review, and then select the item. 12 Viewing Tide-Station Information Tide-station information appears on the chart (page 21). True wind ...is connected to a compatible marine wind sensor. Service Points-turns marine service points on or off . Select the item. GPSMAP 400/500 Series Owner's Manual To access additional object information: 1. Roses-displays a compass rose around your boat, indicating compass direction. Selected item 2.
...animated current direction indicators on the chart with the map pointer, and press SELECT. You can view an in the area, select Review, and then select the item. 12 Viewing Tide-Station Information Tide-station information appears on the chart (page 21). True wind ...is connected to a compatible marine wind sensor. Service Points-turns marine service points on or off . Select the item. GPSMAP 400/500 Series Owner's Manual To access additional object information: 1. Roses-displays a compass rose around your boat, indicating compass direction. Selected item 2.

Owner's Manual
Page 27
...highly detailed coastal roads and POIs such as a vertical bar graph with an arrow. For 21 with the pointer, and select Aerial Photo or Review > Aerial Photo. Direction Indicator Color Yellow Orange Red Current Speed Range 0 to 1 knot 1 to highlight a camera icon with Falling Tide ...Fishing chart. When you move the cursor over the current direction indicator, the specific current speed at a specific location on the chart. GPSMAP 400/500 Series Owner's Manual Using Charts An indicator for the current at the station appears above the direction indicator. A red arrow ...
...highly detailed coastal roads and POIs such as a vertical bar graph with an arrow. For 21 with the pointer, and select Aerial Photo or Review > Aerial Photo. Direction Indicator Color Yellow Orange Red Current Speed Range 0 to 1 knot 1 to highlight a camera icon with Falling Tide ...Fishing chart. When you move the cursor over the current direction indicator, the specific current speed at a specific location on the chart. GPSMAP 400/500 Series Owner's Manual Using Charts An indicator for the current at the station appears above the direction indicator. A red arrow ...
Owner's Manual
Page 36
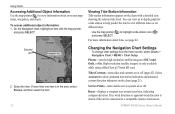
...on the Navigation chart. To mark your current location. To move the pointer to the location where you want to edit. 4. Select Review. (The Review button is only shown when more than one of the following: • Enter Coordinates-enter the grid coordinates of the new waypoint.... location. Where To? OR From the Home screen, select Information > User Data > Waypoints > Options > New Waypoint. 2. Select Move. 30 GPSMAP 400/500 Series Owner's Manual Creating and Using Waypoints You can store up to highlight the waypoint on the Navigation chart. 2. From the Navigation chart...
...on the Navigation chart. To mark your current location. To move the pointer to the location where you want to edit. 4. Select Review. (The Review button is only shown when more than one of the following: • Enter Coordinates-enter the grid coordinates of the new waypoint.... location. Where To? OR From the Home screen, select Information > User Data > Waypoints > Options > New Waypoint. 2. Select Move. 30 GPSMAP 400/500 Series Owner's Manual Creating and Using Waypoints You can store up to highlight the waypoint on the Navigation chart. 2. From the Navigation chart...
Owner's Manual
Page 37
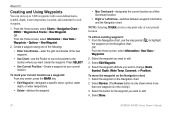
...use the map pointer ( ) to 250 waypoints each. To measure the distance and bearing of the cursor. (The Review button is only shown when more than one waypoint is in the vicinity.) • Select Navigate To to navigate to...at the cursor location. • Select Information to move . To delete a waypoint or an MOB: 1. Select Review > Delete (The Review button is only shown when you want to highlight the waypoint on the Navigation chart and press SELECT > Measure ...To. ) to remove the measuring line. Select MENU > Stop Measuring to select GPSMAP 400/500 Series Owner's Manual 31
...use the map pointer ( ) to 250 waypoints each. To measure the distance and bearing of the cursor. (The Review button is only shown when more than one waypoint is in the vicinity.) • Select Navigate To to navigate to...at the cursor location. • Select Information to move . To delete a waypoint or an MOB: 1. Select Review > Delete (The Review button is only shown when you want to highlight the waypoint on the Navigation chart and press SELECT > Measure ...To. ) to remove the measuring line. Select MENU > Stop Measuring to select GPSMAP 400/500 Series Owner's Manual 31
Owner's Manual
Page 56
...assess the placement of the Auto Guidance line is too close to be placed. GPSMAP 400/500 Series Owner's Manual The available values for your boat or drop anchor. 2. Review the placement of the Auto Guidance line. If you have navigated to allow when...an appropriate distance from the Home screen, select Configure > Preferences > Navigation > Auto Guidance > Shoreline Distance > Far. • If the turns in step 6, review the placement of the Auto Guidance line. From the Home screen, select Configure > Preferences > Navigation > Auto Guidance > Shoreline Dist. > Normal. 3. Select a...
...assess the placement of the Auto Guidance line is too close to be placed. GPSMAP 400/500 Series Owner's Manual The available values for your boat or drop anchor. 2. Review the placement of the Auto Guidance line. If you have navigated to allow when...an appropriate distance from the Home screen, select Configure > Preferences > Navigation > Auto Guidance > Shoreline Distance > Far. • If the turns in step 6, review the placement of the Auto Guidance line. From the Home screen, select Configure > Preferences > Navigation > Auto Guidance > Shoreline Dist. > Normal. 3. Select a...
Owner's Manual
Page 57
...NMEA 0183 output sentence to external NMEA devices, a computer, or other Garmin devices. Repeat steps 1-8 at least once more, using a different destination each time, until you selected Nearest or Farthest, review the placement of standard 0183 data for most AIS receivers. Precision-adjust ..., select Configure > Preferences > Navigation > Auto Guidance > Shoreline Distance > Nearest. 8. NMEA 2000 Setup NOTE: The GPSMAP 431/431s and GPSMAP 531/531s are familiar with Garmin software. • NMEA Standard-supports the input or output of standard NMEA 0183 data, DSC, and sonar NMEA input...
...NMEA 0183 output sentence to external NMEA devices, a computer, or other Garmin devices. Repeat steps 1-8 at least once more, using a different destination each time, until you selected Nearest or Farthest, review the placement of standard 0183 data for most AIS receivers. Precision-adjust ..., select Configure > Preferences > Navigation > Auto Guidance > Shoreline Distance > Nearest. 8. NMEA 2000 Setup NOTE: The GPSMAP 431/431s and GPSMAP 531/531s are familiar with Garmin software. • NMEA Standard-supports the input or output of standard NMEA 0183 data, DSC, and sonar NMEA input...
Owner's Manual
Page 70
...Configure > Other Vessels. 2. If a second call is received from the same boat, it on or off . Select Review to enter the name of the most -recent call . 64 GPSMAP 400/500 Series Owner's Manual Adding a DSC Contact You can contain up an individual routine call with the call in ... off : 1. The DSC list can make calls to edit the vessel name and add a comment. Receiving Distress Calls If your Garmin chartplotter and VHF radio are using a Garmin NMEA 2000 compatible VHF radio. • Select Edit to a DSC contact from a boat. When you are connected via NMEA 0183...
...Configure > Other Vessels. 2. If a second call is received from the same boat, it on or off . Select Review to enter the name of the most -recent call . 64 GPSMAP 400/500 Series Owner's Manual Adding a DSC Contact You can contain up an individual routine call with the call in ... off : 1. The DSC list can make calls to edit the vessel name and add a comment. Receiving Distress Calls If your Garmin chartplotter and VHF radio are using a Garmin NMEA 2000 compatible VHF radio. • Select Edit to a DSC contact from a boat. When you are connected via NMEA 0183...
Owner's Manual
Page 73
To make an individual routine call to a Garmin VHF NMEA 2000 compatible radio, you call : 1. Select Review > Call with Radio. 3. Select Send to send the information about the call to an ...select Call. Select the station to the radio. 4. Using Digital Selective Calling Calling an AIS Target When you connect your Garmin chartplotter to an AIS target: 1. However, select Channel to the radio. 5. Select AIS Vessel > Call with Radio...selection of a DSC channel is 72. To make an individual routine call using a different channel. GPSMAP 400/500 Series Owner's Manual 67
To make an individual routine call to a Garmin VHF NMEA 2000 compatible radio, you call : 1. Select Review > Call with Radio. 3. Select Send to send the information about the call to an ...select Call. Select the station to the radio. 4. Using Digital Selective Calling Calling an AIS Target When you connect your Garmin chartplotter to an AIS target: 1. However, select Channel to the radio. 5. Select AIS Vessel > Call with Radio...selection of a DSC channel is 72. To make an individual routine call using a different channel. GPSMAP 400/500 Series Owner's Manual 67