Owner's Manual
Page 36
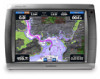
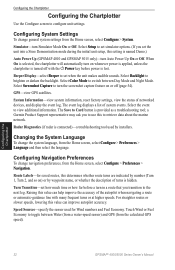
... setting is provided as a troubleshooting tool; System Information-view system information, reset factory settings, view the status of system events. a Garmin Product Support representative may ask you transition to retrieve data about the marine network. Route Labels-for Wind numbers and Fuel Economy. Turn Transition... Mode On or Off. GPS-view GPS satellites. Select the event to Card button is named Demo.) Auto Power Up (GPSMAP 4010 and GPSMAP 5015 only)-turn Auto Power Up On or Off. The Save to view additional information. Changing the System Language To change the system...
... setting is provided as a troubleshooting tool; System Information-view system information, reset factory settings, view the status of system events. a Garmin Product Support representative may ask you transition to retrieve data about the marine network. Route Labels-for Wind numbers and Fuel Economy. Turn Transition... Mode On or Off. GPS-view GPS satellites. Select the event to Card button is named Demo.) Auto Power Up (GPSMAP 4010 and GPSMAP 5015 only)-turn Auto Power Up On or Off. The Save to view additional information. Changing the System Language To change the system...
Owner's Manual
Page 57
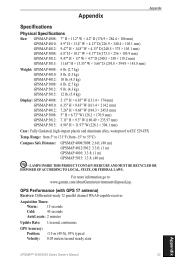
... seconds AutoLocate: 2 minutes Update Rate: 1/second, continuous GPS Accuracy: Position: For more information go to 55°C) Compass Safe Distance GPSMAP 4008/5008: 2.6 ft. (80 cm) GPSMAP 4012/5012: 3.3 ft. (1 m) GPSMAP 4010: 3.3 ft. (1 m) GPSMAP 5015: 1.3 ft. (40 cm) Hg - Range: from 5° to 131°F (from -15° to : www.garmin.com/aboutGarmin/environment/disposal.jsp.
... seconds AutoLocate: 2 minutes Update Rate: 1/second, continuous GPS Accuracy: Position: For more information go to 55°C) Compass Safe Distance GPSMAP 4008/5008: 2.6 ft. (80 cm) GPSMAP 4012/5012: 3.3 ft. (1 m) GPSMAP 4010: 3.3 ft. (1 m) GPSMAP 5015: 1.3 ft. (40 cm) Hg - Range: from 5° to 131°F (from -15° to : www.garmin.com/aboutGarmin/environment/disposal.jsp.
Owner's Manual
Page 58
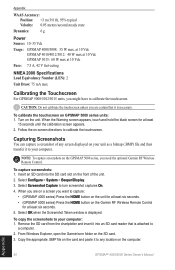
...window is attached to a computer. 2. When you are on a screen you want to any location on the Garmin RF Wireless Remote Control for at least six seconds. 5. Appendix 54 GPSMAP® 4000/5000 Series Owner's Manual To copy the screenshots to turn screenshot captures On. 4. Select Screenshot ...Capture to your computer: 1. From Windows Explorer, open the Garmin\scrn folder on the SD card. 3. Remove the SD card from the chartplotter and insert it to capture: • (GPSMAP 4000 series) Press the HOME button on the unit for at least six seconds. ...
...window is attached to a computer. 2. When you are on a screen you want to any location on the Garmin RF Wireless Remote Control for at least six seconds. 5. Appendix 54 GPSMAP® 4000/5000 Series Owner's Manual To copy the screenshots to turn screenshot captures On. 4. Select Screenshot ...Capture to your computer: 1. From Windows Explorer, open the Garmin\scrn folder on the SD card. 3. Remove the SD card from the chartplotter and insert it to capture: • (GPSMAP 4000 series) Press the HOME button on the unit for at least six seconds. ...
Installation Instructions
Page 1
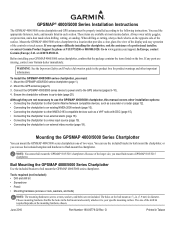
... Because of the controls or touch screen. Mount the GPSMAP 4000/5000 series chartplotter (page 1). 2. Connect the GPSMAP 4000/5000 series device to power and to the following instructions. Note: You cannot bail mount the GPSMAP 5015/5215 chartplotters. The holes on the mounting hardware chosen.... NMEA 2000 network (page 10). • Connecting the chartplotter to other important information. Bail Mounting the GPSMAP 4000/5000 Series Chartplotter Use the included bracket to www.garmin.com/support. Tools required (not included): • Drill and drill bit • Screwdriver • ...
... Because of the controls or touch screen. Mount the GPSMAP 4000/5000 series chartplotter (page 1). 2. Connect the GPSMAP 4000/5000 series device to power and to the following instructions. Note: You cannot bail mount the GPSMAP 5015/5215 chartplotters. The holes on the mounting hardware chosen.... NMEA 2000 network (page 10). • Connecting the chartplotter to other important information. Bail Mounting the GPSMAP 4000/5000 Series Chartplotter Use the included bracket to www.garmin.com/support. Tools required (not included): • Drill and drill bit • Screwdriver • ...
Installation Instructions
Page 4
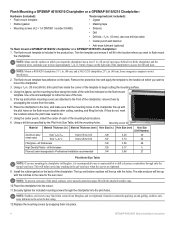
... inside the corner of the solid line indicated on the flush-mount template after cutting, sanding, and filing the hole. Garmin recommends applying an anti-galling, stainless antiseize lubricant to fit the chartplotter and the connected wires, and make sure that the...up with the holes. If they do not, mark the locations where the pilot holes need to avoid interference. 2. Flush Mounting a GPSMAP 4010/4210 Chartplotter or a GPSMAP 5015/5215 Chartplotter: Hardware (included): • Flush-mount template Tools required (not included): • Jigsaw • Rubber gasket •...
... inside the corner of the solid line indicated on the flush-mount template after cutting, sanding, and filing the hole. Garmin recommends applying an anti-galling, stainless antiseize lubricant to fit the chartplotter and the connected wires, and make sure that the...up with the holes. If they do not, mark the locations where the pilot holes need to avoid interference. 2. Flush Mounting a GPSMAP 4010/4210 Chartplotter or a GPSMAP 5015/5215 Chartplotter: Hardware (included): • Flush-mount template Tools required (not included): • Jigsaw • Rubber gasket •...

Installation Instructions
Page 19
...13 7 VGA, H-sync HD-15 Pin 14 12 VGA, V-sync HD-15 Pin shell 9 VGA, overall shield GPSMAP 4000/5000 Series Installation Instructions 19 Marine Video Cable The included Marine Video 17-pin cable allows input of the chartplotter...; Use the PC monitor output (HD 15-pin) connector for details. Marine Video inputs are attached and will not transmit over the Garmin Marine Network. ➊ and ➋ VIDEO 1 and VIDEO 2 Inputs (RCA connectors) allow input from a video source must be...monitor output (4008/4208/4010/4210/5008/5208 = VGA output, 4012/4212/5012/5212/5015/5215 = XGA output).
...13 7 VGA, H-sync HD-15 Pin 14 12 VGA, V-sync HD-15 Pin shell 9 VGA, overall shield GPSMAP 4000/5000 Series Installation Instructions 19 Marine Video Cable The included Marine Video 17-pin cable allows input of the chartplotter...; Use the PC monitor output (HD 15-pin) connector for details. Marine Video inputs are attached and will not transmit over the Garmin Marine Network. ➊ and ➋ VIDEO 1 and VIDEO 2 Inputs (RCA connectors) allow input from a video source must be...monitor output (4008/4208/4010/4210/5008/5208 = VGA output, 4012/4212/5012/5212/5015/5215 = XGA output).


