User Manual
Page 4
... - Mac OS X 10.5/10.6/10.7 67 Managing Color - Mac OS X 10.5/10.6/10.7 71 Checking Print Status - Mac OS X 10.5/10.6/10.7 66 Selecting Page Setup Settings - Mac OS X 10.5/10.6/10.7 72 4 Copying ...41 Copying Documents or Photos...41 Paper Type Settings - Copying...43 Paper Size Settings - Windows 50 Advanced...
... - Mac OS X 10.5/10.6/10.7 67 Managing Color - Mac OS X 10.5/10.6/10.7 71 Checking Print Status - Mac OS X 10.5/10.6/10.7 66 Selecting Page Setup Settings - Mac OS X 10.5/10.6/10.7 72 4 Copying ...41 Copying Documents or Photos...41 Paper Type Settings - Copying...43 Paper Size Settings - Windows 50 Advanced...
User Manual
Page 7
... for Software Updates...168 Product Status Messages ...169 Running a Product Check ...170 Resetting Control Panel Defaults ...171 Solving Setup Problems ...173 Noise After Ink Installation ...173 Software Installation Problems ...173 Control Panel Setup Problems ...174 Solving Network Problems ...174 Product Cannot Connect to a Wireless Router or Access Point 175 Network Software Cannot...
... for Software Updates...168 Product Status Messages ...169 Running a Product Check ...170 Resetting Control Panel Defaults ...171 Solving Setup Problems ...173 Noise After Ink Installation ...173 Software Installation Problems ...173 Control Panel Setup Problems ...174 Solving Network Problems ...174 Product Cannot Connect to a Wireless Router or Access Point 175 Network Software Cannot...

User Manual
Page 14
... Sound and press the OK button. 5. Select the Off setting and press the OK button. 6. Press the up or down arrow buttons to select Printer Setup and press the OK button. Press the up or down arrow buttons to select a language and press the OK button. 6. Press the home button to... select Setup and press the OK button. 3. Press the home button to select Setup and press the OK button. 3. Press the up or down arrow buttons to select Printer...
... Sound and press the OK button. 5. Select the Off setting and press the OK button. 6. Press the up or down arrow buttons to select Printer Setup and press the OK button. Press the up or down arrow buttons to select a language and press the OK button. 6. Press the home button to... select Setup and press the OK button. 3. Press the home button to select Setup and press the OK button. 3. Press the up or down arrow buttons to select Printer...
User Manual
Page 15
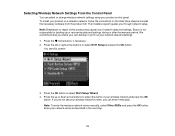
Epson is not responsible for backing up or down arrow buttons to select the name of this screen: 3. We recommend that you through network setup. You see your network data and settings. 1. Note: To enter the wireless network name manually, select Other SSIDs and press the OK button. To install..., you do not see this product may cause loss of network data and settings. Press the left or right arrow buttons to select Wi-Fi Setup Wizard. 4. If you can select or change wireless network settings using your wireless network and press the OK button. Enter your product on a wireless...
Epson is not responsible for backing up or down arrow buttons to select the name of this screen: 3. We recommend that you through network setup. You see your network data and settings. 1. Note: To enter the wireless network name manually, select Other SSIDs and press the OK button. To install..., you do not see this product may cause loss of network data and settings. Press the left or right arrow buttons to select Wi-Fi Setup Wizard. 4. If you can select or change wireless network settings using your wireless network and press the OK button. Enter your product on a wireless...

User Manual
Page 20
... Control Panel You can adjust the time period before the printer turns off automatically. 1. Product Parts - You can use the product's control panel to select Setup and press the OK button. 20
... Control Panel You can adjust the time period before the printer turns off automatically. 1. Product Parts - You can use the product's control panel to select Setup and press the OK button. 20

User Manual
Page 21
Press the up or down arrow buttons to automatically turn off when it is not in use. Press the up or down arrow buttons to select the length of time after which you want the product to select Printer Setup and press the OK button. Then press the OK button. 6. You see this screen: 5. Press the home to select Power Off Timer and press the OK button. You see this screen: 4. 3. Press the up or down arrow buttons to exit. 21
Press the up or down arrow buttons to automatically turn off when it is not in use. Press the up or down arrow buttons to select the length of time after which you want the product to select Printer Setup and press the OK button. Then press the OK button. 6. You see this screen: 5. Press the home to select Power Off Timer and press the OK button. You see this screen: 4. 3. Press the up or down arrow buttons to exit. 21
User Manual
Page 24
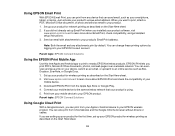
... browser without drivers or cables. Visit www.epson.com/connect to your mobile device. 3. Parent topic: EPSON Connect Solutions Using Google Cloud Print With a Google Account, you can print from your Apple or Android device to learn more about Email Print, check compatibility, and get detailed setup instructions. 3. Connect your mobile device to...
... browser without drivers or cables. Visit www.epson.com/connect to your mobile device. 3. Parent topic: EPSON Connect Solutions Using Google Cloud Print With a Google Account, you can print from your Apple or Android device to learn more about Email Print, check compatibility, and get detailed setup instructions. 3. Connect your mobile device to...
User Manual
Page 25
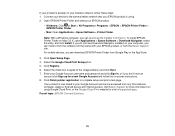
... Google Play or the App Store. 3. For mobile devices, you can download EPSON Printer Finder from Epson. Your product is already on Mac OS X, open Applications > Epson Software > Download Navigator, select the utility, and click Install. Click Open Setup Page. 4. To install EPSON Printer Finder on your computer, you do not have an account click...
... Google Play or the App Store. 3. For mobile devices, you can download EPSON Printer Finder from Epson. Your product is already on Mac OS X, open Applications > Epson Software > Download Navigator, select the utility, and click Install. Click Open Setup Page. 4. To install EPSON Printer Finder on your computer, you do not have an account click...
User Manual
Page 62
....7 Select the basic settings for your product as the Printer setting. 4. Mac OS X 10.5/10.6/10.7 Managing Color - Mac OS X 10.5/10.6/10.7 Selecting Page Setup Settings - You see the expanded printer settings window for the document or photo you want to print. 1.
....7 Select the basic settings for your product as the Printer setting. 4. Mac OS X 10.5/10.6/10.7 Managing Color - Mac OS X 10.5/10.6/10.7 Selecting Page Setup Settings - You see the expanded printer settings window for the document or photo you want to print. 1.

User Manual
Page 63
Select the page setup options: Paper Size and Orientation. Note: The print window may be accessible by selecting Page Setup from the File menu. 63 Note: If you do not see these settings in the print window, check for them in your application before printing. 6. Note: If you are using. 5. They may look different, depending on the version of Mac OS X and the application you do not see these settings in the print window, check for them in your application before printing. Select the Copies and Pages settings as necessary.
Select the page setup options: Paper Size and Orientation. Note: The print window may be accessible by selecting Page Setup from the File menu. 63 Note: If you do not see these settings in the print window, check for them in your application before printing. 6. Note: If you are using. 5. They may look different, depending on the version of Mac OS X and the application you do not see these settings in the print window, check for them in your application before printing. Select the Copies and Pages settings as necessary.

User Manual
Page 65
... print speed. Fine For text and graphics with Mac OS X 10.5, 10.6, or 10.7 Related references Paper or Media Type Settings Related tasks Selecting Page Setup Settings - 9. Select the Print Quality setting you want to fine-tune the quality of the available print options. Super Fine For text and graphics with...
... print speed. Fine For text and graphics with Mac OS X 10.5, 10.6, or 10.7 Related references Paper or Media Type Settings Related tasks Selecting Page Setup Settings - 9. Select the Print Quality setting you want to fine-tune the quality of the available print options. Super Fine For text and graphics with...

User Manual
Page 66
... - Expansion If you selected a borderless paper size setting, adjusts the image expansion settings to customize your application, you may be accessible by selecting Page Setup from the print window. Mac OS X 10.5/10.6/10.7 Depending on other settings you flip the printed image horizontally. Mac OS X 10.5/10.6/10... You can select any of the print options to control printing at the edges of gray. Mac OS X 10.5/10.6/10.7 Selecting Page Setup Settings - Photo RPM For the best print quality, but the slowest print speed. Parent topic: Selecting Basic Print Settings -
... - Expansion If you selected a borderless paper size setting, adjusts the image expansion settings to customize your application, you may be accessible by selecting Page Setup from the print window. Mac OS X 10.5/10.6/10.7 Depending on other settings you flip the printed image horizontally. Mac OS X 10.5/10.6/10... You can select any of the print options to control printing at the edges of gray. Mac OS X 10.5/10.6/10.7 Selecting Page Setup Settings - Photo RPM For the best print quality, but the slowest print speed. Parent topic: Selecting Basic Print Settings -

User Manual
Page 127
.... Drag the photos you want to transfer to your product. Note: Your product's LCD screen does not update to display new photos transferred to select Setup and press the OK button . 2. Press the left or right arrow buttons to the memory card. Note: Do not transfer photos to set up or... folder that contains your product. 3. Wait until the memory card access light stops flashing, then remove and insert the memory card to select File Sharing Setup and press the OK button. 3. Make sure your product's file sharing settings.
.... Drag the photos you want to transfer to your product. Note: Your product's LCD screen does not update to display new photos transferred to select Setup and press the OK button . 2. Press the left or right arrow buttons to the memory card. Note: Do not transfer photos to set up or... folder that contains your product. 3. Wait until the memory card access light stops flashing, then remove and insert the memory card to select File Sharing Setup and press the OK button. 3. Make sure your product's file sharing settings.
User Manual
Page 129
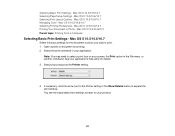
..., you need to select Setup and press the OK button. Note: Please dispose of your ink cartridges using your product's LCD screen. 1. If you know when an ink cartridge is more information. You see this screen: 129 Check Cartridge Status Purchase EPSON Ink Cartridges Removing and Installing... requirements. Press the left or right arrow buttons to replace a cartridge that is low or expended. You may also need to www.epson.com/recycle for proper disposal, please go to replace it. Checking Cartridge Status on the LCD Screen Checking Cartridge Status with Windows Checking...
..., you need to select Setup and press the OK button. Note: Please dispose of your ink cartridges using your product's LCD screen. 1. If you know when an ink cartridge is more information. You see this screen: 129 Check Cartridge Status Purchase EPSON Ink Cartridges Removing and Installing... requirements. Press the left or right arrow buttons to replace a cartridge that is low or expended. You may also need to www.epson.com/recycle for proper disposal, please go to replace it. Checking Cartridge Status on the LCD Screen Checking Cartridge Status with Windows Checking...

User Manual
Page 137
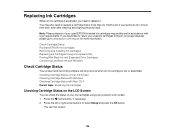
.... 1. Caution: Leave your product. • If an ink cartridge is expended, you see a message on the LCD screen, press the button if necessary, and select Setup. home 137 Do not open ink cartridge packages until you are ready to replace them to install the ink. Select Maintenance, then select Ink Cartridge...
.... 1. Caution: Leave your product. • If an ink cartridge is expended, you see a message on the LCD screen, press the button if necessary, and select Setup. home 137 Do not open ink cartridge packages until you are ready to replace them to install the ink. Select Maintenance, then select Ink Cartridge...
User Manual
Page 149
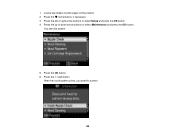
Press the up or down arrow buttons to select Setup and press the OK button. 4. You see this screen: 5. Press the left or right arrow buttons to select Maintenance and press the OK button. Press the start button. Press the OK button. 6. After the nozzle pattern prints, you see this screen: 149 Press the home button, if necessary. 3. Load a few sheets of plain paper in the product. 2. 1.
Press the up or down arrow buttons to select Setup and press the OK button. 4. You see this screen: 5. Press the left or right arrow buttons to select Maintenance and press the OK button. Press the start button. Press the OK button. 6. After the nozzle pattern prints, you see this screen: 149 Press the home button, if necessary. 3. Load a few sheets of plain paper in the product. 2. 1.
User Manual
Page 153
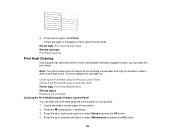
Note: You cannot clean the print head if an ink cartridge is expended, and may not be able to select Setup and press the OK button. 4. Press the home button, if necessary. 3. Parent topic: Print Head Nozzle Check Related concepts Print Head Cleaning Print Head Cleaning ...
Note: You cannot clean the print head if an ink cartridge is expended, and may not be able to select Setup and press the OK button. 4. Press the home button, if necessary. 3. Parent topic: Print Head Nozzle Check Related concepts Print Head Cleaning Print Head Cleaning ...
User Manual
Page 159
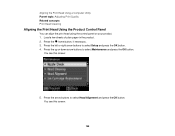
Press the left or right arrow buttons to select Head Alignment and press the OK button. Press the arrow buttons to select Setup and press the OK button. 4. Press the home button, if necessary. 3. Press the up or down arrow buttons to select Maintenance and press the OK ...
Press the left or right arrow buttons to select Head Alignment and press the OK button. Press the arrow buttons to select Setup and press the OK button. 4. Press the home button, if necessary. 3. Press the up or down arrow buttons to select Maintenance and press the OK ...
User Manual
Page 168
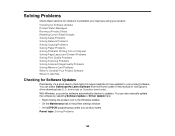
... Messages Running a Product Check Resetting Control Panel Defaults Solving Setup Problems Solving Network Problems Solving Copying Problems Solving Paper Problems Solving Problems Printing from the Home screen of this manual or visit Epson's driver download site (U.S. downloads or Canadian downloads). Solving Problems...When to Uninstall Your Product Software Where to Get Help Checking for Software Updates Periodically, it's a good idea to check Epson's support website for solutions to your product software. You can also manually update the software by selecting Software Update or Driver ...
... Messages Running a Product Check Resetting Control Panel Defaults Solving Setup Problems Solving Network Problems Solving Copying Problems Solving Paper Problems Solving Problems Printing from the Home screen of this manual or visit Epson's driver download site (U.S. downloads or Canadian downloads). Solving Problems...When to Uninstall Your Product Software Where to Get Help Checking for Software Updates Periodically, it's a good idea to check Epson's support website for solutions to your product software. You can also manually update the software by selecting Software Update or Driver ...
User Manual
Page 170
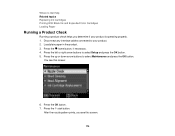
... or right arrow buttons to select Maintenance and press the OK button. You see this screen: 6. Press the up or down arrow buttons to select Setup and press the OK button. 5. Press the OK button. 7. After the nozzle pattern prints, you determine if your product. 2. Press the home button, if necessary...
... or right arrow buttons to select Maintenance and press the OK button. You see this screen: 6. Press the up or down arrow buttons to select Setup and press the OK button. 5. Press the OK button. 7. After the nozzle pattern prints, you determine if your product. 2. Press the home button, if necessary...


