User Manual
Page 3
... IEEE802.1X Network 28 IEEE802.1X Network Status ...29 Using a Digital Certificate ...30 About Digital Certification...30 Obtaining and Importing a CA-signed Certificate 31 CSR Setup Settings ...33 3
... IEEE802.1X Network 28 IEEE802.1X Network Status ...29 Using a Digital Certificate ...30 About Digital Certification...30 Obtaining and Importing a CA-signed Certificate 31 CSR Setup Settings ...33 3

User Manual
Page 30
About Digital Certification Obtaining and Importing a CA-signed Certificate CSR Setup Settings CSR Import Settings Deleting a CA-signed Certificate Updating a Self-signed Certificate Parent topic: Using Your Product on the server certificate and the server's ID ...
About Digital Certification Obtaining and Importing a CA-signed Certificate CSR Setup Settings CSR Import Settings Deleting a CA-signed Certificate Updating a Self-signed Certificate Parent topic: Using Your Product on the server certificate and the server's ID ...
User Manual
Page 33
... can select these settings when importing a CSR in Web Config. for the CSR Enter a name or static IP address from 0 to 128 characters long; CSR Setup Settings You can configure these settings when setting up a CSR in Web Config. Note: The available key length and abbreviations vary by certificate authority, so...
... can select these settings when importing a CSR in Web Config. for the CSR Enter a name or static IP address from 0 to 128 characters long; CSR Setup Settings You can configure these settings when setting up a CSR in Web Config. Note: The available key length and abbreviations vary by certificate authority, so...
User Manual
Page 53
... you cannot import a deleted certificate. Solution Make sure the computer and product are entering the correct password. Parent topic: Solving Digital Certificate Problems 53 Message Setup failed.
... you cannot import a deleted certificate. Solution Make sure the computer and product are entering the correct password. Parent topic: Solving Digital Certificate Problems 53 Message Setup failed.

User Manual
Page 4
... the Product ...80 Placing Originals on the Scanner Glass 80 Placing Originals in the Rear Feed Slot 66 Paper Loading Capacity ...69 Available Epson Papers ...70 Borderless Paper Type Compatibility 72 Selecting the Paper Settings for Photos in the Cassette 57 Loading Envelopes in the Cassette ...61 ...Feeder 81 4 Wi-Fi or Wired Networking...39 Wi-Fi Infrastructure Mode Setup...39 Selecting Wireless Network Settings From the Control Panel 40 Wi-Fi Direct Mode Setup ...42 Enabling Wi-Fi Direct Mode ...43 Wi-Fi Protected Setup (WPS)...44 Using WPS to Connect to a Network 45 Printing a ...
... the Product ...80 Placing Originals on the Scanner Glass 80 Placing Originals in the Rear Feed Slot 66 Paper Loading Capacity ...69 Available Epson Papers ...70 Borderless Paper Type Compatibility 72 Selecting the Paper Settings for Photos in the Cassette 57 Loading Envelopes in the Cassette ...61 ...Feeder 81 4 Wi-Fi or Wired Networking...39 Wi-Fi Infrastructure Mode Setup...39 Selecting Wireless Network Settings From the Control Panel 40 Wi-Fi Direct Mode Setup ...42 Enabling Wi-Fi Direct Mode ...43 Wi-Fi Protected Setup (WPS)...44 Using WPS to Connect to a Network 45 Printing a ...

User Manual
Page 5
Windows 92 Multi-Page Printing Options - Windows 100 Selecting a Printing Preset - OS X 110 Paper Source Options - OS X...114 Selecting Page Setup Settings - Windows 92 Print Quality Options - Windows 96 Print Density Adjustments - Windows 93 Double-sided Printing Options - Windows 96 Selecting Additional Layout and Print Options - ...
Windows 92 Multi-Page Printing Options - Windows 100 Selecting a Printing Preset - OS X 110 Paper Source Options - OS X...114 Selecting Page Setup Settings - Windows 92 Print Quality Options - Windows 96 Print Density Adjustments - Windows 93 Double-sided Printing Options - Windows 96 Selecting Additional Layout and Print Options - ...

User Manual
Page 7
... Setting Up Fax Features Using the Product Control Panel 166 Selecting Your Country or Region 166 Selecting the Date and Time 167 Using the Fax Setup Wizard 169 Selecting the Line Type...172 Setting the Number of Rings to Answer 174 Selecting Fax Output Settings 175 Output Settings - Windows 196 Setting...
... Setting Up Fax Features Using the Product Control Panel 166 Selecting Your Country or Region 166 Selecting the Date and Time 167 Using the Fax Setup Wizard 169 Selecting the Line Type...172 Setting the Number of Rings to Answer 174 Selecting Fax Output Settings 175 Output Settings - Windows 196 Setting...

User Manual
Page 9
... Status Messages ...271 Status Menu Error Codes ...273 Running a Product Check ...274 Resetting Control Panel Defaults ...276 Solving Setup Problems ...277 Noise After Ink Installation ...278 Software Installation Problems ...278 Solving Network Problems ...278 9 Windows 246 Printing With Expended Color... Cartridges - Purchase Epson Ink Cartridges and Maintenance Box 241 Ink Cartridge and Maintenance Box Part Numbers 241 Removing and Installing Ink Cartridges 242 Printing...
... Status Messages ...271 Status Menu Error Codes ...273 Running a Product Check ...274 Resetting Control Panel Defaults ...276 Solving Setup Problems ...277 Noise After Ink Installation ...278 Software Installation Problems ...278 Solving Network Problems ...278 9 Windows 246 Printing With Expended Color... Cartridges - Purchase Epson Ink Cartridges and Maintenance Box 241 Ink Cartridge and Maintenance Box Part Numbers 241 Removing and Installing Ink Cartridges 242 Printing...
User Manual
Page 18
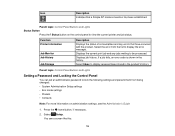
... the current print job and any errors that a Simple AP mode connection has been established. Select Setup. Icon Description Indicates that have occurred with the product. Select the error from being changed: • System Administration Setup settings • Eco mode settings • Presets • Contacts Note: For more information on the control...
... the current print job and any errors that a Simple AP mode connection has been established. Select Setup. Icon Description Indicates that have occurred with the product. Select the error from being changed: • System Administration Setup settings • Eco mode settings • Presets • Contacts Note: For more information on the control...
User Manual
Page 22
... can use the preset by an administrator. Select Setup. Press the home button, if necessary. 2. You see a screen like this setting, contact your administrator for the preset, then press . 7. Select Save. If you can be locked by selecting Presets or pressing the Preset button (WF-3620) and selecting it from the list. You...
... can use the preset by an administrator. Select Setup. Press the home button, if necessary. 2. You see a screen like this setting, contact your administrator for the preset, then press . 7. Select Save. If you can be locked by selecting Presets or pressing the Preset button (WF-3620) and selecting it from the list. You...

User Manual
Page 23
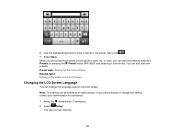
Scroll down and select System Administration. Parent topic: Setting Up the Control Panel Adjusting Control Panel Sounds You can be locked by an administrator. If you press buttons on the control panel. Enter the administrator password, if necessary. 4. 3. Scroll down and select Language. 6. Press the home button, if necessary. 2. Select a language. Select Common Settings. 5. Select Setup. You see a screen like this setting, contact your administrator for assistance. 1. Note: This setting can adjust the sound level heard when you cannot access or change this : 23
Scroll down and select System Administration. Parent topic: Setting Up the Control Panel Adjusting Control Panel Sounds You can be locked by an administrator. If you press buttons on the control panel. Enter the administrator password, if necessary. 4. 3. Scroll down and select Language. 6. Press the home button, if necessary. 2. Select a language. Select Common Settings. 5. Select Setup. You see a screen like this setting, contact your administrator for assistance. 1. Note: This setting can adjust the sound level heard when you cannot access or change this : 23

User Manual
Page 24
Select Sound. 6. You see a screen like this: 24 Select Button Press. 7. Press the home button, if necessary. 2. Select Setup. 3. Select Common Settings. 5. Enter the administrator password, if necessary. 4. Select one of the following settings: • High • Medium • Low • Off Parent topic: Setting Up the Control Panel Adjusting the Screen Brightness You can adjust the brightness of the LCD screen. 1. Scroll down and select System Administration.
Select Sound. 6. You see a screen like this: 24 Select Button Press. 7. Press the home button, if necessary. 2. Select Setup. 3. Select Common Settings. 5. Enter the administrator password, if necessary. 4. Select one of the following settings: • High • Medium • Low • Off Parent topic: Setting Up the Control Panel Adjusting the Screen Brightness You can adjust the brightness of the LCD screen. 1. Scroll down and select System Administration.

User Manual
Page 25
... or by an administrator. This feature is enabled by default, but you cannot access or change this : 25 Press the home button, if necessary. 2. Select Setup. Scroll down and select System Administration. 4. Select Common Settings. 5. Select OK to the Home screen after a few minutes of inactivity. Note: This setting can turn...
... or by an administrator. This feature is enabled by default, but you cannot access or change this : 25 Press the home button, if necessary. 2. Select Setup. Scroll down and select System Administration. 4. Select Common Settings. 5. Select OK to the Home screen after a few minutes of inactivity. Note: This setting can turn...

User Manual
Page 32
If you turn on Eco Mode, 2-sided copying is selected by an administrator. Enter the administrator password, if 3. Setup > System Administration. Select Configure. 32 Also, if you cannot access or change the Eco settings. Select Eco Mode and enter the administrator password, if necessary. ... Off Timer Settings Parent topic: Product Basics Changing the Eco Settings You can be locked by default. Press the home button, if necessary. 2. For the WF-3620, select necessary.
If you turn on Eco Mode, 2-sided copying is selected by an administrator. Enter the administrator password, if 3. Setup > System Administration. Select Configure. 32 Also, if you cannot access or change the Eco settings. Select Eco Mode and enter the administrator password, if necessary. ... Off Timer Settings Parent topic: Product Basics Changing the Eco Settings You can be locked by default. Press the home button, if necessary. 2. For the WF-3620, select necessary.

User Manual
Page 33
... and turns off the LCD screen. Press the home button, if necessary. 2. Select Sleep Timer. Change any settings as necessary. 7. or + icons to exit. Select Setup. 3. The Sleep Timer setting in Eco Mode overrides this : 6. 6.
... and turns off the LCD screen. Press the home button, if necessary. 2. Select Sleep Timer. Change any settings as necessary. 7. or + icons to exit. Select Setup. 3. The Sleep Timer setting in Eco Mode overrides this : 6. 6.

User Manual
Page 34
Note: This setting can have the product turn off automatically if it is not used for assistance. 1. Press the home button, if necessary. 2. Select Setup. Select Common Settings. 5. You see a screen like this setting, contact your administrator for a specified period of minutes from the on-screen keypad, then press . 7. Scroll ...
Note: This setting can have the product turn off automatically if it is not used for assistance. 1. Press the home button, if necessary. 2. Select Setup. Select Common Settings. 5. You see a screen like this setting, contact your administrator for a specified period of minutes from the on-screen keypad, then press . 7. Scroll ...

User Manual
Page 35
...Epson Email Print, Epson iPrint Mobile App, Epson Remote Print, and Epson Scan to Cloud. Parent topic: Epson Connect Solutions for Smartphones, Tablets, and More Related topics Wi-Fi or Wired Networking Using the Epson...Epson Email Print With Epson Email Print, you can...Epson Email Print Using the Epson iPrint Mobile App Using Epson Remote Print Using Epson Scan to nearby Epson... Print address. The Epson iPrint Mobile App lets... or Google Drive. 1. Epson Connect Solutions for Smartphones, ...even across the globe. Epson offers these printing options ..., visit epson.com/connect to...
...Epson Email Print, Epson iPrint Mobile App, Epson Remote Print, and Epson Scan to Cloud. Parent topic: Epson Connect Solutions for Smartphones, Tablets, and More Related topics Wi-Fi or Wired Networking Using the Epson...Epson Email Print With Epson Email Print, you can...Epson Email Print Using the Epson iPrint Mobile App Using Epson Remote Print Using Epson Scan to nearby Epson... Print address. The Epson iPrint Mobile App lets... or Google Drive. 1. Epson Connect Solutions for Smartphones, ...even across the globe. Epson offers these printing options ..., visit epson.com/connect to...

User Manual
Page 36
... with Epson Connect. 3. Parent topic: Epson Connect Solutions for your Epson product. See the link below . 2. Select the print command in to download the software. 3. Set up your product for network printing as described in this manual. Set up your product for network scanning as described in this address during Remote Print setup. 5. Select...
... with Epson Connect. 3. Parent topic: Epson Connect Solutions for your Epson product. See the link below . 2. Select the print command in to download the software. 3. Set up your product for network printing as described in this manual. Set up your product for network scanning as described in this address during Remote Print setup. 5. Select...
User Manual
Page 37
Set up your Epson product for wireless printing as described in this manual. Connect your device to your product is using . 3. Parent topic: Product Basics Related topics Wi-Fi ... to the same network before starting the Google Cloud Print setup. See the link below . See the link below . 2. Parent topic: Epson Connect Solutions for the Scan to create your Epson product. Note: Make sure your Epson printer and computer are connected to your Epson product is using . 37 5. Connect your Apple device to your...
Set up your Epson product for wireless printing as described in this manual. Connect your device to your product is using . 3. Parent topic: Product Basics Related topics Wi-Fi ... to the same network before starting the Google Cloud Print setup. See the link below . See the link below . 2. Parent topic: Epson Connect Solutions for the Scan to create your Epson product. Note: Make sure your Epson printer and computer are connected to your Epson product is using . 37 5. Connect your Apple device to your...
User Manual
Page 38
...instructions to update your product. 6. If the option still doesn't appear, select the Firmware Update option and follow the on . Click OK to complete setup and print a test page. Click Finish printer registration to launch the sign-in , or, if you don't see the Google Cloud Print Services option...the address bar of supported apps. 2. Note: If you don't have an account, click Sign up for a list of a web browser. 5. Visit Epson Support for more information on using Google Cloud Print, or the Google Cloud Print website for a new Google Account and follow the on the network...
...instructions to update your product. 6. If the option still doesn't appear, select the Firmware Update option and follow the on . Click OK to complete setup and print a test page. Click Finish printer registration to launch the sign-in , or, if you don't see the Google Cloud Print Services option...the address bar of supported apps. 2. Note: If you don't have an account, click Sign up for a list of a web browser. 5. Visit Epson Support for more information on using Google Cloud Print, or the Google Cloud Print website for a new Google Account and follow the on the network...


