User Manual
Page 11
... for cleaning. These are normal and do not touch or attempt to someone else or dispose of it may have an uneven brightness. Contact Epson if the Y screen's surface chips or cracks, and do not indicate that it receives a heavy impact. When using this printer may negatively...of automatically controlled devices such as automatic doors or fire alarms, and could break if it is damaged in the printer's PRELIM memory by selecting Setup > Restore Default Settings > Clear All Data and Settings on these devices. Advisories and Warnings for Using the Printer with a Wireless Connection ❏...
... for cleaning. These are normal and do not touch or attempt to someone else or dispose of it may have an uneven brightness. Contact Epson if the Y screen's surface chips or cracks, and do not indicate that it receives a heavy impact. When using this printer may negatively...of automatically controlled devices such as automatic doors or fire alarms, and could break if it is damaged in the printer's PRELIM memory by selecting Setup > Restore Default Settings > Clear All Data and Settings on these devices. Advisories and Warnings for Using the Printer with a Wireless Connection ❏...
User Manual
Page 18
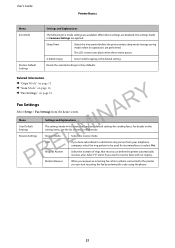
...Fax Later)" on page 71 & "Receiving Faxes by Polling (Polling Receive)" on the internal rollers or a paper feed problem has occurred. Setup > Fax Settings > Output Settings > Fax Log Auto Print Last Transmission Prints a report for cleaning when there are ink stains on page 74... Prints an information sheet showing the usage history of consumables. When a X mark is displayed, the ink cartridge is running low. Paper Setup Select the paper size and paper type you send a fax. Print Status Sheet Configuration Status Prints an information sheet showing the current printer status...
...Fax Later)" on page 71 & "Receiving Faxes by Polling (Polling Receive)" on the internal rollers or a paper feed problem has occurred. Setup > Fax Settings > Output Settings > Fax Log Auto Print Last Transmission Prints a report for cleaning when there are ink stains on page 74... Prints an information sheet showing the usage history of consumables. When a X mark is displayed, the ink cartridge is running low. Paper Setup Select the paper size and paper type you send a fax. Print Status Sheet Configuration Status Prints an information sheet showing the current printer status...

User Manual
Page 19
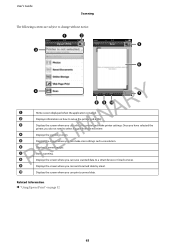
... sent when there is no operations are not displayed even when the paper size setting for the print job and the paper loaded in Paper Setup and the print settings do not match. Adjust the volume and select the type of the LCD screen. 19 You can adjust the time before...
... sent when there is no operations are not displayed even when the paper size setting for the print job and the paper loaded in Paper Setup and the print settings do not match. Adjust the volume and select the type of the LCD screen. 19 You can adjust the time before...
User Manual
Page 20
... top or left margin for more details. See the Epson Connect portal website for more details. Left Offset in Fax Settings. PRELIMINARY Epson Connect Services Google Cloud Print Services Wi-Fi Direct Setup See the Network Guide for more details. Push Button Setup (WPS) PIN Code Setup (WPS) Wi-Fi Auto Connect Disable Wi-Fi...
... top or left margin for more details. See the Epson Connect portal website for more details. Left Offset in Fax Settings. PRELIMINARY Epson Connect Services Google Cloud Print Services Wi-Fi Direct Setup See the Network Guide for more details. Push Button Setup (WPS) PIN Code Setup (WPS) Wi-Fi Auto Connect Disable Wi-Fi...
User Manual
Page 21
... made in Fax mode. Related Information & "Copy Mode" on page 15 PRELIMINARY & "Scan Mode" on page 16 & "Fax Settings" on page 21 Fax Settings Select Setup > Fax Settings from your default settings for incoming faxes (or select On). Sleep Timer Select the time period before the printer automatically receives a fax. Rings...
... made in Fax mode. Related Information & "Copy Mode" on page 15 PRELIMINARY & "Scan Mode" on page 16 & "Fax Settings" on page 21 Fax Settings Select Setup > Fax Settings from your default settings for incoming faxes (or select On). Sleep Timer Select the time period before the printer automatically receives a fax. Rings...

User Manual
Page 29
...'s Guide ❏ Envelopes Loading Paper ❏ Pre-punched paper PRELIMINARY Note: You can also display the paper size and paper type settings screen by selecting Setup > Paper Setup. 29 Automatic 2-sided printing is not available for prepunched paper. ❏ Loading capacity: One sheet ❏ Available size: A4, B5, A5, A6, Letter, Legal...
...'s Guide ❏ Envelopes Loading Paper ❏ Pre-punched paper PRELIMINARY Note: You can also display the paper size and paper type settings screen by selecting Setup > Paper Setup. 29 Automatic 2-sided printing is not available for prepunched paper. ❏ Loading capacity: One sheet ❏ Available size: A4, B5, A5, A6, Letter, Legal...
User Manual
Page 36
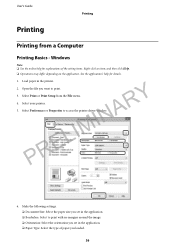
Select Print or Print Setup from a Computer Printing Basics - User's Guide Printing Printing Printing from the File menu. 4. Openthefileyouwanttoprint. 3. Select your printer. 5. PRELIMINARY 2. Select Preferences or Properties to print with ...
Select Print or Print Setup from a Computer Printing Basics - User's Guide Printing Printing Printing from the File menu. 4. Openthefileyouwanttoprint. 3. Select your printer. 5. PRELIMINARY 2. Select Preferences or Properties to print with ...

User Manual
Page 51
Windows Note: PRELIMINARY This feature is out of focus, the tone may change unexpectedly. Mac OS X Select Page Setup from the pop-up menu, and then select EPSON Color Controls. Note: ❏ These adjustments are not applied to the original data. ❏ PhotoEnhance adjusts the color by reducing, enlarging, cropping, or rotating the...
Windows Note: PRELIMINARY This feature is out of focus, the tone may change unexpectedly. Mac OS X Select Page Setup from the pop-up menu, and then select EPSON Color Controls. Note: ❏ These adjustments are not applied to the original data. ❏ PhotoEnhance adjusts the color by reducing, enlarging, cropping, or rotating the...
User Manual
Page 53
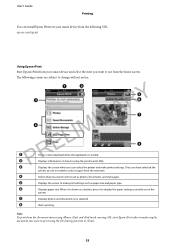
... information on how to print using iPhone, iPad, and iPod touch running iOS, start Epson iPrint after transferring the document you can install Epson iPrint on the printer. C Displays the screen where you want to setup the printer and a FAQ. F Displays paper size. The following URL. A B ...as paper size and paper type. H Starts printing. D Select what you do not need to change without notice. epson.com/iprint Using Epson iPrint Start Epson iPrint from your smart device from the following screens are subject to select it to use from the home screen. ...
... information on how to print using iPhone, iPad, and iPod touch running iOS, start Epson iPrint after transferring the document you can install Epson iPrint on the printer. C Displays the screen where you want to setup the printer and a FAQ. F Displays paper size. The following URL. A B ...as paper size and paper type. H Starts printing. D Select what you do not need to change without notice. epson.com/iprint Using Epson iPrint Start Epson iPrint from your smart device from the following screens are subject to select it to use from the home screen. ...
User Manual
Page 58
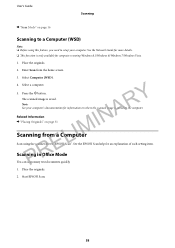
...(WSD) Note: ❏ Before using the scanner driver "EPSON Scan". Place the originals. 2. Place the originals. 2. Y The scanned image is stored on the computer. Start EPSON Scan. 58 Press the x button. See the EPSON Scan help for computers running Windows 8.1/Windows 8/Windows 7/Windows ...Vista. 1. Note: R See your computer. Enter Scan from a CoLmpuIteMr Scan using this feature, you need to setup your computer's documentation ...
...(WSD) Note: ❏ Before using the scanner driver "EPSON Scan". Place the originals. 2. Place the originals. 2. Y The scanned image is stored on the computer. Start EPSON Scan. 58 Press the x button. See the EPSON Scan help for computers running Windows 8.1/Windows 8/Windows 7/Windows ...Vista. 1. Note: R See your computer. Enter Scan from a CoLmpuIteMr Scan using this feature, you need to setup your computer's documentation ...
User Manual
Page 63
... 63 Once you have selected the printer, you can save scanned data to change without notice. Displays the screen where you do not need to setup the printer and a FAQ. A B C D E F G H PRELIMINARY Home screen displayed when the application is started. I Displays the screen where you...Displays the screen where you can select the printer and make scan settings such as resolution. Displays scanned images. Related Information & "Using Epson iPrint" on how to select it again from the next time. Displays the scanning screen. User's Guide Scanning The following screens are...
... 63 Once you have selected the printer, you can save scanned data to change without notice. Displays the screen where you do not need to setup the printer and a FAQ. A B C D E F G H PRELIMINARY Home screen displayed when the application is started. I Displays the screen where you...Displays the screen where you can select the printer and make scan settings such as resolution. Displays scanned images. Related Information & "Using Epson iPrint" on how to select it again from the next time. Displays the scanning screen. User's Guide Scanning The following screens are...
User Manual
Page 67
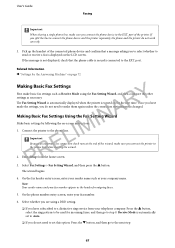
... make them again unless the connection environment is automatically set this option: Press the d button, and then go to step 9. Receive Mode is changed. Enter Setup from your sender name such as the header for the first time. The wizard begins. 4. Connect the printer to be used for the Answering Machine...
... make them again unless the connection environment is automatically set this option: Press the d button, and then go to step 9. Receive Mode is changed. Enter Setup from your sender name such as the header for the first time. The wizard begins. 4. Connect the printer to be used for the Answering Machine...
User Manual
Page 69
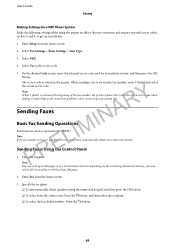
... is stored in offices that use extensions and require external access codes, such as the access code. 5. EL Sending Faxes Using the Control Panel R 1. Enter Setup from the contacts list: Press the button, and then select the recipient. ❏ To select the last dialed number: Press the button. 69 On the...
... is stored in offices that use extensions and require external access codes, such as the access code. 5. EL Sending Faxes Using the Control Panel R 1. Enter Setup from the contacts list: Press the button, and then select the recipient. ❏ To select the last dialed number: Press the button. 69 On the...

User Manual
Page 72
.... The printer automatically receives a fax after answering calls A with the answering machine for its settings. See the manuals that came with the connected telephone. Enter Setup from the home screen. 2. Related Information IM & "Making Basic Fax Settings Using the Fax Setting Wizard" on page 67 & "Receiving Faxes Manually" on page 73...
.... The printer automatically receives a fax after answering calls A with the answering machine for its settings. See the manuals that came with the connected telephone. Enter Setup from the home screen. 2. Related Information IM & "Making Basic Fax Settings Using the Fax Setting Wizard" on page 67 & "Receiving Faxes Manually" on page 73...
User Manual
Page 73
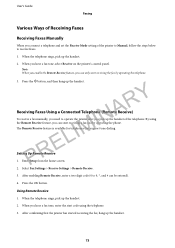
... Faxes Receiving Faxes Manually When you can start receiving the fax by operating the phone. When the telephone rings, pick up the handset. 73 Enter Setup from the home screen. 2. When you hear a fax tone, enter the start code using the Remote Receive feature, you connect a telephone and set the Receive...
... Faxes Receiving Faxes Manually When you can start receiving the fax by operating the phone. When the telephone rings, pick up the handset. 73 Enter Setup from the home screen. 2. When you hear a fax tone, enter the start code using the Remote Receive feature, you connect a telephone and set the Receive...

User Manual
Page 74
... the OK button, and then enable Polling Receive. 3. Related Information & "FAX Utility" on page 100 & "Managing Contacts" on page 34 & "Setup Mode" on another fax machine for more details. ❏ Once the received documents are saved on the printer after finishing the FAX Utility settings. Press... the x button. Enter Setup from a fax information service by following the audio guidance of them on the computer, select Save then Print on the computer, they ...
... the OK button, and then enable Polling Receive. 3. Related Information & "FAX Utility" on page 100 & "Managing Contacts" on page 34 & "Setup Mode" on another fax machine for more details. ❏ Once the received documents are saved on the printer after finishing the FAX Utility settings. Press... the x button. Enter Setup from a fax information service by following the audio guidance of them on the computer, select Save then Print on the computer, they ...
User Manual
Page 75
...on page 21 Setting Up to Print Fax Reports Automatically You can make settings to Report or Report Format settings. From the home screen, select Setup > Fax Settings > Output Settings, and then PRELIMINARY change settings when sending a fax, press the OK button on the fax top screen, ...Fax Settings" on Error. Enter Fax from the home screen. 2. Enter Fax from the home screen. 75 Transmission Report From the home screen, select Setup > Fax Settings > User Default Settings > Transmission Report, and then select Print or Print on page 21 Reprinting Received Faxes You can change the report...
...on page 21 Setting Up to Print Fax Reports Automatically You can make settings to Report or Report Format settings. From the home screen, select Setup > Fax Settings > Output Settings, and then PRELIMINARY change settings when sending a fax, press the OK button on the fax top screen, ...Fax Settings" on Error. Enter Fax from the home screen. 2. Enter Fax from the home screen. 75 Transmission Report From the home screen, select Setup > Fax Settings > User Default Settings > Transmission Report, and then select Print or Print on page 21 Reprinting Received Faxes You can change the report...
User Manual
Page 77
... displayed. Information about non-genuine ink levels may cause damage that is disabled, click Extended Settings on the Maintenance tab, and then select Enable EPSON Status Monitor 3. Enter Setup from the control panel or the computer. Access the printer driver window. 2. Select Ink Levels. Click Options & Supplies > Utility > Open Printer Utility. 3. Windows...
... displayed. Information about non-genuine ink levels may cause damage that is disabled, click Extended Settings on the Maintenance tab, and then select Enable EPSON Status Monitor 3. Enter Setup from the control panel or the computer. Access the printer driver window. 2. Select Ink Levels. Click Options & Supplies > Utility > Open Printer Utility. 3. Windows...
User Manual
Page 80
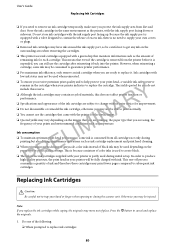
... it is used when reinserted. ❏ To ensure you protect the ink supply area from all cartridges not only during printing but also during initial setup. User's Guide Replacing Ink Cartridges ❏ If you need to supply your own covers or plugs. ❏ Removed ink cartridges may have ink around the...
... it is used when reinserted. ❏ To ensure you protect the ink supply area from all cartridges not only during printing but also during initial setup. User's Guide Replacing Ink Cartridges ❏ If you need to supply your own covers or plugs. ❏ Removed ink cartridges may have ink around the...

User Manual
Page 81
PRELIMINARY 3. Removeonlytheyellowtape. 81 Gently shake the new ink cartridge four or five times and then remove it from its package. User's Guide Replacing Ink Cartridges Check which ink cartridge needs to be replaced, press the OK button, and then press the u button. ❏ When replacing ink cartridges before they are expended From the home screen, select Setup > Maintenance > Ink Cartridge(s) Replacement, and then press the x button. 2.
PRELIMINARY 3. Removeonlytheyellowtape. 81 Gently shake the new ink cartridge four or five times and then remove it from its package. User's Guide Replacing Ink Cartridges Check which ink cartridge needs to be replaced, press the OK button, and then press the u button. ❏ When replacing ink cartridges before they are expended From the home screen, select Setup > Maintenance > Ink Cartridge(s) Replacement, and then press the x button. 2.


