
UB-E03 Users Manual
Page 3
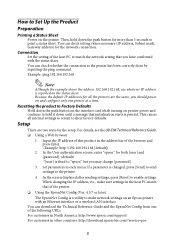
...(IP address, Subnet mask, Gateway address) for the network connection. For details, see the UB-E03 Technical Reference Guide. ❏ Using a Web browser 1. Resetting the UB-E03 to Factory Defaults Hold down the push button on the interface card while turning on printer power and continue to Set Up the UB-E03... make the submission effective on the status sheet. If you change the IP address, etc., you should power on a TM printer with the status sheet. Setup There are the same, you have confirmed with an Ethernet interface and a wireless LAN interface. 3 You must click ...
...(IP address, Subnet mask, Gateway address) for the network connection. For details, see the UB-E03 Technical Reference Guide. ❏ Using a Web browser 1. Resetting the UB-E03 to Factory Defaults Hold down the push button on the interface card while turning on printer power and continue to Set Up the UB-E03... make the submission effective on the status sheet. If you change the IP address, etc., you should power on a TM printer with the status sheet. Setup There are the same, you have confirmed with an Ethernet interface and a wireless LAN interface. 3 You must click ...
UB-E04 Users Manual
Page 7
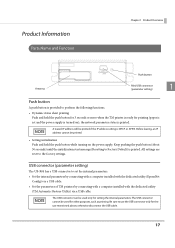
....192.168, use whatever IP address is changed, press [Send] to send settings to enable settings. Resetting the product to Factory Defaults Hold down the push button for more than 3 seconds to "epson" but you may change [password]. 3. You can check setting values necessary (IP address, Subnet mask... have confirmed with an Ethernet interface or a wireless LAN interface. You can check whether the connection to their factory defaults. For customers in North America: http://www.epson.com/support/ For customers in each menu. Connection Set the setting of the browser and press Enter. (Example...
....192.168, use whatever IP address is changed, press [Send] to send settings to enable settings. Resetting the product to Factory Defaults Hold down the push button for more than 3 seconds to "epson" but you may change [password]. 3. You can check setting values necessary (IP address, Subnet mask... have confirmed with an Ethernet interface or a wireless LAN interface. You can check whether the connection to their factory defaults. For customers in North America: http://www.epson.com/support/ For customers in each menu. Connection Set the setting of the browser and press Enter. (Example...
UB-R04 Technical Reference Guide
Page 17
...USB cable. • Set the parameters of TM printers by connecting with a computer installed with the dedicated utility (TM Automatic Restore Utility) via a USB cable. Keep pushing the push button (about 30 seconds) until the initialization start message (Resetting to Factory Default) is printed. The USB connector can... be printed. • Setting initialization Push and hold the push button for 3 seconds or more when the TM printer is ready for other purposes, such as ...
...USB cable. • Set the parameters of TM printers by connecting with a computer installed with the dedicated utility (TM Automatic Restore Utility) via a USB cable. Keep pushing the push button (about 30 seconds) until the initialization start message (Resetting to Factory Default) is printed. The USB connector can... be printed. • Setting initialization Push and hold the push button for 3 seconds or more when the TM printer is ready for other purposes, such as ...
UB-R04 Users Manual
Page 2
...SSID, Network mode, IP address, Subnet mask, Gateway address) for the network connection. • Factory Default Settings The table below shows the UB-R04 default settings. The printer prints the parameters for.... 2 Then hold down the push button on the printer. See the manual for each TM printer for pin 31 to match the network setting that has this interface board, the interface... *) SimpleAP is supported if Soft Version is available only for more than 3 seconds. Set the reset signal for details. Note: Connect the USB cable only when setting. USB connection is 1.10 or...
...SSID, Network mode, IP address, Subnet mask, Gateway address) for the network connection. • Factory Default Settings The table below shows the UB-R04 default settings. The printer prints the parameters for.... 2 Then hold down the push button on the printer. See the manual for each TM printer for pin 31 to match the network setting that has this interface board, the interface... *) SimpleAP is supported if Soft Version is available only for more than 3 seconds. Set the reset signal for details. Note: Connect the USB cable only when setting. USB connection is 1.10 or...
UB-R04 Users Manual
Page 3
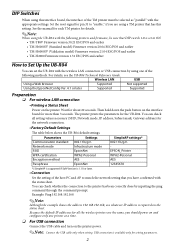
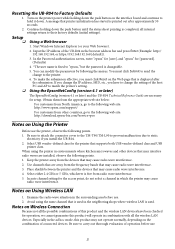
.... 6. A message that may cause radio wave interference. 2. Especially in which the printer may cause radio wave interference. 3. You must click Reset on the interface board and continue to match the printer's setting. ❏ Using the EpsonNetConfig (version 4.1 or later) The EpsonNetConfig (version .../TM-L90 to prevent malfunction due to Factory Defaults 1. Select either 2.4 GHz or 5 GHz, whichever is used in environments where kitchen microwaves and other countries, go to the following web site: http://download.epson-biz.com/?service=pos Notes on Using the Printer...
.... 6. A message that may cause radio wave interference. 2. Especially in which the printer may cause radio wave interference. 3. You must click Reset on the interface board and continue to match the printer's setting. ❏ Using the EpsonNetConfig (version 4.1 or later) The EpsonNetConfig (version .../TM-L90 to prevent malfunction due to Factory Defaults 1. Select either 2.4 GHz or 5 GHz, whichever is used in environments where kitchen microwaves and other countries, go to the following web site: http://download.epson-biz.com/?service=pos Notes on Using the Printer...
TM-T88IV Technical Reference Guide
Page 37
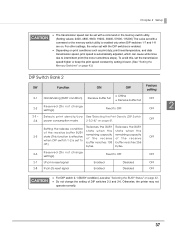
... print speed constant by setting it lower. (See "Setting the Memory Switches" on page 43.) DIP Switch Bank 2 SW Function ON OFF Factory setting • Offline 2-1 Handshaking (BUSY condition) Receive buffer full OFF • Receive buffer full Reserved (Do not change the setting of... 1-7 and 1-8 are on page 42. • Do not change 2-2 settings) Fixed to OFF OFF settings) 2-7 I/F pin 6 reset signal Enabled Disabled OFF 2-8 IF pin 25 reset signal Enabled Disabled OFF • For DIP switch 2-1 (BUSY condition), see also "Selecting the BUSY Status" on . Otherwise, the ...
... print speed constant by setting it lower. (See "Setting the Memory Switches" on page 43.) DIP Switch Bank 2 SW Function ON OFF Factory setting • Offline 2-1 Handshaking (BUSY condition) Receive buffer full OFF • Receive buffer full Reserved (Do not change the setting of... 1-7 and 1-8 are on page 42. • Do not change 2-2 settings) Fixed to OFF OFF settings) 2-7 I/F pin 6 reset signal Enabled Disabled OFF 2-8 IF pin 25 reset signal Enabled Disabled OFF • For DIP switch 2-1 (BUSY condition), see also "Selecting the BUSY Status" on . Otherwise, the ...

TM-T88IV Technical Reference Guide
Page 38
Reserved (Do not change settings) Fixed to OFF IF pin 31 reset signal (Do not change setting) Fixed to ON Factory setting OFF OFF OFF OFF OFF ON 38 OFF DIP switch bank 2 SW 2-1 2-2 2-3 ∼ 2-4 2-5 2-6 ∼ 2-7 2-8 Function ON OFF Handshaking (BUSY condition) Receive buffer full •... Undefined ON Always enabled 45 bytes Disabled Disabled - OFF Always disabled 4 KB Roll paper end sensor enabled, roll paper near-end sensor enabled Enabled Factory setting OFF OFF OFF OFF - e n d s i g n a l s (default value of the receive buffer reaches 256 bytes.
Reserved (Do not change settings) Fixed to OFF IF pin 31 reset signal (Do not change setting) Fixed to ON Factory setting OFF OFF OFF OFF OFF ON 38 OFF DIP switch bank 2 SW 2-1 2-2 2-3 ∼ 2-4 2-5 2-6 ∼ 2-7 2-8 Function ON OFF Handshaking (BUSY condition) Receive buffer full •... Undefined ON Always enabled 45 bytes Disabled Disabled - OFF Always disabled 4 KB Roll paper end sensor enabled, roll paper near-end sensor enabled Enabled Factory setting OFF OFF OFF OFF - e n d s i g n a l s (default value of the receive buffer reaches 256 bytes.

