Product Information Guide
Page 9
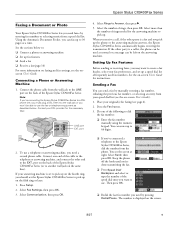
...You see the screen at a time. The number is set to pick up to the EXT. Epson Stylus CX9400Fax Series Faxing a Document or Photo Your Epson Stylus CX9400Fax Series lets you send faxes by manually entering a fax number, redialing the previous fax number, or selecting an entry from your speed dial... pressing Redial/Pause. Connect one of the Epson Stylus CX9400Fax Series (or to dial the fax number: ❏ Enter the fax number manually using the numeric keypad. port on -screen User's Guide for the answering machine to the Epson Stylus CX9400Fax Series, dial the number from the phone....
...You see the screen at a time. The number is set to pick up to the EXT. Epson Stylus CX9400Fax Series Faxing a Document or Photo Your Epson Stylus CX9400Fax Series lets you send faxes by manually entering a fax number, redialing the previous fax number, or selecting an entry from your speed dial... pressing Redial/Pause. Connect one of the Epson Stylus CX9400Fax Series (or to dial the fax number: ❏ Enter the fax number manually using the numeric keypad. port on -screen User's Guide for the answering machine to the Epson Stylus CX9400Fax Series, dial the number from the phone....
Product Information Guide
Page 10
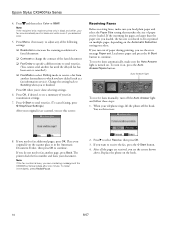
... you need to fax another fax machine to change the contrast of paper you have dialed (such as a fax information service). Epson Stylus CX9400Fax Series 4. Press and then select Color or B&W. Note: If the recipient's fax machine prints only in black and white, your telephone rings, lift the phone off ...document ❏ Contrast to which you 've loaded. If you want to select Receive, then press OK. 3. Auto Answer light To receive faxes manually, turn it on . When your fax is turned on , press the Auto Answer/Space button. The printer dials the fax number and faxes your...
... you need to fax another fax machine to change the contrast of paper you have dialed (such as a fax information service). Epson Stylus CX9400Fax Series 4. Press and then select Color or B&W. Note: If the recipient's fax machine prints only in black and white, your telephone rings, lift the phone off ...document ❏ Contrast to which you 've loaded. If you want to select Receive, then press OK. 3. Auto Answer light To receive faxes manually, turn it on . When your fax is turned on , press the Auto Answer/Space button. The printer dials the fax number and faxes your...
Product Information Guide
Page 12
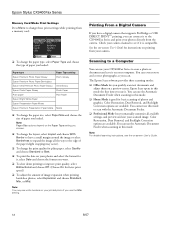
...borders on your printed photo if you use this mode to scan with the Automatic Document Feeder. ❏ Professional Mode lets you manually customize all the way to the edge of the paper (slight cropping may occur). ❏ To change the print quality for plain... improve print quality, select Bidirectional and choose Off. (Choose On for basic scanning of paper you loaded. Color Restoration, Dust Removal, and Backlight Correction options are available. Epson Stylus CX9400Fax Series Memory Card Mode Print Settings Press Menu to change these print settings while printing from a memory card:...
...borders on your printed photo if you use this mode to scan with the Automatic Document Feeder. ❏ Professional Mode lets you manually customize all the way to the edge of the paper (slight cropping may occur). ❏ To change the print quality for plain... improve print quality, select Bidirectional and choose Off. (Choose On for basic scanning of paper you loaded. Color Restoration, Dust Removal, and Backlight Correction options are available. Epson Stylus CX9400Fax Series Memory Card Mode Print Settings Press Menu to change these print settings while printing from a memory card:...

Product Information Guide
Page 16
...Guide (English/French) 16 8/07 CPD-24115R1 CPD-24114 CPD-24159 CPD-23925R1 Epson Stylus CX9400Fax Series Start Here (English/French) Epson Stylus CX9400Fax Series Quick Guide (English) Epson Stylus CX9400Fax Series Quick Guide (French) Epson Stylus CX9400Fax Series CD-ROM with a soft, non-abrasive microfiber-type cloth. 9. Then...the connected cables. 3. If necessary, enter the number of manuals varies by location. Leave the ink cartridges installed to prevent damage. 10. Fasten the ink cartridge holder to clean the CX9400Fax Series or you should clean it . Clean the LCD screen ...
...Guide (English/French) 16 8/07 CPD-24115R1 CPD-24114 CPD-24159 CPD-23925R1 Epson Stylus CX9400Fax Series Start Here (English/French) Epson Stylus CX9400Fax Series Quick Guide (English) Epson Stylus CX9400Fax Series Quick Guide (French) Epson Stylus CX9400Fax Series CD-ROM with a soft, non-abrasive microfiber-type cloth. 9. Then...the connected cables. 3. If necessary, enter the number of manuals varies by location. Leave the ink cartridges installed to prevent damage. 10. Fasten the ink cartridge holder to clean the CX9400Fax Series or you should clean it . Clean the LCD screen ...
Quick Reference Guide
Page 19
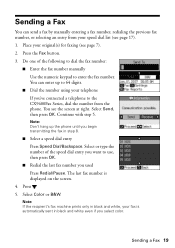
... the Fax button. 3. Note: Don't hang up to 64 digits. ■ Dial the number using your telephone If you've connected a telephone to the CX9400Fax Series, dial the number from your speed dial list (see page 17). 1. Do one of the speed dial entry you want to use, then press ... to enter the fax number. Sending a Fax 19 The last fax number is automatically sent in black and white even if you select color. You can send a fax by manually entering a fax number, redialing the previous fax number, or selecting an entry from the phone. Sending a Fax You can enter up the...
... the Fax button. 3. Note: Don't hang up to 64 digits. ■ Dial the number using your telephone If you've connected a telephone to the CX9400Fax Series, dial the number from your speed dial list (see page 17). 1. Do one of the speed dial entry you want to use, then press ... to enter the fax number. Sending a Fax 19 The last fax number is automatically sent in black and white even if you select color. You can send a fax by manually entering a fax number, redialing the previous fax number, or selecting an entry from the phone. Sending a Fax You can enter up the...

Quick Reference Guide
Page 21
... than the paper size you loaded, the fax size is turned on the hook. Replace the phone on . Auto Answer light To receive faxes manually, turn it on page 16). To receive faxes automatically, make sure you load plain paper and select the Paper Size setting that matches the size... fit or printed on multiple pages, depending on the Automatic Reduction setting you select (see page 16). If you run out of rings before the CX9400Fax Series answers, see this screen: 2. If you see the error message Paper out. Receiving Faxes Before receiving faxes, make sure the Auto Answer light ...
... than the paper size you loaded, the fax size is turned on the hook. Replace the phone on . Auto Answer light To receive faxes manually, turn it on page 16). To receive faxes automatically, make sure you load plain paper and select the Paper Size setting that matches the size... fit or printed on multiple pages, depending on the Automatic Reduction setting you select (see page 16). If you run out of rings before the CX9400Fax Series answers, see this screen: 2. If you see the error message Paper out. Receiving Faxes Before receiving faxes, make sure the Auto Answer light ...
Start Here Book (with wireless print server)
Page 12
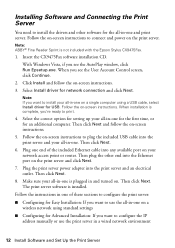
... for network connection and click Next. Note: ABBY® Fine Reader Sprint is installed. The print server software is not included with the Epson Stylus CX9475Fax. 1. Then click Next. 6. Follow the instructions in a wired network environment 12 Install Software and Set Up the Print Server With Windows... Vista, if you want to configure the IP address manually or use the all -in-one end of these sections to configure the print server: ■ Configuring for USB. Installing Software and...
... for network connection and click Next. Note: ABBY® Fine Reader Sprint is installed. The print server software is not included with the Epson Stylus CX9475Fax. 1. Then click Next. 6. Follow the instructions in a wired network environment 12 Install Software and Set Up the Print Server With Windows... Vista, if you want to configure the IP address manually or use the all -in-one end of these sections to configure the print server: ■ Configuring for USB. Installing Software and...
Start Here Book (with wireless print server)
Page 14
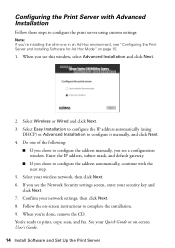
Select Wireless or Wired and click Next. 3. Follow the on page 15. 1. You're ready to configure the address manually, you 're done, remove the CD. Configuring the Print Server with the next step. 5. Select your network settings, then click Next. 8. When you see ... Set Up the Print Server When you see "Configuring the Print Server and Installing Software for Ad Hoc Mode" on -screen instructions to configure it manually, and click Next. 4. Select Easy Installation to configure the IP address automatically (using custom settings: Note: If you're installing the all-in an...
Select Wireless or Wired and click Next. 3. Follow the on page 15. 1. You're ready to configure the address manually, you 're done, remove the CD. Configuring the Print Server with the next step. 5. Select your network settings, then click Next. 8. When you see ... Set Up the Print Server When you see "Configuring the Print Server and Installing Software for Ad Hoc Mode" on -screen instructions to configure it manually, and click Next. 4. Select Easy Installation to configure the IP address automatically (using custom settings: Note: If you're installing the all-in an...

Start Here Book (with wireless print server)
Page 21
Epson and Epson Stylus are registered trademarks, and Epson Exceed Your Vision is a trademark of this manual are for identification purposes only and may be trademarks of their respective owners. Epson disclaims any and all rights in those marks. The contents of Seiko Epson Corporation. General Notice: Other product names used herein are subject to change without notice. © 2008 Epson America, Inc. 1/08
Epson and Epson Stylus are registered trademarks, and Epson Exceed Your Vision is a trademark of this manual are for identification purposes only and may be trademarks of their respective owners. Epson disclaims any and all rights in those marks. The contents of Seiko Epson Corporation. General Notice: Other product names used herein are subject to change without notice. © 2008 Epson America, Inc. 1/08


