
Technical Brief (Ink Jet Printers)
Page 2
...: • Different ink droplet sizes can produce a number of print head nozzles Page 2 Gradations and blends become smoother as resolution and droplet control are used in photos and laser sharp text. Small ink droplet size: Most Epson printers produce ink droplets so small you cannot see them with high resolutions to precisely print crisp details in dense coverage areas allowing Epson to have fast print speeds without having...
...: • Different ink droplet sizes can produce a number of print head nozzles Page 2 Gradations and blends become smoother as resolution and droplet control are used in photos and laser sharp text. Small ink droplet size: Most Epson printers produce ink droplets so small you cannot see them with high resolutions to precisely print crisp details in dense coverage areas allowing Epson to have fast print speeds without having...

Technical Brief (Ink Jet Printers)
Page 3
...; Epson ink jet papers are present and used, the best possibly print quality is achieved. • The Epson printer driver optimizes ink density based on the resolution and type of documents and the occasional photo, is an amateur photographer looking to primarily print photos with stellar image quality and durability, or is most efficient pattern for the job. Epson Papers: In general, Epson printers will deliver their respective owners. Epson...
...; Epson ink jet papers are present and used, the best possibly print quality is achieved. • The Epson printer driver optimizes ink density based on the resolution and type of documents and the occasional photo, is an amateur photographer looking to primarily print photos with stellar image quality and durability, or is most efficient pattern for the job. Epson Papers: In general, Epson printers will deliver their respective owners. Epson...
Product Information Guide
Page 1
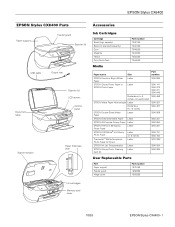
EPSON Stylus CX6400 EPSON Stylus CX6400 Parts Paper support Feeder guard Scanner lid USB cable Output tray Document table Scanner lid LCD screen Control panel Scanner section Paper thickness lever Accessories Ink Cartridges Cartridge Black (high capacity) Black ink (standard capacity) Cyan Magenta Yellow Color Multi-Pack Part number T043120 T044120 T044220 T044320 T044420 T044520 Media Paper name EPSON Premium Bright White Paper EPSON Glossy Photo Paper or EPSON Photo Paper Size Letter Letter Borderless 4 × 6 inches, non-perforated EPSON Matte Paper Heavyweight Letter ...
EPSON Stylus CX6400 EPSON Stylus CX6400 Parts Paper support Feeder guard Scanner lid USB cable Output tray Document table Scanner lid LCD screen Control panel Scanner section Paper thickness lever Accessories Ink Cartridges Cartridge Black (high capacity) Black ink (standard capacity) Cyan Magenta Yellow Color Multi-Pack Part number T043120 T044120 T044220 T044320 T044420 T044520 Media Paper name EPSON Premium Bright White Paper EPSON Glossy Photo Paper or EPSON Photo Paper Size Letter Letter Borderless 4 × 6 inches, non-perforated EPSON Matte Paper Heavyweight Letter ...
Product Information Guide
Page 2
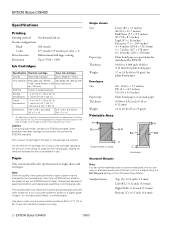
... (3.0 mm) Right (B-R): 0.12 inch (3.0 mm) Bottom (C): 0.12 inch (3.0 mm) 2 - The actual print capacity may cause damage to 60% RH (relative humidity). EPSON Stylus CX6400 Specifications Printing Printing method On-demand ink jet Nozzle configuration Black 180 nozzles Color 177 nozzles (59 nozzles per color × 3) Print direction Bidirectional with 0.06 inch (1.5 mm) margins using the Min Margins setting on the LCD panel (Copy Mode). Do not refill the ink cartridge.
... (3.0 mm) Right (B-R): 0.12 inch (3.0 mm) Bottom (C): 0.12 inch (3.0 mm) 2 - The actual print capacity may cause damage to 60% RH (relative humidity). EPSON Stylus CX6400 Specifications Printing Printing method On-demand ink jet Nozzle configuration Black 180 nozzles Color 177 nozzles (59 nozzles per color × 3) Print direction Bidirectional with 0.06 inch (1.5 mm) margins using the Min Margins setting on the LCD panel (Copy Mode). Do not refill the ink cartridge.
Product Information Guide
Page 3
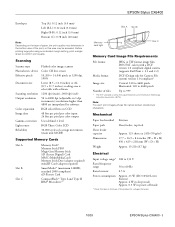
... Digital) Card MMC (MultiMediaCard) Memory Stick Duo (adapter required) miniSD Card (adapter required) SmartMedia™ (maximum 128MB; Mechanical Paper feed method Paper path Sheet feeder capacity Dimensions Weight Friction Sheet feeder, top feed Approx. 125 sheets at 1200 dpi, 100% Letter (8.5 × 11.0 inches) or A4 (8.5 × 11.7 inches); Scanning Scanner type Photoelectric device Effective pixels Document size Scanning resolution Output resolution Color separation Image data Gamma correction Light source Reliability Flatbed color image scanner Color CIS line sensor...
... Digital) Card MMC (MultiMediaCard) Memory Stick Duo (adapter required) miniSD Card (adapter required) SmartMedia™ (maximum 128MB; Mechanical Paper feed method Paper path Sheet feeder capacity Dimensions Weight Friction Sheet feeder, top feed Approx. 125 sheets at 1200 dpi, 100% Letter (8.5 × 11.0 inches) or A4 (8.5 × 11.7 inches); Scanning Scanner type Photoelectric device Effective pixels Document size Scanning resolution Output resolution Color separation Image data Gamma correction Light source Reliability Flatbed color image scanner Color CIS line sensor...

Product Information Guide
Page 4
... entering the PIN unless you see the Software Installation screen, click Exit. Make sure the CX6400 is connected to display Security Lock on the LCD screen. 2. Open the SecurityLock Tool folder on the LCD screen). 9. Macintosh:® The EPSON folder automatically opens (if it without condensation) Operation 20 to 80% RH Storage* 5 to 85% RH * Stored in shipping container Interface Standard Bit rate Data encoding Connector Recommended cable...
... entering the PIN unless you see the Software Installation screen, click Exit. Make sure the CX6400 is connected to display Security Lock on the LCD screen. 2. Open the SecurityLock Tool folder on the LCD screen). 9. Macintosh:® The EPSON folder automatically opens (if it without condensation) Operation 20 to 80% RH Storage* 5 to 85% RH * Stored in shipping container Interface Standard Bit rate Data encoding Connector Recommended cable...
Product Information Guide
Page 5
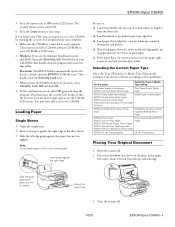
... full access to exit setup. Open the scanner lid. 2. Press the button next to the CX6400 by running the security lock program from the top and side edge. If you forget your PIN, you see the Software Installation screen, click Exit. Make sure the CX6400 is now turned off. 6. The security feature is connected to these guidelines: For this paper Select this Type or Media Type setting Plain paper sheets or envelopes EPSON...
... full access to exit setup. Open the scanner lid. 2. Press the button next to the CX6400 by running the security lock program from the top and side edge. If you forget your PIN, you see the Software Installation screen, click Exit. Make sure the CX6400 is now turned off. 6. The security feature is connected to these guidelines: For this paper Select this Type or Media Type setting Plain paper sheets or envelopes EPSON...
Product Information Guide
Page 6
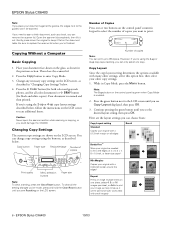
... control panel's numeric keypad to scan a thick document, such as described in "Changing Copy Settings" below. 4. Then close the scanner lid. 2. To clear all color documents) or x B&W button (for black and white copies). Press the green button next to 99 copies. Be sure to replace the scanner lid when you 're using the 2-up or 4-up copy layout setting, you see Resetting on one copy. Glossy 100% Photo 01 LTR Number of copies Print quality Menu selection buttons Paper size Note: To clear a setting...
... control panel's numeric keypad to scan a thick document, such as described in "Changing Copy Settings" below. 4. Then close the scanner lid. 2. To clear all color documents) or x B&W button (for black and white copies). Press the green button next to 99 copies. Be sure to replace the scanner lid when you 're using the 2-up or 4-up copy layout setting, you see Resetting on one copy. Glossy 100% Photo 01 LTR Number of copies Print quality Menu selection buttons Paper size Note: To clear a setting...
Product Information Guide
Page 8
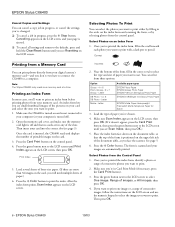
... photos from the control panel. Note: The Stylus CX6400 only reads one image or a range of the form is turned on the card. 3. Open the memory card cover, and make sure the memory card light is off ). 2. Then insert your images are in Card Print Mode (if necessary, press the Card Print button). 3. Load several sheets of the slots. After the index form prints, Scan Index appears on the card, you want to print. Select Photos on the LCD screen and use...
... photos from the control panel. Note: The Stylus CX6400 only reads one image or a range of the form is turned on the card. 3. Open the memory card cover, and make sure the memory card light is off ). 2. Then insert your images are in Card Print Mode (if necessary, press the Card Print button). 3. Load several sheets of the slots. After the index form prints, Scan Index appears on the card, you want to print. Select Photos on the LCD screen and use...

Product Information Guide
Page 9
.... EPSON Stylus CX6400 5. Note: The number of print settings available in Card Print Mode, see the Quick Reference. Press the Card Print button to EPSON's photosharing web site. Select EPSON Smart Panel, and then select the Always use this action box. EPSON Smart Panel launches. Use the numeric keypad to enter the number of paper you want to print (up to editable text files on it with 3 photos printed on your computer asking you install your own fax software, scans your image or document...
.... EPSON Stylus CX6400 5. Note: The number of print settings available in Card Print Mode, see the Quick Reference. Press the Card Print button to EPSON's photosharing web site. Select EPSON Smart Panel, and then select the Always use this action box. EPSON Smart Panel launches. Use the numeric keypad to enter the number of paper you want to print (up to editable text files on it with 3 photos printed on your computer asking you install your own fax software, scans your image or document...
Product Information Guide
Page 10
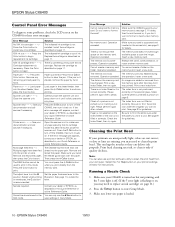
... to print. Error Message Solution Cannot recognize the memory card. Make sure the CX6400 supports your card is loaded. 10 - Operation canceled. Insert a new card. Operation canceled. Print a new Index Sheet, then try again. There is not right. Please perform again after a check. See page 8 for guidelines. Note: You can also use . or Help button on . Press the Setup button to print. Paper jam - - - > Press the Color button. Paper out - - - > Load paper into the printer at once. Multi-page feed error - > Multiple pages have enough available space to turn...
... to print. Error Message Solution Cannot recognize the memory card. Make sure the CX6400 supports your card is loaded. 10 - Operation canceled. Insert a new card. Operation canceled. Print a new Index Sheet, then try again. There is not right. Please perform again after a check. See page 8 for guidelines. Note: You can also use . or Help button on . Press the Setup button to print. Paper jam - - - > Press the Color button. Paper out - - - > Load paper into the printer at once. Multi-page feed error - > Multiple pages have enough available space to turn...
Product Information Guide
Page 11
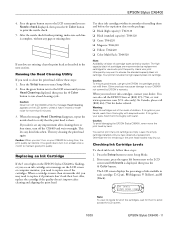
... EPSON Stylus CX6400 - 11 If you don't see Nozzle check displayed, then press the x Color button to your dealer. Caution: When you may cause damage to print the nozzle check. 5. Users who print frequently. Checking Ink Cartridge Levels To check ink levels, follow these steps: 1. Ink levels C:50% M:50% Y:50% Note: To view ink levels for all of black ink cartridge types varies by location. The high capacity black ink cartridges are missing, clean the print head as replacement cartridges...
... EPSON Stylus CX6400 - 11 If you don't see Nozzle check displayed, then press the x Color button to your dealer. Caution: When you may cause damage to print the nozzle check. 5. Users who print frequently. Checking Ink Cartridge Levels To check ink levels, follow these steps: 1. Ink levels C:50% M:50% Y:50% Note: To view ink levels for all of black ink cartridge types varies by location. The high capacity black ink cartridges are missing, clean the print head as replacement cartridges...

Product Support Bulletin
Page 4
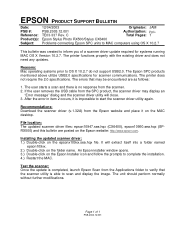
... be deleted. EPSON PRODUCT SUPPORT BULLETIN Date: PSB #: Reference: Product(s): Subject: 2/2/2004 Originator: PSB.2004.02.006 Authorization: TE03-502 Rev. With the multi-function device turned on and connected to complete the installation. 4.) Restart the MAC. An Epson installer window opens. 3.) Double-click on the scanner's flatbed. Action: Download the Epson Scan scanner driver package (epson11004.sea.hqx for your model. Installing the updated scanner driver: 1.) Double-click on the MAC desktop. A Total Pages: Epson Stylus Photo RX500, Stylus CX6400 Epson Scan Driver...
... be deleted. EPSON PRODUCT SUPPORT BULLETIN Date: PSB #: Reference: Product(s): Subject: 2/2/2004 Originator: PSB.2004.02.006 Authorization: TE03-502 Rev. With the multi-function device turned on and connected to complete the installation. 4.) Restart the MAC. An Epson installer window opens. 3.) Double-click on the scanner's flatbed. Action: Download the Epson Scan scanner driver package (epson11004.sea.hqx for your model. Installing the updated scanner driver: 1.) Double-click on the MAC desktop. A Total Pages: Epson Stylus Photo RX500, Stylus CX6400 Epson Scan Driver...
Product Support Bulletin
Page 7
... user removes the USB cable from the scanner. 2. Installing the updated scanner driver: 1.) Double-click on the Epson website: http://www.epson.com. C Total Pages: 1 Epson Stylus Photo RX500/Stylus CX6400 Problems connecting Epson SPC units to MAC computers using OS X 10.2.7 This bulletin was created to start the scanner driver utility again. Test the scanner: Once the update is completed, launch Epson Scan from the Applications folder to verify that may display an "Error message" dialog and the scanner driver utility will extract itself into a folder named epson109xx. 2.) Double...
... user removes the USB cable from the scanner. 2. Installing the updated scanner driver: 1.) Double-click on the Epson website: http://www.epson.com. C Total Pages: 1 Epson Stylus Photo RX500/Stylus CX6400 Problems connecting Epson SPC units to MAC computers using OS X 10.2.7 This bulletin was created to start the scanner driver utility again. Test the scanner: Once the update is completed, launch Epson Scan from the Applications folder to verify that may display an "Error message" dialog and the scanner driver utility will extract itself into a folder named epson109xx. 2.) Double...

Quick Reference Guide
Page 9
... buttons to OK. On the control panel, press the Setup button, then use the Select buttons to Off (shown on the LCD screen. Press the button next to display Security Lock on the LCD screen). 4. The security feature is now turned off (so that folder. If you forget your PIN code, you see the Software Installation screen, click Exit. Press the Color button. 3. Windows: If you can regain access to the CX6400...
... buttons to OK. On the control panel, press the Setup button, then use the Select buttons to Off (shown on the LCD screen. Press the button next to display Security Lock on the LCD screen). 4. The security feature is now turned off (so that folder. If you forget your PIN code, you see the Software Installation screen, click Exit. Press the Color button. 3. Windows: If you can regain access to the CX6400...

Quick Reference Guide
Page 15
... Reset button for 3 seconds until you want to clear the current copy settings and return the CX6400 to scan additional sheets. If you see "Copy Layout" on page 18), follow the instructions on the LCD screen. Close the scanner lid. 4. You can save the current copy settings (except for the number of copies) by pressing the Save button for 3 seconds. Press the Copy button to make color copies) or B&W Copy button (to enter Copy Mode. 5. Copy Mode button Paper type Reduce/enlarge Number of copies Print quality Menu selection buttons Paper size...
... Reset button for 3 seconds until you want to clear the current copy settings and return the CX6400 to scan additional sheets. If you see "Copy Layout" on page 18), follow the instructions on the LCD screen. Close the scanner lid. 4. You can save the current copy settings (except for the number of copies) by pressing the Save button for 3 seconds. Press the Copy button to make color copies) or B&W Copy button (to enter Copy Mode. 5. Copy Mode button Paper type Reduce/enlarge Number of copies Print quality Menu selection buttons Paper size...

Quick Reference Guide
Page 19
... Optional Zoom displayed, then press OK. 3. Changing Copy Settings 19 Press the Menu button. 2. Manual Zoom You can paste together to the LCD screen until you see Copy Density displayed, then press OK. 3. Press the green button next to make your copies, then press OK. Use the number keypad to - Copy Layout Poster Prints the original image on separate sheets (4, 9, or 16) that you can manually adjust the size of the page, use the Copy Density menu...
... Optional Zoom displayed, then press OK. 3. Changing Copy Settings 19 Press the Menu button. 2. Manual Zoom You can paste together to the LCD screen until you see Copy Density displayed, then press OK. 3. Press the green button next to make your copies, then press OK. Use the number keypad to - Copy Layout Poster Prints the original image on separate sheets (4, 9, or 16) that you can manually adjust the size of the page, use the Copy Density menu...
Quick Reference Guide
Page 41
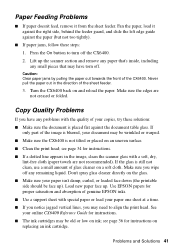
... image is blurred, your document may be face up). Use EPSON papers for instructions. ■ The ink cartridges may be wrinkled or warped. ■ Make sure the CX6400 is still not clean, use a small amount of the sheet feeder. 3. Caution: Clear paper jams by pulling the paper out towards the front of your paper one sheet at a time. ■ If you notice jagged vertical lines, you have torn off. Turn the CX6400 back on replacing...
... image is blurred, your document may be face up). Use EPSON papers for instructions. ■ The ink cartridges may be wrinkled or warped. ■ Make sure the CX6400 is still not clean, use a small amount of the sheet feeder. 3. Caution: Clear paper jams by pulling the paper out towards the front of your paper one sheet at a time. ■ If you notice jagged vertical lines, you have torn off. Turn the CX6400 back on replacing...
Quick Reference Guide
Page 46
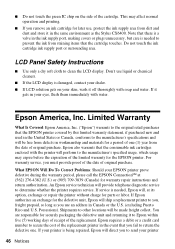
... consumable ink cartridges enclosed with water. For warranty service, you to Epson within five (5) working days of receipt of original purchase. An Epson service technician will be free from the date of the replacement. LCD Panel Safety Instructions ■ Use only a dry soft cloth to determine whether the printer requires service. If Epson authorizes an exchange for warranty repair instructions and return authorization. Don't use an address in the ink supply port, making covers...
... consumable ink cartridges enclosed with water. For warranty service, you to Epson within five (5) working days of receipt of original purchase. An Epson service technician will be free from the date of the replacement. LCD Panel Safety Instructions ■ Use only a dry soft cloth to determine whether the printer requires service. If Epson authorizes an exchange for warranty repair instructions and return authorization. Don't use an address in the ink supply port, making covers...
Start Here Card
Page 7
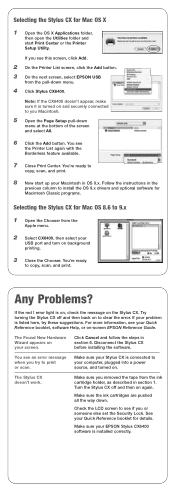
... Printer List screen, click the Add button. 3 On the next screen, select EPSON USB from the pull-down menu. 4 Click Stylus CX6400. Make sure your Stylus CX is connected to your problem is on, check the message on again. See your screen. error light is listed here, try to see the Printer List again with the Borderless feature available. 7 Close Print Center. The Stylus CX doesn't work. Check the LCD screen to print or scan. You see if you Macintosh. 5 Open the Page Setup...
... Printer List screen, click the Add button. 3 On the next screen, select EPSON USB from the pull-down menu. 4 Click Stylus CX6400. Make sure your Stylus CX is connected to your problem is on, check the message on again. See your screen. error light is listed here, try to see the Printer List again with the Borderless feature available. 7 Close Print Center. The Stylus CX doesn't work. Check the LCD screen to print or scan. You see if you Macintosh. 5 Open the Page Setup...


