
Owners Manual
Page 3
... Off Your Computer 9 After Working Inside Your Computer 9 2 Battery...11 Removing The Battery...11 Installing The Battery...12 3 Memory Card 13 Removing The Memory Card 13 Installing The Memory Card 14 4 Subscriber Identity Module (SIM) Card 15 Removing The Phone Subscriber Identity Module (SIM... 15 Installing The Phone Subscriber Identity Module (SIM 16 5 Access Panel 17 Removing The Access Panel 17 Installing The Access Panel 18 6 Memory...19 Removing The Memory Module 19 Installing The Memory Module 20 7 Optical Drive 21 Removing The...
... Off Your Computer 9 After Working Inside Your Computer 9 2 Battery...11 Removing The Battery...11 Installing The Battery...12 3 Memory Card 13 Removing The Memory Card 13 Installing The Memory Card 14 4 Subscriber Identity Module (SIM) Card 15 Removing The Phone Subscriber Identity Module (SIM... 15 Installing The Phone Subscriber Identity Module (SIM 16 5 Access Panel 17 Removing The Access Panel 17 Installing The Access Panel 18 6 Memory...19 Removing The Memory Module 19 Installing The Memory Module 20 7 Optical Drive 21 Removing The...

Owners Manual
Page 14
Installing The Memory Card 1. Follow the procedures in After Working Inside Your Computer. 14 Push the memory card into its slot until it clicks into place. 2.
Installing The Memory Card 1. Follow the procedures in After Working Inside Your Computer. 14 Push the memory card into its slot until it clicks into place. 2.

Owners Manual
Page 20
Insert the memory module into the memory socket. 2. Install the battery. 5. Press the clips to secure the memory module to the system board. 3. Follow the procedures in After Working Inside Your Computer. 20 Installing The Memory Module 1. Install the access panel. 4.
Insert the memory module into the memory socket. 2. Install the battery. 5. Press the clips to secure the memory module to the system board. 3. Follow the procedures in After Working Inside Your Computer. 20 Installing The Memory Module 1. Install the access panel. 4.
Owners Manual
Page 55
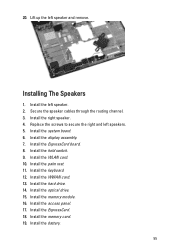
... the routing channel. 3. Install the WLAN card. 10. Install the memory module. 16. Install the left speaker and remove. Install the palm rest. 11. Install the access panel. 17. Install the keyboard. 12. Install the hard drive. 14. Install the system board. 6. Install the hold switch. 9. Install the battery. 55 Install the display assembly. 7. Install the WWAN card. 13. Installing The Speakers 1. Replace the...
... the routing channel. 3. Install the WLAN card. 10. Install the memory module. 16. Install the left speaker and remove. Install the palm rest. 11. Install the access panel. 17. Install the keyboard. 12. Install the hard drive. 14. Install the system board. 6. Install the hold switch. 9. Install the battery. 55 Install the display assembly. 7. Install the WWAN card. 13. Installing The Speakers 1. Replace the...
Owners Manual
Page 65
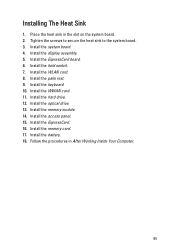
Install the hold switch. 7. Install the WLAN card. 8. Install the optical drive. 13. Installing The Heat Sink 1. Install the ExpressCard. 16. Install the memory card. 17. Install the battery. 18. Install the display assembly. 5. Install the palm rest. 9. Install the WWAN card. 11. Install the access panel. 15. Follow the procedures in the slot on the system board. 2. Tighten the screws to secure...
Install the hold switch. 7. Install the WLAN card. 8. Install the optical drive. 13. Installing The Heat Sink 1. Install the ExpressCard. 16. Install the memory card. 17. Install the battery. 18. Install the display assembly. 5. Install the palm rest. 9. Install the WWAN card. 11. Install the access panel. 15. Follow the procedures in the slot on the system board. 2. Tighten the screws to secure...
Owners Manual
Page 69
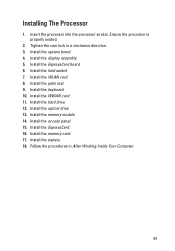
... into the processor socket. Install the ExpressCard board. 6. Install the WWAN card. 11. Install the hard drive. 12. Install the ExpressCard. 16. Install the system board. 4. Install the battery. 18. Install the hold switch. 7. Install the memory card. 17. Ensure the processor is properly seated. 2. Install the keyboard. 10. Install the optical drive. 13. Install the display assembly. 5. Install the palm rest. 9. Follow...
... into the processor socket. Install the ExpressCard board. 6. Install the WWAN card. 11. Install the hard drive. 12. Install the ExpressCard. 16. Install the system board. 4. Install the battery. 18. Install the hold switch. 7. Install the memory card. 17. Ensure the processor is properly seated. 2. Install the keyboard. 10. Install the optical drive. 13. Install the display assembly. 5. Install the palm rest. 9. Follow...
Owners Manual
Page 85
7. Install the WLAN card. 14. Follow the procedures in After Working Inside Your Computer. 85 Install the battery. 17. Install the palm rest. 10. Install the keyboard. 12. Install the memory card. 16. Install the access panel. 15. Install the display assembly. 9. Install the display bezel. 8. Install the WWAN card. 11. Install the hard drive. 13.
7. Install the WLAN card. 14. Follow the procedures in After Working Inside Your Computer. 85 Install the battery. 17. Install the palm rest. 10. Install the keyboard. 12. Install the memory card. 16. Install the access panel. 15. Install the display assembly. 9. Install the display bezel. 8. Install the WWAN card. 11. Install the hard drive. 13.
Owners Manual
Page 89
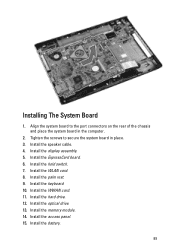
... board in the computer. 2. Install the keyboard. 10. Tighten the screws to the port connectors on the rear of the chassis and place the system board in place. 3. Install the memory module. 14. Install the ExpressCard board. 6. Install the hard drive. 12. Install the hold switch. 7. Install the access panel. 15. Install the battery. 89 Install the WLAN card. 8.
... board in the computer. 2. Install the keyboard. 10. Tighten the screws to the port connectors on the rear of the chassis and place the system board in place. 3. Install the memory module. 14. Install the ExpressCard board. 6. Install the hard drive. 12. Install the hold switch. 7. Install the access panel. 15. Install the battery. 89 Install the WLAN card. 8.
Owners Manual
Page 93
... Computer. 93 Install the hard drive. 11. Install the memory card. 16. Install the system board. 3. Install the WLAN card. 7. Install the access panel. 14. Install the ExpressCard board. 5. Install the WWAN card. 10. Install the battery. 17. Install the display assembly. 4. Install the optical drive. 12. Install the memory module. 13. Install the hold switch. 6. Install the palm rest. 8. Install the ExpressCard. 15. Install the left...
... Computer. 93 Install the hard drive. 11. Install the memory card. 16. Install the system board. 3. Install the WLAN card. 7. Install the access panel. 14. Install the ExpressCard board. 5. Install the WWAN card. 10. Install the battery. 17. Install the display assembly. 4. Install the optical drive. 12. Install the memory module. 13. Install the hold switch. 6. Install the palm rest. 8. Install the ExpressCard. 15. Install the left...

Owners Manual
Page 95
... and then press . Then, shut down the System Setup screen information for future reference. When the blue DELL logo is recommended that the keyboard has initialized. If you press before you are an expert computer user, ...change a user-selectable option such as the user password. • read the current amount of hard drive installed. Before you use System Setup, it to wait until you see the Microsoft Windows desktop. Certain changes can... remove any hardware in your computer. • set the type of memory or set or change the settings for this keystroke will be lost. 4.
... and then press . Then, shut down the System Setup screen information for future reference. When the blue DELL logo is recommended that the keyboard has initialized. If you press before you are an expert computer user, ...change a user-selectable option such as the user password. • read the current amount of hard drive installed. Before you use System Setup, it to wait until you see the Microsoft Windows desktop. Certain changes can... remove any hardware in your computer. • set the type of memory or set or change the settings for this keystroke will be lost. 4.

Owners Manual
Page 97
... command. Save current configuration and exit System Setup. Re-sets the date on the computer. 97 Displays the processor L1 cache size. Displays the memory installed on the computer's internal calendar. Displays the processor ID. Load setup default. Displays the speed of your computer (if available). or + <...Tag Asset Tag Processor Information CPU Type CPU Speed CPU ID L1 Cache Size L2 Cache Size L3 Cache Size Memory Information Extended Memory Action Change existing item value. Displays the service tag of the processor. Displays the processor L2 cache size....
... command. Save current configuration and exit System Setup. Re-sets the date on the computer. 97 Displays the processor L1 cache size. Displays the memory installed on the computer's internal calendar. Displays the processor ID. Load setup default. Displays the speed of your computer (if available). or + <...Tag Asset Tag Processor Information CPU Type CPU Speed CPU ID L1 Cache Size L2 Cache Size L3 Cache Size Memory Information Extended Memory Action Change existing item value. Displays the service tag of the processor. Displays the processor L2 cache size....

Owners Manual
Page 98
...using the stored system battery power through the USB PowerShare port, even while the computer is connected. 98 Displays information about the installed eSATA device. Enable or disable the Intel Default: Enabled Virtualization feature. Enable or disable the USB Default: Enabled emulation feature ...from standby. This feature is enabled only when the AC adapter is turned off. Displays the memory speed. Displays the type of the hard drive. System Memory Memory Speed Device Information Fixed HDD SATA ODD eSATA Device AC Adapter Type Advanced Intel SpeedStep Virtualization Integrated...
...using the stored system battery power through the USB PowerShare port, even while the computer is connected. 98 Displays information about the installed eSATA device. Enable or disable the Intel Default: Enabled Virtualization feature. Enable or disable the USB Default: Enabled emulation feature ...from standby. This feature is enabled only when the AC adapter is turned off. Displays the memory speed. Displays the type of the hard drive. System Memory Memory Speed Device Information Fixed HDD SATA ODD eSATA Device AC Adapter Type Advanced Intel SpeedStep Virtualization Integrated...


