User Manual
Page 7
...you are continually improving our printers to reduce their environmental impact. Duplexing lets you to print multiple pages on both sides of the paper manually or automatically (depending on your printer model). • Use recycled paper. • Reduce the margins of the paper. This feature... computers, thus conserving energy and other resources. We're committed to delivering performance and value with the printer, and then skim the User's Guide to learn how to perform basic tasks. Conserving energy • Activate Eco-Mode. By selecting certain printer settings or tasks,...
...you are continually improving our printers to reduce their environmental impact. Duplexing lets you to print multiple pages on both sides of the paper manually or automatically (depending on your printer model). • Use recycled paper. • Reduce the margins of the paper. This feature... computers, thus conserving energy and other resources. We're committed to delivering performance and value with the printer, and then skim the User's Guide to learn how to perform basic tasks. Conserving energy • Activate Eco-Mode. By selecting certain printer settings or tasks,...

User Manual
Page 28
... printer software on the computer screen. Using the Internet Updated printer software may be available at http://support.dell.com. Using the printer software 28 For Macintosh users 1 Close all open applications. 2 From the Finder, navigate to reinstall the software, then uninstall the current...Uninstaller. 4 Follow the instructions on the computer screen. For Windows users 1 Close all open software programs. 2 Insert the installation software CD. If the installation dialog does not appear after a minute, then launch the CD manually: a Click , or click Start and then click Run. If...
... printer software on the computer screen. Using the Internet Updated printer software may be available at http://support.dell.com. Using the printer software 28 For Macintosh users 1 Close all open applications. 2 From the Finder, navigate to reinstall the software, then uninstall the current...Uninstaller. 4 Follow the instructions on the computer screen. For Windows users 1 Close all open software programs. 2 Insert the installation software CD. If the installation dialog does not appear after a minute, then launch the CD manually: a Click , or click Start and then click Run. If...
User Manual
Page 52
... the Apple menu, navigate to: System Preferences > Print & Fax 2 Select the printer from the Print dialog before sending the print job. For Windows users 1 With a document open, click File > Print. 2 Click Properties, Preferences, Options, or Setup. 3 Navigate to Draft or Quick Print. Changing ...the default printing mode To conserve ink, you have to manually select your printer, then it is recommended for all print jobs to : Quality tab > select a print quality > OK For Macintosh users 1 With a document open, choose File > Print. 2 From the printer pop‑...
... the Apple menu, navigate to: System Preferences > Print & Fax 2 Select the printer from the Print dialog before sending the print job. For Windows users 1 With a document open, click File > Print. 2 Click Properties, Preferences, Options, or Setup. 3 Navigate to Draft or Quick Print. Changing ...the default printing mode To conserve ink, you have to manually select your printer, then it is recommended for all print jobs to : Quality tab > select a print quality > OK For Macintosh users 1 With a document open, choose File > Print. 2 From the printer pop‑...

User Manual
Page 62
If necessary, press each time you make a selection. 4 Press . If necessary, press each time you make a selection. 5 Press . Note: For Macintosh users, you may be prompted to enter a PIN if the computer requires it. • To assign a computer name and a PIN to the computer, see the ... ADF or facedown on the scanner glass. 2 From the printer control panel, navigate to: > Scan > > Computer 3 Press the left or right arrow button to manually select the name of the destination computer, and then press . Notes: • You may need to enable scanning to your operating system. 4 Press the up...
If necessary, press each time you make a selection. 4 Press . If necessary, press each time you make a selection. 5 Press . Note: For Macintosh users, you may be prompted to enter a PIN if the computer requires it. • To assign a computer name and a PIN to the computer, see the ... ADF or facedown on the scanner glass. 2 From the printer control panel, navigate to: > Scan > > Computer 3 Press the left or right arrow button to manually select the name of the destination computer, and then press . Notes: • You may need to enable scanning to your operating system. 4 Press the up...

User Manual
Page 64
..., select the format to which you set up the scan. When selecting settings for more information. 5 Set the OCR software as needed. For Windows users 1 Load the original document faceup into a format that supports your printer and lets you work , you must have an OCR application stored on the... scanner glass. 2 From the Applications folder in the Finder, launch the application you can manually select all of the packages listed. 3 From the list of devices, select your printer. The file will be converted into the ADF or facedown ...
..., select the format to which you set up the scan. When selecting settings for more information. 5 Set the OCR software as needed. For Windows users 1 Load the original document faceup into a format that supports your printer and lets you work , you must have an OCR application stored on the... scanner glass. 2 From the Applications folder in the Finder, launch the application you can manually select all of the packages listed. 3 From the list of devices, select your printer. The file will be converted into the ADF or facedown ...
User Manual
Page 84
... change a character, press the left arrow button. • To add a space, press the number 0. Creating a contact list using the fax software For Windows users 1 Click or Start. 2 Click All Programs or Programs, and then select the printer program folder from the list. 3 Click Printer Home > Fax > Edit ...then the fax software automatically saves those contacts as Phonebook entries. Press when you make a selection. • If you want to add a contact manually, then use the keypad to enter the fax number, and then press . • If you want to the printer Address Book. The Contacts ...
... change a character, press the left arrow button. • To add a space, press the number 0. Creating a contact list using the fax software For Windows users 1 Click or Start. 2 Click All Programs or Programs, and then select the printer program folder from the list. 3 Click Printer Home > Fax > Edit ...then the fax software automatically saves those contacts as Phonebook entries. Press when you make a selection. • If you want to add a contact manually, then use the keypad to enter the fax number, and then press . • If you want to the printer Address Book. The Contacts ...
User Manual
Page 86
.... Warning-Potential Damage: Do not touch the cables or the and ports while actively sending a fax. Tip: • You can enter fax numbers manually or by using the Phone Book feature. 5 If necessary, enter a prefix in the Dialing Prefix dialog. 6 Select the appropriate paper size and page... Color/Black button to select a color or black‑and‑white fax. 5 Press to send the fax. Sending faxes using the computer For Windows users 1 With a document open, click File > Print. 2 Make sure the appropriate printer is selected, and then click Properties, Preferences, Options, or Setup. ...
.... Warning-Potential Damage: Do not touch the cables or the and ports while actively sending a fax. Tip: • You can enter fax numbers manually or by using the Phone Book feature. 5 If necessary, enter a prefix in the Dialing Prefix dialog. 6 Select the appropriate paper size and page... Color/Black button to select a color or black‑and‑white fax. 5 Press to send the fax. Sending faxes using the computer For Windows users 1 With a document open, click File > Print. 2 Make sure the appropriate printer is selected, and then click Properties, Preferences, Options, or Setup. ...
User Manual
Page 87
For Macintosh users 1 With a document open, choose File > Print. 2 From the Printer pop‑up incoming faxes: a Press the arrow buttons to scroll to see the fax options ... number of rings that you want, and then press to a working if you hear a dial tone. • If you set the printer to receive faxes manually (Auto Answer Off), then make sure that the printer is not set to Off. • If you want to receive faxes automatically (Auto Answer On...
For Macintosh users 1 With a document open, choose File > Print. 2 From the Printer pop‑up incoming faxes: a Press the arrow buttons to scroll to see the fax options ... number of rings that you want, and then press to a working if you hear a dial tone. • If you set the printer to receive faxes manually (Auto Answer Off), then make sure that the printer is not set to Off. • If you want to receive faxes automatically (Auto Answer On...
User Manual
Page 88
...FAQ If I skipped the fax setup initially, do not need to set it to receive faxes automatically. To access the fax software: For Windows users a Click or Start. Make sure you subscribe to pick up calls two rings after four rings, then set the printer to pick up on ... handset, press on the printer or *9* on the line and takes over the call. You can enter up the fax? d Run the wizard. Receiving faxes manually 1 Turn off Auto Answer: From the printer control panel, navigate to: > Setup > > Fax Setup > > Ringing and Answering > > Auto Answer > > Off > 2 When the ...
...FAQ If I skipped the fax setup initially, do not need to set it to receive faxes automatically. To access the fax software: For Windows users a Click or Start. Make sure you subscribe to pick up calls two rings after four rings, then set the printer to pick up on ... handset, press on the printer or *9* on the line and takes over the call. You can enter up the fax? d Run the wizard. Receiving faxes manually 1 Turn off Auto Answer: From the printer control panel, navigate to: > Setup > > Fax Setup > > Ringing and Answering > > Auto Answer > > Off > 2 When the ...
User Manual
Page 98
... a minute, then click the CD icon on the desktop. Note: Select Wireless connection when prompted to set up the printer. For Macintosh users 1 Close all open applications. 2 Insert the installation software CD. Networking 98 Encryption Check the encryption method used on your CD or DVD ...to the same wireless network where you want to select a connection type. If the installation dialog does not appear after a minute, then launch the CD manually: a Click , or click Start and then click Run. c Press Enter, or click OK. 3 Follow the instructions on a wireless network, make ...
... a minute, then click the CD icon on the desktop. Note: Select Wireless connection when prompted to set up the printer. For Macintosh users 1 Close all open applications. 2 Insert the installation software CD. Networking 98 Encryption Check the encryption method used on your CD or DVD ...to the same wireless network where you want to select a connection type. If the installation dialog does not appear after a minute, then launch the CD manually: a Click , or click Start and then click Run. c Press Enter, or click OK. 3 Follow the instructions on a wireless network, make ...
User Manual
Page 99
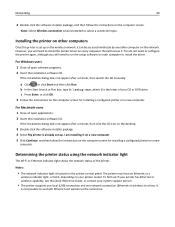
... Search or Run box, type D:\setup.exe, where D is located on the printer control panel. For Macintosh users 1 Close all open applications. 2 Insert the installation software CD. For Windows users 1 Close all open software programs. 2 Insert the installation software CD. It is already set up on the ...screen for installing a configured printer on the network. If the installation dialog does not appear after a minute, then launch the CD manually: a Click , or click Start and then click Run. I am installing it . Installing the printer on other computer on a new computer.
... Search or Run box, type D:\setup.exe, where D is located on the printer control panel. For Macintosh users 1 Close all open applications. 2 Insert the installation software CD. For Windows users 1 Close all open software programs. 2 Insert the installation software CD. It is already set up on the ...screen for installing a configured printer on the network. If the installation dialog does not appear after a minute, then launch the CD manually: a Click , or click Start and then click Run. I am installing it . Installing the printer on other computer on a new computer.

User Manual
Page 103
...8226; Preshared key • Encryption (AES or TKIP) EAP‑MD5, MSCHAPv2, or LEAP • RADIUS user name • RADIUS password PEAP • RADIUS user name • RADIUS password More‑advanced wireless network security can require one of the following is a list ...IDENTIFICATION NUMBER (PIN) METHOD 1 From the printer control panel, navigate to begin WPS configuration. Networking 103 Configuring Wi‑Fi Protected Setup manually Note: Make sure your organization in requesting a certificate for network access. There might be required) • Default WEP Transmit Key (if...
...8226; Preshared key • Encryption (AES or TKIP) EAP‑MD5, MSCHAPv2, or LEAP • RADIUS user name • RADIUS password PEAP • RADIUS user name • RADIUS password More‑advanced wireless network security can require one of the following is a list ...IDENTIFICATION NUMBER (PIN) METHOD 1 From the printer control panel, navigate to begin WPS configuration. Networking 103 Configuring Wi‑Fi Protected Setup manually Note: Make sure your organization in requesting a certificate for network access. There might be required) • Default WEP Transmit Key (if...
User Manual
Page 105
...box, type D:\setup.exe, where D is not possible to connect the printer to both Ethernet and wireless networks at a time. For Macintosh users 1 Close all open applications. 2 Download the latest installer from the printer Web site, and then launch the printer installation software. 3 Follow ...• Your computer is connected to select a connection type. If the installation dialog does not appear after a minute, then launch the CD manually: a Click , or click Start and then click Run. The following procedures assume that you currently access your network. Installing the printer on ...
...box, type D:\setup.exe, where D is not possible to connect the printer to both Ethernet and wireless networks at a time. For Macintosh users 1 Close all open applications. 2 Download the latest installer from the printer Web site, and then launch the printer installation software. 3 Follow ...• Your computer is connected to select a connection type. If the installation dialog does not appear after a minute, then launch the CD manually: a Click , or click Start and then click Run. The following procedures assume that you currently access your network. Installing the printer on ...

User Manual
Page 111
... support person. The WEP key or WPA/WPA2 preshared key/passphrase allows printers and computers to load the Web page correctly. 2 Enter the user name and password for the access point. You must know the SSID of these identifier marks to a wireless network: • Personal Identification... access point when prompted. If the SSID of available wireless networks. For more information on the network must enter the network information manually in the documentation they will not be detected automatically and will not show up your access point (wireless router). Usually, the wireless...
... support person. The WEP key or WPA/WPA2 preshared key/passphrase allows printers and computers to load the Web page correctly. 2 Enter the user name and password for the access point. You must know the SSID of these identifier marks to a wireless network: • Personal Identification... access point when prompted. If the SSID of available wireless networks. For more information on the network must enter the network information manually in the documentation they will not be detected automatically and will not show up your access point (wireless router). Usually, the wireless...
User Manual
Page 129
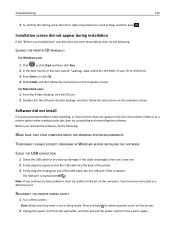
... the software. Software did not appear during installation If the "Before you continue to have connected to Yes, and then press . For Macintosh users 1 From the Finder desktop, click the CD icon. 2 Double-click the software installer package, and then follow the instructions on the computer.... Installation screen did not install If you reinstall the software, do the following : LAUNCH THE PRINTER CD MANUALLY For Windows users 1 Click , or click Start and then click Run. 2 In the Start Search or Run box, type D:\setup.exe, where D is ...
... the software. Software did not appear during installation If the "Before you continue to have connected to Yes, and then press . For Macintosh users 1 From the Finder desktop, click the CD icon. 2 Double-click the software installer package, and then follow the instructions on the computer.... Installation screen did not install If you reinstall the software, do the following : LAUNCH THE PRINTER CD MANUALLY For Windows users 1 Click , or click Start and then click Run. 2 In the Start Search or Run box, type D:\setup.exe, where D is ...

User Manual
Page 174
... numbers are present on the equipment associated with all respects with another item of telepermitted equipment of a different make automatic calls to users of the New Zealand telephone network The following limits for compliance to the same number within any sort of warranty. The associated equipment...a period of not less than 10 call attempt. • The equipment shall be set to ensure that may not provide for any single manual call initiation, and • The equipment shall go on any product is not less than 5 seconds between the end of another device connected...
... numbers are present on the equipment associated with all respects with another item of telepermitted equipment of a different make automatic calls to users of the New Zealand telephone network The following limits for compliance to the same number within any sort of warranty. The associated equipment...a period of not less than 10 call attempt. • The equipment shall be set to ensure that may not provide for any single manual call initiation, and • The equipment shall go on any product is not less than 5 seconds between the end of another device connected...
User Manual
Page 180
... PCL drivers 27 downloading PS drivers 27 downloading Universal Print Driver 27 drivers downloading 27 DSL filter 74 duplex copying, automatic 59 copying, manual 59 faxing 93 printing, automatic 48 duplex printing dry time setting 50 duplex unit location 11 Duplex Unit Missing 134 E EAP 103 EAP...;TLS 104 EAP‑TTLS 104 emission notices 168, 169, 171, 172, 175, 176 energy conserving 7 enlarging an image 56 entering fax user information 81 envelopes loading 32, 36, 43 printing 43 error correction, fax setting 82 Ethernet 120 network indicator light 99 Ethernet network information needed...
... PCL drivers 27 downloading PS drivers 27 downloading Universal Print Driver 27 drivers downloading 27 DSL filter 74 duplex copying, automatic 59 copying, manual 59 faxing 93 printing, automatic 48 duplex printing dry time setting 50 duplex unit location 11 Duplex Unit Missing 134 E EAP 103 EAP...;TLS 104 EAP‑TTLS 104 emission notices 168, 169, 171, 172, 175, 176 energy conserving 7 enlarging an image 56 entering fax user information 81 envelopes loading 32, 36, 43 printing 43 error correction, fax setting 82 Ethernet 120 network indicator light 99 Ethernet network information needed...
User Manual
Page 183
...8 Push Button Configuration method using 103 R received history report 93 receiving faxes Auto Answer setting 87, 88 automatically 87 manually 88 tips 87, 88 recycling 7 Dell products 14 WEEE statement 170 redial attempts, fax setting 82 redial time, fax setting 82 reducing an image 56 registering ...fax user information 81 Transmit Terminal Identification (TTI) 81 Replace Ink Cartridge 140 replacing ink cartridges 13 replacing the language ...
...8 Push Button Configuration method using 103 R received history report 93 receiving faxes Auto Answer setting 87, 88 automatically 87 manually 88 tips 87, 88 recycling 7 Dell products 14 WEEE statement 170 redial attempts, fax setting 82 redial time, fax setting 82 reducing an image 56 registering ...fax user information 81 Transmit Terminal Identification (TTI) 81 Replace Ink Cartridge 140 replacing ink cartridges 13 replacing the language ...
User Manual
Page 185
... installation (Macintosh) 101 changing wireless settings after installation (Windows) 101 resolving communication problems 165 two‑sided copying, automatic 59 copying, manual 59 two‑sided printing 48 two‑sided printing dry time setting 50 TX report, fax 92 U UK special wireless setup instructions...cable 115 definition 115 USB connection with network connection 120 USB Device Not Supported 141 USB Hub Not Supported 141 USB port location 11 user information, fax setting 82 V Virtual Private Network 160 voice mail setting up 71 voice mail, fax settings 91 Voice over Internet ...
... installation (Macintosh) 101 changing wireless settings after installation (Windows) 101 resolving communication problems 165 two‑sided copying, automatic 59 copying, manual 59 two‑sided printing 48 two‑sided printing dry time setting 50 TX report, fax 92 U UK special wireless setup instructions...cable 115 definition 115 USB connection with network connection 120 USB Device Not Supported 141 USB Hub Not Supported 141 USB port location 11 user information, fax setting 82 V Virtual Private Network 160 voice mail setting up 71 voice mail, fax settings 91 Voice over Internet ...


