
User Manual
Page 6
..., power cord, or telephone, during a lightning storm. If any electrical or cabling connections, such as furniture and walls. SAVE THESE INSTRUCTIONS. CAUTION-POTENTIAL INJURY: The lithium battery in the user documentation, to a professional service person. Do not recharge, disassemble, or incinerate ...replacement parts. CAUTION-SHOCK HAZARD: To avoid the risk of electric shock when cleaning the exterior of the printer, unplug the power cord from the printer before inspecting it. Safety information 6 Safety information Connect the power cord to a properly grounded electrical outlet...
..., power cord, or telephone, during a lightning storm. If any electrical or cabling connections, such as furniture and walls. SAVE THESE INSTRUCTIONS. CAUTION-POTENTIAL INJURY: The lithium battery in the user documentation, to a professional service person. Do not recharge, disassemble, or incinerate ...replacement parts. CAUTION-SHOCK HAZARD: To avoid the risk of electric shock when cleaning the exterior of the printer, unplug the power cord from the printer before inspecting it. Safety information 6 Safety information Connect the power cord to a properly grounded electrical outlet...
User Manual
Page 8
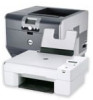
...these programs or some of the functions of these programs, depending on the installation software CD. Initial setup instructions: • Connecting the printer • Installing the printer software Find it away. • Recycle paper from discarded print jobs. • Use recycled paper. ...of the colors. • Use high‑yield cartridges. For updates, check our Web site at http://support.dell.com. Additional setup and instructions for using the printer: • Selecting and storing paper and specialty media • Loading paper • Performing printing, copying, scanning...
...these programs or some of the functions of these programs, depending on the installation software CD. Initial setup instructions: • Connecting the printer • Installing the printer software Find it away. • Recycle paper from discarded print jobs. • Use recycled paper. ...of the colors. • Use high‑yield cartridges. For updates, check our Web site at http://support.dell.com. Additional setup and instructions for using the printer: • Selecting and storing paper and specialty media • Loading paper • Performing printing, copying, scanning...
User Manual
Page 27
... from the list. 3 Click the uninstaller. 4 Follow the instructions on the computer screen. 5 Once the uninstall process is complete, restart your printer and then download the driver. 5 Install additional or optional software. Reinstalling the printer software When you encountered problems while installing, or if your printer, select the custom install option during installation, and...
... from the list. 3 Click the uninstaller. 4 Follow the instructions on the computer screen. 5 Once the uninstall process is complete, restart your printer and then download the driver. 5 Install additional or optional software. Reinstalling the printer software When you encountered problems while installing, or if your printer, select the custom install option during installation, and...

User Manual
Page 28
..., then click the CD icon on the desktop. 3 Double-click the software installer package, and then follow the instructions on the computer screen. Using the Internet Updated printer software may be available at http://support.dell.com. If the installation dialog does not appear after a minute, then launch the CD manually: a Click , or...
..., then click the CD icon on the desktop. 3 Double-click the software installer package, and then follow the instructions on the computer screen. Using the Internet Updated printer software may be available at http://support.dell.com. If the installation dialog does not appear after a minute, then launch the CD manually: a Click , or...

User Manual
Page 29
Loading paper and original documents 29 Loading paper and original documents Loading the paper tray Make sure: • You use paper designed for inkjet printers. • The paper is not used or damaged. • If you are using specialty paper, you follow the instructions that came with it. • The paper does not buckle when you adjust the paper guides to avoid jams. 1 Pull the tray completely out of the printer. 2 Move the paper guides to the sides of the tray.
Loading paper and original documents 29 Loading paper and original documents Loading the paper tray Make sure: • You use paper designed for inkjet printers. • The paper is not used or damaged. • If you are using specialty paper, you follow the instructions that came with it. • The paper does not buckle when you adjust the paper guides to avoid jams. 1 Pull the tray completely out of the printer. 2 Move the paper guides to the sides of the tray.

User Manual
Page 35
... of coated paper 25 sheets of photo paper 25 sheets of glossy paper Make sure • The paper is the printable side, then see the instructions that came with the paper.) • The paper guides rest against the left, right, and bottom edges of the paper faces down. (If you are... stacking, displaying, or storing. • For best results, load more photo paper than needed, but do not exceed the maximum amount for use with inkjet printers. • The paper guides rest against the left, right, and bottom edges of the paper. • The glossy or printable side of the paper.
... of coated paper 25 sheets of photo paper 25 sheets of glossy paper Make sure • The paper is the printable side, then see the instructions that came with the paper.) • The paper guides rest against the left, right, and bottom edges of the paper faces down. (If you are... stacking, displaying, or storing. • For best results, load more photo paper than needed, but do not exceed the maximum amount for use with inkjet printers. • The paper guides rest against the left, right, and bottom edges of the paper. • The glossy or printable side of the paper.

User Manual
Page 46
...your flash drive does not fit directly into the USB port. Note: If the printer does not recognize the memory device, then remove and reinsert it. A loss of data can occur. 2 Follow the instructions or select from the memory device. Warning-Potential Damage: Do not touch any cables,... any network adapter, any connector, the memory device, or the printer in the areas shown while actively printing, reading, or writing from available ...
...your flash drive does not fit directly into the USB port. Note: If the printer does not recognize the memory device, then remove and reinsert it. A loss of data can occur. 2 Follow the instructions or select from the memory device. Warning-Potential Damage: Do not touch any cables,... any network adapter, any connector, the memory device, or the printer in the areas shown while actively printing, reading, or writing from available ...
User Manual
Page 51
... may appear in the list, then create a new print queue. Creating a print queue For Windows users 1 From the Printer Tasks area, click Add a Printer. 2 Follow the instructions on how the printer is connected to rename the printer. 4 Click Add. For more information, see the documentation that is connected (USB, Ethernet, wireless). If necessary, use the...
... may appear in the list, then create a new print queue. Creating a print queue For Windows users 1 From the Printer Tasks area, click Add a Printer. 2 Follow the instructions on how the printer is connected to rename the printer. 4 Click Add. For more information, see the documentation that is connected (USB, Ethernet, wireless). If necessary, use the...
User Manual
Page 59
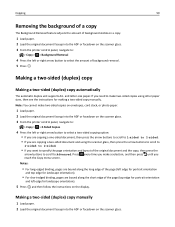
..., card stock, or photo paper. 1 Load paper. 2 Load the original document faceup into the ADF or facedown on the scanner glass. 3 From the printer control panel, navigate to: > Copy > > Background Removal 4 Press the left or right arrow button to select the amount of background removal. 5 Press ... the short edge of the page (top edge for portrait orientation and left edge for landscape orientation). 5 Press , and then follow the instructions on the scanner glass. Copying 59 Removing the background of a copy The Background Removal feature adjusts the amount of background visible on a copy...
..., card stock, or photo paper. 1 Load paper. 2 Load the original document faceup into the ADF or facedown on the scanner glass. 3 From the printer control panel, navigate to: > Copy > > Background Removal 4 Press the left or right arrow button to select the amount of background removal. 5 Press ... the short edge of the page (top edge for portrait orientation and left edge for landscape orientation). 5 Press , and then follow the instructions on the scanner glass. Copying 59 Removing the background of a copy The Background Removal feature adjusts the amount of background visible on a copy...
User Manual
Page 63
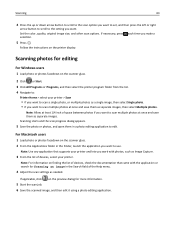
... the color, quality, original image size, and other scan options. Note: Allow at least 1/4 inch of devices, check the documentation that supports your printer. Note: Use any application that came with photos, such as needed. For Macintosh users 1 Load photo or photos facedown on finding the list of ...space between photos if you want to the setting you want to use. If necessary, press each time you want . Follow the instructions on the preview dialog for Scanning an image in a photo editing application to scan multiple photos at once and save them as separate images,...
... the color, quality, original image size, and other scan options. Note: Allow at least 1/4 inch of devices, check the documentation that supports your printer. Note: Use any application that came with photos, such as needed. For Macintosh users 1 Load photo or photos facedown on finding the list of ...space between photos if you want to the setting you want to use. If necessary, press each time you want . Follow the instructions on the preview dialog for Scanning an image in a photo editing application to scan multiple photos at once and save them as separate images,...
User Manual
Page 68
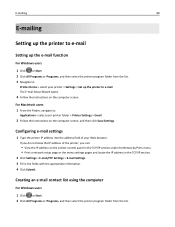
... information. 4 Click Submit. E-mailing 68 E-mailing Setting up the printer to e-mail Setting up the printer to e‑mail The E‑mail Setup Wizard opens. 4 Follow the instructions on the computer screen. For Macintosh users 1 From the Finder, navigate to : Printer Home > select your printer > Settings > Set up the e-mail function For Windows users 1 Click...
... information. 4 Click Submit. E-mailing 68 E-mailing Setting up the printer to e-mail Setting up the printer to e‑mail The E‑mail Setup Wizard opens. 4 Follow the instructions on the computer screen. For Macintosh users 1 From the Finder, navigate to : Printer Home > select your printer > Settings > Set up the e-mail function For Windows users 1 Click...
User Manual
Page 98
... software CD. Networking 98 Encryption Check the encryption method used on the desktop. Note: Select Wireless connection when prompted to set up the printer. If the installation dialog does not appear after a minute, then launch the CD manually: a Click , or click Start and then ...a connection type. c Press Enter, or click OK. 3 Follow the instructions on a wireless network, make sure that: • Your wireless network is set up and working properly. • The computer you install the printer on the computer screen. Note: Some authentication types may be available only in...
... software CD. Networking 98 Encryption Check the encryption method used on the desktop. Note: Select Wireless connection when prompted to set up the printer. If the installation dialog does not appear after a minute, then launch the CD manually: a Click , or click Start and then ...a connection type. c Press Enter, or click OK. 3 Follow the instructions on a wireless network, make sure that: • Your wireless network is set up and working properly. • The computer you install the printer on the computer screen. Note: Some authentication types may be available only in...
User Manual
Page 99
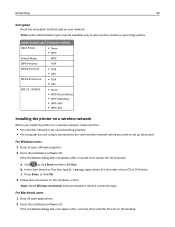
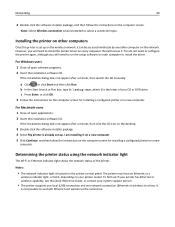
... already set up . Networking 99 3 Double-click the software installer package, and then follow the instructions on the computer screen for installing a configured printer on the network. Installing the printer on other computer on a new computer. b In the Start Search or Run box, type D:\... is set up on the wireless network, it on a new computer. 5 Click Continue, and then follow the instructions on your system support person. • The printer supports one local (USB) connection and one network connection (Ethernet or wireless) at the same time. Note: Select...
... already set up . Networking 99 3 Double-click the software installer package, and then follow the instructions on the computer screen for installing a configured printer on the network. Installing the printer on other computer on a new computer. b In the Start Search or Run box, type D:\... is set up on the wireless network, it on a new computer. 5 Click Continue, and then follow the instructions on your system support person. • The printer supports one local (USB) connection and one network connection (Ethernet or wireless) at the same time. Note: Select...
User Manual
Page 100
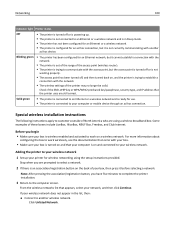
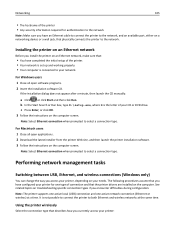
...and activated to work wirelessly, see the documentation that the printer uses are using the setup instructions provided. Blinking green • The printer has been configured for use. • The printer is connected to your printer for an ad hoc connection, but it is in ...does not appear in Sleep mode. • The printer has not been configured for an Ethernet or a wireless network. • The printer is powering up your wireless network. Special wireless installation instructions The following instructions apply to establish a connection with another wireless network...
...and activated to work wirelessly, see the documentation that the printer uses are using the setup instructions provided. Blinking green • The printer has been configured for use. • The printer is connected to your printer for an ad hoc connection, but it is in ...does not appear in Sleep mode. • The printer has not been configured for an Ethernet or a wireless network. • The printer is powering up your wireless network. Special wireless installation instructions The following instructions apply to establish a connection with another wireless network...
User Manual
Page 101
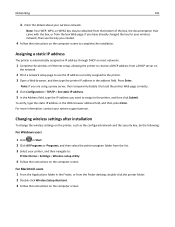
...Select your wireless network, then use the key you created. 4 Follow the instructions on the computer screen. If you want to assign to the printer, and then click Submit. Assigning a static IP address The printer is automatically assigned an IP address through DHCP on most networks. 1 Complete...IP address you have already changed the key for your printer, and then navigate to: Printer Home > Settings > Wireless setup utility 4 Follow the instructions on the computer screen to the printer. 3 Open a Web browser, and then type the printer IP address in the Finder, or from the Finder ...
...Select your wireless network, then use the key you created. 4 Follow the instructions on the computer screen. If you want to assign to the printer, and then click Submit. Assigning a static IP address The printer is automatically assigned an IP address through DHCP on most networks. 1 Complete...IP address you have already changed the key for your printer, and then navigate to: Printer Home > Settings > Wireless setup utility 4 Follow the instructions on the computer screen to the printer. 3 Open a Web browser, and then type the printer IP address in the Finder, or from the Finder ...
User Manual
Page 102
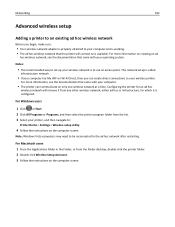
...Macintosh users 1 From the Applications folder in the Finder, or from the list. 3 Select your printer, and then navigate to: Printer Home > Settings > Wireless setup utility 4 Follow the instructions on the computer screen. For Windows users 1 Click or Start. 2 Click All Programs or ...Programs, and then select the printer program folder from the Finder desktop, double-click the printer folder. 2 Double‑click Wireless Setup Assistant. 3 Follow the instructions on the computer screen. Networking 102 Advanced wireless setup Adding a printer to an existing ad hoc wireless network...
...Macintosh users 1 From the Applications folder in the Finder, or from the list. 3 Select your printer, and then navigate to: Printer Home > Settings > Wireless setup utility 4 Follow the instructions on the computer screen. For Windows users 1 Click or Start. 2 Click All Programs or ...Programs, and then select the printer program folder from the Finder desktop, double-click the printer folder. 2 Double‑click Wireless Setup Assistant. 3 Follow the instructions on the computer screen. Networking 102 Advanced wireless setup Adding a printer to an existing ad hoc wireless network...

User Manual
Page 103
...USE THE PUSH BUTTON CONFIGURATION (PBC) METHOD 1 From the printer control panel, navigate to: > Setup > > Network Setup > > Wireless 802.11b/g/n > > Wi‑Fi Protected Setup > > WPS PBC Mode > 2 Follow the instructions on the wireless router. Networking 103 Configuring Wi‑Fi... > Setup > > Network Setup > > Wireless 802.11b/g/n > > Wi‑Fi Protected Setup > > WPS PIN Mode > 2 Follow the instructions on the printer display. > Network Connection Setup > > Wireless > Configuring security Simple wireless networks require WEP keys or a WPA/WPA2 preshared key/passphrase, or may be...
...USE THE PUSH BUTTON CONFIGURATION (PBC) METHOD 1 From the printer control panel, navigate to: > Setup > > Network Setup > > Wireless 802.11b/g/n > > Wi‑Fi Protected Setup > > WPS PBC Mode > 2 Follow the instructions on the wireless router. Networking 103 Configuring Wi‑Fi... > Setup > > Network Setup > > Wireless 802.11b/g/n > > Wi‑Fi Protected Setup > > WPS PIN Mode > 2 Follow the instructions on the printer display. > Network Connection Setup > > Wireless > Configuring security Simple wireless networks require WEP keys or a WPA/WPA2 preshared key/passphrase, or may be...

User Manual
Page 104
... network Make sure you have selected Do this EAP‑MD5, LEAP, or MSCHAPv2 Proceed to the next step. Installing the printer on an Ethernet network Information you will reside PEAP or EAP‑TTLS Click Install CA Certificate, and then type the path to...certificate, or click Browse to locate the certificate file. 2 Type the necessary information that the authentication server requires. 3 Click OK, and then follow the instructions on the computer screen. If you select. Networking 104 • CA certificate EAP‑TLS • RADIUS user name • CA certificate •...
... network Make sure you have selected Do this EAP‑MD5, LEAP, or MSCHAPv2 Proceed to the next step. Installing the printer on an Ethernet network Information you will reside PEAP or EAP‑TTLS Click Install CA Certificate, and then type the path to...certificate, or click Browse to locate the certificate file. 2 Type the necessary information that the authentication server requires. 3 Click OK, and then follow the instructions on the computer screen. If you select. Networking 104 • CA certificate EAP‑TLS • RADIUS user name • CA certificate •...
User Manual
Page 105
... You can change the way you access your printer, depending on an Ethernet network, make sure that describes how you install the printer on your network. c Press Enter, or click OK. 3 Follow the instructions on troubleshooting specific connection types if you have ...Close all open applications. 2 Download the latest installer from the printer Web site, and then launch the printer installation software. 3 Follow the instructions on a networking device or a wall jack, that you have configured your printer for authentication to the network Note: Make sure you encounter difficulties...
... You can change the way you access your printer, depending on an Ethernet network, make sure that describes how you install the printer on your network. c Press Enter, or click OK. 3 Follow the instructions on troubleshooting specific connection types if you have ...Close all open applications. 2 Download the latest installer from the printer Web site, and then launch the printer installation software. 3 Follow the instructions on a networking device or a wall jack, that you have configured your printer for authentication to the network Note: Make sure you encounter difficulties...

User Manual
Page 106
... then navigate to locate the driver and finish setting up the printer. 3 Select the USB printer. Note: You will need to remove the USB cable connecting the printer to : Printer Home > Settings > Wireless setup utility 4 Follow the instructions on the computer screen. If the printer is currently set up for wireless access. Note: There is no...
... then navigate to locate the driver and finish setting up the printer. 3 Select the USB printer. Note: You will need to remove the USB cable connecting the printer to : Printer Home > Settings > Wireless setup utility 4 Follow the instructions on the computer screen. If the printer is currently set up for wireless access. Note: There is no...


