User Manual
Page 8
...page image on one side of time (the Sleep timeout). • Share your printer's environmental impact even further. And if you get the most out of documents to 16 page images on one of the paper manually or automatically (depending on track fast. We're committed to delivering performance and ...value with the printer, and then skim the User's Guide to learn how to Sleep mode after the...
...page image on one side of time (the Sleep timeout). • Share your printer's environmental impact even further. And if you get the most out of documents to 16 page images on one of the paper manually or automatically (depending on track fast. We're committed to delivering performance and ...value with the printer, and then skim the User's Guide to learn how to Sleep mode after the...
User Manual
Page 21
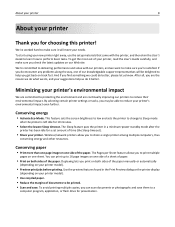
Using the printer control panel buttons and menus 21 Use 8 Redial 9 Pause 10 Dial Tone To Display the last number dialed. Start a job, depending on which mode is ... status of numbers. 12 Color Switch to color mode. 13 Black 14 Start Switch to view the last five numbers dialed. Dial the telephone number manually using the keypad before sending the fax. 11 Address Book Access fax numbers from a saved list of your...
Using the printer control panel buttons and menus 21 Use 8 Redial 9 Pause 10 Dial Tone To Display the last number dialed. Start a job, depending on which mode is ... status of numbers. 12 Color Switch to color mode. 13 Black 14 Start Switch to view the last five numbers dialed. Dial the telephone number manually using the keypad before sending the fax. 11 Address Book Access fax numbers from a saved list of your...

User Manual
Page 28
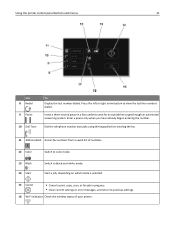
...Note: To take advantage of the full features of your printer, select the custom install option, and then select all... not appear after a minute, then launch the CD manually: a Click , or click Start and then click Run. ...printer software 28 For Macintosh users 1 Close all open applications. 2 From the Finder, navigate to reinstall the software, then uninstall the current software first. Installing the printer software Note: If you installed the printer... software on this computer before but need to : Applications > select your printer ...
...Note: To take advantage of the full features of your printer, select the custom install option, and then select all... not appear after a minute, then launch the CD manually: a Click , or click Start and then click Run. ...printer software 28 For Macintosh users 1 Close all open applications. 2 From the Finder, navigate to reinstall the software, then uninstall the current software first. Installing the printer software Note: If you installed the printer... software on this computer before but need to : Applications > select your printer ...
User Manual
Page 45
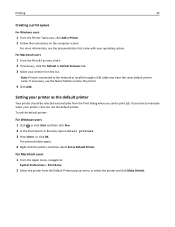
... to the network or locally through a USB cable may have to manually select your printer as Default Printer. For more information, see the documentation that came with your printer from the Default Printer pop‑up menu, or select the printer and click Make Default. For Macintosh users 1 From the Print & Fax area, click +. 2 If necessary...
... to the network or locally through a USB cable may have to manually select your printer as Default Printer. For more information, see the documentation that came with your printer from the Default Printer pop‑up menu, or select the printer and click Make Default. For Macintosh users 1 From the Print & Fax area, click +. 2 If necessary...
User Manual
Page 53
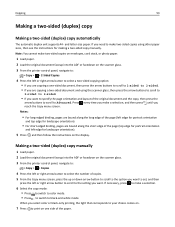
... one side of the page (left edge for making a two‑sided copy manually. Making a two‑sided (duplex) copy manually 1 Load paper. 2 Load the original document faceup into the ADF or facedown on the scanner glass. 3 From the printer control panel, navigate to: > Copy > > Copies 4 Press the left or...card stock, or photo paper. 1 Load paper. 2 Load the original document faceup into the ADF or facedown on the scanner glass. 3 From the printer control panel, navigate to: > Copy > > 2‑Sided Copies 4 Press the left or right arrow button to scroll to black‑and‑white ...
... one side of the page (left edge for making a two‑sided copy manually. Making a two‑sided (duplex) copy manually 1 Load paper. 2 Load the original document faceup into the ADF or facedown on the scanner glass. 3 From the printer control panel, navigate to: > Copy > > Copies 4 Press the left or...card stock, or photo paper. 1 Load paper. 2 Load the original document faceup into the ADF or facedown on the scanner glass. 3 From the printer control panel, navigate to: > Copy > > 2‑Sided Copies 4 Press the left or right arrow button to scroll to black‑and‑white ...
User Manual
Page 56
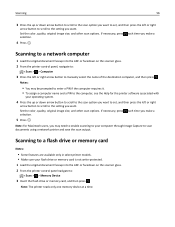
... drive or memory card is not write‑protected. 1 Load the original document faceup into the ADF or facedown on the scanner glass. 2 From the printer control panel navigate to: > Scan > > Memory Device 3 Insert the flash drive or memory card, and then press . Scanning to a network computer ...1 Load the original document faceup into the ADF or facedown on the scanner glass. 2 From the printer control panel, navigate to: > Scan > > Computer 3 Press the left or right arrow button to manually select the name of the destination computer, and then press . Scanning 56 3 Press the up or ...
... drive or memory card is not write‑protected. 1 Load the original document faceup into the ADF or facedown on the scanner glass. 2 From the printer control panel navigate to: > Scan > > Memory Device 3 Insert the flash drive or memory card, and then press . Scanning to a network computer ...1 Load the original document faceup into the ADF or facedown on the scanner glass. 2 From the printer control panel, navigate to: > Scan > > Computer 3 Press the left or right arrow button to manually select the name of the destination computer, and then press . Scanning 56 3 Press the up or ...
User Manual
Page 58
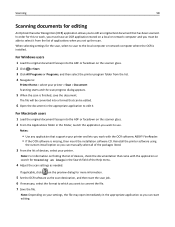
... If the OCR software is installed. If applicable, click on the preview dialog for Scanning an image in the appropriate application so you can manually select all of the packages listed. 3 From the list of applications when you set up the scan. For Windows users 1 Load the ...facedown on the scanner glass. 2 From the Applications folder in the appropriate application to edit it from the list. 4 Navigate to: Printer Home > select your printer. Scanning 58 Scanning documents for this to work with the application or search for more information. 5 Set the OCR software as needed....
... If the OCR software is installed. If applicable, click on the preview dialog for Scanning an image in the appropriate application so you can manually select all of the packages listed. 3 From the list of applications when you set up the scan. For Windows users 1 Load the ...facedown on the scanner glass. 2 From the Applications folder in the appropriate application to edit it from the list. 4 Navigate to: Printer Home > select your printer. Scanning 58 Scanning documents for this to work with the application or search for more information. 5 Set the OCR software as needed....
User Manual
Page 65
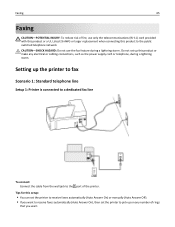
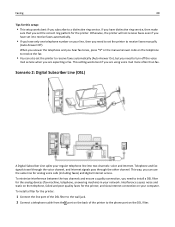
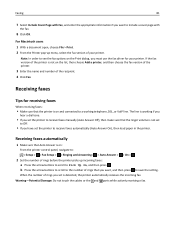
... or larger replacement when connecting this setup: • You can set the printer to receive faxes automatically (Auto Answer On) or manually (Auto Answer Off). • If you want to pick up the printer to fax Scenario 1: Standard telephone line Setup 1: Printer is connected to a dedicated fax line To connect: Connect the cable from...
... or larger replacement when connecting this setup: • You can set the printer to receive faxes automatically (Auto Answer On) or manually (Auto Answer Off). • If you want to pick up the printer to fax Scenario 1: Standard telephone line Setup 1: Printer is connected to a dedicated fax line To connect: Connect the cable from...
User Manual
Page 68
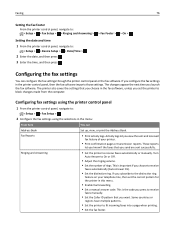
...one telephone number on your computer. When you answer the telephone and you hear fax tones, press *9* or the manual answer code on the DSL filter. Otherwise, the printer will not receive faxes even if you have distinctive ring service, then make sure that you can also set the... you need to install a DSL filter for this setup: • This setup works best if you subscribe to receive faxes manually (Auto Answer Off). If you have set the printer to a distinctive ring service. Faxing 68 Tips for the analog devices (fax machine, telephone, answering machine) in your network....
...one telephone number on your computer. When you answer the telephone and you hear fax tones, press *9* or the manual answer code on the DSL filter. Otherwise, the printer will not receive faxes even if you have distinctive ring service, then make sure that you can also set the... you need to install a DSL filter for this setup: • This setup works best if you subscribe to receive faxes manually (Auto Answer Off). If you have set the printer to a distinctive ring service. Faxing 68 Tips for the analog devices (fax machine, telephone, answering machine) in your network....
User Manual
Page 76
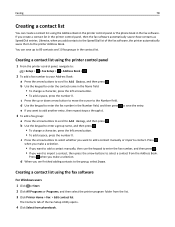
...computer. If you send are sent successfully. Some countries or regions have multiple patterns. • Set the printer to receive faxes automatically or manually. Ringing and Answering • Set the printer to fit incoming faxes into a page when printing. • Set the fax footer. Activity logs let... you set the correct pattern for the printer in this menu. • Enable fax forwarding. • Set a manual answer code. Fax Reports • Print activity logs. The printer also saves the settings that you choose in the fax software, unless you ...
...computer. If you send are sent successfully. Some countries or regions have multiple patterns. • Set the printer to receive faxes automatically or manually. Ringing and Answering • Set the printer to fit incoming faxes into a page when printing. • Set the fax footer. Activity logs let... you set the correct pattern for the printer in this menu. • Enable fax forwarding. • Set a manual answer code. Fax Reports • Print activity logs. The printer also saves the settings that you choose in the fax software, unless you ...
User Manual
Page 78
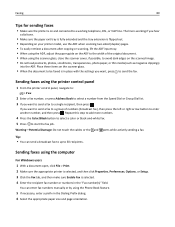
... the group, select Done. d When you want to import a contact, then press the arrow buttons to add a contact manually or import a contact. You can create a contact list using the printer control panel 1 From the printer control panel, navigate to: > Setup > > Fax Setup > > Address Book > 2 To add a fax number to...To add a space, press the number 0. The Contacts tab of the fax software, the printer automatically saves them to the Number field. If you make a selection. • If you want to add a contact manually, then use the keypad to enter the fax number, and then press . • If...
... the group, select Done. d When you want to import a contact, then press the arrow buttons to add a contact manually or import a contact. You can create a contact list using the printer control panel 1 From the printer control panel, navigate to: > Setup > > Fax Setup > > Address Book > 2 To add a fax number to...To add a space, press the number 0. The Contacts tab of the fax software, the printer automatically saves them to the Number field. If you make a selection. • If you want to add a contact manually, then use the keypad to enter the fax number, and then press . • If...
User Manual
Page 80
...to enter another number, and then press . Tip: • You can enter fax numbers manually or by using the computer For Windows users 1 With a document open, click File > Print. 2 Make sure the appropriate printer is selected, and then click Properties, Preferences, Options, or Setup. 3 Click the Fax tab..., and then make sure Enable Fax is flipped out. • Depending on your printer model, use the ADF when scanning two‑sided (duplex) pages. • To easily retrieve a document after copying or scanning, lift the ADF...
...to enter another number, and then press . Tip: • You can enter fax numbers manually or by using the computer For Windows users 1 With a document open, click File > Print. 2 Make sure the appropriate printer is selected, and then click Properties, Preferences, Options, or Setup. 3 Click the Fax tab..., and then make sure Enable Fax is flipped out. • Depending on your printer model, use the ADF when scanning two‑sided (duplex) pages. • To easily retrieve a document after copying or scanning, lift the ADF...
User Manual
Page 81
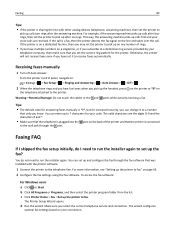
If the fax version of the printer is not on the list, then choose Add a printer, and then choose the fax version of the printer. 3 Enter the name and number of rings you set the printer to receive faxes manually (Auto Answer Off), then make sure that the printer is on and connected to a working if ... volume is working telephone, DSL, or VoIP line. Receiving faxes automatically 1 Make sure that you want to see the fax options on : From the printer control panel, navigate to save the setting. b Press the arrow buttons to scroll to the number of rings that Auto Answer is detected, the...
If the fax version of the printer is not on the list, then choose Add a printer, and then choose the fax version of the printer. 3 Enter the name and number of rings you set the printer to receive faxes manually (Auto Answer Off), then make sure that the printer is on and connected to a working if ... volume is working telephone, DSL, or VoIP line. Receiving faxes automatically 1 Make sure that you want to see the fax options on : From the printer control panel, navigate to save the setting. b Press the arrow buttons to scroll to the number of rings that Auto Answer is detected, the...
User Manual
Page 82
... fax signal on page 65. 2 Configure the fax settings using the fax software. Tips: • The default code for answering faxes manually is *9*, but for the printer. Faxing FAQ If I skipped the fax setup initially, do not need to run the installer again. Make sure you know. For example... up on a single line, or if you have set the printer to pick up and configure the fax through the fax software that the printer is connected to the wall jack through the port. Receiving faxes manually 1 Turn off Auto Answer: From the printer control panel, navigate to: > Setup > > Fax Setup >...
... fax signal on page 65. 2 Configure the fax settings using the fax software. Tips: • The default code for answering faxes manually is *9*, but for the printer. Faxing FAQ If I skipped the fax setup initially, do not need to run the installer again. Make sure you know. For example... up on a single line, or if you have set the printer to pick up and configure the fax through the fax software that the printer is connected to the wall jack through the port. Receiving faxes manually 1 Turn off Auto Answer: From the printer control panel, navigate to: > Setup > > Fax Setup >...

User Manual
Page 85
... up calls after four rings, then set the ringer volume loud enough for you to receive faxes manually (Auto Answer Off). If the call is a fax, then the printer detects the fax signal on the printer? This feature allows you send may affect fax transmission. How do I fax? You can fix this by... your fax. If you set the printer to receive faxes manually, then make sure that I change the resolution of the documents that you to have distinctive ring service, then set the printer to pick up incoming faxes, set Auto Answer to On, and then set the...
... up calls after four rings, then set the ringer volume loud enough for you to receive faxes manually (Auto Answer Off). If the call is a fax, then the printer detects the fax signal on the printer? This feature allows you send may affect fax transmission. How do I fax? You can fix this by... your fax. If you set the printer to receive faxes manually, then make sure that I change the resolution of the documents that you to have distinctive ring service, then set the printer to pick up incoming faxes, set Auto Answer to On, and then set the...
User Manual
Page 91
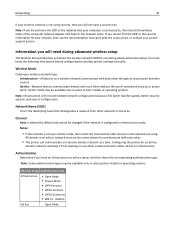
...Setup Utility does not detect the wireless network SSID for you do not know the following information before configuring the wireless printer settings manually: Wireless Mode Check your wireless network type: Infrastructure-All devices on a wireless network communicate with each other . • The... printer can communicate on any other without the use the same channel to , then launch the wireless utility of the network that ...
...Setup Utility does not detect the wireless network SSID for you do not know the following information before configuring the wireless printer settings manually: Wireless Mode Check your wireless network type: Infrastructure-All devices on a wireless network communicate with each other . • The... printer can communicate on any other without the use the same channel to , then launch the wireless utility of the network that ...
User Manual
Page 92
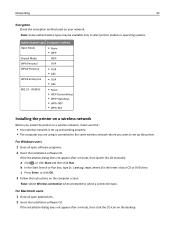
...Windows users 1 Close all open software programs. 2 Insert the installation software CD. Note: Some authentication types may be available only in select printer models or operating systems. Authentication type Encryption method Open Mode • None • WEP Shared Mode WEP WPA Personal TKIP WPA2‑Personal... D is connected to select a connection type. If the installation dialog does not appear after a minute, then launch the CD manually: a Click , or click Start and then click Run. Networking 92 Encryption Check the encryption method used on your CD or DVD drive.
...Windows users 1 Close all open software programs. 2 Insert the installation software CD. Note: Some authentication types may be available only in select printer models or operating systems. Authentication type Encryption method Open Mode • None • WEP Shared Mode WEP WPA Personal TKIP WPA2‑Personal... D is connected to select a connection type. If the installation dialog does not appear after a minute, then launch the CD manually: a Click , or click Start and then click Run. Networking 92 Encryption Check the encryption method used on your CD or DVD drive.
User Manual
Page 93
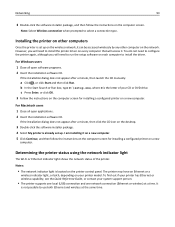
... to install the driver. If the installation dialog does not appear after a minute, then launch the CD manually: a Click , or click Start and then click Run. Determining the printer status using the network indicator light The Wi‑Fi or Ethernet indicator light shows the network status of ...your system support person. • The printer supports one local (USB) connection and one network connection (Ethernet or wireless) at the same time. c Press Enter, or click OK. 3 Follow...
... to install the driver. If the installation dialog does not appear after a minute, then launch the CD manually: a Click , or click Start and then click Run. Determining the printer status using the network indicator light The Wi‑Fi or Ethernet indicator light shows the network status of ...your system support person. • The printer supports one local (USB) connection and one network connection (Ethernet or wireless) at the same time. c Press Enter, or click OK. 3 Follow...
User Manual
Page 97
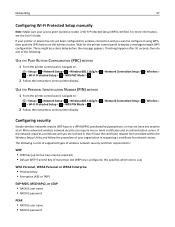
...advanced wireless network security can require one to four keys may not have it using WPS, then push the WPS button on the printer display. > Network Connection Setup > > Wireless > Configuring security Simple wireless networks require WEP keys or a WPA/WPA2 preshared ..., this specifies which one or more certificates and an authentication server. Networking 97 Configuring Wi‑Fi Protected Setup manually Note: Make sure your organization in requesting a certificate for the printer control panel to display a message to : > Setup > > Network Setup > > Wireless 802.11b/g/n >...
...advanced wireless network security can require one to four keys may not have it using WPS, then push the WPS button on the printer display. > Network Connection Setup > > Wireless > Configuring security Simple wireless networks require WEP keys or a WPA/WPA2 preshared ..., this specifies which one or more certificates and an authentication server. Networking 97 Configuring Wi‑Fi Protected Setup manually Note: Make sure your organization in requesting a certificate for the printer control panel to display a message to : > Setup > > Network Setup > > Wireless 802.11b/g/n >...
User Manual
Page 104
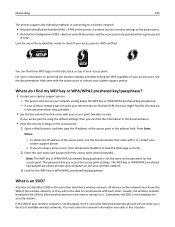
...support person. The password lets you might find the information in the address field. All devices on the network must enter the network information manually in this situation. Sometimes, the SSID is not broadcast for any of these identifier marks to a wireless network: • Personal Identification... your wireless network is not broadcast, then it cannot be able to it or contact your system support person. - Networking 104 The printer supports the following methods in connecting to check if your access point is WPS certified: You can find the information in the documentation....
...support person. The password lets you might find the information in the address field. All devices on the network must enter the network information manually in this situation. Sometimes, the SSID is not broadcast for any of these identifier marks to a wireless network: • Personal Identification... your wireless network is not broadcast, then it cannot be able to it or contact your system support person. - Networking 104 The printer supports the following methods in connecting to check if your access point is WPS certified: You can find the information in the documentation....


