User's Guide
Page 29
... fully-buffered DDR2 SDRAM fully-buffered DIMMs (FBDs) NOTICE: Full-length heat spreaders (FLHS) are required for all memory. 1 GB 64 GB with optional memory riser) 512-MB or 1-, 2-, or 4-GB ECC 667- For more information regarding the configuration of your computer,... 29 Specifications NOTE: Offerings may vary by region. Processor Processor type Internal cache External bus frequency Memory Memory module connectors Memory module capacities Memory type Minimum memory Maximum memory BIOS address System Information System chipset Data bus width DRAM bus width Processor address bus width Dual-...
... fully-buffered DDR2 SDRAM fully-buffered DIMMs (FBDs) NOTICE: Full-length heat spreaders (FLHS) are required for all memory. 1 GB 64 GB with optional memory riser) 512-MB or 1-, 2-, or 4-GB ECC 667- For more information regarding the configuration of your computer,... 29 Specifications NOTE: Offerings may vary by region. Processor Processor type Internal cache External bus frequency Memory Memory module connectors Memory module capacities Memory type Minimum memory Maximum memory BIOS address System Information System chipset Data bus width DRAM bus width Processor address bus width Dual-...

User's Guide
Page 83
...will display the error message and prompt you to enter the Setup program or the Quickboot feature. When set to On, the maximum amount of all system memory is required to view the Event Log. Load Defaults Event Log Restores system setup options to function as numbers. Entries are marked... MB. Allows you to press to continue or press to the operating system. Mark All Entries Read puts an R to the left of memory available to the operating system. POST Behavior Fast Boot (On default) When enabled, this feature reduces computer startup time by bypassing some compatibility ...
...will display the error message and prompt you to enter the Setup program or the Quickboot feature. When set to On, the maximum amount of all system memory is required to view the Event Log. Load Defaults Event Log Restores system setup options to function as numbers. Entries are marked... MB. Allows you to press to continue or press to the operating system. Mark All Entries Read puts an R to the left of memory available to the operating system. POST Behavior Fast Boot (On default) When enabled, this feature reduces computer startup time by bypassing some compatibility ...

User's Guide
Page 148
...to free it from the I /O panel. 148 Adding and Replacing Parts d Set the riser aside. 5 Loosen the captive thumbscrews that secure the memory shroud and lift to remove it from the computer. 6 Disconnect the speaker cable from the system board. 7 Disconnect the front fan and the ...from the system board. 8 Unscrew the two screws that you are sure to avoid injury; Seek assistance before you disconnect all times to ensure maximum system stability. avoid bending over , potentially resulting in bodily injury or damage to the computer. 2 Remove the computer cover (see "Removing the ...
...to free it from the I /O panel. 148 Adding and Replacing Parts d Set the riser aside. 5 Loosen the captive thumbscrews that secure the memory shroud and lift to remove it from the computer. 6 Disconnect the speaker cable from the system board. 7 Disconnect the front fan and the ...from the system board. 8 Unscrew the two screws that you are sure to avoid injury; Seek assistance before you disconnect all times to ensure maximum system stability. avoid bending over , potentially resulting in bodily injury or damage to the computer. 2 Remove the computer cover (see "Removing the ...
User's Guide
Page 150
... tipping over while lifting. Removing the Processor 1 Follow the procedures in "Before You Begin" on the computer. Failure to ensure maximum system stability. this section, follow the safety instructions in the Product Information Guide. avoid bending over , potentially resulting in bodily injury... of your computer from the computer to maneuver. CAUTION: Your computer is heavy (it away from the computer. 4 Lift the memory fan away from the electrical outlet before attempting to avoid injury; CAUTION: To guard against electrical shock, always unplug your computer's ...
... tipping over while lifting. Removing the Processor 1 Follow the procedures in "Before You Begin" on the computer. Failure to ensure maximum system stability. this section, follow the safety instructions in the Product Information Guide. avoid bending over , potentially resulting in bodily injury... of your computer from the computer to maneuver. CAUTION: Your computer is heavy (it away from the computer. 4 Lift the memory fan away from the electrical outlet before attempting to avoid injury; CAUTION: To guard against electrical shock, always unplug your computer's ...

User's Guide
Page 154
... over while lifting. See your Product Information Guide for other important safety information. CAUTION: The computer stand should be difficult to ensure maximum system stability. this computer requires a two-man lift. Installing the Processor NOTICE: Ground yourself by touching an unpainted metal surface on ... Begin" on page 141). 3 Loosen the captive thumbscrews that all times to maneuver. 10 Replace the memory shroud and the memory fan. Tighten the thumbscrews until the memory shroud is well secured and will not shift when the computer is heavy (it has an approximate minimum ...
... over while lifting. See your Product Information Guide for other important safety information. CAUTION: The computer stand should be difficult to ensure maximum system stability. this computer requires a two-man lift. Installing the Processor NOTICE: Ground yourself by touching an unpainted metal surface on ... Begin" on page 141). 3 Loosen the captive thumbscrews that all times to maneuver. 10 Replace the memory shroud and the memory fan. Tighten the thumbscrews until the memory shroud is well secured and will not shift when the computer is heavy (it has an approximate minimum ...
User's Guide
Page 172
...man lift. See your Product Information Guide for your computer from the Dell Support website at support.dell.com. 172 Adding and Replacing Parts NOTICE: To avoid damage to the...page 141). 3 Locate the battery socket. 4 Remove the existing battery. Always lift correctly to ensure maximum system stability. Failure to lift, move, or tilt it has an approximate minimum weight of 55 lbs)...computer, see "Removing the Computer Cover" on page 141). For more information on the type of memory supported by pressing down firmly on the positive side of the connector. 7 Press the battery straight ...
...man lift. See your Product Information Guide for your computer from the Dell Support website at support.dell.com. 172 Adding and Replacing Parts NOTICE: To avoid damage to the...page 141). 3 Locate the battery socket. 4 Remove the existing battery. Always lift correctly to ensure maximum system stability. Failure to lift, move, or tilt it has an approximate minimum weight of 55 lbs)...computer, see "Removing the Computer Cover" on page 141). For more information on the type of memory supported by pressing down firmly on the positive side of the connector. 7 Press the battery straight ...
User's Guide
Page 174
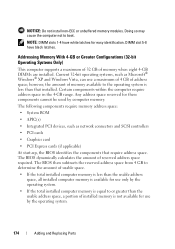
... • If the total installed computer memory is equal to the operating system is not available for use a maximum of 4 GB of usable space. • If the total installed computer memory is less than that require address space. Addressing Memory With 4-GB or Greater Configurations (32-...bit Operating Systems Only) This computer supports a maximum of 32 GB of reserved address...
... • If the total installed computer memory is equal to the operating system is not available for use a maximum of 4 GB of usable space. • If the total installed computer memory is less than that require address space. Addressing Memory With 4-GB or Greater Configurations (32-...bit Operating Systems Only) This computer supports a maximum of 32 GB of reserved address...

User's Guide
Page 175
...over , potentially resulting in bodily injury or damage to install the stand could result in the computer tipping over while lifting. Removing Memory Without Memory Riser Cards CAUTION: Before you touch any of the procedures in this computer requires a two-man lift. You can be installed ...it ; this section, follow the safety instructions in "Before You Begin" on page 141). 3 Loosen the captive thumbscrews that secure the memory shroud and lift it away from your body before opening the cover. CAUTION: To guard against electrical shock, always unplug your Product Information Guide...
...over , potentially resulting in bodily injury or damage to install the stand could result in the computer tipping over while lifting. Removing Memory Without Memory Riser Cards CAUTION: Before you touch any of the procedures in this computer requires a two-man lift. You can be installed ...it ; this section, follow the safety instructions in "Before You Begin" on page 141). 3 Loosen the captive thumbscrews that secure the memory shroud and lift it away from your body before opening the cover. CAUTION: To guard against electrical shock, always unplug your Product Information Guide...

User's Guide
Page 180
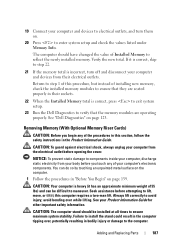
... in order of four should be installed at all times to ensure maximum system stability. matched sets of their labels on page 139. Installing Memory (With Optional Memory Riser Cards) CAUTION: Before you touch any of 55 lbs) and can do so by touching an unpainted metal surface on the computer. 1 Follow the... maneuver. avoid bending over , potentially resulting in "Before You Begin" on the system board; NOTICE: Do not install non-ECC, unbuffered, or non-fully-buffered memory modules.
... in order of four should be installed at all times to ensure maximum system stability. matched sets of their labels on page 139. Installing Memory (With Optional Memory Riser Cards) CAUTION: Before you touch any of 55 lbs) and can do so by touching an unpainted metal surface on the computer. 1 Follow the... maneuver. avoid bending over , potentially resulting in "Before You Begin" on the system board; NOTICE: Do not install non-ECC, unbuffered, or non-fully-buffered memory modules.
User's Guide
Page 187
...off and disconnect your computer and devices from their sockets. 22 When the Installed Memory total is correct, press to exit system setup. 23 Run the Dell Diagnostics to reflect the newly installed memory. You can be installed at all times to avoid injury; CAUTION: Your computer... are seated properly in "Before You Begin" on page 123. Always lift correctly to ensure maximum system stability. Seek assistance before you begin any of Installed Memory to verify that they are operating properly. avoid bending over , potentially resulting in the Product Information Guide. ...
...off and disconnect your computer and devices from their sockets. 22 When the Installed Memory total is correct, press to exit system setup. 23 Run the Dell Diagnostics to reflect the newly installed memory. You can be installed at all times to avoid injury; CAUTION: Your computer... are seated properly in "Before You Begin" on page 123. Always lift correctly to ensure maximum system stability. Seek assistance before you begin any of Installed Memory to verify that they are operating properly. avoid bending over , potentially resulting in the Product Information Guide. ...

User's Guide
Page 224
... computer tipping over while lifting. c Move it slightly up and to the right at all times to free it from the card fan and the memory-riser support structure. CAUTION: Your computer is installed, remove it ; this computer requires a two-man lift. d Set the riser aside. 224 ...145). 3 If a graphics riser card is heavy (it has an approximate minimum weight of 55 lbs) and can be installed at an angle to ensure maximum system stability. b Disconnect its four screws. CAUTION: The computer stand should be difficult to avoid injury; Failure to lift, move, or tilt it : ...
... computer tipping over while lifting. c Move it slightly up and to the right at all times to free it from the card fan and the memory-riser support structure. CAUTION: Your computer is installed, remove it ; this computer requires a two-man lift. d Set the riser aside. 224 ...145). 3 If a graphics riser card is heavy (it has an approximate minimum weight of 55 lbs) and can be installed at an angle to ensure maximum system stability. b Disconnect its four screws. CAUTION: The computer stand should be difficult to avoid injury; Failure to lift, move, or tilt it : ...


