
Quick Reference Guide
Page 14
... (With the Operating System Disc) NOTE: The Files and Settings Transfer Wizard designates the source computer from the Windows XP CD, and then click Next. 4 Review the information under Now go to your old computer, and then go to your choice, and then click Next. 7 Under What do you want to...
... (With the Operating System Disc) NOTE: The Files and Settings Transfer Wizard designates the source computer from the Windows XP CD, and then click Next. 4 Review the information under Now go to your old computer, and then go to your choice, and then click Next. 7 Under What do you want to...

Quick Reference Guide
Page 15
... XP CD?, click I want to create a Wizard Disk in the following drive, and then click Next. 4 Insert a writable CD or DVD, and then click OK. 5 Review the information under Now go to the source computer. When the transfer is going to be transferred as the new computer. The wizard reads the...
... XP CD?, click I want to create a Wizard Disk in the following drive, and then click Next. 4 Insert a writable CD or DVD, and then click OK. 5 Review the information under Now go to the source computer. When the transfer is going to be transferred as the new computer. The wizard reads the...

Quick Reference Guide
Page 33
... display a screen image, see "Troubleshooting" in your User's Guide. 1 Turn on Dell computers. Dell Diagnostics CAUTION: Before you run the Dell Diagnostics from the Drivers and Utilities disc. Starting the Dell Diagnostics From Your Hard Drive The Dell Diagnostics is active. When to review your computer's configuration information, and ensure that the device that best describes...
... display a screen image, see "Troubleshooting" in your User's Guide. 1 Turn on Dell computers. Dell Diagnostics CAUTION: Before you run the Dell Diagnostics from the Drivers and Utilities disc. Starting the Dell Diagnostics From Your Hard Drive The Dell Diagnostics is active. When to review your computer's configuration information, and ensure that the device that best describes...
Quick Reference Guide
Page 37
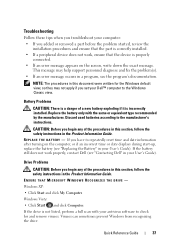
...click Computer. Replace the battery only with your antivirus software to the Windows Classic view. This message may not apply if you set your Dell™ computer to check for and remove viruses. Drive Problems CAUTION: Before you begin any of the procedures in the Product Information Guide... 37 Troubleshooting Follow these tips when you troubleshoot your computer: • If you added or removed a part before the problem started, review the installation procedures and ensure that the part is correctly installed. • If a peripheral device does not work properly, contact...
...click Computer. Replace the battery only with your antivirus software to the Windows Classic view. This message may not apply if you set your Dell™ computer to check for and remove viruses. Drive Problems CAUTION: Before you begin any of the procedures in the Product Information Guide... 37 Troubleshooting Follow these tips when you troubleshoot your computer: • If you added or removed a part before the problem started, review the installation procedures and ensure that the part is correctly installed. • If a peripheral device does not work properly, contact...

User's Guide
Page 93
...does not work , ensure that the part is correctly installed. • If a peripheral device does not work properly, contact Dell (see the program's documentation. Drive Problems CAUTION: Before you begin any of the procedures in this section, follow the safety ...instructions in a program, see "Contacting Dell" on the computer, or if an incorrect time or date displays during...Information Guide. 9 Troubleshooting Solving Problems Follow these tips when you troubleshoot your Dell™ computer to the Windows Classic view. This message may not apply ...
...does not work , ensure that the part is correctly installed. • If a peripheral device does not work properly, contact Dell (see the program's documentation. Drive Problems CAUTION: Before you begin any of the procedures in this section, follow the safety ...instructions in a program, see "Contacting Dell" on the computer, or if an incorrect time or date displays during...Information Guide. 9 Troubleshooting Solving Problems Follow these tips when you troubleshoot your Dell™ computer to the Windows Classic view. This message may not apply ...

User's Guide
Page 123
... DATA AND R E P L A C E Y O U R H A R D D R I V E B Y C A L L I N P R O T E C T E D M O D E - WRITE FAULT ON SELECTED DRIVE - NOTE: The Drivers and Utilities media is recommended that the device you contact Dell for technical assistance. Enter system setup (see "System Setup" on page 75). U N E X P E C T E D I N T E R R U P T I N G Y O U R S U P P O R T D E S K O R D E L L - If no replacement drive is... into the drive and try again. The floppy drive cannot read the disk. See "Dell Diagnostics" on Dell™ computers. See "Drive Problems" on page 75), review your computer.
... DATA AND R E P L A C E Y O U R H A R D D R I V E B Y C A L L I N P R O T E C T E D M O D E - WRITE FAULT ON SELECTED DRIVE - NOTE: The Drivers and Utilities media is recommended that the device you contact Dell for technical assistance. Enter system setup (see "System Setup" on page 75). U N E X P E C T E D I N T E R R U P T I N G Y O U R S U P P O R T D E S K O R D E L L - If no replacement drive is... into the drive and try again. The floppy drive cannot read the disk. See "Dell Diagnostics" on Dell™ computers. See "Drive Problems" on page 75), review your computer.


