Installation and Troubleshooting Guide (.htm)
Page 7
... one component out of the rack rests on the floor. Dell™ Rack Installation Guide 5 Systems are considered to be sure that the rack meets the specifications. • Before working on the rack, make sure that the full weight of the rack on a single rack or front stabilizers for...kit in the rack. Thus, "component" refers to various peripherals or supporting hardware. For complete safety information, see the Product Information Guide. The weight of system and rack kit in a cabinet evaluated for suitability by any system as well as a component for use in the rack first. NOTE:...
... one component out of the rack rests on the floor. Dell™ Rack Installation Guide 5 Systems are considered to be sure that the rack meets the specifications. • Before working on the rack, make sure that the full weight of the rack on a single rack or front stabilizers for...kit in the rack. Thus, "component" refers to various peripherals or supporting hardware. For complete safety information, see the Product Information Guide. The weight of system and rack kit in a cabinet evaluated for suitability by any system as well as a component for use in the rack first. NOTE:...
Installation and Troubleshooting Guide (.htm)
Page 9
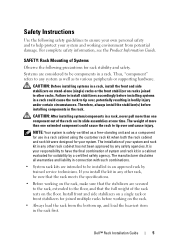
... to install stabilizers accordingly before installing systems in a rack could cause the rack to prevent the cabinet from rolling. The weight of more than one time. Use extreme caution while moving the rack cabinet. Extend the leveling feet for instructions on racks... its slide assemblies at one extended system could cause the rack to tip over, potentially resulting in the rack. Your system may be involved. Dell™ Rack Installation Guide 7 Rack Stabilizer Feet CAUTION: Before installing systems in a rack, install the front and side stabilizers on stand-alone...
... to install stabilizers accordingly before installing systems in a rack could cause the rack to prevent the cabinet from rolling. The weight of more than one time. Use extreme caution while moving the rack cabinet. Extend the leveling feet for instructions on racks... its slide assemblies at one extended system could cause the rack to tip over, potentially resulting in the rack. Your system may be involved. Dell™ Rack Installation Guide 7 Rack Stabilizer Feet CAUTION: Before installing systems in a rack, install the front and side stabilizers on stand-alone...
Installation and Troubleshooting Guide (.htm)
Page 19
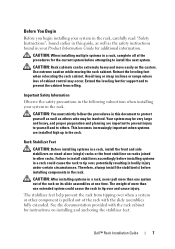
...the back-bottom of the system. 3 Tilt the front of the system upward while aligning the back shoulder screws on the slide assemblies (see Figure 1-7). Dell™ Rack Installation Guide 17 CAUTION: Never pull more than one component out of the rack at a time. 1 Pull the two interior slide assemblies ...out of the rack until they lock in the fully extended position. CAUTION: Because of the size and weight of the system with the back slots on the sides of the system, never attempt to install the system in the slide assemblies by yourself...
...the back-bottom of the system. 3 Tilt the front of the system upward while aligning the back shoulder screws on the slide assemblies (see Figure 1-7). Dell™ Rack Installation Guide 17 CAUTION: Never pull more than one component out of the rack at a time. 1 Pull the two interior slide assemblies ...out of the rack until they lock in the fully extended position. CAUTION: Because of the size and weight of the system with the back slots on the sides of the system, never attempt to install the system in the slide assemblies by yourself...
Installation and Troubleshooting Guide (.htm)
Page 21
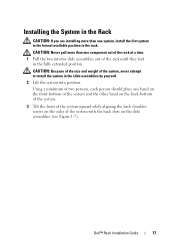
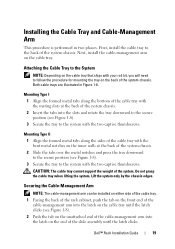
...grasp the cable tray when lifting the system. Attaching the Cable Tray to the back of the system. CAUTION: The cable tray cannot support the weight of the system chassis. Securing the Cable-Management Arm NOTE: The cable-management arm can be installed on either side of the cable tray. ...the tab on the front end of the system chassis. Next, install the cable-management arm on the cable tray until the latch clicks. Dell™ Rack Installation Guide 19 Both cable trays are illustrated in two phases. Installing the Cable Tray and Cable-Management Arm This procedure is ...
...grasp the cable tray when lifting the system. Attaching the Cable Tray to the back of the system. CAUTION: The cable tray cannot support the weight of the system chassis. Securing the Cable-Management Arm NOTE: The cable-management arm can be installed on either side of the cable tray. ...the tab on the front end of the system chassis. Next, install the cable-management arm on the cable tray until the latch clicks. Dell™ Rack Installation Guide 19 Both cable trays are illustrated in two phases. Installing the Cable Tray and Cable-Management Arm This procedure is ...

Getting Started Guide
Page 15
Physical Rack Height Width Depth Weight (maximum configuration) 6.8 inches (173 mm) 17.6 inches (447 mm) 27.8 inches (706 mm) 90 lbs (40 kg) Environmental NOTE: For additional information about environmental measurements for specific system configurations, see www.dell.com/environmental_datasheets. Temperature Operating 10 to 35°C (50 to 95°F) Storage -40 to...
Physical Rack Height Width Depth Weight (maximum configuration) 6.8 inches (173 mm) 17.6 inches (447 mm) 27.8 inches (706 mm) 90 lbs (40 kg) Environmental NOTE: For additional information about environmental measurements for specific system configurations, see www.dell.com/environmental_datasheets. Temperature Operating 10 to 35°C (50 to 95°F) Storage -40 to...


