
Microprocessor Upgrade Installation Guide
Page 3
...the microprocessor upgrade kit: • A microprocessor • A heat sink • Heat-sink retention clip(s) • A VRM, if applicable Your upgrade kit may also include a cooling fan. To take advantage of future options in speed and functionality, you add or replace a microprocessor, check the latest system BIOS information on the system board...be present to install or replace the microprocessor in the primary microprocessor socket. In addition to the ZIF socket for the primary microprocessor on the Dell Support website at support.dell.com, and upgrade the BIOS if necessary.
...the microprocessor upgrade kit: • A microprocessor • A heat sink • Heat-sink retention clip(s) • A VRM, if applicable Your upgrade kit may also include a cooling fan. To take advantage of future options in speed and functionality, you add or replace a microprocessor, check the latest system BIOS information on the system board...be present to install or replace the microprocessor in the primary microprocessor socket. In addition to the ZIF socket for the primary microprocessor on the Dell Support website at support.dell.com, and upgrade the BIOS if necessary.
Microprocessor Upgrade Installation Guide
Page 4
... from the heat sink. See your Installation and Troubleshooting Guide. 1-2 Microprocessor Upgrade Installation Guide Bending the pins can remove the fan to provide easier access to maintain proper thermal conditions. Be sure they have had sufficient time to remove the microprocessor. NOTICE... removing the microprocessor. CAUTION: The microprocessor and heat sink can permanently damage the microprocessor. 7 Unpack the new microprocessor. www.dell.com | support.dell.com 4 If you intend to cool before handling. NOTICE: Be careful not to prevent the thermal interface material from a...
... from the heat sink. See your Installation and Troubleshooting Guide. 1-2 Microprocessor Upgrade Installation Guide Bending the pins can remove the fan to provide easier access to maintain proper thermal conditions. Be sure they have had sufficient time to remove the microprocessor. NOTICE... removing the microprocessor. CAUTION: The microprocessor and heat sink can permanently damage the microprocessor. 7 Unpack the new microprocessor. www.dell.com | support.dell.com 4 If you intend to cool before handling. NOTICE: Be careful not to prevent the thermal interface material from a...
Microprocessor Upgrade Installation Guide
Page 6
...on the clip latches onto the ZIF socket tab. NOTE: The system does not support mismatched VRMs. 1-4 Microprocessor Upgrade Installation Guide www.dell.com | support.dell.com 9 Install the heat sink. • If the heat sink provided has a protective cover on the underside of the VRMs from... the upgrade kit. NOTICE: If a cooling fan is provided with your upgrade kit, you removed a cooling fan earlier in the appropriate secondary VRM connector, ensuring...
...on the clip latches onto the ZIF socket tab. NOTE: The system does not support mismatched VRMs. 1-4 Microprocessor Upgrade Installation Guide www.dell.com | support.dell.com 9 Install the heat sink. • If the heat sink provided has a protective cover on the underside of the VRMs from... the upgrade kit. NOTICE: If a cooling fan is provided with your upgrade kit, you removed a cooling fan earlier in the appropriate secondary VRM connector, ensuring...
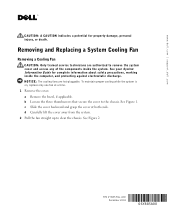
Removing and Replacing a System Cooling Fan
Page 1
...three thumbscrews that secure the cover to clear the chassis. Removing and Replacing a System Cooling Fan Removing a Cooling Fan CAUTION: Only trained service technicians are hot-pluggable. NOTICE: The cooling fans are authorized to remove the system cover and access any of the components inside the computer,... backward and grasp the cover at a time. 1 Remove the cover. See Figure 2. A00 December 2002 06Y885A00 See Figure 1. www.dell.com | support.dell.com CAUTION: A CAUTION indicates a potential for complete information about safety precautions, working inside the system.
...three thumbscrews that secure the cover to clear the chassis. Removing and Replacing a System Cooling Fan Removing a Cooling Fan CAUTION: Only trained service technicians are hot-pluggable. NOTICE: The cooling fans are authorized to remove the system cover and access any of the components inside the computer,... backward and grasp the cover at a time. 1 Remove the cover. See Figure 2. A00 December 2002 06Y885A00 See Figure 1. www.dell.com | support.dell.com CAUTION: A CAUTION indicates a potential for complete information about safety precautions, working inside the system.

Removing and Replacing a System Cooling Fan
Page 2
Removing and Replacing the Cover thumbscrews (3) Figure 2. Removing and Installing a Cooling Fan system fans (2) fan connector cooling fan www.dell.com | support.dell.com Figure 1.
Removing and Replacing the Cover thumbscrews (3) Figure 2. Removing and Installing a Cooling Fan system fans (2) fan connector cooling fan www.dell.com | support.dell.com Figure 1.
Removing and Replacing a System Cooling Fan
Page 3
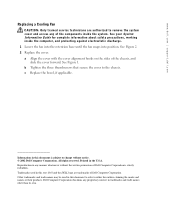
...dell.com | support.dell.com Replacing a Cooling Fan CAUTION: Only trained service technicians are trademarks of the chassis, and slide the cover forward. b Tighten the three thumbscrews that secure the cover to change without the written permission of the components inside the computer, and protecting against electrostatic discharge. 1 Lower the fan... 2. 2 Replace the cover. a Align the cover with the cover alignment hooks on the sides of Dell Computer Corporation. c Replace the bezel, if applicable. See your System Information Guide for complete information about safety...
...dell.com | support.dell.com Replacing a Cooling Fan CAUTION: Only trained service technicians are trademarks of the chassis, and slide the cover forward. b Tighten the three thumbscrews that secure the cover to change without the written permission of the components inside the computer, and protecting against electrostatic discharge. 1 Lower the fan... 2. 2 Replace the cover. a Align the cover with the cover alignment hooks on the sides of Dell Computer Corporation. c Replace the bezel, if applicable. See your System Information Guide for complete information about safety...


