
Microprocessor Upgrade Installation Guide
Page 3
...: • A microprocessor • A heat sink • Heat-sink retention clip(s) • A VRM, if applicable Your upgrade kit may also include a cooling fan. Adding or Replacing a Microprocessor NOTICE: The secondary microprocessors must be the same speed as the primary microprocessor. The following subsection describes how to accommodate secondary... (see your Installation and Troubleshooting Guide). NOTE: In a single microprocessor system, the microprocessor must be installed in a ZIF socket on the Dell Support website at support.dell.com, and upgrade the BIOS if necessary.
...: • A microprocessor • A heat sink • Heat-sink retention clip(s) • A VRM, if applicable Your upgrade kit may also include a cooling fan. Adding or Replacing a Microprocessor NOTICE: The secondary microprocessors must be the same speed as the primary microprocessor. The following subsection describes how to accommodate secondary... (see your Installation and Troubleshooting Guide). NOTE: In a single microprocessor system, the microprocessor must be installed in a ZIF socket on the Dell Support website at support.dell.com, and upgrade the BIOS if necessary.
Microprocessor Upgrade Installation Guide
Page 4
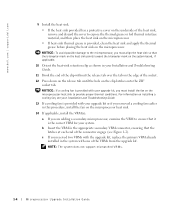
...to prevent the thermal interface material from a microprocessor unless you are upgrading an existing microprocessor, remove the microprocessor heat sink. www.dell.com | support.dell.com 4 If you intend to remove the microprocessor. Be sure they have had sufficient time to the fully open position so that... the socket is ready for information on removing a cooling fan, see "Getting Help" in the open position (see Figure 1-1). NOTICE: Never ...
...to prevent the thermal interface material from a microprocessor unless you are upgrading an existing microprocessor, remove the microprocessor heat sink. www.dell.com | support.dell.com 4 If you intend to remove the microprocessor. Be sure they have had sufficient time to the fully open position so that... the socket is ready for information on removing a cooling fan, see "Getting Help" in the open position (see Figure 1-1). NOTICE: Never ...
Microprocessor Upgrade Installation Guide
Page 6
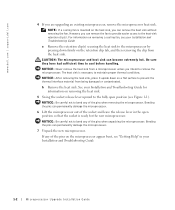
...a secondary microprocessor, examine the VRM to ensure that it is provided with one of the VRMs from the upgrade kit. For information on installing a cooling fan, see Figure 1-2). c If you must align the heat sink so that the latches at each end of the connector engage (see your Installation and Troubleshooting... edge of the socket. 12 Press down on the release tab until the hole on the clip latches onto the ZIF socket tab. www.dell.com | support.dell.com 9 Install the heat sink. • If the heat sink provided has a protective cover on the underside of the heat sink, remove and ...
...a secondary microprocessor, examine the VRM to ensure that it is provided with one of the VRMs from the upgrade kit. For information on installing a cooling fan, see Figure 1-2). c If you must align the heat sink so that the latches at each end of the connector engage (see your Installation and Troubleshooting... edge of the socket. 12 Press down on the release tab until the hole on the clip latches onto the ZIF socket tab. www.dell.com | support.dell.com 9 Install the heat sink. • If the heat sink provided has a protective cover on the underside of the heat sink, remove and ...
Removing and Replacing a System Cooling Fan
Page 1
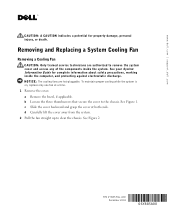
... a Cooling Fan CAUTION: Only trained service technicians are hot-pluggable. b Loosen the three thumbscrews that secure the cover to clear the chassis. P/N 6Y885 Rev. See Figure 2. www.dell.com | support.dell.com CAUTION: A CAUTION indicates a potential for complete information about safety ...precautions, working inside the system. a Remove the bezel, if applicable. d Carefully lift the cover away from the system. 2 Pull the fan straight up to the...
... a Cooling Fan CAUTION: Only trained service technicians are hot-pluggable. b Loosen the three thumbscrews that secure the cover to clear the chassis. P/N 6Y885 Rev. See Figure 2. www.dell.com | support.dell.com CAUTION: A CAUTION indicates a potential for complete information about safety ...precautions, working inside the system. a Remove the bezel, if applicable. d Carefully lift the cover away from the system. 2 Pull the fan straight up to the...

Removing and Replacing a System Cooling Fan
Page 2
Removing and Installing a Cooling Fan system fans (2) fan connector cooling fan Removing and Replacing the Cover thumbscrews (3) Figure 2. www.dell.com | support.dell.com Figure 1.
Removing and Installing a Cooling Fan system fans (2) fan connector cooling fan Removing and Replacing the Cover thumbscrews (3) Figure 2. www.dell.com | support.dell.com Figure 1.
Removing and Replacing a System Cooling Fan
Page 3
www.dell.com | support.dell.com Replacing a Cooling Fan CAUTION: Only trained service technicians are trademarks of the chassis, and slide the cover forward. c Replace the bezel, if applicable. Reproduction in any proprietary interest ... marks and names or their products. Printed in this document is strictly forbidden. a Align the cover with the cover alignment hooks on the sides of Dell Computer Corporation. Trademarks used in the U.S.A. Other trademarks and trade names may be used in this document to refer to change without the written permission...
www.dell.com | support.dell.com Replacing a Cooling Fan CAUTION: Only trained service technicians are trademarks of the chassis, and slide the cover forward. c Replace the bezel, if applicable. Reproduction in any proprietary interest ... marks and names or their products. Printed in this document is strictly forbidden. a Align the cover with the cover alignment hooks on the sides of Dell Computer Corporation. Trademarks used in the U.S.A. Other trademarks and trade names may be used in this document to refer to change without the written permission...


