
Hardware Owner's Manual (PDF)
Page 3
... Codes 15 LCD Status Messages 16 Solving Problems Described by LCD Status Messages 22 Removing LCD Status Messages 23 System Messages 23 Warning Messages 30 Diagnostics Messages 30 Alert Messages 31 2 Using the System Setup Program Entering the System Setup Program 33 Responding to Error Messages 33 Using the System Setup...
... Codes 15 LCD Status Messages 16 Solving Problems Described by LCD Status Messages 22 Removing LCD Status Messages 23 System Messages 23 Warning Messages 30 Diagnostics Messages 30 Alert Messages 31 2 Using the System Setup Program Entering the System Setup Program 33 Responding to Error Messages 33 Using the System Setup...
Hardware Owner's Manual (PDF)
Page 7
... for Testing 122 Selecting Diagnostics Options 123 Viewing Information and Results 123 6 Jumpers and Connectors System Board Jumpers 125 System Board Connectors 127 Disabling a Forgotten Password 129 7 Getting Help Technical Assistance 131 Online Services 131 AutoTech Service 132 Automated Order-Status Service 132 Technical Support Service 132 Dell Enterprise Training and Certification...
... for Testing 122 Selecting Diagnostics Options 123 Viewing Information and Results 123 6 Jumpers and Connectors System Board Jumpers 125 System Board Connectors 127 Disabling a Forgotten Password 129 7 Getting Help Technical Assistance 131 Online Services 131 AutoTech Service 132 Automated Order-Status Service 132 Technical Support Service 132 Dell Enterprise Training and Certification...
Hardware Owner's Manual (PDF)
Page 9
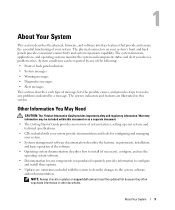
...be reported by any of the following: • Front or back panel indicators • System messages • Warning messages • Diagnostics messages • Alert messages This section describes each type of message, lists the possible causes, and provides steps to resolve any components... separately provides information to configure and install these options. • Updates are illustrated in other documents. The physical connectors on support.dell.com and read the updates first because they often supersede information in this document or as a separate document. • The Getting...
...be reported by any of the following: • Front or back panel indicators • System messages • Warning messages • Diagnostics messages • Alert messages This section describes each type of message, lists the possible causes, and provides steps to resolve any components... separately provides information to configure and install these options. • Updates are illustrated in other documents. The physical connectors on support.dell.com and read the updates first because they often supersede information in this document or as a separate document. • The Getting...
Hardware Owner's Manual (PDF)
Page 10
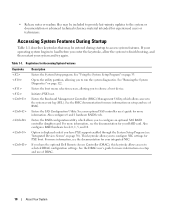
... to provide last-minute updates to choose a boot device. If your operating system begins to load before you have the optional Dell Remote Access Controller (DRAC), this keystroke allows access to the system event log (SEL). Initiates PXE boot. Option is displayed...RAID controller daughter card. Also configures 0 and 1 hardware RAID levels. Opens the utility partition, allowing you to run the system diagnostics. See the DRAC user's guide for Accessing System Features Keystroke Description Enters the System Setup program. Enters the RAID configuration utility, ...
... to provide last-minute updates to choose a boot device. If your operating system begins to load before you have the optional Dell Remote Access Controller (DRAC), this keystroke allows access to the system event log (SEL). Initiates PXE boot. Option is displayed...RAID controller daughter card. Also configures 0 and 1 hardware RAID levels. Opens the utility partition, allowing you to run the system diagnostics. See the DRAC user's guide for Accessing System Features Keystroke Description Enters the System Setup program. Enters the RAID configuration utility, ...
Hardware Owner's Manual (PDF)
Page 16
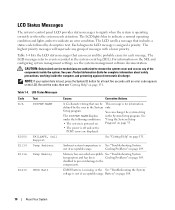
LCD Status Messages The system's control panel LCD provides status messages to signify when the system is assigned a priority. Each diagnostic LCD message is operating correctly or when the system needs attention. Table 1-4. See under the following conditions: "Using the System Setup • The system is ...
LCD Status Messages The system's control panel LCD provides status messages to signify when the system is assigned a priority. Each diagnostic LCD message is operating correctly or when the system needs attention. Table 1-4. See under the following conditions: "Using the System Setup • The system is ...
Hardware Owner's Manual (PDF)
Page 30
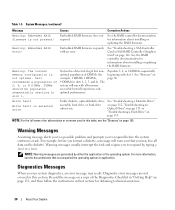
...: Embedded RAID firmware is not optimal. Warning: The current memory configuration is not present! The system will run system diagnostics, an error message may lose all memory accessible but nonoptimal population of an abbreviation or acronym used in that accompanied the...See "Troubleshooting a SAS Controller Card or SAS RAID Controller Daughter Card" on page 80. Dell recommends a population of the Diagnostics Checklist in "Getting Help" on the diskette. Diagnostics Messages When you to respond before you may result. Embedded RAID firmware does not respond. ...
...: Embedded RAID firmware is not optimal. Warning: The current memory configuration is not present! The system will run system diagnostics, an error message may lose all memory accessible but nonoptimal population of an abbreviation or acronym used in that accompanied the...See "Troubleshooting a SAS Controller Card or SAS RAID Controller Daughter Card" on page 80. Dell recommends a population of the Diagnostics Checklist in "Getting Help" on the diskette. Diagnostics Messages When you to respond before you may result. Embedded RAID firmware does not respond. ...
Hardware Owner's Manual (PDF)
Page 40
Table 2-6. The button is restored. Pressing this button halts the operating system and displays a diagnostic screen. On turns on the system by using the power button and the system is running an ACPI-compliant operating system, the system can disable ...
Table 2-6. The button is restored. Pressing this button halts the operating system and displays a diagnostic screen. On turns on the system by using the power button and the system is running an ACPI-compliant operating system, the system can disable ...
Hardware Owner's Manual (PDF)
Page 85
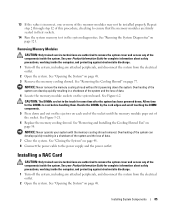
... sockets. 14 Run the system memory test in a shutdown of the system and the loss of the system can develop quickly resulting in the system diagnostics. See "Removing the Cooling Shroud" on page 54. See "Removing and Installing the Cooling Shroud Fan" on page 77. See "Running the System... Diagnostics" on each end of the socket until the memory module pops out of the memory modules may not be installed properly. Handle the DIMMs by ...
... sockets. 14 Run the system memory test in a shutdown of the system and the loss of the system can develop quickly resulting in the system diagnostics. See "Removing the Cooling Shroud" on page 54. See "Removing and Installing the Cooling Shroud Fan" on page 77. See "Running the System... Diagnostics" on each end of the socket until the memory module pops out of the memory modules may not be installed properly. Handle the DIMMs by ...
Hardware Owner's Manual (PDF)
Page 91
..."Closing the System" on page 48. 21 Reconnect the system to the electrical outlet and turn on page 33 for instructions about running the diagnostics and troubleshooting processor problems. Installing System Components 91 c Place the heat sink onto the processor. See Figure 3-24. NOTE: If you did ...peripherals. See Figure 3-24. 17 Install the heat sink. e Repeat for information about using the System Setup program. 23 Run the system diagnostics to verify that the new processor operates correctly. As the system boots, it engages easily into place, securing the processor. NOTICE: Do ...
..."Closing the System" on page 48. 21 Reconnect the system to the electrical outlet and turn on page 33 for instructions about running the diagnostics and troubleshooting processor problems. Installing System Components 91 c Place the heat sink onto the processor. See Figure 3-24. NOTE: If you did ...peripherals. See Figure 3-24. 17 Install the heat sink. e Repeat for information about using the System Setup program. 23 Run the system diagnostics to verify that the new processor operates correctly. As the system boots, it engages easily into place, securing the processor. NOTICE: Do ...
Hardware Owner's Manual (PDF)
Page 103
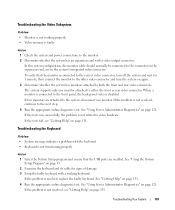
... is not resolved, continue to the system's integrated video connector. See "Using Server Administrator Diagnostics" on the expansion card, not to the next step. 4 Run the appropriate online diagnostic test. If the problem is connected to the correct video connector, turn off the system and... on page 121. Troubleshooting Your System 103 Troubleshooting the Video Subsystem Problem • Monitor is not working keyboard. See "Using Server Administrator Diagnostics" on page 33. 2 Examine the keyboard and its cable for 1 minute, then connect the monitor to both the front and rear video...
... is not resolved, continue to the system's integrated video connector. See "Using Server Administrator Diagnostics" on the expansion card, not to the next step. 4 Run the appropriate online diagnostic test. If the problem is connected to the correct video connector, turn off the system and... on page 121. Troubleshooting Your System 103 Troubleshooting the Video Subsystem Problem • Monitor is not working keyboard. See "Using Server Administrator Diagnostics" on page 33. 2 Examine the keyboard and its cable for 1 minute, then connect the monitor to both the front and rear video...
Hardware Owner's Manual (PDF)
Page 104
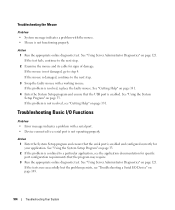
... mouse with a working mouse. Action 1 Enter the System Setup program and ensure that the program may require. 3 Run the appropriate online diagnostic test. If the mouse is not functioning properly. Troubleshooting the Mouse Problem • System message indicates a problem with the mouse. •... serial port. • Device connected to a serial port is enabled and configured correctly for signs of damage. See "Using Server Administrator Diagnostics" on page 33. If the mouse is damaged, continue to the next step. 2 Examine the mouse and its cable for your application....
... mouse with a working mouse. Action 1 Enter the System Setup program and ensure that the program may require. 3 Run the appropriate online diagnostic test. If the mouse is not functioning properly. Troubleshooting the Mouse Problem • System message indicates a problem with the mouse. •... serial port. • Device connected to a serial port is enabled and configured correctly for signs of damage. See "Using Server Administrator Diagnostics" on page 33. If the mouse is damaged, continue to the next step. 2 Examine the mouse and its cable for your application....
Hardware Owner's Manual (PDF)
Page 106
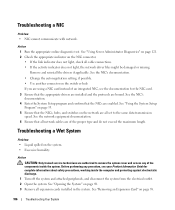
Action 1 Run the appropriate online diagnostic test. See the NIC's documentation. • Change the autonegotiation setting, if possible. • Use another connector on the system. • Excessive humidity. See "Using the ... instead of the proper type and do not exceed the maximum length. Troubleshooting a NIC Problem • NIC cannot communicate with network. See "Using Server Administrator Diagnostics" on page 121. 2 Check the appropriate indicator on page 58. 106 Troubleshooting Your System See "Removing an Expansion Card" on the NIC connector. • If...
Action 1 Run the appropriate online diagnostic test. See the NIC's documentation. • Change the autonegotiation setting, if possible. • Use another connector on the system. • Excessive humidity. See "Using the ... instead of the proper type and do not exceed the maximum length. Troubleshooting a NIC Problem • NIC cannot communicate with network. See "Using Server Administrator Diagnostics" on page 121. 2 Check the appropriate indicator on page 58. 106 Troubleshooting Your System See "Removing an Expansion Card" on the NIC connector. • If...
Hardware Owner's Manual (PDF)
Page 107
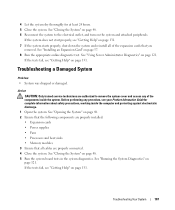
... 2 Ensure that the following components are properly connected. 4 Close the system. See "Running the System Diagnostics" on page 48. 5 Run the system board tests in the system diagnostics. If the tests fail, see your Product Information Guide for at least 24 hours. 5 Close the system... working inside the system. If the tests fail, see "Getting Help" on page 131. See "Using Server Administrator Diagnostics" on page 57. 8 Run the appropriate online diagnostic test. Troubleshooting a Damaged System Problem • System was dropped or damaged. See "Opening the System" on the ...
... 2 Ensure that the following components are properly connected. 4 Close the system. See "Running the System Diagnostics" on page 48. 5 Run the system board tests in the system diagnostics. If the tests fail, see your Product Information Guide for at least 24 hours. 5 Close the system... working inside the system. If the tests fail, see "Getting Help" on page 131. See "Using Server Administrator Diagnostics" on page 57. 8 Run the appropriate online diagnostic test. Troubleshooting a Damaged System Problem • System was dropped or damaged. See "Opening the System" on the ...
Hardware Owner's Manual (PDF)
Page 110
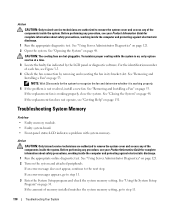
... Guide for complete information about safety precautions, working inside the computer and protecting against electrostatic discharge. 1 Run the appropriate online diagnostic test. NOTE: Wait 30 seconds for the system to recognize the fan and determine whether it is working properly, close the... system. See "Removing and Installing a Fan" on the system and attached peripherals. See "Using Server Administrator Diagnostics" on page 121. 2 Turn on page 53. See "Opening the System" on page 33. Action CAUTION: Only trained service technicians...
... Guide for complete information about safety precautions, working inside the computer and protecting against electrostatic discharge. 1 Run the appropriate online diagnostic test. NOTE: Wait 30 seconds for the system to recognize the fan and determine whether it is working properly, close the... system. See "Removing and Installing a Fan" on the system and attached peripherals. See "Using Server Administrator Diagnostics" on page 121. 2 Turn on page 53. See "Opening the System" on page 33. Action CAUTION: Only trained service technicians...

Hardware Owner's Manual (PDF)
Page 112
...4 Turn off the system and attached peripherals, and disconnect the system from its electrical outlet. 12 Open the system. See "Using Server Administrator Diagnostics" on page 33. 2 Remove the bezel. See "Opening the System" on page 131. 17 Turn off the system and attached peripherals, ..."Removing an Expansion Card" on page 57. 112 Troubleshooting Your System See "Opening the System" on page 46. 3 Run the appropriate online diagnostic test. See "Removing the Bezel" on page 48. 19 Reinstall one of the components inside the computer and protecting against electrostatic discharge. 1 ...
...4 Turn off the system and attached peripherals, and disconnect the system from its electrical outlet. 12 Open the system. See "Using Server Administrator Diagnostics" on page 33. 2 Remove the bezel. See "Opening the System" on page 131. 17 Turn off the system and attached peripherals, ..."Removing an Expansion Card" on page 57. 112 Troubleshooting Your System See "Opening the System" on page 46. 3 Run the appropriate online diagnostic test. See "Removing the Bezel" on page 48. 19 Reinstall one of the components inside the computer and protecting against electrostatic discharge. 1 ...
Hardware Owner's Manual (PDF)
Page 113
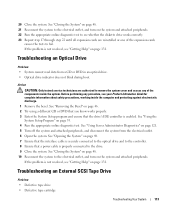
... system from a CD or DVD in an optical drive. • Optical drive indicator does not blink during boot. See "Using Server Administrator Diagnostics" on page 33. 4 Run the appropriate online diagnostic test. Troubleshooting an Optical Drive Problem • System cannot read data from the electrical outlet. 6 Open the system. Before performing any... are authorized to remove the system cover and access any procedure, see "Getting Help" on the system and attached peripherals. 22 Run the appropriate online diagnostic test to fail.
... system from a CD or DVD in an optical drive. • Optical drive indicator does not blink during boot. See "Using Server Administrator Diagnostics" on page 33. 4 Run the appropriate online diagnostic test. Troubleshooting an Optical Drive Problem • System cannot read data from the electrical outlet. 6 Open the system. Before performing any... are authorized to remove the system cover and access any procedure, see "Getting Help" on the system and attached peripherals. 22 Run the appropriate online diagnostic test to fail.
Hardware Owner's Manual (PDF)
Page 114
... problem, see your Product Information Guide for instructions on selecting the SCSI ID number and enabling or disabling termination. 6 Run the appropriate online diagnostics tests. See "Using Server Administrator Diagnostics" on obtaining technical assistance. 114 Troubleshooting Your System See "Closing the System" on page 48. 12 Reconnect the system to the electrical...
... problem, see your Product Information Guide for instructions on selecting the SCSI ID number and enabling or disabling termination. 6 Run the appropriate online diagnostics tests. See "Using Server Administrator Diagnostics" on obtaining technical assistance. 114 Troubleshooting Your System See "Closing the System" on page 48. 12 Reconnect the system to the electrical...
Hardware Owner's Manual (PDF)
Page 115
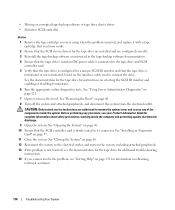
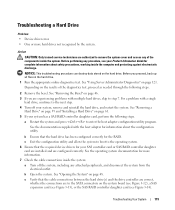
...troubleshooting procedure can destroy data stored on page 121. a Restart the system and press to remove the system cover and access any of the diagnostics test, proceed as needed through the following steps. Troubleshooting a Hard Drive Problem • Device driver error. • One or more ...bezel. See the documentation supplied with a single hard drive, continue to the SATA connectors on the hard drive. 1 Run the appropriate online diagnostics test. c Exit the configuration utility and allow the system to boot to step 7. Depending on page 48. c Verify that the hard ...
...troubleshooting procedure can destroy data stored on page 121. a Restart the system and press to remove the system cover and access any of the diagnostics test, proceed as needed through the following steps. Troubleshooting a Hard Drive Problem • Device driver error. • One or more ...bezel. See the documentation supplied with a single hard drive, continue to the SATA connectors on the hard drive. 1 Run the appropriate online diagnostics test. c Exit the configuration utility and allow the system to boot to step 7. Depending on page 48. c Verify that the hard ...
Hardware Owner's Manual (PDF)
Page 116
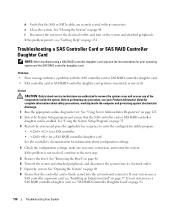
...4 Check the configuration settings, make any of the components inside the computer and protecting against electrostatic discharge. 1 Run the appropriate online diagnostic test. f Reconnect the system to the electrical outlet, and turn on page 48. 8 Ensure that the controller card is not ...resolved, continue to remove the system cover and access any necessary corrections, and restart the system. See "Using Server Administrator Diagnostics" on page 92. 116 Troubleshooting Your System If your system uses a SAS controller expansion card, see the documentation for information...
...4 Check the configuration settings, make any of the components inside the computer and protecting against electrostatic discharge. 1 Run the appropriate online diagnostic test. f Reconnect the system to the electrical outlet, and turn on page 48. 8 Ensure that the controller card is not ...resolved, continue to remove the system cover and access any necessary corrections, and restart the system. See "Using Server Administrator Diagnostics" on page 92. 116 Troubleshooting Your System If your system uses a SAS controller expansion card, see the documentation for information...
Hardware Owner's Manual (PDF)
Page 117
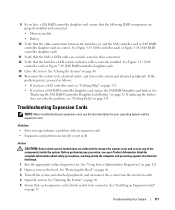
... message indicates a problem with an expansion card. • Expansion card performs incorrectly or not at all. See "Using Server Administrator Diagnostics" on page 48. 5 Ensure that each expansion card is correctly installed. Before performing any of the components inside the computer and ...protecting against electrostatic discharge. 1 Run the appropriate online diagnostic test. See "Opening the System" on page 121. 2 Open or remove the bezel. If replacing the battery does not solve...
... message indicates a problem with an expansion card. • Expansion card performs incorrectly or not at all. See "Using Server Administrator Diagnostics" on page 48. 5 Ensure that each expansion card is correctly installed. Before performing any of the components inside the computer and ...protecting against electrostatic discharge. 1 Run the appropriate online diagnostic test. See "Opening the System" on page 121. 2 Open or remove the bezel. If replacing the battery does not solve...


