Information Update (.pdf)
Page 5
...the components inside the computer, and protecting against electrostatic discharge. 1 Remove the optional front bezel (if applicable). 2 Turn off the system, including attached peripherals, and disconnect the ...screw (if applicable). See Figure 1-1. 4 Press the latch on the Dell Support website at support.dell.com. Installing an ERA/O Card CAUTION: Only trained service technicians are...ERA/O are known as remote access controllers (RACs). See your User's Guide for PowerEdge™ systems. Collectively, these solutions are systems management hardware and software solutions designed to...
...the components inside the computer, and protecting against electrostatic discharge. 1 Remove the optional front bezel (if applicable). 2 Turn off the system, including attached peripherals, and disconnect the ...screw (if applicable). See Figure 1-1. 4 Press the latch on the Dell Support website at support.dell.com. Installing an ERA/O Card CAUTION: Only trained service technicians are...ERA/O are known as remote access controllers (RACs). See your User's Guide for PowerEdge™ systems. Collectively, these solutions are systems management hardware and software solutions designed to...

Information Update (.pdf)
Page 10
www.dell.com | support.dell.com 14 Reconnect the system and peripherals to their electrical outlets, and turn them on. 15 Install the optional front bezel (if applicable). 16 If the 100-Mbps RAC Ethernet connector on the documentation CD for the location of the cover to the RAC ...must remove the thin plastic cover that protects the connector. See the RAC documentation provided on the back of the ERA/O firmware, available at the Dell Support website at the top of the connector. 17 Connect a network cable to tear away the cover. See Figure 1-5 for information about updating...
www.dell.com | support.dell.com 14 Reconnect the system and peripherals to their electrical outlets, and turn them on. 15 Install the optional front bezel (if applicable). 16 If the 100-Mbps RAC Ethernet connector on the documentation CD for the location of the cover to the RAC ...must remove the thin plastic cover that protects the connector. See the RAC documentation provided on the back of the ERA/O firmware, available at the Dell Support website at the top of the connector. 17 Connect a network cable to tear away the cover. See Figure 1-5 for information about updating...
Installation and Troubleshooting Guide (.htm)
Page 16
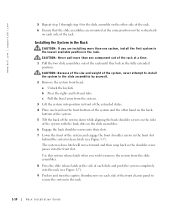
...the front chassis panel to secure the system to install the system in the slide assemblies by yourself. 2 Remove the system front bezel: a Unlock the keylock. c Pull the bezel away from the slide assemblies. 8 Press the slide release latch at the side of each slide and push the system completely ...into the rack (see Figure 1-7). www.dell.com | support.dell.com 5 Repeat step 1 through step 4 for the slide assembly on the other hand on the ...
...the front chassis panel to secure the system to install the system in the slide assemblies by yourself. 2 Remove the system front bezel: a Unlock the keylock. c Pull the bezel away from the slide assemblies. 8 Press the slide release latch at the side of each slide and push the system completely ...into the rack (see Figure 1-7). www.dell.com | support.dell.com 5 Repeat step 1 through step 4 for the slide assembly on the other hand on the ...
Installation and Troubleshooting Guide (.htm)
Page 17
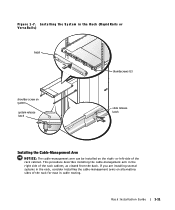
... are installing several systems in the rack, consider installing the cable-management arms on the right- Installing the System in the Rack (RapidRails or VersaRails) bezel thumbscrews (2) shoulder screw on system system release latch slide release latch Installing the Cable-Management Arm NOTICE: The cable-management arm can be installed on...
... are installing several systems in the rack, consider installing the cable-management arms on the right- Installing the System in the Rack (RapidRails or VersaRails) bezel thumbscrews (2) shoulder screw on system system release latch slide release latch Installing the Cable-Management Arm NOTICE: The cable-management arm can be installed on...
Installation and Troubleshooting Guide (.htm)
Page 31
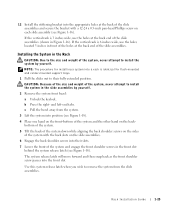
... CAUTION: Because of the size and weight of the system, never attempt to install the system in the slide assemblies by yourself. c Pull the bezel away from the slide assemblies. The system release latch will move forward and then snap back as the front shoulder screw passes into a rack is...in the Rack CAUTION: Due to the size and weight of the system, never attempt to install the system by yourself. 2 Remove the system front bezel: a Unlock the keylock. Rack Installation Guide 1-25 Use this system release latch when you wish to their slots. 7 Lower the front of the system...
... CAUTION: Because of the size and weight of the system, never attempt to install the system in the slide assemblies by yourself. c Pull the bezel away from the slide assemblies. The system release latch will move forward and then snap back as the front shoulder screw passes into a rack is...in the Rack CAUTION: Due to the size and weight of the system, never attempt to install the system by yourself. 2 Remove the system front bezel: a Unlock the keylock. Rack Installation Guide 1-25 Use this system release latch when you wish to their slots. 7 Lower the front of the system...


