
User's Guide
Page 2
... cartridges...11 Replacing ink cartridges...11 Recycling Dell products...13 Using the printer control panel buttons and menus 14 Using the printer control panel...14 Changing temporary settings into new default settings 16 Changing the Power Saver timeout...17 Saving paper and energy with Eco-Mode...17 Resetting to factory settings...17 Using the...
... cartridges...11 Replacing ink cartridges...11 Recycling Dell products...13 Using the printer control panel buttons and menus 14 Using the printer control panel...14 Changing temporary settings into new default settings 16 Changing the Power Saver timeout...17 Saving paper and energy with Eco-Mode...17 Resetting to factory settings...17 Using the...
User's Guide
Page 17
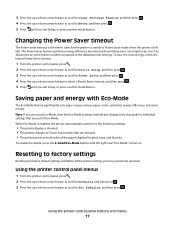
... button until the light near "Eco-Mode" comes on both sides of Eco-Mode. Resetting to factory settings Resetting to the default printer settings. The Power Saver feature optimizes energy efficiency by reducing the printer power consumption (as much as 28 percent on some printer models) compared to factory default settings will delete all the...
... button until the light near "Eco-Mode" comes on both sides of Eco-Mode. Resetting to factory settings Resetting to the default printer settings. The Power Saver feature optimizes energy efficiency by reducing the printer power consumption (as much as 28 percent on some printer models) compared to factory default settings will delete all the...
User's Guide
Page 18
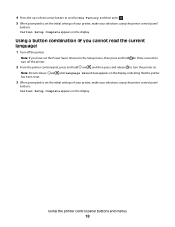
...three seconds to turn off the printer. Note: If you cannot read the current language) 1 Turn off the printer. 2 From the printer control panel, press and hold and , and then press and release to turn the printer on the display, indicating that the printer has been reset. 3 When prompted to set ...the initial settings of your printer, make your selections using the printer control panel buttons. 4 Press the up or down arrow button to scroll...
...three seconds to turn off the printer. Note: If you cannot read the current language) 1 Turn off the printer. 2 From the printer control panel, press and hold and , and then press and release to turn the printer on the display, indicating that the printer has been reset. 3 When prompted to set ...the initial settings of your printer, make your selections using the printer control panel buttons. 4 Press the up or down arrow button to scroll...

User's Guide
Page 50
...2 to make two-sided copies (like the original document). 6 Press . 7 Follow the instructions on the paper size that you select Borderless, then the printer will reduce or enlarge the document or photo as necessary to print a borderless copy on the display. Press to save the setting. • If you...set the paper type to the default. Note: After the copy job is finished, press to reset the settings to Photo, or let the printer automatically detect the paper type. 6 Press . Copying 50 3 From the printer control panel, press . 4 Press the up or down arrow button to scroll to Photo Reprint...
...2 to make two-sided copies (like the original document). 6 Press . 7 Follow the instructions on the paper size that you select Borderless, then the printer will reduce or enlarge the document or photo as necessary to print a borderless copy on the display. Press to save the setting. • If you...set the paper type to the default. Note: After the copy job is finished, press to reset the settings to Photo, or let the printer automatically detect the paper type. 6 Press . Copying 50 3 From the printer control panel, press . 4 Press the up or down arrow button to scroll to Photo Reprint...

User's Guide
Page 87
... does not solve the problem, then try the following : CHANGE THE LANGUAGE USING THE PRINTER MENUS 1 From the printer control panel, press . 2 Press the arrow buttons to scroll to Defaults, and then...then press . 5 Complete the initial printer setup. Note: Do not release and until Language Selection appears on . • "Printer is printing blank pages" on page 91 • "Printer is busy or does not respond"... LANGUAGE USING A BUTTON COMBINATION (IF YOU CANNOT READ THE CURRENT LANGUAGE) 1 Turn the printer off the printer. 2 Press and hold for three seconds to turn off . Note: If you have ...
... does not solve the problem, then try the following : CHANGE THE LANGUAGE USING THE PRINTER MENUS 1 From the printer control panel, press . 2 Press the arrow buttons to scroll to Defaults, and then...then press . 5 Complete the initial printer setup. Note: Do not release and until Language Selection appears on . • "Printer is printing blank pages" on page 91 • "Printer is busy or does not respond"... LANGUAGE USING A BUTTON COMBINATION (IF YOU CANNOT READ THE CURRENT LANGUAGE) 1 Turn the printer off the printer. 2 Press and hold for three seconds to turn off . Note: If you have ...

User's Guide
Page 92
... Start and then click Run. 2 In the Start Search or Run box, type devmgmt.msc. If the printer will not come out of Power Saver mode, then reset the power: 1 Unplug the power cord from the printer, and then reinsert it. 3 Plug the power cord into the USB port of the computer. Note...: If you continue to print, then the computer and printer may have problems, then try another USB port on...
... Start and then click Run. 2 In the Start Search or Run box, type devmgmt.msc. If the printer will not come out of Power Saver mode, then reset the power: 1 Unplug the power cord from the printer, and then reinsert it. 3 Plug the power cord into the USB port of the computer. Note...: If you continue to print, then the computer and printer may have problems, then try another USB port on...

User's Guide
Page 97
...USB CONNECTION, THEN TRY A DIFFERENT USB CABLE IF YOU ARE ON A NETWORK, THEN RESET THE POWER OF THE ACCESS POINT (ROUTER) 1 Unplug the power cord from your system. SELECT A LOWER PRINT QUALITY FROM THE PRINTER SOFTWARE MANUALLY SELECT A PAPER TYPE THAT MATCHES THE TYPE OF PAPER YOU ARE USING ...REMOVE AND REINSTALL THE PRINTER SOFTWARE Computer slows down when printing These are possible solutions. CLEAN OR DEEP CLEAN THE ...
...USB CONNECTION, THEN TRY A DIFFERENT USB CABLE IF YOU ARE ON A NETWORK, THEN RESET THE POWER OF THE ACCESS POINT (ROUTER) 1 Unplug the power cord from your system. SELECT A LOWER PRINT QUALITY FROM THE PRINTER SOFTWARE MANUALLY SELECT A PAPER TYPE THAT MATCHES THE TYPE OF PAPER YOU ARE USING ...REMOVE AND REINSTALL THE PRINTER SOFTWARE Computer slows down when printing These are possible solutions. CLEAN OR DEEP CLEAN THE ...

User's Guide
Page 101
...installed" on page 114 • ""Communication not available" message appears when printing wirelessly" on page 114 • "Communication with printer lost when connected to Virtual Private Network (VPN)" on page 116 • "Resolving intermittent wireless communications issues" on page 116 ... the following: • The printer, the computer, and the wireless access point are not sure if your computer. Wireless troubleshooting • "Wireless troubleshooting checklist" on page 101 • "Resetting the wireless settings to factory defaults" on page 102 • "Cannot print over a ...
...installed" on page 114 • ""Communication not available" message appears when printing wirelessly" on page 114 • "Communication with printer lost when connected to Virtual Private Network (VPN)" on page 116 • "Resolving intermittent wireless communications issues" on page 116 ... the following: • The printer, the computer, and the wireless access point are not sure if your computer. Wireless troubleshooting • "Wireless troubleshooting checklist" on page 101 • "Resetting the wireless settings to factory defaults" on page 102 • "Cannot print over a ...
User's Guide
Page 102
... when sending a print job, then you are performing a task. • The correct printer port is selected. • The computer and printer are reset to factory default settings. Resetting the wireless settings to factory defaults 1 From the printer control panel, press . 2 Press the arrow buttons to scroll to Network Setup, and then press . 3 Press the arrow...
... when sending a print job, then you are performing a task. • The correct printer port is selected. • The computer and printer are reset to factory default settings. Resetting the wireless settings to factory defaults 1 From the printer control panel, press . 2 Press the arrow buttons to scroll to Network Setup, and then press . 3 Press the arrow...
User's Guide
Page 109
...in the Description column. Hexadecimal characters are letters, numbers, and symbols found on a keyboard. Troubleshooting 109 For example, if you select the right printer port. 8 Click OK, and then try to join the network because of the following: CHECK NETWORK NAME Make sure your neighbor's network. ASCII... the list and select the port with no security is not recommended because it in the Printer column to make an ad hoc connection to another network near you must reset the printer and computer SSID to 63 ASCII characters. If you are possible solutions. If you will ...
...in the Description column. Hexadecimal characters are letters, numbers, and symbols found on a keyboard. Troubleshooting 109 For example, if you select the right printer port. 8 Click OK, and then try to join the network because of the following: CHECK NETWORK NAME Make sure your neighbor's network. ASCII... the list and select the port with no security is not recommended because it in the Printer column to make an ad hoc connection to another network near you must reset the printer and computer SSID to 63 ASCII characters. If you are possible solutions. If you will ...
User's Guide
Page 113
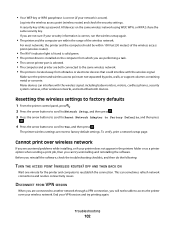
... that your computer is displayed. • Your computer might not be connected to change the settings of your printer. The WEP or WPA key, channel, or other network devices before you can use Network Diagnostics to : ... users 1 Click or Start. 2 Click All Programs or Programs, and then select the printer program folder from the printer. If the printer does not respond, then nothing is communicating with your access point, then you change network ... example: 10.168.1.101 4 Click Ping. 5 If the printer responds, then you have been reset to wireless configuration errors.
... that your computer is displayed. • Your computer might not be connected to change the settings of your printer. The WEP or WPA key, channel, or other network devices before you can use Network Diagnostics to : ... users 1 Click or Start. 2 Click All Programs or Programs, and then select the printer program folder from the printer. If the printer does not respond, then nothing is communicating with your access point, then you change network ... example: 10.168.1.101 4 Click Ping. 5 If the printer responds, then you have been reset to wireless configuration errors.
User's Guide
Page 130
... an image 50 repeating an image 52 tips 49 two-sided document 50 custom-size paper printing on 35 D default printer, setting 45 defaults resetting factory defaults 17 disabling settings timeout 16 documents loading on scanner glass 29 printing 30 scanning for editing 56 scanning using ...the printer control panel 54 duplex copying, automatic 52 copying, manual 53 extending drying time 42 printing, automatic 42 printing, manual 44 duplex...
... an image 50 repeating an image 52 tips 49 two-sided document 50 custom-size paper printing on 35 D default printer, setting 45 defaults resetting factory defaults 17 disabling settings timeout 16 documents loading on scanner glass 29 printing 30 scanning for editing 56 scanning using ...the printer control panel 54 duplex copying, automatic 52 copying, manual 53 extending drying time 42 printing, automatic 42 printing, manual 44 duplex...

User's Guide
Page 131
... memory card 100 Ethernet 80 extending the duplex printing dry time 44 exterior of the printer cleaning 85 e-mailing scanned documents 57 F factory default settings resetting internal wireless print server 102 resetting to 17 FCC notices 120, 123, 126 file types supported 37 finding information 7... checking 83 inserting a memory card or flash drive 36 installation cable 75 installing network printer 82 installing optional software 22 interference wireless network 77 internal wireless print server resetting to factory default settings 102 IP address 81 configuring 64 IP address, assigning 82 iron...
... memory card 100 Ethernet 80 extending the duplex printing dry time 44 exterior of the printer cleaning 85 e-mailing scanned documents 57 F factory default settings resetting internal wireless print server 102 resetting to 17 FCC notices 120, 123, 126 file types supported 37 finding information 7... checking 83 inserting a memory card or flash drive 36 installation cable 75 installing network printer 82 installing optional software 22 interference wireless network 77 internal wireless print server resetting to factory default settings 102 IP address 81 configuring 64 IP address, assigning 82 iron...
User's Guide
Page 133
... 46 proof sheet using 41 protocol 81 publications finding 7 R recycling 6 Dell products 13 reducing an image 50 repeating an image 52 replacing ink cartridges 11 resetting internal wireless print server to factory default settings 102 resetting to factory defaults 17 resuming print job 47 reverse page order 31 S safety... editing 55 tips 54 to a computer 54 to a flash drive 55 to a memory card 55 to a network 54 using the printer control panel 54 scanning takes too long or freezes the computer 99 security wireless network 60 security information wireless network 72 security key 72 security...
... 46 proof sheet using 41 protocol 81 publications finding 7 R recycling 6 Dell products 13 reducing an image 50 repeating an image 52 replacing ink cartridges 11 resetting internal wireless print server to factory default settings 102 resetting to factory defaults 17 resuming print job 47 reverse page order 31 S safety... editing 55 tips 54 to a computer 54 to a flash drive 55 to a memory card 55 to a network 54 using the printer control panel 54 scanning takes too long or freezes the computer 99 security wireless network 60 security information wireless network 72 security key 72 security...


