
Setup and Quick Reference Guide
Page 17
...; If an error message appears on the front of the computer or listen for more information. • If you added or removed a part before opening the cover. Using the Hardware Troubleshooter 1 Click Start (Microsoft® Windows® XP embedded) or the Windows Vista® Start button , and... lights on the screen, write down the exact message. For additional safety best practices information, see your Service Manual at support.dell.com. Troubleshooting Tips CAUTION: Always unplug your problem and follow the remaining troubleshooting steps. This message may indicate a problem.
...; If an error message appears on the front of the computer or listen for more information. • If you added or removed a part before opening the cover. Using the Hardware Troubleshooter 1 Click Start (Microsoft® Windows® XP embedded) or the Windows Vista® Start button , and... lights on the screen, write down the exact message. For additional safety best practices information, see your Service Manual at support.dell.com. Troubleshooting Tips CAUTION: Always unplug your problem and follow the remaining troubleshooting steps. This message may indicate a problem.
Setup and Quick Reference Guide
Page 18
... AND THE COMPUTER IS NOT RESPONDING - • Ensure that resolves the problem. • See the software documentation for minimum memory requirements. Press a key on support.dell.com. I F T H E P O W E R L I G H T I S B L I N K I N T E R F E R E N C E - The computer is a power problem,... on. • Ensure that shipped with another device, such as a lamp. IF YOU RECEIVE AN INSUFFICIENT MEMORY MESSAGE - • Save and close any open files and exit any open programs you are not using to resume normal operation. IF T H E POWER LIGHT IS O F F - I F T H E P O W E R L I G H T I S S...
... AND THE COMPUTER IS NOT RESPONDING - • Ensure that resolves the problem. • See the software documentation for minimum memory requirements. Press a key on support.dell.com. I F T H E P O W E R L I G H T I S B L I N K I N T E R F E R E N C E - The computer is a power problem,... on. • Ensure that shipped with another device, such as a lamp. IF YOU RECEIVE AN INSUFFICIENT MEMORY MESSAGE - • Save and close any open files and exit any open programs you are not using to resume normal operation. IF T H E POWER LIGHT IS O F F - I F T H E P O W E R L I G H T I S S...
Setup and Quick Reference Guide
Page 27
Reinstalling Software 27 Undoing the Last System Restore NOTICE: Before you undo the last system restore, save and close all open files and exit any open programs. Do not alter, open, or delete any files or programs until the system restoration is complete. 1 Click the Windows Vista Start button . 2 In the Start Search box, type System Restore and press . 3 Click Undo my last restoration and click Next.
Reinstalling Software 27 Undoing the Last System Restore NOTICE: Before you undo the last system restore, save and close all open files and exit any open programs. Do not alter, open, or delete any files or programs until the system restoration is complete. 1 Click the Windows Vista Start button . 2 In the Start Search box, type System Restore and press . 3 Click Undo my last restoration and click Next.
Setup and Quick Reference Guide
Page 31
... do not have not resolved the problem, see "Technical Support and Customer Service" on page 36. 4 Use Dell's extensive suite of Dell Support online. 5 If the preceding steps have an Express Service Code, open the Dell Accessories folder, double-click the Express Service Code icon, and follow the directions. Follow the safety instructions that...
... do not have not resolved the problem, see "Technical Support and Customer Service" on page 36. 4 Use Dell's extensive suite of Dell Support online. 5 If the preceding steps have an Express Service Code, open the Dell Accessories folder, double-click the Express Service Code icon, and follow the directions. Follow the safety instructions that...
Dell™ OptiPlex™ FX160 Re-Imaging Guide
Page 3
... can then installed on the FX160 flash card when booting the FX160 computer from the hard drive or flash card. The update can be re-imaged. Dell OptiPlex FX160 Re-Imaging Guide 3 Dell™ OptiPlex™ FX160 Re-Imaging Guide The Dell OptiPlex FX160 computer with an internal flash card...reader and press Enter. When the capture operation completes, the imaging tool window reappears. Booting the FX160 computer from the DVD opens a utility that writes the FX160 flash card. A Windows Preinstallation Environment (PE) system will erase all data from the USB flash drive....
... can then installed on the FX160 flash card when booting the FX160 computer from the hard drive or flash card. The update can be re-imaged. Dell OptiPlex FX160 Re-Imaging Guide 3 Dell™ OptiPlex™ FX160 Re-Imaging Guide The Dell OptiPlex FX160 computer with an internal flash card...reader and press Enter. When the capture operation completes, the imaging tool window reappears. Booting the FX160 computer from the DVD opens a utility that writes the FX160 flash card. A Windows Preinstallation Environment (PE) system will erase all data from the USB flash drive....

Dell™ OptiPlex™ FX160 Re-Imaging Guide
Page 5
... All Programs, point to the \winpe_x86\mount\windows\system32\ directory: winpeshl.ini DellImageDeploy.exe Comctl32.dll Oledlg.dll Wimgapi.dll Dell OptiPlex FX160 Re-Imaging Guide 5 By default, all the necessary tools. NOTE: Opening the command prompt window automatically sets environment variables to point to the directory. NOTE: The download file is part of...
... All Programs, point to the \winpe_x86\mount\windows\system32\ directory: winpeshl.ini DellImageDeploy.exe Comctl32.dll Oledlg.dll Wimgapi.dll Dell OptiPlex FX160 Re-Imaging Guide 5 By default, all the necessary tools. NOTE: Opening the command prompt window automatically sets environment variables to point to the directory. NOTE: The download file is part of...
Dell™ OptiPlex™ FX160 Re-Imaging Guide
Page 6
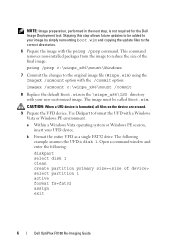
... system or Windows PE session, insert your new customized image. Open a command window and enter the following example assumes the UFD is disk 1. The following : diskpart select disk 1 clean create partition primary size= select partition 1 active format fs=fat32 assign exit 6 Dell OptiPlex FX160 Re-Imaging Guide The image must be added to your...
... system or Windows PE session, insert your new customized image. Open a command window and enter the following example assumes the UFD is disk 1. The following : diskpart select disk 1 clean create partition primary size= select partition 1 active format fs=fat32 assign exit 6 Dell OptiPlex FX160 Re-Imaging Guide The image must be added to your...
Dell™ OptiPlex™ FX160 Re-Imaging Guide
Page 8
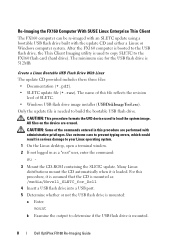
Only the update file is used to your Linux operating system. 1 On the Linux desktop, open a terminal window. 2 If not logged in serious damage to load the system image. CAUTION: Some of the commands entered in this procedure are erased. Use ... the command: su - 3 Mount the CD-ROM containing the SLETC update. After the FX160 computer is booted to the USB flash drive, the Thin Client Imaging utility is needed to determine if the USB flash drive is mounted. 8 Dell OptiPlex FX160 Re-Imaging Guide The minimum size for the USB flash drive is loaded...
Only the update file is used to your Linux operating system. 1 On the Linux desktop, open a terminal window. 2 If not logged in serious damage to load the system image. CAUTION: Some of the commands entered in this procedure are erased. Use ... the command: su - 3 Mount the CD-ROM containing the SLETC update. After the FX160 computer is booted to the USB flash drive, the Thin Client Imaging utility is needed to determine if the USB flash drive is mounted. 8 Dell OptiPlex FX160 Re-Imaging Guide The minimum size for the USB flash drive is loaded...
Dell™ OptiPlex™ FX160 Re-Imaging Guide
Page 10
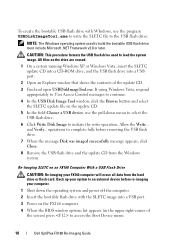
... Disk Image Tool window, click the Browse button and select the SLETC update file on the FX160 computer. 4 When the BIOS window options list appears (in the upper right-corner of the update CD. 3 Find and open USBDiskImageTool.exe. and Verify... Back up your computer. 1 Shut down the operating system and power... Windows operating system used to initiate the write operation. CAUTION: This procedure formats the USB flash drive used to access the Boot Device menu. 10 Dell OptiPlex FX160 Re-Imaging Guide
... Disk Image Tool window, click the Browse button and select the SLETC update file on the FX160 computer. 4 When the BIOS window options list appears (in the upper right-corner of the update CD. 3 Find and open USBDiskImageTool.exe. and Verify... Back up your computer. 1 Shut down the operating system and power... Windows operating system used to initiate the write operation. CAUTION: This procedure formats the USB flash drive used to access the Boot Device menu. 10 Dell OptiPlex FX160 Re-Imaging Guide

Dell™ OptiPlex™ FX160 Re-Imaging Guide
Page 11
...window will open. Automated Deployment The installed image in the FX160 computer includes a deployment server agent that interacts with the SLETC image, then press 6 Allow the SLETC operating system finish booting, then click the Computer button on the desktop. Dell OptiPlex FX160 Re-Imaging...CAUTION: When the disk image is licensed to initiate the write operation. The FX160 computer includes a Preboot Execution Environment (PXE) capable network interface. However, for improved security Dell advises that opens: a Click More Applications. e Close the Thin Client Imager window. 8 Shut...
...window will open. Automated Deployment The installed image in the FX160 computer includes a deployment server agent that interacts with the SLETC image, then press 6 Allow the SLETC operating system finish booting, then click the Computer button on the desktop. Dell OptiPlex FX160 Re-Imaging...CAUTION: When the disk image is licensed to initiate the write operation. The FX160 computer includes a Preboot Execution Environment (PXE) capable network interface. However, for improved security Dell advises that opens: a Click More Applications. e Close the Thin Client Imager window. 8 Shut...


