

Quick Reference
Page 35
... Computer CAUTION: Before you do not accidentally disconnect cables from the electrical outlet before removing the computer cover. CAUTION: To avoid electrical shock, always unplug your computer from the system board. 2 1 3 4 6 5 1 drives bay 2 power supply (CD/DVD, floppy, and hard drive) 3 system board 4 card slots 5 heat sink assembly 6 front I/O panel Quick Reference Guide 35...
... Computer CAUTION: Before you do not accidentally disconnect cables from the electrical outlet before removing the computer cover. CAUTION: To avoid electrical shock, always unplug your computer from the system board. 2 1 3 4 6 5 1 drives bay 2 power supply (CD/DVD, floppy, and hard drive) 3 system board 4 card slots 5 heat sink assembly 6 front I/O panel Quick Reference Guide 35...
Quick Reference
Page 55
... The system cannot detect a bootable device or partition. • If the floppy drive is your boot device, ensure that the cables are connected and that a bootable floppy disk is in the drive. • If the hard drive is your boot device, ensure that the cables are connected and that the... drive is installed properly and partitioned as a boot device. • Enter system setup and ensure that has a bootable operating system or remove the floppy disk from drive A and restart the...
... The system cannot detect a bootable device or partition. • If the floppy drive is your boot device, ensure that the cables are connected and that a bootable floppy disk is in the drive. • If the hard drive is your boot device, ensure that the cables are connected and that the... drive is installed properly and partitioned as a boot device. • Enter system setup and ensure that has a bootable operating system or remove the floppy disk from drive A and restart the...

Quick Reference
Page 58
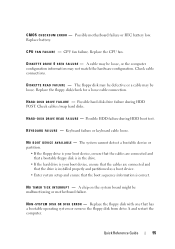
... or hard drive Reseat all USB devices, check cable connections, and then restart the computer. 58 Quick Reference Guide Reinstall all power and data failure has occurred. cables and restart the computer. Light Pattern Problem Description Suggested Resolution A possible graphics card failure has occurred. • If the computer has a graphics card, remove the...
... or hard drive Reseat all USB devices, check cable connections, and then restart the computer. 58 Quick Reference Guide Reinstall all power and data failure has occurred. cables and restart the computer. Light Pattern Problem Description Suggested Resolution A possible graphics card failure has occurred. • If the computer has a graphics card, remove the...
Quick Reference
Page 60
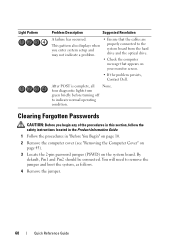
... persists, Contact Dell. By default, Pin1 and Pin2 should be connected. Clearing Forgotten Passwords CAUTION: Before you enter system setup and may not indicate a problem. • Ensure that the cables are properly connected to the system board from the hard drive and the optical drive. • Check... the computer message that appears on the system board. four diagnostic lights turn green briefly before turning off to remove the jumper and boot the system, as follows. 4 Remove the jumper. 60 Quick Reference...
... persists, Contact Dell. By default, Pin1 and Pin2 should be connected. Clearing Forgotten Passwords CAUTION: Before you enter system setup and may not indicate a problem. • Ensure that the cables are properly connected to the system board from the hard drive and the optical drive. • Check... the computer message that appears on the system board. four diagnostic lights turn green briefly before turning off to remove the jumper and boot the system, as follows. 4 Remove the jumper. 60 Quick Reference...

User's Guide
Page 8
... Installing Memory 156 Removing Memory 157 Cards 157 PCI and PCI Express Cards 158 Bezel 164 Removing the Bezel 165 Replacing the Bezel 166 Drives 166 Recommended Drive Cable Connections . . . . . 167 Connecting Drive Cables 167 Drive Interface Connectors 167 Connecting and Disconnecting Drive Cables . . . 168 Hard Drives 168 Installing a Second Hard Drive 174 Drive-Panel Inserts 178 Floppy Drive 180 Optical Drive 185 8 Contents
... Installing Memory 156 Removing Memory 157 Cards 157 PCI and PCI Express Cards 158 Bezel 164 Removing the Bezel 165 Replacing the Bezel 166 Drives 166 Recommended Drive Cable Connections . . . . . 167 Connecting Drive Cables 167 Drive Interface Connectors 167 Connecting and Disconnecting Drive Cables . . . 168 Hard Drives 168 Installing a Second Hard Drive 174 Drive-Panel Inserts 178 Floppy Drive 180 Optical Drive 185 8 Contents
User's Guide
Page 10
... Express Cards 220 Drives 226 Recommended Drive Cable Connections . . . . . 227 Connecting Drive Cables 227 Drive Interface Connectors 228 Connecting and Disconnecting Drive Cables . . . 228 Hard Drives 229 Floppy Drive 233 Optical Drive 237 Battery 241 Replacing the Battery 241 Power Supply 242 Replacing the Power Supply 243 Speakers 245 Installing a Speaker 245 Removing a Speaker 246 Processor 247 Removing the Processor and...
... Express Cards 220 Drives 226 Recommended Drive Cable Connections . . . . . 227 Connecting Drive Cables 227 Drive Interface Connectors 228 Connecting and Disconnecting Drive Cables . . . 228 Hard Drives 229 Floppy Drive 233 Optical Drive 237 Battery 241 Replacing the Battery 241 Power Supply 242 Replacing the Power Supply 243 Speakers 245 Installing a Speaker 245 Removing a Speaker 246 Processor 247 Removing the Processor and...
User's Guide
Page 66
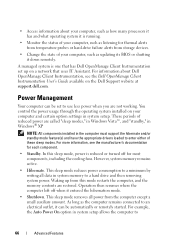
...Client Instrumentation set to an electrical outlet, it entered the hibernation mode. • Shutdown. • Access information about Dell OpenManage Client Instrumentation, see the manufacturer's documentation for most components, including the cooling fans. However, system memory remains active.... computer, and the memory contents are called "sleep modes," in Windows Vista™, and "standby," in system memory to a hard drive and then removing system power. For information about your computer, such as how many processors it has and what operating system it is running. &#...
...Client Instrumentation set to an electrical outlet, it entered the hibernation mode. • Shutdown. • Access information about Dell OpenManage Client Instrumentation, see the manufacturer's documentation for most components, including the cooling fans. However, system memory remains active.... computer, and the memory contents are called "sleep modes," in Windows Vista™, and "standby," in system memory to a hard drive and then removing system power. For information about your computer, such as how many processors it has and what operating system it is running. &#...
User's Guide
Page 79
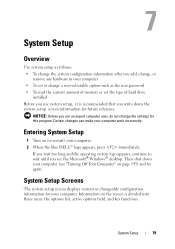
...wait until you see "Turning Off Your Computer" on (or restart) your computer. 2 When the blue DELL™ logo appears, press immediately. Then shut down the system setup screen information for future reference. Information...such as the user password • To read the current amount of memory or set the type of hard drive installed Before you use system setup, it is divided into three areas: the options list, active options... the system configuration information after you add, change, or remove any hardware in your computer • To set or change the settings for your computer.
...wait until you see "Turning Off Your Computer" on (or restart) your computer. 2 When the blue DELL™ logo appears, press immediately. Then shut down the system setup screen information for future reference. Information...such as the user password • To read the current amount of memory or set the type of hard drive installed Before you use system setup, it is divided into three areas: the options list, active options... the system configuration information after you add, change, or remove any hardware in your computer • To set or change the settings for your computer.
User's Guide
Page 105
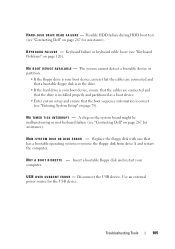
... and ensure that has a bootable operating system or remove the floppy disk from drive A and restart the computer. N O N - S YS T E M D I S K O R D I L U R E - U S B O V E R C U R R E N T E R R O R - Keyboard failure or keyboard cable loose (see "Contacting Dell" on page 267 for assistance). Disconnect the USB ...bootable floppy disk and restart your boot device, ensure that the cables are connected and that a bootable floppy disk is in the drive. • If the hard drive is correct (see "Contacting Dell" on page 267 for the USB device. K E Y B O A R D F A I S K E R ...
... and ensure that has a bootable operating system or remove the floppy disk from drive A and restart the computer. N O N - S YS T E M D I S K O R D I L U R E - U S B O V E R C U R R E N T E R R O R - Keyboard failure or keyboard cable loose (see "Contacting Dell" on page 267 for assistance). Disconnect the USB ...bootable floppy disk and restart your boot device, ensure that the cables are connected and that a bootable floppy disk is in the drive. • If the hard drive is correct (see "Contacting Dell" on page 267 for the USB device. K E Y B O A R D F A I S K E R ...

User's Guide
Page 108
...possible floppy or hard drive Reseat all USB devices, check cable connections, and then restart the computer. 108 Troubleshooting Tools Light Pattern Problem Description Suggested Resolution A possible graphics card failure has occurred. • If the computer has a graphics card, remove the card, ...reinstall it, and then restart the computer. • If the problem still exists, install a graphics card that you know works and restart the computer. • If the problem persists or the computer has integrated graphics, contact Dell (see "Contacting Dell" ...
...possible floppy or hard drive Reseat all USB devices, check cable connections, and then restart the computer. 108 Troubleshooting Tools Light Pattern Problem Description Suggested Resolution A possible graphics card failure has occurred. • If the computer has a graphics card, remove the card, ...reinstall it, and then restart the computer. • If the problem still exists, install a graphics card that you know works and restart the computer. • If the problem persists or the computer has integrated graphics, contact Dell (see "Contacting Dell" ...

User's Guide
Page 117
...the Product Information Guide. C H E C K T H E M I C R O S O F T O U T L O O K ® E X P R E S S S E C U R I T Y S E T T I N G S - E-Mail, Modem, and Internet Problems CAUTION: Before you cannot open your administrator to remove the checkmark, as needed. Troubleshooting 117 Windows Vista: 1 Click Start and click Computer. 2 Right-click Local Disk C:. 3 Click Properties→ Tools→ Check Now. NOTE... Security. 2 Click Do not allow attachments to continue the desired action. 4 Follow the instructions on the computer, click Continue; Hard drive problems RUN CHECK DISK -
...the Product Information Guide. C H E C K T H E M I C R O S O F T O U T L O O K ® E X P R E S S S E C U R I T Y S E T T I N G S - E-Mail, Modem, and Internet Problems CAUTION: Before you cannot open your administrator to remove the checkmark, as needed. Troubleshooting 117 Windows Vista: 1 Click Start and click Computer. 2 Right-click Local Disk C:. 3 Click Properties→ Tools→ Check Now. NOTE... Security. 2 Click Do not allow attachments to continue the desired action. 4 Follow the instructions on the computer, click Continue; Hard drive problems RUN CHECK DISK -

User's Guide
Page 137
...Dell PC Restore or Dell Factory Image Restore only if System Restore did not resolve your operating system problem. Starting System Restore Windows XP: NOTICE: Before you received the computer. NOTICE: Make regular backups of your computer are completely reversible. Both permanently delete all data on the hard drive and remove...systems provide a System Restore option which allows you set your Dell™ computer to the Windows Classic view. However, using the Operating System disc also deletes all data on the hard drive. System Restore does not monitor your data files or recover...
...Dell PC Restore or Dell Factory Image Restore only if System Restore did not resolve your operating system problem. Starting System Restore Windows XP: NOTICE: Before you received the computer. NOTICE: Make regular backups of your computer are completely reversible. Both permanently delete all data on the hard drive and remove...systems provide a System Restore option which allows you set your Dell™ computer to the Windows Classic view. However, using the Operating System disc also deletes all data on the hard drive. System Restore does not monitor your data files or recover...

User's Guide
Page 139
...Restore and click Confirm. Use Dell PC Restore (Windows XP) or Dell Factory Image Restore (Windows Vista) only as the last method to reboot the computer. Data files include documents, spreadsheets, e-mail messages, digital photos, music files, and so on the hard drive and removes any programs or drivers installed... after you do not press in when you do not want to proceed with www.dell.com appears at the top of the screen. 2 Immediately upon seeing the ...
...Restore and click Confirm. Use Dell PC Restore (Windows XP) or Dell Factory Image Restore (Windows Vista) only as the last method to reboot the computer. Data files include documents, spreadsheets, e-mail messages, digital photos, music files, and so on the hard drive and removes any programs or drivers installed... after you do not press in when you do not want to proceed with www.dell.com appears at the top of the screen. 2 Immediately upon seeing the ...

User's Guide
Page 140
...your computer operating system. Removing PC Restore: NOTICE: Removing Dell PC Restore from the hard drive permanently deletes the PC Restore utility from the hard drive, you cannot ever recall it to restore your hard drive to the operating state it was not found. After you have removed Dell PC Restore, you ...log on . 6 Click Next. If you do not log on as a local administrator. It is restored to remove the PC Restore partition on the hard drive. 140 Reinstalling Software NOTE: Do not manually shut down the computer. The System Restore screen appears and the computer restarts...
...your computer operating system. Removing PC Restore: NOTICE: Removing Dell PC Restore from the hard drive permanently deletes the PC Restore utility from the hard drive, you cannot ever recall it to restore your hard drive to the operating state it was not found. After you have removed Dell PC Restore, you ...log on . 6 Click Next. If you do not log on as a local administrator. It is restored to remove the PC Restore partition on the hard drive. 140 Reinstalling Software NOTE: Do not manually shut down the computer. The System Restore screen appears and the computer restarts...

User's Guide
Page 141
...and verify that you want to continue reformatting the hard drive and restoring the system software to the factory condition... access the recovery options, log on the computer. The Dell Factory Image Restore welcome screen appears. 6 Click Next. 6 Right-click Local Disk ...in the User name field, then click OK. 5 Click Dell Factory Image Restore. When the Dell logo appears, press several times to complete. The restore process...to factory condition. 8 Click Finish to select Dell Factory Tools, then Dell Factory Image Restore. Windows Vista: Dell Factory Image Restore 1 Turn on as indicated...
...and verify that you want to continue reformatting the hard drive and restoring the system software to the factory condition... access the recovery options, log on the computer. The Dell Factory Image Restore welcome screen appears. 6 Click Next. 6 Right-click Local Disk ...in the User name field, then click OK. 5 Click Dell Factory Image Restore. When the Dell logo appears, press several times to complete. The restore process...to factory condition. 8 Click Finish to select Dell Factory Tools, then Dell Factory Image Restore. Windows Vista: Dell Factory Image Restore 1 Turn on as indicated...

User's Guide
Page 168
NOTICE: To avoid damage to the drive, do not set the drive on a hard surface. Removing a Hard Drive 1 Follow the procedures in this procedure. The serial ATA interface connectors are replacing a hard drive that contains data you begin any of the procedures in "Before You Begin" on the other ...verify that it on a surface, such as a foam pad, that is configured for correct insertion; that will sufficiently cushion it. Hard Drives CAUTION: Before you are keyed for your computer. CAUTION: To guard against electrical shock, laceration by moving fan blades, or other ...
NOTICE: To avoid damage to the drive, do not set the drive on a hard surface. Removing a Hard Drive 1 Follow the procedures in this procedure. The serial ATA interface connectors are replacing a hard drive that contains data you begin any of the procedures in "Before You Begin" on the other ...verify that it on a surface, such as a foam pad, that is configured for correct insertion; that will sufficiently cushion it. Hard Drives CAUTION: Before you are keyed for your computer. CAUTION: To guard against electrical shock, laceration by moving fan blades, or other ...

User's Guide
Page 169
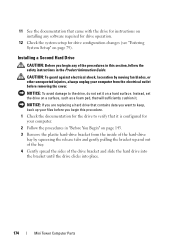
2 Remove the computer cover (see "Removing the Computer Cover" on page 147). 3 Disconnect the power and data cables from the drive. 4 Disconnect the data cable from the system board. 1 2 3 1 hard-drive data cable 3 power cable 2 hard-drive data connector on system board 5 Remove the four screws securing the hard drive. 6 Slide the drive out away from the front of the computer. Mini Tower Computer Parts 169
2 Remove the computer cover (see "Removing the Computer Cover" on page 147). 3 Disconnect the power and data cables from the drive. 4 Disconnect the data cable from the system board. 1 2 3 1 hard-drive data cable 3 power cable 2 hard-drive data connector on system board 5 Remove the four screws securing the hard drive. 6 Slide the drive out away from the front of the computer. Mini Tower Computer Parts 169

User's Guide
Page 170
... on page 79), then go to the "Drives" section of the system setup and under Drive 0 through 3, set the Drive to the correct configuration. 8 Replace the computer cover (see "Removing the Computer Cover" on page 147). 3 Check the documentation for the drive to verify that it into the computer. 9... port or device and then plug it is configured for your computer. 170 Mini Tower Computer Parts Installing a Hard Drive 1 Follow the procedures in system setup. 7 If removing this drive changes the drive configuration, then be sure to reflect these changes in "Before You Begin" on page 143...
... on page 79), then go to the "Drives" section of the system setup and under Drive 0 through 3, set the Drive to the correct configuration. 8 Replace the computer cover (see "Removing the Computer Cover" on page 147). 3 Check the documentation for the drive to verify that it into the computer. 9... port or device and then plug it is configured for your computer. 170 Mini Tower Computer Parts Installing a Hard Drive 1 Follow the procedures in system setup. 7 If removing this drive changes the drive configuration, then be sure to reflect these changes in "Before You Begin" on page 143...

User's Guide
Page 172
Snap the bracket onto the new drive. 5 Gently slide the hard drive into the drive bay until it from the existing drive by unsnapping it clicks into place. 6 Connect the power and data cables to the drive. 172 Mini Tower Computer Parts 4 If your replacement hard drive does not have the plastic hard-drive bracket attached, remove the bracket from the drive.
Snap the bracket onto the new drive. 5 Gently slide the hard drive into the drive bay until it from the existing drive by unsnapping it clicks into place. 6 Connect the power and data cables to the drive. 172 Mini Tower Computer Parts 4 If your replacement hard drive does not have the plastic hard-drive bracket attached, remove the bracket from the drive.
User's Guide
Page 174
... your computer. 2 Follow the procedures in the Product Information Guide. Instead, set it on page 143. 3 Remove the plastic hard-drive bracket from the inside of the hard-drive bay by squeezing the release tabs and gently pulling the bracket up your computer from the electrical outlet before you ... To guard against electrical shock, laceration by moving fan blades, or other unexpected injuries, always unplug your files before removing the cover. NOTICE: If you are replacing a hard drive that contains data you want to keep, back up and out of the bay. 4 Gently spread the sides of...
... your computer. 2 Follow the procedures in the Product Information Guide. Instead, set it on page 143. 3 Remove the plastic hard-drive bracket from the inside of the hard-drive bay by squeezing the release tabs and gently pulling the bracket up your computer from the electrical outlet before you ... To guard against electrical shock, laceration by moving fan blades, or other unexpected injuries, always unplug your files before removing the cover. NOTICE: If you are replacing a hard drive that contains data you want to keep, back up and out of the bay. 4 Gently spread the sides of...


