
Owner's Manual
Page 2
.... Other trademarks and trade names may be used in this text: Dell, the DELL logo, Inspiron, Dell Precision, Dimension, DellNet, OptiPlex, Latitude, PowerEdge, PowerConnect, PowerVault, PowerApp, and Dell OpenManage are registered trademarks of Dell Inc.; A01 All rights reserved. is subject to Microsoft® Windows® operating systems are registered trademarks of data and tells you purchased...
.... Other trademarks and trade names may be used in this text: Dell, the DELL logo, Inspiron, Dell Precision, Dimension, DellNet, OptiPlex, Latitude, PowerEdge, PowerConnect, PowerVault, PowerApp, and Dell OpenManage are registered trademarks of Dell Inc.; A01 All rights reserved. is subject to Microsoft® Windows® operating systems are registered trademarks of data and tells you purchased...
Owner's Manual
Page 4
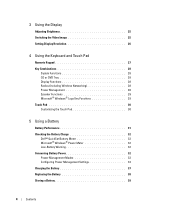
...CD or DVD Tray 28 Display Functions 28 Radios (Including Wireless Networking 28 Power Management 28 Speaker Functions 29 Microsoft® Windows® Logo Key Functions 29 Touch Pad 30 Customizing the Touch Pad 30 5 Using a Battery Battery Performance 31 Checking the Battery ...Charge 32 Dell™ QuickSet Battery Meter 32 Microsoft® Windows® Power Meter 32 Low-Battery Warning 32 Conserving Battery Power 32 Power Management Modes 33 Configuring Power Management ...
...CD or DVD Tray 28 Display Functions 28 Radios (Including Wireless Networking 28 Power Management 28 Speaker Functions 29 Microsoft® Windows® Logo Key Functions 29 Touch Pad 30 Customizing the Touch Pad 30 5 Using a Battery Battery Performance 31 Checking the Battery ...Charge 32 Dell™ QuickSet Battery Meter 32 Microsoft® Windows® Power Meter 32 Low-Battery Warning 32 Conserving Battery Power 32 Power Management Modes 33 Configuring Power Management ...
Owner's Manual
Page 5
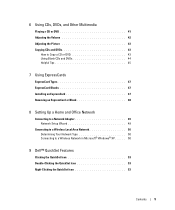
... Adapter 49 Network Setup Wizard 49 Connecting to a Wireless Local Area Network 50 Determining Your Network Type 50 Connecting to a Wireless Network in Microsoft® Windows® XP . . . . . 50 9 Dell™ QuickSet Features Clicking the QuickSet Icon 53 Double-Clicking the QuickSet Icon 53 Right-Clicking the QuickSet Icon 53 Contents 5
... Adapter 49 Network Setup Wizard 49 Connecting to a Wireless Local Area Network 50 Determining Your Network Type 50 Connecting to a Wireless Network in Microsoft® Windows® XP . . . . . 50 9 Dell™ QuickSet Features Clicking the QuickSet Icon 53 Double-Clicking the QuickSet Icon 53 Right-Clicking the QuickSet Icon 53 Contents 5
Owner's Manual
Page 6
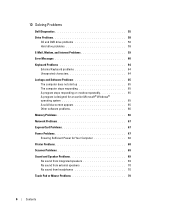
10 Solving Problems Dell Diagnostics 55 Drive Problems 58 CD and DVD drive problems 58 Hard drive problems 59 E-Mail, Modem, and Internet Problems 59 Error Messages 60 Keyboard ... does not start up 65 The computer stops responding 65 A program stops responding or crashes repeatedly 65 A program is designed for an earlier Microsoft® Windows® operating system 65 A solid blue screen appears 65 Other software problems 66 Memory Problems 66 Network Problems 67 ExpressCard Problems 67 Power Problems 67...
10 Solving Problems Dell Diagnostics 55 Drive Problems 58 CD and DVD drive problems 58 Hard drive problems 59 E-Mail, Modem, and Internet Problems 59 Error Messages 60 Keyboard ... does not start up 65 The computer stops responding 65 A program stops responding or crashes repeatedly 65 A program is designed for an earlier Microsoft® Windows® operating system 65 A solid blue screen appears 65 Other software problems 66 Memory Problems 66 Network Problems 67 ExpressCard Problems 67 Power Problems 67...
Owner's Manual
Page 7
...Identifying Drivers 72 Reinstalling Drivers and Utilities 73 Resolving Software and Hardware Incompatibilities 75 Restoring Your Operating System 75 Using Microsoft Windows XP System Restore 76 Using Dell PC Restore by Symantec 77 Using the Operating System CD 79 11 Adding and Replacing Parts Before You Begin 81 ...Recommended Tools 81 Turning Off Your Computer 81 Before Working Inside Your Computer 81 Hard Drive 83 Returning a Hard Drive to Dell 85 CD/DVD Drive 85 Memory 86 Wireless Mini PCI Card 90 Hinge Cover 94 Keyboard 95 12 Appendix Specifications 97 Using the ...
...Identifying Drivers 72 Reinstalling Drivers and Utilities 73 Resolving Software and Hardware Incompatibilities 75 Restoring Your Operating System 75 Using Microsoft Windows XP System Restore 76 Using Dell PC Restore by Symantec 77 Using the Operating System CD 79 11 Adding and Replacing Parts Before You Begin 81 ...Recommended Tools 81 Turning Off Your Computer 81 Before Working Inside Your Computer 81 Hard Drive 83 Returning a Hard Drive to Dell 85 CD/DVD Drive 85 Memory 86 Wireless Mini PCI Card 90 Hinge Cover 94 Keyboard 95 12 Appendix Specifications 97 Using the ...
Owner's Manual
Page 9
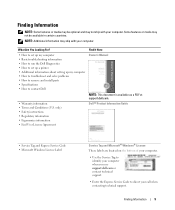
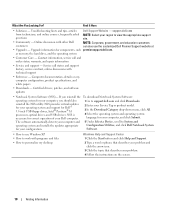
.... only) • Safety instructions • Regulatory information • Ergonomics information • End User License Agreement Dell™ Product Information Guide • Service Tag and Express Service Code • Microsoft Windows License Label Service Tag and Microsoft® Windows® License These labels are located on the bottom of your computer. • Use the...
.... only) • Safety instructions • Regulatory information • Ergonomics information • End User License Agreement Dell™ Product Information Guide • Service Tag and Express Service Code • Microsoft Windows License Label Service Tag and Microsoft® Windows® License These labels are located on the bottom of your computer. • Use the...
Owner's Manual
Page 10
...; 3.5-inch USB floppy drives, Intel® Pentium® M processors, optical drives, and USB devices. Online discussion with other Dell NOTE: Corporate, government, and education customers customers can also use Windows XP • How to work with technical support • Reference - as memory, the hard drive, and the operating system • Customer Care...
...; 3.5-inch USB floppy drives, Intel® Pentium® M processors, optical drives, and USB devices. Online discussion with other Dell NOTE: Corporate, government, and education customers customers can also use Windows XP • How to work with technical support • Reference - as memory, the hard drive, and the operating system • Customer Care...

Owner's Manual
Page 13
... computer is turned off your computer, shut down your computer. P O W E R B U T T O N - Turns on steadily or blinks to an electrical outlet, the light operates as the Microsoft Windows logo key. Turns on when the computer reads or writes data. K E Y B O A R D - The keyboard includes a numeric keypad as well as follows: • Solid green: The battery...
... computer is turned off your computer, shut down your computer. P O W E R B U T T O N - Turns on steadily or blinks to an electrical outlet, the light operates as the Microsoft Windows logo key. Turns on when the computer reads or writes data. K E Y B O A R D - The keyboard includes a numeric keypad as well as follows: • Solid green: The battery...

Owner's Manual
Page 19
... connection with a different ISP: 1 Save and close any open files, and exit any open programs. 2 Double-click the ISP icon on the Microsoft® Windows® desktop. 3 Follow the instructions on your computer and to the telephone wall jack before you set up connection, connect a telephone line to the modem... Up Your Computer 19 If you want to complete the setup. The New Connection Wizard appears. 3 Click Connect to the Internet. 4 In the next window, click the appropriate option: • If you do not have an ISP and want to set up your desktop or if you are using a dial...
... connection with a different ISP: 1 Save and close any open files, and exit any open programs. 2 Double-click the ISP icon on the Microsoft® Windows® desktop. 3 Follow the instructions on your computer and to the telephone wall jack before you set up connection, connect a telephone line to the modem... Up Your Computer 19 If you want to complete the setup. The New Connection Wizard appears. 3 Click Connect to the Internet. 4 In the next window, click the appropriate option: • If you do not have an ISP and want to set up your desktop or if you are using a dial...
Owner's Manual
Page 20
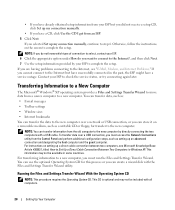
...Use the setup information provided by directly connecting the two computers with a USB cable. Transferring Information to a New Computer The Microsoft® Windows® XP operating system provides a Files and Settings Transfer Wizard to move data from a source computer to the new computer by your... from the old computer to a new computer. You can transfer data, such as: • E-mail messages • Toolbar settings • Window sizes • Internet bookmarks You can transfer the data to the new computer over a USB connection, you must run the Files and Settings Transfer...
...Use the setup information provided by directly connecting the two computers with a USB cable. Transferring Information to a New Computer The Microsoft® Windows® XP operating system provides a Files and Settings Transfer Wizard to move data from a source computer to the new computer by your... from the old computer to a new computer. You can transfer data, such as: • E-mail messages • Toolbar settings • Window sizes • Internet bookmarks You can transfer the data to the new computer over a USB connection, you must run the Files and Settings Transfer...

Owner's Manual
Page 21
... new computer. To transfer data to the new computer: 1 On the Now go to your old or source computer. To copy data from the Windows XP CD and click Next. 5 When the Now go to your old computer screen appears, go to your old computer screen on the new computer...and click Next. 6 On the Select a transfer method screen, click the transfer method you must create a wizard disk that will use your new computer with Windows XP and perform the following steps: 1 Click the Start button. 2 Click Files and Settings Transfer Wizard. 3 When the Files and Settings Transfer Wizard welcome ...
... new computer. To transfer data to the new computer: 1 On the Now go to your old or source computer. To copy data from the Windows XP CD and click Next. 5 When the Now go to your old computer screen appears, go to your old computer screen on the new computer...and click Next. 6 On the Select a transfer method screen, click the transfer method you must create a wizard disk that will use your new computer with Windows XP and perform the following steps: 1 Click the Start button. 2 Click Files and Settings Transfer Wizard. 3 When the Files and Settings Transfer Wizard welcome ...

Owner's Manual
Page 22
...click I Transfer Files From My Old Computer to My New Dell™ Computer Using the Microsoft® Windows® XP Operating System?). screen, select the items you want to the old computer. Follow the instructions on the Run window, browse to your old computer screen on the appropriate removable ...media) and click OK. 4 On the Files and Settings Transfer Wizard welcome screen, click Next. 5 On the Which computer is this procedure, search dell.support.com for fastwiz (on the...
...click I Transfer Files From My Old Computer to My New Dell™ Computer Using the Microsoft® Windows® XP Operating System?). screen, select the items you want to the old computer. Follow the instructions on the Run window, browse to your old computer screen on the appropriate removable ...media) and click OK. 4 On the Files and Settings Transfer Wizard welcome screen, click Next. 5 On the Which computer is this procedure, search dell.support.com for fastwiz (on the...
Owner's Manual
Page 24
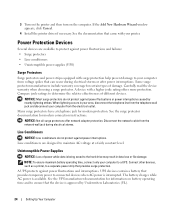
... not protect against power interruptions. Connect other devices, such as a printer, to connected devices when AC power is interrupted. If the Add New Hardware Wizard window appears, click Cancel. 4 Install the printer driver if necessary. UPS devices contain a battery that provides temporary power to a separate power strip that provides surge protection...
... not protect against power interruptions. Connect other devices, such as a printer, to connected devices when AC power is interrupted. If the Add New Hardware Wizard window appears, click Cancel. 4 Install the printer driver if necessary. UPS devices contain a battery that provides temporary power to a separate power strip that provides surge protection...
Owner's Manual
Page 28
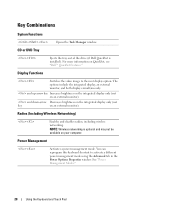
...management mode. Display Functions Switches the video image to activate a different power management mode using the Advanced tab in the Power Options Properties window. NOTE: Wireless networking is installed). You can reprogram this keyboard shortcut to the next display option. CD or DVD Tray Ejects the tray... out of the drive (if Dell QuickSet is optional and may not be available on an external monitor). and up-arrow key Increases brightness on the integrated display only...
...management mode. Display Functions Switches the video image to activate a different power management mode using the Advanced tab in the Power Options Properties window. NOTE: Wireless networking is installed). You can reprogram this keyboard shortcut to the next display option. CD or DVD Tray Ejects the tray... out of the drive (if Dell QuickSet is optional and may not be available on an external monitor). and up-arrow key Increases brightness on the integrated display only...

Owner's Manual
Page 29
... Increases the volume of the integrated speakers and external speakers, if attached. Using the Keyboard and Touch Pad 29 Microsoft® Windows® Logo Key Functions Windows logo key and Minimizes all windows. Decreases the volume of the integrated speakers and external speakers, if attached. To adjust keyboard operation, such as the character...
... Increases the volume of the integrated speakers and external speakers, if attached. Using the Keyboard and Touch Pad 29 Microsoft® Windows® Logo Key Functions Windows logo key and Minimizes all windows. Decreases the volume of the integrated speakers and external speakers, if attached. To adjust keyboard operation, such as the character...

Owner's Manual
Page 30
... touch pad and touch pad buttons as you to move the cursor on the display. Customizing the Touch Pad You can use the Mouse Properties window to press the left touch-pad button. • To select and move (or drag) an object, position the cursor on the object and tap twice... on the touch pad or use your thumb to press the left touch-pad button twice. For information about the Control Panel, see "Windows Help and Support Center." 2 In the Mouse Properties window, click the Touch Pad tab to adjust touch pad settings. 3 Click OK to save the settings and close the...
... touch pad and touch pad buttons as you to move the cursor on the display. Customizing the Touch Pad You can use the Mouse Properties window to press the left touch-pad button. • To select and move (or drag) an object, position the cursor on the object and tap twice... on the touch pad or use your thumb to press the left touch-pad button twice. For information about the Control Panel, see "Windows Help and Support Center." 2 In the Mouse Properties window, click the Touch Pad tab to adjust touch pad settings. 3 Click OK to save the settings and close the...

Owner's Manual
Page 32
... AC power and the battery is approximately 90 percent depleted. The Battery Meter window displays status, charge level, and charge completion time for long periods of power, hibernate mode begins automatically. icon, and the Dell™ QuickSet Battery Meter If Dell QuickSet is installed, press to an electrical outlet when possible because battery...
... AC power and the battery is approximately 90 percent depleted. The Battery Meter window displays status, charge level, and charge completion time for long periods of power, hibernate mode begins automatically. icon, and the Dell™ QuickSet Battery Meter If Dell QuickSet is installed, press to an electrical outlet when possible because battery...
Owner's Manual
Page 33
... by turning off the computer. When the computer exits hibernate mode, it returns to the same operating state it was in the Power Options Properties window, use one of inactivity (a time-out). When the computer exits standby mode, it returns to the same operating state it was in hibernate mode. or...
... by turning off the computer. When the computer exits hibernate mode, it returns to the same operating state it was in the Power Options Properties window, use one of inactivity (a time-out). When the computer exits standby mode, it returns to the same operating state it was in hibernate mode. or...

Owner's Manual
Page 34
... hibernate mode by pressing a key or touching the touch pad. For more information on the Advanced tab in the Power Options Properties window, use the QuickSet Power Management Wizard or Windows Power Options Properties to open the Power Management Wizard. screen, you can select Do not show this option, the Welcome screen...
... hibernate mode by pressing a key or touching the touch pad. For more information on the Advanced tab in the Power Options Properties window, use the QuickSet Power Management Wizard or Windows Power Options Properties to open the Power Management Wizard. screen, you can select Do not show this option, the Welcome screen...

Owner's Manual
Page 35
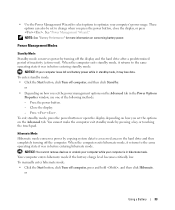
...device, the Network Disabled power scheme disables only your computer is in order to set them through QuickSet (not Microsoft® Windows®) for each scheme are not available through the Control Panel power schemes. The Selecting a Power Scheme screen allows you ...) after the names of these features, you to change . Choose no action. - The Power Management Wizard also allows you cannot delete Dell™ QuickSet predefined power schemes (Maximum Battery, Maximum Performance, Presentation, and Network Disabled). In addition, you can delete power schemes that...
...device, the Network Disabled power scheme disables only your computer is in order to set them through QuickSet (not Microsoft® Windows®) for each scheme are not available through the Control Panel power schemes. The Selecting a Power Scheme screen allows you ...) after the names of these features, you to change . Choose no action. - The Power Management Wizard also allows you cannot delete Dell™ QuickSet predefined power schemes (Maximum Battery, Maximum Performance, Presentation, and Network Disabled). In addition, you can delete power schemes that...


