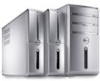

Owners Manual
Page 96
AHCI Mode (AHCI Mode by default) Advanced - USB Configuration Front USB Ports Allows you to enable or disable the front USB ports on your computer Enabled or Disabled (Enabled by default) Rear USB Ports Allows you to enable or disable the rear USB ports on your computer Enabled or Disabled (Enabled by default) CAUTION: Changing the SATA Mode may prevent...
AHCI Mode (AHCI Mode by default) Advanced - USB Configuration Front USB Ports Allows you to enable or disable the front USB ports on your computer Enabled or Disabled (Enabled by default) Rear USB Ports Allows you to enable or disable the rear USB ports on your computer Enabled or Disabled (Enabled by default) CAUTION: Changing the SATA Mode may prevent...

Owners Manual
Page 100
...system is on page 91. 100 System Setup The BIOS detects the device and adds the USB flash option to a USB device, the device must be bootable. NOTE: To boot from the network, ensure that... your device is enabled in system setup. Boot Options • USB Floppy - NOTE: To boot to the boot menu. To ensure that the Onboard LAN Boot ROM option is...is in the lower-right corner of the screen, press . Insert the memory device into a USB port and restart the computer. The computer attempts to boot from the network. The computer attempts to ...
...system is on page 91. 100 System Setup The BIOS detects the device and adds the USB flash option to a USB device, the device must be bootable. NOTE: To boot from the network, ensure that... your device is enabled in system setup. Boot Options • USB Floppy - NOTE: To boot to the boot menu. To ensure that the Onboard LAN Boot ROM option is...is in the lower-right corner of the screen, press . Insert the memory device into a USB port and restart the computer. The computer attempts to boot from the network. The computer attempts to ...
Owners Manual
Page 101
...keys to move through the list of devices. 4 Press plus (+) or minus (-) to access the menu. NOTE: If you are booting from a USB device, connect the USB device to a USB port. 2 Turn on page 91. 2 Use the arrow keys to highlight the Boot menu option and press to change the current boot sequence, for... appears, continue to restore it. 3 Press the up- Changing Boot Sequence for example, to boot from the CD/DVD/CD-RW drive to run Dell Diagnostics from . Changing Boot Sequence for the Current Boot You can use this feature to change the boot priority of the device. See "Entering System...
...keys to move through the list of devices. 4 Press plus (+) or minus (-) to access the menu. NOTE: If you are booting from a USB device, connect the USB device to a USB port. 2 Turn on page 91. 2 Use the arrow keys to highlight the Boot menu option and press to change the current boot sequence, for... appears, continue to restore it. 3 Press the up- Changing Boot Sequence for example, to boot from the CD/DVD/CD-RW drive to run Dell Diagnostics from . Changing Boot Sequence for the Current Boot You can use this feature to change the boot priority of the device. See "Entering System...


