
Owner's Manual
Page 5
6 Using PC Cards PC Card Types 43 PC Card Blanks 43 Extended PC Cards 43 Installing a PC Card 43 Removing a PC Card or Blank 45 7 Setting Up a Home and Office Network Connecting to a Network Adapter 47 Network Setup Wizard 48 Connecting to a ... Type 48 Connecting to a Wireless Network in Microsoft® Windows® XP . . . . . 49 8 Solving Problems Dell Diagnostics 51 When to Use the Dell Diagnostics 51 Drive Problems 53 DVD drive problems 53 Hard drive problems 54 E-Mail, Modem, and Internet Problems 55 Error Messages 56 IEEE 1394 Device Problems 58 Keyboard Problems 58...
6 Using PC Cards PC Card Types 43 PC Card Blanks 43 Extended PC Cards 43 Installing a PC Card 43 Removing a PC Card or Blank 45 7 Setting Up a Home and Office Network Connecting to a Network Adapter 47 Network Setup Wizard 48 Connecting to a ... Type 48 Connecting to a Wireless Network in Microsoft® Windows® XP . . . . . 49 8 Solving Problems Dell Diagnostics 51 When to Use the Dell Diagnostics 51 Drive Problems 53 DVD drive problems 53 Hard drive problems 54 E-Mail, Modem, and Internet Problems 55 Error Messages 56 IEEE 1394 Device Problems 58 Keyboard Problems 58...

Owner's Manual
Page 21
.... B A T T E R Y - A Tour of Your Computer 21 However, power connectors and power strips vary among countries. Bottom View battery charge gauge optical drive locking screw battery-bay latch release optical drive bay battery hard drive fan memory/modem cover O P T I C A L D R I V E L O C K I N G S C R E W - B A T T E R Y - NOTICE: When you can use the computer without connecting the computer to ... the cable to the power strip or electrical outlet may cause fire or equipment damage. For more information, see "Optical Drive" on page 30. See "Removing a Battery" on page 88.
.... B A T T E R Y - A Tour of Your Computer 21 However, power connectors and power strips vary among countries. Bottom View battery charge gauge optical drive locking screw battery-bay latch release optical drive bay battery hard drive fan memory/modem cover O P T I C A L D R I V E L O C K I N G S C R E W - B A T T E R Y - NOTICE: When you can use the computer without connecting the computer to ... the cable to the power strip or electrical outlet may cause fire or equipment damage. For more information, see "Optical Drive" on page 30. See "Removing a Battery" on page 88.
Owner's Manual
Page 56
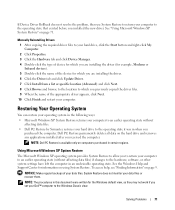
... checkmark to remove it and connect to commands from the computer. If you are experiencing slow computer performance, you frequently receive pop-up advertisements, or you begin any of the procedures in this section, follow the safety instructions in the Product Information Guide. B A D C O M M A N D O R F I A - The hard drive cannot read ...Before you are trying to copy is too large to fit on the disk, or the disk is trying to boot to support.dell.com and search for the operating system or the program that you have too many programs open , click File. Try copying the ...
... checkmark to remove it and connect to commands from the computer. If you are experiencing slow computer performance, you frequently receive pop-up advertisements, or you begin any of the procedures in this section, follow the safety instructions in the Product Information Guide. B A D C O M M A N D O R F I A - The hard drive cannot read ...Before you are trying to copy is too large to fit on the disk, or the disk is trying to boot to support.dell.com and search for the operating system or the program that you have too many programs open , click File. Try copying the ...

Owner's Manual
Page 57
...hard drive. See "FCC Notices (U.S. The program that you want to open is missing an essential file. X : \ I S N O T A C C E S S I L E W A S N O T F O U N D - Remove and then reinstall the program. 1 Click the Start button and click Control Panel. 2 Click Add or Remove Programs. 3 Select the program you are trying to remove. 4 Click Remove or Change/Remove... and follow the prompts on page 101. See page 77. If the problem persists, contact Dell. D L L F I B ...
...hard drive. See "FCC Notices (U.S. The program that you want to open is missing an essential file. X : \ I S N O T A C C E S S I L E W A S N O T F O U N D - Remove and then reinstall the program. 1 Click the Start button and click Control Panel. 2 Click Add or Remove Programs. 3 Select the program you are trying to remove. 4 Click Remove or Change/Remove... and follow the prompts on page 101. See page 77. If the problem persists, contact Dell. D L L F I B ...

Owner's Manual
Page 61
... connecting to the Internet, your program may require an upgrade) to support.dell.com and search for information. • Ensure that includes anti-spyware protection...reinstall the program. For more information, go to scan the computer and remove spyware. Use an anti-virus program that the program is related to ... • Ensure that the device drivers do not conflict with spyware. BACK UP YOUR FILES IMMEDIATELY USE A VIRUS-SCANNING PROGRAM TO CHECK THE HARD DRIVE, FLOPPY DISKS, OR CDS SAVE AND CLOSE ANY OPEN FILES OR PROGRAMS AND SHUT DOWN YOUR COMPUTER THROUGH THE Start MENU S C A ...
... connecting to the Internet, your program may require an upgrade) to support.dell.com and search for information. • Ensure that includes anti-spyware protection...reinstall the program. For more information, go to scan the computer and remove spyware. Use an anti-virus program that the program is related to ... • Ensure that the device drivers do not conflict with spyware. BACK UP YOUR FILES IMMEDIATELY USE A VIRUS-SCANNING PROGRAM TO CHECK THE HARD DRIVE, FLOPPY DISKS, OR CDS SAVE AND CLOSE ANY OPEN FILES OR PROGRAMS AND SHUT DOWN YOUR COMPUTER THROUGH THE Start MENU S C A ...
Owner's Manual
Page 71
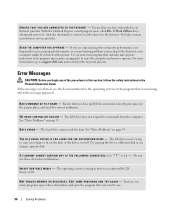
... Microsoft Windows XP System Restore returns your computer to an earlier operating state without affecting data files. • Dell PC Restore by Symantec restores your hard drive to the operating state it was in this document were written for the Windows default view, so they may not...Infrared devices). 5 Double-click the name of your data files or recover them. To access help, see "Finding Information" on the hard drive and removes any applications installed after you previously copied the driver files. 9 When the name of device for which you received the computer. Manually ...
... Microsoft Windows XP System Restore returns your computer to an earlier operating state without affecting data files. • Dell PC Restore by Symantec restores your hard drive to the operating state it was in this document were written for the Windows default view, so they may not...Infrared devices). 5 Double-click the name of your data files or recover them. To access help, see "Finding Information" on the hard drive and removes any applications installed after you previously copied the driver files. 9 When the name of device for which you received the computer. Manually ...

Owner's Manual
Page 73
... Restore by Symantec NOTE: Dell PC Restore is available only on the hard drive and removes any applications or drivers installed after you received your hard drive to restore your computer-including data files-are permanently deleted from the hard drive. To use PC Restore: 1 Turn on . Any programs ... finish restarting, and then restart the computer again. Enabling System Restore If you reinstall Windows XP with www.dell.com appears at the top of free hard-disk space available, System Restore is automatically disabled. Solving Problems 73 To see if System Restore is enabled:...
... Restore by Symantec NOTE: Dell PC Restore is available only on the hard drive and removes any applications or drivers installed after you received your hard drive to restore your computer-including data files-are permanently deleted from the hard drive. To use PC Restore: 1 Turn on . Any programs ... finish restarting, and then restart the computer again. Enabling System Restore If you reinstall Windows XP with www.dell.com appears at the top of free hard-disk space available, System Restore is automatically disabled. Solving Problems 73 To see if System Restore is enabled:...

Owner's Manual
Page 77
..., and utilities on page 77. Adding and Replacing Parts 77 See "Hard Drive" on the new hard drive. Hard Drive CAUTION: If you are extremely fragile; even a slight bump can damage the drive. NOTE: Dell does not guarantee compatibility or provide support for hard drives from the optical drive bay. See "Removing a PC Card or Blank" on page 45. 8 Close the display...
..., and utilities on page 77. Adding and Replacing Parts 77 See "Hard Drive" on the new hard drive. Hard Drive CAUTION: If you are extremely fragile; even a slight bump can damage the drive. NOTE: Dell does not guarantee compatibility or provide support for hard drives from the optical drive bay. See "Removing a PC Card or Blank" on page 45. 8 Close the display...

Owner's Manual
Page 78
... and tighten the screws. 7 Install the operating system for storing or shipping the hard drive. See "Protecting Against Electrostatic Discharge" in "Before You Begin" on page 75. 2 Turn the computer over, and remove the hard drive screws. Save the original packaging for your computer. NOTICE: Use firm and even ...pressure to slide the drive into the bay until it in the computer, store it is not in protective...
... and tighten the screws. 7 Install the operating system for storing or shipping the hard drive. See "Protecting Against Electrostatic Discharge" in "Before You Begin" on page 75. 2 Turn the computer over, and remove the hard drive screws. Save the original packaging for your computer. NOTICE: Use firm and even ...pressure to slide the drive into the bay until it in the computer, store it is not in protective...

Owner's Manual
Page 82
As the computer boots, it detects the additional memory and automatically updates the system configuration information. See "Hard Drive" on page 77. 9 Turn on the modem cover, and then remove the modem cover. 82 Adding and Replacing Parts Modem If you ordered the optional modem at the same time ...that you ordered your computer and an electrical outlet. 8 Reinstall the hard drive. To confirm the amount of the procedures in this...
As the computer boots, it detects the additional memory and automatically updates the system configuration information. See "Hard Drive" on page 77. 9 Turn on the modem cover, and then remove the modem cover. 82 Adding and Replacing Parts Modem If you ordered the optional modem at the same time ...that you ordered your computer and an electrical outlet. 8 Reinstall the hard drive. To confirm the amount of the procedures in this...

Owner's Manual
Page 122
... description, 17, 22 FCC notice, 101 Finding Information documentation, 9 floppy drive connecting to a USB connector, 18 H hard drive description, 22 problems, 54 replacing, 77 returning to Dell, 79 hardware conflicts, 74 Hardware Troubleshooter, 74 Help and Support Center, 11 help file, 9 hinge cover removing, 89 I IEEE 1394 connector description, 18 problems, 58 Internet connection, 23...
... description, 17, 22 FCC notice, 101 Finding Information documentation, 9 floppy drive connecting to a USB connector, 18 H hard drive description, 22 problems, 54 replacing, 77 returning to Dell, 79 hardware conflicts, 74 Hardware Troubleshooter, 74 Help and Support Center, 11 help file, 9 hinge cover removing, 89 I IEEE 1394 connector description, 18 problems, 58 Internet connection, 23...

Owner's Manual
Page 123
... description, 22 optical-drive-tray eject button description, 18 P PC Card slot description, 19 PC Cards blanks, 43, 45 CardBus technology, 43 extended, 43 installing, 43 removing, 45 slots, 43 types, 43 wireless network adapter, 43 PC Restore, 73 power line conditioners, 25 problems, 63 protection ... 60 computer does not start up, 59 computer stops responding, 60 conditions indicated by power light, 63 conflicts, 74 Dell Diagnostics, 51 drives, 53 DVD drive, 53 error messages, 56 hard drive, 54 IEEE 1394, 58 keyboard, 58 lockups, 59 network, 62 power, 63 printer, 64 program crashes, 60 program...
... description, 22 optical-drive-tray eject button description, 18 P PC Card slot description, 19 PC Cards blanks, 43, 45 CardBus technology, 43 extended, 43 installing, 43 removing, 45 slots, 43 types, 43 wireless network adapter, 43 PC Restore, 73 power line conditioners, 25 problems, 63 protection ... 60 computer does not start up, 59 computer stops responding, 60 conditions indicated by power light, 63 conflicts, 74 Dell Diagnostics, 51 drives, 53 DVD drive, 53 error messages, 56 hard drive, 54 IEEE 1394, 58 keyboard, 58 lockups, 59 network, 62 power, 63 printer, 64 program crashes, 60 program...

Service Manual
Page 3
Hard Drive: (2 each) Optical Drive: (1 each) Keyboard: (2 each) Modem: Display Assembly: Display Bezel: The placemat provides the number of the screws. 2 battery Recommended Tools The procedures in this document require the following tools: l #1 Phillips screwdriver l ¼-inch flat-blade screwdriver l Small plastic scribe l Flash BIOS update program (see the Dell Support website at support.dell....com) Computer Orientation 1 front 2 left 3 back 4 right Screw Identification When you are removing and replacing components, ...
Hard Drive: (2 each) Optical Drive: (1 each) Keyboard: (2 each) Modem: Display Assembly: Display Bezel: The placemat provides the number of the screws. 2 battery Recommended Tools The procedures in this document require the following tools: l #1 Phillips screwdriver l ¼-inch flat-blade screwdriver l Small plastic scribe l Flash BIOS update program (see the Dell Support website at support.dell....com) Computer Orientation 1 front 2 left 3 back 4 right Screw Identification When you are removing and replacing components, ...

Service Manual
Page 9
...substrate on the computer. Follow the instructions in your skin reduce the heat transfer capability of the thermal pads. 8. Remove the hard drive. 4. To loosen the ZIF socket, use a small, flat-blade screwdriver and rotate the ZIF-socket cam screw ...touch the heat transfer areas on the microprocessor module. 9. Back to Contents Page Microprocessor Module Dell Inspiron™ 6000 Service Manual Removing the Microprocessor Module Replacing the Microprocessor Module Removing the Microprocessor Module CAUTION: Before you begin working inside the computer. 1. NOTICE: To ...
...substrate on the computer. Follow the instructions in your skin reduce the heat transfer capability of the thermal pads. 8. Remove the hard drive. 4. To loosen the ZIF socket, use a small, flat-blade screwdriver and rotate the ZIF-socket cam screw ...touch the heat transfer areas on the microprocessor module. 9. Back to Contents Page Microprocessor Module Dell Inspiron™ 6000 Service Manual Removing the Microprocessor Module Replacing the Microprocessor Module Removing the Microprocessor Module CAUTION: Before you begin working inside the computer. 1. NOTICE: To ...

Service Manual
Page 17
... unpainted metal surface (such as the back panel) on the computer. Remove the hard drive. 4. Remove the display assembly. 7. Remove the keyboard. 6. NOTICE: To avoid damaging the system board, you must remove the main battery before you perform the following procedures, see the safety ...) and the optical drive. 3. Remove the hinge cover. 5. Lift the fan out of the computer. 1 fan 2 M2.5 x 5-mm screws (2) 3 fan cable 4 system board connector Back to Contents Page Fan Dell Inspiron™ 6000 Service Manual Removing the Fan Replacing the Fan Removing the Fan CAUTION: Before...
... unpainted metal surface (such as the back panel) on the computer. Remove the hard drive. 4. Remove the display assembly. 7. Remove the keyboard. 6. NOTICE: To avoid damaging the system board, you must remove the main battery before you perform the following procedures, see the safety ...) and the optical drive. 3. Remove the hinge cover. 5. Lift the fan out of the computer. 1 fan 2 M2.5 x 5-mm screws (2) 3 fan cable 4 system board connector Back to Contents Page Fan Dell Inspiron™ 6000 Service Manual Removing the Fan Replacing the Fan Removing the Fan CAUTION: Before...

Service Manual
Page 19
... your Product Information Guide. 3. Back to Contents Page Hard Drive Dell Inspiron™ 6000 Service Manual Removing the Hard Drive Replacing the Hard Drive Returning a Hard Drive to Dell Removing the Hard Drive CAUTION: If you remove the hard drive from sources other than Dell. 1. Turn the computer over and remove the two M3 x 3-mm screws. 1 M3 x 3-mm screws (2) 2 hard drive NOTICE: When the hard drive is not in "Preparing to Work Inside the Computer...
... your Product Information Guide. 3. Back to Contents Page Hard Drive Dell Inspiron™ 6000 Service Manual Removing the Hard Drive Replacing the Hard Drive Returning a Hard Drive to Dell Removing the Hard Drive CAUTION: If you remove the hard drive from sources other than Dell. 1. Turn the computer over and remove the two M3 x 3-mm screws. 1 M3 x 3-mm screws (2) 2 hard drive NOTICE: When the hard drive is not in "Preparing to Work Inside the Computer...

Service Manual
Page 24
...MCH heat sink Replacing the MCH Heat Sink 1. Back to Contents Page MCH Heat Sink Dell Inspiron™ 6000 Service Manual Removing the MCH Heat Sink Replacing the MCH Heat Sink Removing the MCH Heat Sink CAUTION: Before you begin working inside the computer. 1. NOTICE: ..."Preparing to the system board. Remove the Mini PCI card (if applicable) and the optical drive. 3. Remove the hard drive. 4. Remove the keyboard. 6. For computers with a video controller integrated on the system board. Remove the video card/thermal-cooling assembly (if applicable). 9. Remove the M2.5 x 5-mm screw ...
...MCH heat sink Replacing the MCH Heat Sink 1. Back to Contents Page MCH Heat Sink Dell Inspiron™ 6000 Service Manual Removing the MCH Heat Sink Replacing the MCH Heat Sink Removing the MCH Heat Sink CAUTION: Before you begin working inside the computer. 1. NOTICE: ..."Preparing to the system board. Remove the Mini PCI card (if applicable) and the optical drive. 3. Remove the hard drive. 4. Remove the keyboard. 6. For computers with a video controller integrated on the system board. Remove the video card/thermal-cooling assembly (if applicable). 9. Remove the M2.5 x 5-mm screw ...

Service Manual
Page 29
Back to Work Inside the Computer." 2. Remove the Mini PCI card (if applicable) and the optical drive. 3. Remove the display assembly. 7. Remove the hard drive. 4. Remove the keyboard. 6. Turn the computer top-side up and remove the M2.5 x 5-mm screw and loosen the captive screw from the computer base. 1 M2.5 x 8-mm... back panel) on the computer. Follow the instructions in "Preparing to Contents Page Palm Rest Dell Inspiron™ 6000 Service Manual Removing the Palm Rest Replacing the Palm Rest Removing the Palm Rest CAUTION: Before you begin working inside the computer. 1.
Back to Work Inside the Computer." 2. Remove the Mini PCI card (if applicable) and the optical drive. 3. Remove the display assembly. 7. Remove the hard drive. 4. Remove the keyboard. 6. Turn the computer top-side up and remove the M2.5 x 5-mm screw and loosen the captive screw from the computer base. 1 M2.5 x 8-mm... back panel) on the computer. Follow the instructions in "Preparing to Contents Page Palm Rest Dell Inspiron™ 6000 Service Manual Removing the Palm Rest Replacing the Palm Rest Removing the Palm Rest CAUTION: Before you begin working inside the computer. 1.

Service Manual
Page 33
...Remove the hard drive. 4. Remove the display assembly. 7. Remove the palm rest. NOTICE: Handle the speakers with care to Work Inside the Computer." 2. Back to Contents Page Speakers Dell Inspiron™ 6000 Service Manual Removing the Speakers Replacing the Speakers Removing the Speakers CAUTION: Before you begin working inside the computer. 1. NOTICE: To avoid damaging the system board, you must remove... 8. Remove the speakers and lift the speaker cable away from the cable guides. 10. Remove the Mini PCI card (if applicable) and the optical drive. 3. Remove the hinge cover. 5. Remove the...
...Remove the hard drive. 4. Remove the display assembly. 7. Remove the palm rest. NOTICE: Handle the speakers with care to Work Inside the Computer." 2. Back to Contents Page Speakers Dell Inspiron™ 6000 Service Manual Removing the Speakers Replacing the Speakers Removing the Speakers CAUTION: Before you begin working inside the computer. 1. NOTICE: To avoid damaging the system board, you must remove... 8. Remove the speakers and lift the speaker cable away from the cable guides. 10. Remove the Mini PCI card (if applicable) and the optical drive. 3. Remove the hinge cover. 5. Remove the...

Service Manual
Page 35
...Dell Inspiron™ 6000 Service Manual Removing the System Board Replacing the System Board Removing the System Board CAUTION: Before you begin working inside the computer. Remove the memory modules, the Mini PCI card (if applicable), and the optical drive. 3. Remove the palm rest. 8. Remove the MCH heat sink. 10. Remove... transferring the Service Tag to Work Inside the Computer." 2. Remove the keyboard. 6. Remove the three M2.5 x 5-mm screws from the system board. 11. Remove the hard drive. 4. Remove the hinge cover. 5. Follow the instructions in the Product Information ...
...Dell Inspiron™ 6000 Service Manual Removing the System Board Replacing the System Board Removing the System Board CAUTION: Before you begin working inside the computer. Remove the memory modules, the Mini PCI card (if applicable), and the optical drive. 3. Remove the palm rest. 8. Remove the MCH heat sink. 10. Remove... transferring the Service Tag to Work Inside the Computer." 2. Remove the keyboard. 6. Remove the three M2.5 x 5-mm screws from the system board. 11. Remove the hard drive. 4. Remove the hinge cover. 5. Follow the instructions in the Product Information ...


