Service Manual
Page 3
Contents 1 Before You Begin 9 Recommended Tools 9 Turning Off Your Computer 9 Before Working Inside Your Computer 10 2 Battery 13 Removing the Battery 13 Replacing the Battery 14 3 Hinge Cover 15 Removing the Hinge Cover 15 Replacing the Hinge Cover 16 4 Keyboard 17 Removing the Keyboard 17 Replacing the Keyboard 19 5 Hard Drive 21 Removing the Hard Drive 22 Contents 3
Contents 1 Before You Begin 9 Recommended Tools 9 Turning Off Your Computer 9 Before Working Inside Your Computer 10 2 Battery 13 Removing the Battery 13 Replacing the Battery 14 3 Hinge Cover 15 Removing the Hinge Cover 15 Replacing the Hinge Cover 16 4 Keyboard 17 Removing the Keyboard 17 Replacing the Keyboard 19 5 Hard Drive 21 Removing the Hard Drive 22 Contents 3
Service Manual
Page 6
14 Camera Module 63 Removing the Camera Module 63 Replacing the Camera Module 64 15 Palm Rest Assembly 67 Removing the Palm Rest Assembly 67 Replacing the Palm Rest Assembly 70 16 System Board 73 Removing the System Board 73 Replacing the System Board 76 Entering the Service Tag in the BIOS 77 17 Coin-Cell Battery 79 Removing the Coin-Cell Battery 79 Replacing the Coin-Cell Battery 80 18 Flashing the BIOS 81 6 Contents
14 Camera Module 63 Removing the Camera Module 63 Replacing the Camera Module 64 15 Palm Rest Assembly 67 Removing the Palm Rest Assembly 67 Replacing the Palm Rest Assembly 70 16 System Board 73 Removing the System Board 73 Replacing the System Board 76 Entering the Service Tag in the BIOS 77 17 Coin-Cell Battery 79 Removing the Coin-Cell Battery 79 Replacing the Coin-Cell Battery 80 18 Flashing the BIOS 81 6 Contents
Service Manual
Page 11
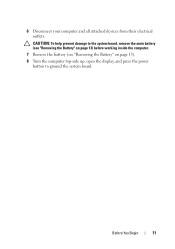
CAUTION: To help prevent damage to the system board, remove the main battery (see "Removing the Battery" on page 13) before working inside the computer. 7 Remove the battery (see "Removing the Battery" on page 13). 8 Turn the computer top-side up, open the display, and press the power button to ground the system board. Before You Begin 11 6 Disconnect your computer and all attached devices from their electrical outlets.
CAUTION: To help prevent damage to the system board, remove the main battery (see "Removing the Battery" on page 13) before working inside the computer. 7 Remove the battery (see "Removing the Battery" on page 13). 8 Turn the computer top-side up, open the display, and press the power button to ground the system board. Before You Begin 11 6 Disconnect your computer and all attached devices from their electrical outlets.

Service Manual
Page 13
... your computer. CAUTION: To avoid damage to the computer, use batteries designed for this particular Dell computer. Battery 13 For additional safety best practices information, see the Regulatory Compliance Homepage at www.dell.com/regulatory_compliance. Do not use only the battery designed for other Dell computers. 3 Battery WARNING: Before working inside your computer, read the safety information...
... your computer. CAUTION: To avoid damage to the computer, use batteries designed for this particular Dell computer. Battery 13 For additional safety best practices information, see the Regulatory Compliance Homepage at www.dell.com/regulatory_compliance. Do not use only the battery designed for other Dell computers. 3 Battery WARNING: Before working inside your computer, read the safety information...

Service Manual
Page 14
2 3 1 1 battery release latch 3 battery lock latch 2 battery Replacing the Battery 1 Follow the procedures in "Before You Begin" on page 9. 2 Slide the battery into the battery bay until it clicks into place. 3 Slide the battery lock latch to the lock position. 14 Battery
2 3 1 1 battery release latch 3 battery lock latch 2 battery Replacing the Battery 1 Follow the procedures in "Before You Begin" on page 9. 2 Slide the battery into the battery bay until it clicks into place. 3 Slide the battery lock latch to the lock position. 14 Battery
Service Manual
Page 15
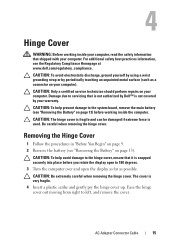
... the hinge cover, ensure that it is used. CAUTION: To help prevent damage to the system board, remove the main battery (see "Removing the Battery" on your warranty. Ease the hinge cover out moving from right to servicing that shipped with your computer. CAUTION: To ...such as possible. Removing the Hinge Cover 1 Follow the procedures in "Before You Begin" on page 9. 2 Remove the battery (see the Regulatory Compliance Homepage at www.dell.com/regulatory_compliance. Be careful when removing the hinge cover. 4 Hinge Cover WARNING: Before working inside your computer, read the ...
... the hinge cover, ensure that it is used. CAUTION: To help prevent damage to the system board, remove the main battery (see "Removing the Battery" on your warranty. Ease the hinge cover out moving from right to servicing that shipped with your computer. CAUTION: To ...such as possible. Removing the Hinge Cover 1 Follow the procedures in "Before You Begin" on page 9. 2 Remove the battery (see the Regulatory Compliance Homepage at www.dell.com/regulatory_compliance. Be careful when removing the hinge cover. 4 Hinge Cover WARNING: Before working inside your computer, read the ...

Service Manual
Page 16
1 1 hinge cover Replacing the Hinge Cover 1 Follow the procedures in "Before You Begin" on page 9. 2 Align the tabs on the hinge cover with the slots on the palm rest and snap the cover in place. 3 Replace the battery (see "Replacing the Battery" on page 14). 16 AC Adapter Connector Cable
1 1 hinge cover Replacing the Hinge Cover 1 Follow the procedures in "Before You Begin" on page 9. 2 Align the tabs on the hinge cover with the slots on the palm rest and snap the cover in place. 3 Replace the battery (see "Replacing the Battery" on page 14). 16 AC Adapter Connector Cable
Service Manual
Page 17
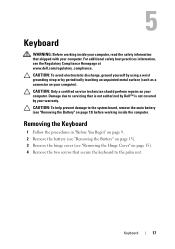
...technician should perform repairs on your computer). Removing the Keyboard 1 Follow the procedures in "Before You Begin" on page 9. 2 Remove the battery (see "Removing the Battery" on page 13). 3 Remove the hinge cover (see "Removing the Hinge Cover" on page 15). 4 Remove the two screws that... Damage due to the palm rest. CAUTION: To help prevent damage to the system board, remove the main battery (see the Regulatory Compliance Homepage at www.dell.com/regulatory_compliance. 5 Keyboard WARNING: Before working inside your computer, read the safety information that is not authorized by...
...technician should perform repairs on your computer). Removing the Keyboard 1 Follow the procedures in "Before You Begin" on page 9. 2 Remove the battery (see "Removing the Battery" on page 13). 3 Remove the hinge cover (see "Removing the Hinge Cover" on page 15). 4 Remove the two screws that... Damage due to the palm rest. CAUTION: To help prevent damage to the system board, remove the main battery (see the Regulatory Compliance Homepage at www.dell.com/regulatory_compliance. 5 Keyboard WARNING: Before working inside your computer, read the safety information that is not authorized by...

Service Manual
Page 19
... the two screws that secure the keyboard to the palm rest. 6 Replace the hinge cover (see "Replacing the Hinge Cover" on page 16). 7 Replace the battery (see "Replacing the Battery" on page 14).
... the two screws that secure the keyboard to the palm rest. 6 Replace the hinge cover (see "Replacing the Hinge Cover" on page 16). 7 Replace the battery (see "Replacing the Battery" on page 14).
Service Manual
Page 21
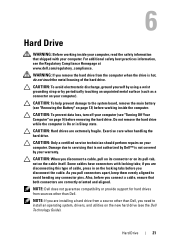
...are disconnecting this type of the hard drive. As you pull connectors apart, keep them evenly aligned to servicing that is not authorized by Dell™ is not covered by periodically touching an unpainted metal surface (such as a connector on the locking tabs before you are installing ...the computer when the drive is On or in on your computer). WARNING: If you need to the system board, remove the main battery (see the Dell Technology Guide). Exercise care when handling the hard drive. CAUTION: When you disconnect the cable. CAUTION: To avoid electrostatic discharge, ground...
...are disconnecting this type of the hard drive. As you pull connectors apart, keep them evenly aligned to servicing that is not authorized by Dell™ is not covered by periodically touching an unpainted metal surface (such as a connector on the locking tabs before you are installing ...the computer when the drive is On or in on your computer). WARNING: If you need to the system board, remove the main battery (see the Dell Technology Guide). Exercise care when handling the hard drive. CAUTION: When you disconnect the cable. CAUTION: To avoid electrostatic discharge, ground...

Service Manual
Page 22
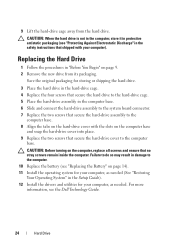
Removing the Hard Drive 1 Follow the procedures in "Before You Begin" on page 9. 2 Remove the battery (see "Removing the Battery" on page 13). 3 Remove the two screws that secure the hard-drive cover to the computer base. 4 Pry out the hard-drive cover using your ...
Removing the Hard Drive 1 Follow the procedures in "Before You Begin" on page 9. 2 Remove the battery (see "Removing the Battery" on page 13). 3 Remove the two screws that secure the hard-drive cover to the computer base. 4 Pry out the hard-drive cover using your ...
Service Manual
Page 24
...drive assembly to the system board connector. 7 Replace the two screws that secure the hard-drive assembly to the computer. 10 Replace the battery (see "Replacing the Battery" on the computer, replace all screws and ensure that shipped with the slots on page 9. 2 Remove the new drive from the ...Align the tabs on the hard-drive cover with your computer, as needed (See "Restoring Your Operating System" in protective antistatic packaging (see the Dell Technology Guide. 24 Hard Drive CAUTION: When the hard drive is not in the computer, store it in the Setup Guide). 12 Install the ...
...drive assembly to the system board connector. 7 Replace the two screws that secure the hard-drive assembly to the computer. 10 Replace the battery (see "Replacing the Battery" on the computer, replace all screws and ensure that shipped with the slots on page 9. 2 Remove the new drive from the ...Align the tabs on the hard-drive cover with your computer, as needed (See "Restoring Your Operating System" in protective antistatic packaging (see the Dell Technology Guide. 24 Hard Drive CAUTION: When the hard drive is not in the computer, store it in the Setup Guide). 12 Install the ...
Service Manual
Page 25
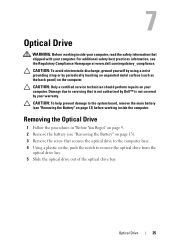
... You Begin" on page 9. 2 Remove the battery (see "Removing the Battery" on page 13) before working inside the computer. Damage due to the system board, remove the main battery (see the Regulatory Compliance Homepage at www.dell.com/regulatory_compliance. 7 Optical Drive WARNING: Before working... inside your computer, read the safety information that is not authorized by Dell™ is not covered by periodically ...
... You Begin" on page 9. 2 Remove the battery (see "Removing the Battery" on page 13) before working inside the computer. Damage due to the system board, remove the main battery (see the Regulatory Compliance Homepage at www.dell.com/regulatory_compliance. 7 Optical Drive WARNING: Before working... inside your computer, read the safety information that is not authorized by Dell™ is not covered by periodically ...

Service Manual
Page 26
1 2 3 1 optical drive 3 notch 2 screw Replacing the Optical Drive 1 Follow the procedures in "Before You Begin" on page 9. 2 Slide the optical drive into the optical drive bay until it is fully seated. 3 Replace the screw that secures the optical drive to the computer base. 4 Replace the battery (see "Replacing the Battery" on page 14). 26 Optical Drive
1 2 3 1 optical drive 3 notch 2 screw Replacing the Optical Drive 1 Follow the procedures in "Before You Begin" on page 9. 2 Slide the optical drive into the optical drive bay until it is fully seated. 3 Replace the screw that secures the optical drive to the computer base. 4 Replace the battery (see "Replacing the Battery" on page 14). 26 Optical Drive
Service Manual
Page 29
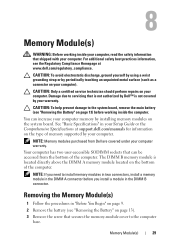
See "Basic Specifications" in "Before You Begin" on page 9. 2 Remove the battery (see "Removing the Battery" on page 13) before you need to the computer base. 8 Memory Module(s) WARNING: Before working inside your computer, read the safety...To help prevent damage to servicing that can increase your computer. CAUTION: Only a certified service technician should perform repairs on your computer memory by Dell™ is located directly above the DIMM A memory module located on your computer). For additional safety best practices information, see the Regulatory Compliance ...
See "Basic Specifications" in "Before You Begin" on page 9. 2 Remove the battery (see "Removing the Battery" on page 13) before you need to the computer base. 8 Memory Module(s) WARNING: Before working inside your computer, read the safety...To help prevent damage to servicing that can increase your computer. CAUTION: Only a certified service technician should perform repairs on your computer memory by Dell™ is located directly above the DIMM A memory module located on your computer). For additional safety best practices information, see the Regulatory Compliance ...
Service Manual
Page 32
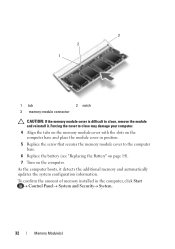
... Control PanelSystem and SecuritySystem. 32 Memory Module(s) Forcing the cover to the computer base. 6 Replace the battery (see "Replacing the Battery" on page 14). 7 Turn on the computer. To confirm the amount of memory installed in position. 5 Replace the screw that secures the memory...
... Control PanelSystem and SecuritySystem. 32 Memory Module(s) Forcing the cover to the computer base. 6 Replace the battery (see "Replacing the Battery" on page 14). 7 Turn on the computer. To confirm the amount of memory installed in position. 5 Replace the screw that secures the memory...
Service Manual
Page 33
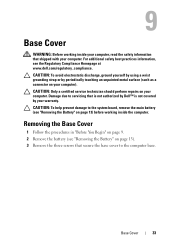
CAUTION: To help prevent damage to the system board, remove the main battery (see the Regulatory Compliance Homepage at www.dell.com/regulatory_compliance. Removing the Base Cover 1 Follow the procedures in "Before You Begin" on page 9. 2 Remove the battery (see "Removing the Battery" on your warranty. CAUTION: To avoid electrostatic discharge, ground yourself by using...
CAUTION: To help prevent damage to the system board, remove the main battery (see the Regulatory Compliance Homepage at www.dell.com/regulatory_compliance. Removing the Base Cover 1 Follow the procedures in "Before You Begin" on page 9. 2 Remove the battery (see "Removing the Battery" on your warranty. CAUTION: To avoid electrostatic discharge, ground yourself by using...

Service Manual
Page 34
Replacing the Base Cover 1 Follow the procedures in "Before You Begin" on page 9. 2 Align the tabs on the base cover with the slots on the computer base and snap the base cover into place. 3 Replace the three screws that secure the base cover to the computer base. 4 Replace the battery (see "Replacing the Battery" on page 14). 34 Base Cover 1 2 3 1 screws (3) 3 base-cover tabs (2) 2 base cover 4 Pry the base cover up and lift it out of the computer base.
Replacing the Base Cover 1 Follow the procedures in "Before You Begin" on page 9. 2 Align the tabs on the base cover with the slots on the computer base and snap the base cover into place. 3 Replace the three screws that secure the base cover to the computer base. 4 Replace the battery (see "Replacing the Battery" on page 14). 34 Base Cover 1 2 3 1 screws (3) 3 base-cover tabs (2) 2 base cover 4 Pry the base cover up and lift it out of the computer base.
Service Manual
Page 35
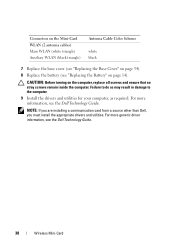
... 33). 4 Disconnect the antenna cables from sources other than Dell. Damage due to servicing that secure the Mini-Card to the system board, remove the main battery (see the Regulatory Compliance Homepage at www.dell.com/regulatory_compliance. If you ordered a wireless Mini-Card with your...Follow the procedures in "Before You Begin" on page 9. 2 Remove the battery (see "Removing the Battery" on page 13). 3 Remove the base cover (see "Removing the Base Cover" on your warranty. NOTE: Dell does not guarantee compatibility or provide support for WLAN NOTE: Depending on your computer...
... 33). 4 Disconnect the antenna cables from sources other than Dell. Damage due to servicing that secure the Mini-Card to the system board, remove the main battery (see the Regulatory Compliance Homepage at www.dell.com/regulatory_compliance. If you ordered a wireless Mini-Card with your...Follow the procedures in "Before You Begin" on page 9. 2 Remove the battery (see "Removing the Battery" on page 13). 3 Remove the base cover (see "Removing the Base Cover" on your warranty. NOTE: Dell does not guarantee compatibility or provide support for WLAN NOTE: Depending on your computer...
Service Manual
Page 38
... black 7 Replace the base cover (see "Replacing the Base Cover" on page 34). 8 Replace the battery (see the Dell Technology Guide. For more generic driver information, see the Dell Technology Guide. 38 Wireless Mini-Card CAUTION: Before turning on page 14). For more information, see "Replacing... the Battery" on the computer, replace all screws and ensure that no stray screws remain inside the computer. ...
... black 7 Replace the base cover (see "Replacing the Base Cover" on page 34). 8 Replace the battery (see the Dell Technology Guide. For more generic driver information, see the Dell Technology Guide. 38 Wireless Mini-Card CAUTION: Before turning on page 14). For more information, see "Replacing... the Battery" on the computer, replace all screws and ensure that no stray screws remain inside the computer. ...

