Dell Dimension 4100 System Solutions Guide
Page 8
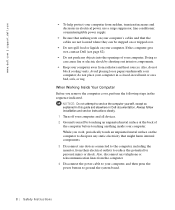
...by touching an unpainted metal surface at the back of your computer, and then press the power button to ground the system board. 8 Safety Instructions If the computer gets wet, contact Dell (see page 82). • Do not push any telephone or telecommunication lines from the ...to reduce the potential for personal injury or shock. www.dell.com | support.dell.com • To help protect your computer from sudden, transient increases and decreases in electrical power, use a surge suppressor, line conditioner, or uninterruptible power supply. • Be sure that nothing rests on your...
...by touching an unpainted metal surface at the back of your computer, and then press the power button to ground the system board. 8 Safety Instructions If the computer gets wet, contact Dell (see page 82). • Do not push any telephone or telecommunication lines from the ...to reduce the potential for personal injury or shock. www.dell.com | support.dell.com • To help protect your computer from sudden, transient increases and decreases in electrical power, use a surge suppressor, line conditioner, or uninterruptible power supply. • Be sure that nothing rests on your...
Dell Dimension 4100 System Solutions Guide
Page 16
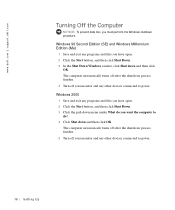
...Second Edition (SE) and Windows Millennium Edition (Me) 1 Save and exit any programs and files you have open . 2 Click the Start button, and then click Shut Down. 3 Click the pull-down menu under What do you must perform the Windows shutdown procedure. The computer automatically ...Turn off your monitor and any other devices connected to power. The computer automatically turns off after the shutdown process finishes. 5 Turn off your monitor and any other devices connected to power. 16 Sett ing Up www.dell.com | support.dell.com Turning Off the Computer NOTICE: To prevent data ...
...Second Edition (SE) and Windows Millennium Edition (Me) 1 Save and exit any programs and files you have open . 2 Click the Start button, and then click Shut Down. 3 Click the pull-down menu under What do you must perform the Windows shutdown procedure. The computer automatically ...Turn off your monitor and any other devices connected to power. The computer automatically turns off after the shutdown process finishes. 5 Turn off your monitor and any other devices connected to power. 16 Sett ing Up www.dell.com | support.dell.com Turning Off the Computer NOTICE: To prevent data ...
Dell Dimension 4100 System Solutions Guide
Page 20
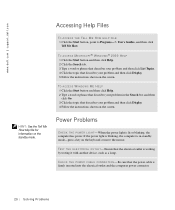
... blinking, the computer has power. TE S T T H E E L E C T R I C A L O U T L E T - TO ACC ES S WI N DO W S M E HE LP 1 Click the Start button and then click Help. 2 Type a word or phrase that describes your problem and then click Display. 5 Follow the instructions shown on the keyboard or move the mouse. www.dell.com | support.dell.com Accessing Help Files HINT...
... blinking, the computer has power. TE S T T H E E L E C T R I C A L O U T L E T - TO ACC ES S WI N DO W S M E HE LP 1 Click the Start button and then click Help. 2 Type a word or phrase that describes your problem and then click Display. 5 Follow the instructions shown on the keyboard or move the mouse. www.dell.com | support.dell.com Accessing Help Files HINT...
Dell Dimension 4100 System Solutions Guide
Page 21
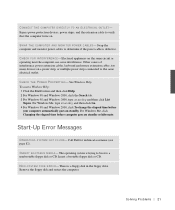
...button and then click Help. 2 For Windows 98 and Windows 2000, click the Search tab. 3 For Windows 98 and Windows 2000, type standby and then click List Topics. I T O R P O W E R C A B L E S - N ON -S Y S T E M D IS K ERR OR - See Windows Help. S olving Pr oblems 21 S W A P T H E C O M P U T E R A N D M O N I NS E R T B O O T A B L E ME DI A - Swap the computer and monitor power... cables to a nonbootable floppy disk or CD. Call Dell for technical assistance (see page 82). Other causes of interference: power extension cables, keyboard and ...
...button and then click Help. 2 For Windows 98 and Windows 2000, click the Search tab. 3 For Windows 98 and Windows 2000, type standby and then click List Topics. I T O R P O W E R C A B L E S - N ON -S Y S T E M D IS K ERR OR - See Windows Help. S olving Pr oblems 21 S W A P T H E C O M P U T E R A N D M O N I NS E R T B O O T A B L E ME DI A - Swap the computer and monitor power... cables to a nonbootable floppy disk or CD. Call Dell for technical assistance (see page 82). Other causes of interference: power extension cables, keyboard and ...
Dell Dimension 4100 System Solutions Guide
Page 22
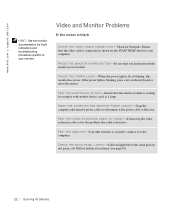
... R P O W E R C A B L E S - Ensure that the electrical outlet is blank C H E C K T H E V I D E O C A B L E C O N N E C T I O N - TE S T T H E V I D E O EX T E N S I O N C A B L E ( I T O R P O W E R B U T T O N- P R E S S T HE M O N I F U S E D ) - C H E C K T H E B A C K P A N E L L I G HT - Ensure that you firmly pressed the monitor power button. C H E C K T H E PO W E R L I G H T S - If all four lights below the serial port are not green, call Dell for bent pins. TES T T H E M O NI T O R- Be sure that the video cable is defective. Swap the computer and monitor...
... R P O W E R C A B L E S - Ensure that the electrical outlet is blank C H E C K T H E V I D E O C A B L E C O N N E C T I O N - TE S T T H E V I D E O EX T E N S I O N C A B L E ( I T O R P O W E R B U T T O N- P R E S S T HE M O N I F U S E D ) - C H E C K T H E B A C K P A N E L L I G HT - Ensure that you firmly pressed the monitor power button. C H E C K T H E PO W E R L I G H T S - If all four lights below the serial port are not green, call Dell for bent pins. TES T T H E M O NI T O R- Be sure that the video cable is defective. Swap the computer and monitor...
Dell Dimension 4100 System Solutions Guide
Page 23
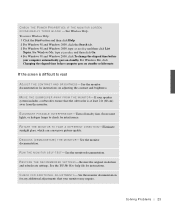
... the monitor documentation. D E G A U S S (D E M A G N E T I Z E ) T H E M O N I B L E IN T E R F E R E N C E - See the Tell Me How help file for instructions on standby or hibernate. E L I M I N A T E P O S S I T O R - CHECK THE POWER PROPERTIES IF THE MONITOR SCREEN O C C A S I T O R - To access Windows Help: 1 Click the Start button and then click Help. 2 For Windows 98 and Windows 2000, click the Search tab. 3 For Windows 98 and Windows...
... the monitor documentation. D E G A U S S (D E M A G N E T I Z E ) T H E M O N I B L E IN T E R F E R E N C E - See the Tell Me How help file for instructions on standby or hibernate. E L I M I N A T E P O S S I T O R - CHECK THE POWER PROPERTIES IF THE MONITOR SCREEN O C C A S I T O R - To access Windows Help: 1 Click the Start button and then click Help. 2 For Windows 98 and Windows 2000, click the Search tab. 3 For Windows 98 and Windows...
Dell Dimension 4100 System Solutions Guide
Page 26
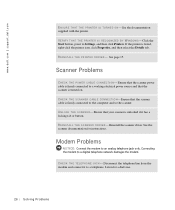
...B Y W I V E R - Ensure that the scanner power cable is firmly connected to a working electrical power source and that the scanner cable is listed, right-click the ...printer icon, click Properties, and then select the Details tab. RE I N S T A L L T H E P R I N T E R D R I N D O W S - Listen for instructions. Reinstall the scanner driver. Ensure that the scanner is unlocked if it to a telephone. www.dell.com | support.dell.com E N S U R E T H A T T H E P R I N T E R I S T U R N E D O N - Click the Start button...
...B Y W I V E R - Ensure that the scanner power cable is firmly connected to a working electrical power source and that the scanner cable is listed, right-click the ...printer icon, click Properties, and then select the Details tab. RE I N S T A L L T H E P R I N T E R D R I N D O W S - Listen for instructions. Reinstall the scanner driver. Ensure that the scanner is unlocked if it to a telephone. www.dell.com | support.dell.com E N S U R E T H A T T H E P R I N T E R I S T U R N E D O N - Click the Start button...
Dell Dimension 4100 System Solutions Guide
Page 32
...Task button....or a proper shutdown (see page 16), press the power button until the computer turns off. In the Close Program window, ...select the program that you were not able to restart the computer. Press the power button again to perform a proper Windows shutdown. ScanDisk will automatically run during the start-up process. General Program Problems A program ...N O T F O UN D - To remove and then reinstall the program: 1 Click the Start button, point to Settings, and then click Control Panel. 2 Double-click the Add/Remove Programs icon. 3...
...Task button....or a proper shutdown (see page 16), press the power button until the computer turns off. In the Close Program window, ...select the program that you were not able to restart the computer. Press the power button again to perform a proper Windows shutdown. ScanDisk will automatically run during the start-up process. General Program Problems A program ...N O T F O UN D - To remove and then reinstall the program: 1 Click the Start button, point to Settings, and then click Control Panel. 2 Double-click the Add/Remove Programs icon. 3...
Dell Dimension 4100 System Solutions Guide
Page 42
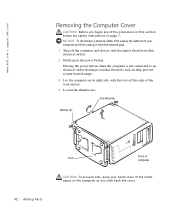
... safety instructions on the computer as you begin any of the work surface. 4 Loosen the thumbscrew. www.dell.com | support.dell.com Removing the Computer Cover CAUTION: Before you slide back the cover. Pressing the power button when the computer is not connected to an electrical outlet discharges residual electricity and can help prevent... 3 Lay the computer on its right side, with the foot off the computer and devices, and disconnect them from their electrical outlets. 2 Briefly press the power button. thumbscrew latches (2) 42 Adding Parts foot front of the metal edges on page 7.
... safety instructions on the computer as you begin any of the work surface. 4 Loosen the thumbscrew. www.dell.com | support.dell.com Removing the Computer Cover CAUTION: Before you slide back the cover. Pressing the power button when the computer is not connected to an electrical outlet discharges residual electricity and can help prevent... 3 Lay the computer on its right side, with the foot off the computer and devices, and disconnect them from their electrical outlets. 2 Briefly press the power button. thumbscrew latches (2) 42 Adding Parts foot front of the metal edges on page 7.
Dell Dimension 4100 System Solutions Guide
Page 45
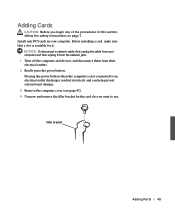
Pressing the power button when the computer is available for the card slot you begin any of the procedures in your computer and then unplug it . NOTICE: To disconnect a ... the filler bracket for it from the network jack. 1 Turn off the computer and devices, and disconnect them from their electrical outlets. 2 Briefly press the power button. Adding Cards CAUTION: Before you want to use. Install only PCI cards in this section, follow the safety instructions on page 7. filler bracket Addi ng...
Pressing the power button when the computer is available for the card slot you begin any of the procedures in your computer and then unplug it . NOTICE: To disconnect a ... the filler bracket for it from the network jack. 1 Turn off the computer and devices, and disconnect them from their electrical outlets. 2 Briefly press the power button. Adding Cards CAUTION: Before you want to use. Install only PCI cards in this section, follow the safety instructions on page 7. filler bracket Addi ng...
Dell Dimension 4100 System Solutions Guide
Page 48
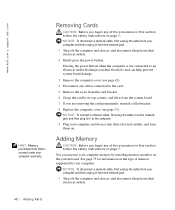
...page 71). NOTICE: To disconnect a network cable, first unplug the cable from your computer and devices into their electrical outlets. 2 Briefly press the power button. See page 75 for information on the system board. NOTICE: To disconnect a network cable, first unplug the cable from your computer and then unplug... not connected to the network jack and then plug it from their electrical outlets. 48 Adding Parts www.dell.com | support.dell.com HINT: Memory purchased from their electrical outlets, and turn them on page 7. Removing Cards CAUTION: Before you are removing the card ...
...page 71). NOTICE: To disconnect a network cable, first unplug the cable from your computer and devices into their electrical outlets. 2 Briefly press the power button. See page 75 for information on the system board. NOTICE: To disconnect a network cable, first unplug the cable from your computer and then unplug... not connected to the network jack and then plug it from their electrical outlets. 48 Adding Parts www.dell.com | support.dell.com HINT: Memory purchased from their electrical outlets, and turn them on page 7. Removing Cards CAUTION: Before you are removing the card ...

Dell Dimension 4100 System Solutions Guide
Page 49
...connector. Press firmly on the bottom of the memory connector until the memory module snaps into place. Addi ng Part s 49 Pressing the power button when the computer is not connected to an electrical outlet discharges residual electricity and can help prevent system board damage. 3 Remove the computer .... If you insert the module correctly, the securing clips snap into the vertical guides at each end of the module. 2 Briefly press the power button. NOTICE: To avoid breaking the memory module, do not press near the middle of the module. 6 Insert the module straight down into the...
...connector. Press firmly on the bottom of the memory connector until the memory module snaps into place. Addi ng Part s 49 Pressing the power button when the computer is not connected to an electrical outlet discharges residual electricity and can help prevent system board damage. 3 Remove the computer .... If you insert the module correctly, the securing clips snap into the vertical guides at each end of the module. 2 Briefly press the power button. NOTICE: To avoid breaking the memory module, do not press near the middle of the module. 6 Insert the module straight down into the...
Dell Dimension 4100 System Solutions Guide
Page 50
... an electrical outlet discharges residual electricity and can help prevent system board damage. 3 Remove the computer cover (see page 71). www.dell.com | support.dell.com 7 Replace the computer cover (see page 42). 50 Adding Parts NOTICE: To connect a network cable, first plug the cable... Turn off the computer and devices, and disconnect them from your computer and devices into their electrical outlets. 2 Briefly press the power button. Pressing the power button when the computer is not connected to the computer. 8 Plug your computer and then unplug it in this section, follow the ...
... an electrical outlet discharges residual electricity and can help prevent system board damage. 3 Remove the computer cover (see page 71). www.dell.com | support.dell.com 7 Replace the computer cover (see page 42). 50 Adding Parts NOTICE: To connect a network cable, first plug the cable... Turn off the computer and devices, and disconnect them from your computer and devices into their electrical outlets. 2 Briefly press the power button. Pressing the power button when the computer is not connected to the computer. 8 Plug your computer and then unplug it in this section, follow the ...
Dell Dimension 4100 System Solutions Guide
Page 56
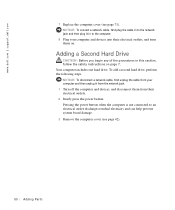
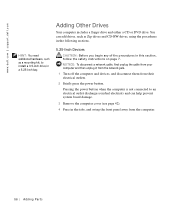
www.dell.com | support.dell.com HINT: You need additional hardware, such as a mounting kit, to an electrical outlet discharges residual electricity and can add drives, such as Zip drives ...). 4 Press in the tabs, and swing the front panel away from their electrical outlets. 2 Briefly press the power button. Adding Other Drives Your computer includes a floppy drive and either a CD or DVD drive. Pressing the power button when the computer is not connected to install a 3.5-inch drive in this section, follow the safety instructions...
www.dell.com | support.dell.com HINT: You need additional hardware, such as a mounting kit, to an electrical outlet discharges residual electricity and can add drives, such as Zip drives ...). 4 Press in the tabs, and swing the front panel away from their electrical outlets. 2 Briefly press the power button. Adding Other Drives Your computer includes a floppy drive and either a CD or DVD drive. Pressing the power button when the computer is not connected to install a 3.5-inch drive in this section, follow the safety instructions...
Dell Dimension 4100 System Solutions Guide
Page 63
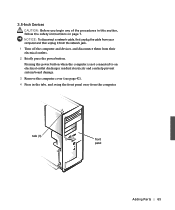
Pressing the power button when the computer is not connected to an electrical outlet discharges residual electricity and can help prevent system board damage. 3 Remove the computer cover (see ... Devices CAUTION: Before you begin any of the procedures in the tabs, and swing the front panel away from their electrical outlets. 2 Briefly press the power button.
Pressing the power button when the computer is not connected to an electrical outlet discharges residual electricity and can help prevent system board damage. 3 Remove the computer cover (see ... Devices CAUTION: Before you begin any of the procedures in the tabs, and swing the front panel away from their electrical outlets. 2 Briefly press the power button.

Dell Dimension 4100 System Solutions Guide
Page 71
Replacing the Computer Cover CAUTION: Before you begin any of the computer (see page 42). Pressing the power button when the computer is not connected to an electrical outlet discharges residual electricity and can help prevent system board damage. 3 Make sure that no tools ... the cover forward until it from the network jack. 1 Turn off the computer and devices, and disconnect them from their electrical outlets. 2 Briefly press the power button. Addi ng Part s 71
Replacing the Computer Cover CAUTION: Before you begin any of the computer (see page 42). Pressing the power button when the computer is not connected to an electrical outlet discharges residual electricity and can help prevent system board damage. 3 Make sure that no tools ... the cover forward until it from the network jack. 1 Turn off the computer and devices, and disconnect them from their electrical outlets. 2 Briefly press the power button. Addi ng Part s 71
Dell Dimension 4100 System Solutions Guide
Page 76
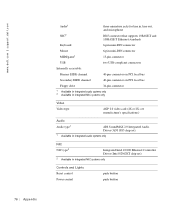
.../100 Ethernet Controller Driver (Intel 82562ET chip set) 2 Available in integrated NIC systems only Video Video type AGP 2.0 video card (4X or 2X; www.dell.com | support.dell.com 76 Appendix Audio1 three miniature jacks for line in, line out, and microphone NIC2 RJ45 connector that supports 10BASE-T and 100BASE-T Ethernet standards... PCI local bus Floppy drive 34-pin connector 1 Available in integrated audio systems only 2 Available in integrated NIC systems only Controls and Lights Reset control Power control push button push button
.../100 Ethernet Controller Driver (Intel 82562ET chip set) 2 Available in integrated NIC systems only Video Video type AGP 2.0 video card (4X or 2X; www.dell.com | support.dell.com 76 Appendix Audio1 three miniature jacks for line in, line out, and microphone NIC2 RJ45 connector that supports 10BASE-T and 100BASE-T Ethernet standards... PCI local bus Floppy drive 34-pin connector 1 Available in integrated audio systems only 2 Available in integrated NIC systems only Controls and Lights Reset control Power control push button push button

