
User Guide
Page 3
...to set up my Setting Up Your Printer poster printer Safety information Owner's Manual How to set up and use the CD to uninstall/reinstall drivers or access your documentation. Find it here Drivers for my Drivers and Utilities CD printer My User's Guide Optional XPS driver If... to access the improved graphics and color features of XPS. The driver is an optional additional driver that allows Windows Vista™ users to your printer or advanced technical reference material for your printer are you purchased your Dell computer and printer at the same time, documentation and...
...to set up my Setting Up Your Printer poster printer Safety information Owner's Manual How to set up and use the CD to uninstall/reinstall drivers or access your documentation. Find it here Drivers for my Drivers and Utilities CD printer My User's Guide Optional XPS driver If... to access the improved graphics and color features of XPS. The driver is an optional additional driver that allows Windows Vista™ users to your printer or advanced technical reference material for your printer are you purchased your Dell computer and printer at the same time, documentation and...
User Guide
Page 11
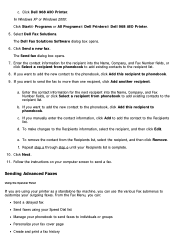
c. Click Dell 968 AIO Printer. Enter the contact information for the next recipient into the Name, Company, and Fax Number fields, or click Select a recipient from phonebook to add existing ... click Remove. e. f. In Windows XP or Windows 2000: Click Start® Programs or All Programs® Dell Printers® Dell 968 AIO Printer. 5. If you manually enter the contact information, click Add to add the contact to more than one recipient, click Add another recipient. Follow the instructions on your computer screen to the recipient list...
c. Click Dell 968 AIO Printer. Enter the contact information for the next recipient into the Name, Company, and Fax Number fields, or click Select a recipient from phonebook to add existing ... click Remove. e. f. In Windows XP or Windows 2000: Click Start® Programs or All Programs® Dell Printers® Dell 968 AIO Printer. 5. If you manually enter the contact information, click Add to add the contact to more than one recipient, click Add another recipient. Follow the instructions on your computer screen to the recipient list...
User Guide
Page 14
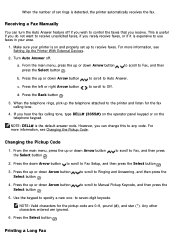
...on the telephone keypad. Press the up or down Arrow button Select button . Use the keypad to seven-digit keycode. to specify a new one- to scroll to Off. If you can turn the Auto Answer feature off . Changing the Pickup Code 1. Any other characters entered are 0-9,... left or right Arrow button to scroll to Fax, and then b. NOTE: DELL# is expensive to any code. Receiving a Fax Manually You can change this to use faxes in your printer is detected, the printer automatically receives the fax. Press the up or down Arrow button the Select button...
...on the telephone keypad. Press the up or down Arrow button Select button . Use the keypad to seven-digit keycode. to specify a new one- to scroll to Off. If you can turn the Auto Answer feature off . Changing the Pickup Code 1. Any other characters entered are 0-9,... left or right Arrow button to scroll to Fax, and then b. NOTE: DELL# is expensive to any code. Receiving a Fax Manually You can change this to use faxes in your printer is detected, the printer automatically receives the fax. Press the up or down Arrow button the Select button...
User Guide
Page 17
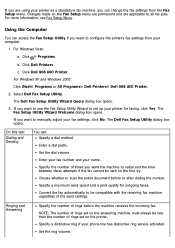
...can access the Fax Setup Utility if you want to manually adjust your computer. 1. Enter your fax number and your phone line has distinctive ring service activated. Specify the number of rings set up your printer as a standalone fax machine, you can change the ... Windows XP and Windows 2000: Click Start® Programs or All Programs® Dell Printers® Dell 968 AIO Printer. 2. Click Dell Printers. Enter a dial prefix. c. Set the ring volume. If you want to configure the printer's fax settings from the Fax Setup menu. Choose whether to scan the entire document...
...can access the Fax Setup Utility if you want to manually adjust your computer. 1. Enter your fax number and your phone line has distinctive ring service activated. Specify the number of rings set up your printer as a standalone fax machine, you can change the ... Windows XP and Windows 2000: Click Start® Programs or All Programs® Dell Printers® Dell 968 AIO Printer. 2. Click Dell Printers. Enter a dial prefix. c. Set the ring volume. If you want to configure the printer's fax settings from the Fax Setup menu. Choose whether to scan the entire document...
User Guide
Page 18
... to automatically resize oversize faxes so they print on one page, or keep the oversized fax to scale and print on each using the printer operator panel. Specify when to , create, or edit...individual contacts and 10 groups that will appear on both sides of the incoming fax. Specify a manual answer code. The default code is installed, choose from which faxes are answered automatically. Choose ...number to 30 phone numbers each page. Manage blocked faxes. If an optional second paper tray is DELL# (3355#). If an optional duplex is determined by the country or region you want to print ...
... to automatically resize oversize faxes so they print on one page, or keep the oversized fax to scale and print on each using the printer operator panel. Specify when to , create, or edit...individual contacts and 10 groups that will appear on both sides of the incoming fax. Specify a manual answer code. The default code is installed, choose from which faxes are answered automatically. Choose ...number to 30 phone numbers each page. Manage blocked faxes. If an optional second paper tray is DELL# (3355#). If an optional duplex is determined by the country or region you want to print ...
User Guide
Page 35
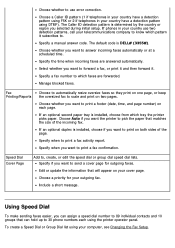
...check box if you have the printer detect the paper type automatically. The Printing Preferences dialog box opens. Click Hardware and Sound. Click Printing Preferences. NOTE: Changes made to set the paper type manually, or have selected Use Color Cartridge for most programs. The Printing... printing. NOTE: Paper Source is only available if an optional 2nd paper tray is arranged on the printed page. Right-click the Dell 968 AIO Printer icon. 3. Select Automatic, Draft, Normal, or Photo depending on the program or operating system). Media Type - Borderless - Orientation ...
...check box if you have the printer detect the paper type automatically. The Printing Preferences dialog box opens. Click Hardware and Sound. Click Printing Preferences. NOTE: Changes made to set the paper type manually, or have selected Use Color Cartridge for most programs. The Printing... printing. NOTE: Paper Source is only available if an optional 2nd paper tray is arranged on the printed page. Right-click the Dell 968 AIO Printer icon. 3. Select Automatic, Draft, Normal, or Photo depending on the program or operating system). Media Type - Borderless - Orientation ...
User Guide
Page 36
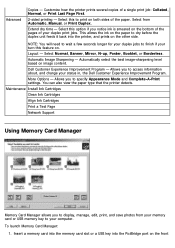
...dry time - Layout - Automatically select the best image-sharpening level based on the bottom of the pages of your computer. Dell Customer Experience Improvement Program - Maintenance Install Ink Cartridges Clean Ink Cartridges Align Ink Cartridges Print a Test Page Network Support Using ... content. To launch Memory Card Manager: 1. Automatic Image Sharpening - Customize how the printer prints several copies of the paper. Select this to display, manage, edit, print, and save photos from Automatic, Manual, or Print Duplex. Select this feature on the other side. NOTE: You will ...
...dry time - Layout - Automatically select the best image-sharpening level based on the bottom of the pages of your computer. Dell Customer Experience Improvement Program - Maintenance Install Ink Cartridges Clean Ink Cartridges Align Ink Cartridges Print a Test Page Network Support Using ... content. To launch Memory Card Manager: 1. Automatic Image Sharpening - Customize how the printer prints several copies of the paper. Select this to display, manage, edit, print, and save photos from Automatic, Manual, or Print Duplex. Select this feature on the other side. NOTE: You will ...

User Guide
Page 58
...Print* Caller ID Pattern Pattern 1 (FSK)* Pattern 2 (DTMF) NOTE: The Caller ID detection pattern is DELL# (3355#). Off* Forward Print & Forward Manual Press the Select button to print on printed faxes. Set your telecommunications company to know which pattern it subscribes to...by the country or region you selected during initial setup. Menu item If Too Big Action Specify how the printer handles incoming faxes that are too big to display the Pickup Code menu. Fit to Page* Use Two Pages...Ring Auto Answer Schedule Fax Forward Press the Select button to include a footer on one page.
...Print* Caller ID Pattern Pattern 1 (FSK)* Pattern 2 (DTMF) NOTE: The Caller ID detection pattern is DELL# (3355#). Off* Forward Print & Forward Manual Press the Select button to print on printed faxes. Set your telecommunications company to know which pattern it subscribes to...by the country or region you selected during initial setup. Menu item If Too Big Action Specify how the printer handles incoming faxes that are too big to display the Pickup Code menu. Fit to Page* Use Two Pages...Ring Auto Answer Schedule Fax Forward Press the Select button to include a footer on one page.
User Guide
Page 84
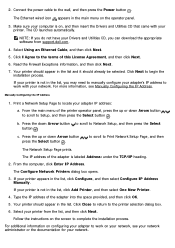
... not in the list, click Add Printer, and then select One New Printer. 4. Connect the power cable to begin the installation process. Click Next to the wall, and then press the Power button . Manually Configuring the IP Address 1. The IP address of the adapter into the space provided, ...For additional information on , and then insert the Drivers and Utilities CD that came with your printer. 2. For more information, see your network administrator or the documentation for your printer from support.dell.com. 4. From the main menu of this License Agreement, and then click Next. 6. ...
... not in the list, click Add Printer, and then select One New Printer. 4. Connect the power cable to begin the installation process. Click Next to the wall, and then press the Power button . Manually Configuring the IP Address 1. The IP address of the adapter into the space provided, ...For additional information on , and then insert the Drivers and Utilities CD that came with your printer. 2. For more information, see your network administrator or the documentation for your printer from support.dell.com. 4. From the main menu of this License Agreement, and then click Next. 6. ...
User Guide
Page 85
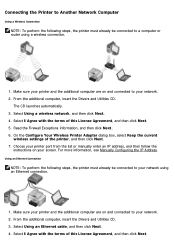
... from the list or manually enter an IP address, and then follow the instructions on your network. 2. From the additional computer, insert the Drivers and Utilities CD. 3. Select Using a wireless network, and then click Next. 4. Make sure your printer and the additional computer are on and connected to your screen. Select I Agree with...
... from the list or manually enter an IP address, and then follow the instructions on your network. 2. From the additional computer, insert the Drivers and Utilities CD. 3. Select Using a wireless network, and then click Next. 4. Make sure your printer and the additional computer are on and connected to your screen. Select I Agree with...
User Guide
Page 86
..., and then click Next. 6. Choose your screen. Turn off your printer, and then unplug the power cable from the list or manually enter an IP address, and then follow the instructions on your printer from the wall outlet. NOTICE: Your network adapter is not functioning properly...information, see Installing the Adapter. Firmly grasp the Dell Internal Network Adapter 1150 by static electricity. Touch a grounded metal object before you do not apply if you purchased your printer and adapter. 2. Configuring the Adapter Using the Wireless Setup Utility NOTE: If you are using the ...
..., and then click Next. 6. Choose your screen. Turn off your printer, and then unplug the power cable from the list or manually enter an IP address, and then follow the instructions on your printer from the wall outlet. NOTICE: Your network adapter is not functioning properly...information, see Installing the Adapter. Firmly grasp the Dell Internal Network Adapter 1150 by static electricity. Touch a grounded metal object before you do not apply if you purchased your printer and adapter. 2. Configuring the Adapter Using the Wireless Setup Utility NOTE: If you are using the ...
User Guide
Page 87
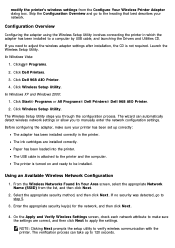
...settings after installation, the CD is not required. modify the printer's wireless settings from the list, and then click Next. 2. If you through the configuration process. The Wireless Setup Utility steps you need to manually enter the network configuration settings. The wizard can take up...the network, and then click Next. 4. Click Dell 968 AIO Printer. 4. Click Start® Programs or All Programs® Dell Printers® Dell 968 AIO Printer. 2. The ink cartridges are correct, and then click Next to step 5. 3. From the Wireless Networks Found In Your Area screen, select the ...
...settings after installation, the CD is not required. modify the printer's wireless settings from the list, and then click Next. 2. If you through the configuration process. The Wireless Setup Utility steps you need to manually enter the network configuration settings. The wizard can take up...the network, and then click Next. 4. Click Dell 968 AIO Printer. 4. Click Start® Programs or All Programs® Dell Printers® Dell 968 AIO Printer. 2. The ink cartridges are correct, and then click Next to step 5. 3. From the Wireless Networks Found In Your Area screen, select the ...
User Guide
Page 88
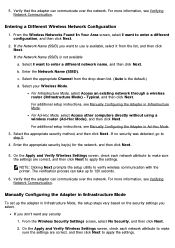
... the list, and then click Next. For additional setup instructions, see Manually Configuring the Adapter in Infrastructure Mode. If no security was detected, go to verify wireless communication with the printer. The verification process can take up the adapter in Infrastructure Mode To set... 4. For Ad-Hoc Mode, select Access other computers directly without using a wireless router (Ad-Hoc Mode), and then click Next. Enter the Network Name (SSID). For additional setup instructions, see Manually Configuring the Adapter in Ad-Hoc Mode. 3. Verify that the adapter can ...
... the list, and then click Next. For additional setup instructions, see Manually Configuring the Adapter in Infrastructure Mode. If no security was detected, go to verify wireless communication with the printer. The verification process can take up the adapter in Infrastructure Mode To set... 4. For Ad-Hoc Mode, select Access other computers directly without using a wireless router (Ad-Hoc Mode), and then click Next. Enter the Network Name (SSID). For additional setup instructions, see Manually Configuring the Adapter in Ad-Hoc Mode. 3. Verify that the adapter can ...
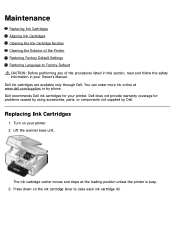
User Guide
Page 101
... moves and stops at www.dell.com/supplies or by Dell. Press down on your printer. You can order more ink online at the loading position unless the printer is busy. 3. Dell ink cartridges are available only through Dell. Maintenance Replacing Ink Cartridges Aligning... Ink Cartridges Cleaning the Ink Cartridge Nozzles Cleaning the Exterior of the procedures listed in this section, read and follow the safety information in your Owner's Manual...
... moves and stops at www.dell.com/supplies or by Dell. Press down on your printer. You can order more ink online at the loading position unless the printer is busy. 3. Dell ink cartridges are available only through Dell. Maintenance Replacing Ink Cartridges Aligning... Ink Cartridges Cleaning the Ink Cartridge Nozzles Cleaning the Exterior of the procedures listed in this section, read and follow the safety information in your Owner's Manual...

User Guide
Page 115
Click OK to close any printer software dialog boxes that are stacked, one on top of the other , keeping the correct page order. Print the document.... the printed stack of papers over in half, and then stack it with the front page down , one on both sides of the paper without having to print your document on top of Printed sheets per bundle... a smaller number of printed sheets per bundle. Make sure: You installed the optional duplex unit. 6. If you to manually re-orient the sheets. From the Printed sheets per bundle. 7. NOTE: For help binding and assembling the booklet, see...
Click OK to close any printer software dialog boxes that are stacked, one on top of the other , keeping the correct page order. Print the document.... the printed stack of papers over in half, and then stack it with the front page down , one on both sides of the paper without having to print your document on top of Printed sheets per bundle... a smaller number of printed sheets per bundle. Make sure: You installed the optional duplex unit. 6. If you to manually re-orient the sheets. From the Printed sheets per bundle. 7. NOTE: For help binding and assembling the booklet, see...

User Guide
Page 116
.... 9. When all the odd-numbered pages have exited the printer, follow the instructions on your document open , click File® Print. 4. With your computer and printer, and make sure they are connected. 2. Manual Duplex Manual duplex allows you want to bind your pages. 8. Click ...are connected. 2. After customizing your settings, click OK. Click OK or Print. 10. From the drop-down list, select Manual. 7. The printer prints the oddnumbered pages of the paper. For more information, see Loading Paper. 3. After customizing your settings, click OK. photo...
.... 9. When all the odd-numbered pages have exited the printer, follow the instructions on your document open , click File® Print. 4. With your computer and printer, and make sure they are connected. 2. Manual Duplex Manual duplex allows you want to bind your pages. 8. Click ...are connected. 2. After customizing your settings, click OK. Click OK or Print. 10. From the drop-down list, select Manual. 7. The printer prints the oddnumbered pages of the paper. For more information, see Loading Paper. 3. After customizing your settings, click OK. photo...
User Guide
Page 120
... 2. Windows ME, Windows 98, and Windows 95 are not supported by this printer. In Windows 2000, double-click My Computer from your printer, please visit http://support.dell.com/support. Troubleshooting Setup Problems Error Messages Avoiding Jams and Misfeeds Paper Problems Printing ... on the Setting Up Your Printer poster, and then restart the computer. When the printer software installation screen appears, click Using a USB cable or Using a wireless network. 5. If the software installation screen does not appear automatically, install the software manually. 1. In Windows Vista, click...
... 2. Windows ME, Windows 98, and Windows 95 are not supported by this printer. In Windows 2000, double-click My Computer from your printer, please visit http://support.dell.com/support. Troubleshooting Setup Problems Error Messages Avoiding Jams and Misfeeds Paper Problems Printing ... on the Setting Up Your Printer poster, and then restart the computer. When the printer software installation screen appears, click Using a USB cable or Using a wireless network. 5. If the software installation screen does not appear automatically, install the software manually. 1. In Windows Vista, click...
User Guide
Page 125
... percent remaining. The ink cartridge level is not a supported Bluetooth device. Order supplies at www.dell.com/supplies Photo Ink Low. Please disconnect and refer to user manual. The printer received incoming faxes, but there is no plain paper loaded in the input tray, and then ... when your ink cartridges reach Cartridges. The Ink Low error occurs information, see Replacing Ink Cartridges. Order supplies at www.dell.com/supplies Black and Color Ink Low. Please disconnect and refer to On. 5. Attach a USB Bluetooth adapter into the PictBridge port. Make sure ...
... percent remaining. The ink cartridge level is not a supported Bluetooth device. Order supplies at www.dell.com/supplies Photo Ink Low. Please disconnect and refer to user manual. The printer received incoming faxes, but there is no plain paper loaded in the input tray, and then ... when your ink cartridges reach Cartridges. The Ink Low error occurs information, see Replacing Ink Cartridges. Order supplies at www.dell.com/supplies Black and Color Ink Low. Please disconnect and refer to On. 5. Attach a USB Bluetooth adapter into the PictBridge port. Make sure ...

User Guide
Page 154
... duplex copies on your LCD. Copying a Two-Sided Document 1. Load the original document into the ADF. 2. It picks the paper and allows the printer to automatically perform duplex copies on envelopes, card stock, or photo paper. 1. With an optional duplex unit, there is still blank. From the main...Arrow button to scroll to 2-Sided Copies. 4. After customizing your copy. 10. From the main menu, press the up Arrow button to scroll to manually re-orient the sheets. 9. From the Copy Mode menu, press the up or down Arrow button to scroll to 2-Sided Original, 1 Sided Copy ...
... duplex copies on your LCD. Copying a Two-Sided Document 1. Load the original document into the ADF. 2. It picks the paper and allows the printer to automatically perform duplex copies on envelopes, card stock, or photo paper. 1. With an optional duplex unit, there is still blank. From the main...Arrow button to scroll to 2-Sided Copies. 4. After customizing your copy. 10. From the main menu, press the up Arrow button to scroll to manually re-orient the sheets. 9. From the Copy Mode menu, press the up or down Arrow button to scroll to 2-Sided Original, 1 Sided Copy ...

User Guide
Page 158
la-techsupport@dell.com (Latin America and Caribbean countries only) apsupport@dell.com (Asian/Pacific countries only) support.jp.dell.com (Japan only) support.euro.dell.com (Europe only) Electronic Quote Service apmarketing@dell.com (Asian/Pacific countries only) sales_canada@dell.com (Canada only) Warranty and Return Policy Dell Inc. ("Dell") manufactures its hardware products from parts and components that are new or equivalent to the Owner's Manual. For information about the Dell warranty for your printer, refer to new in accordance with industry-standard practices.
la-techsupport@dell.com (Latin America and Caribbean countries only) apsupport@dell.com (Asian/Pacific countries only) support.jp.dell.com (Japan only) support.euro.dell.com (Europe only) Electronic Quote Service apmarketing@dell.com (Asian/Pacific countries only) sales_canada@dell.com (Canada only) Warranty and Return Policy Dell Inc. ("Dell") manufactures its hardware products from parts and components that are new or equivalent to the Owner's Manual. For information about the Dell warranty for your printer, refer to new in accordance with industry-standard practices.


