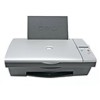
Owner's Manual
Page 6
...Photos 30 Scanning Multiple Pages or Images 31 Editing Scanned Text Using Optical Character Recognition (OCR) 31 Saving an Image on Your Computer 32 E-mailing a Scanned Image or Document 32 Enlarging or Reducing Images or Documents 33 Faxing 33 Sending a Fax 34 Installing Microsoft Fax in Windows XP... 34 Configuring Microsoft Fax 35 Changing the Fax Configuration 36 3 Understanding the Software Understanding the Printer Software 38 Using the Dell Printer Solution Center 38 Using the Dell All-In-One Center 39 Using Print Properties 40 Using Dell Picture Studio v2...
...Photos 30 Scanning Multiple Pages or Images 31 Editing Scanned Text Using Optical Character Recognition (OCR) 31 Saving an Image on Your Computer 32 E-mailing a Scanned Image or Document 32 Enlarging or Reducing Images or Documents 33 Faxing 33 Sending a Fax 34 Installing Microsoft Fax in Windows XP... 34 Configuring Microsoft Fax 35 Changing the Fax Configuration 36 3 Understanding the Software Understanding the Printer Software 38 Using the Dell Printer Solution Center 38 Using the Dell All-In-One Center 39 Using Print Properties 40 Using Dell Picture Studio v2...
Owner's Manual
Page 14
... Up Your Printer NOTE: The Dell Photo AIO Printer 922 supports Microsoft® Windows® 2000 and Windows XP. NOTE: You cannot access your User's Guide until you encounter problems during setup, see "Troubleshooting" on your printer to a computer to scan, print, and fax. • You do a variety of things. You can use the Dell Photo All-In-One Printer 922 to do not...
... Up Your Printer NOTE: The Dell Photo AIO Printer 922 supports Microsoft® Windows® 2000 and Windows XP. NOTE: You cannot access your User's Guide until you encounter problems during setup, see "Troubleshooting" on your printer to a computer to scan, print, and fax. • You do a variety of things. You can use the Dell Photo All-In-One Printer 922 to do not...
Owner's Manual
Page 18
www.dell.com/supplies | support.dell.com The Printing Preferences screen appears. 3 Click the Quality/Copies tab. 4 Click the Use my choice button. 5 Select the paper type in the drop-down menu. 6 Click OK. In Windows 2000, click Start→ Settings→Printers. 2 Right-click the Printer icon. 3 Click Printing Preferences. 4 Click the Quality/Copies tab... slide the left paper guide to the left edge of the paper. To turn off the automatic paper type sensor for all print jobs: 1 In Windows XP, click Start→ Control Panel→ Printers and Other Hardware→...
www.dell.com/supplies | support.dell.com The Printing Preferences screen appears. 3 Click the Quality/Copies tab. 4 Click the Use my choice button. 5 Select the paper type in the drop-down menu. 6 Click OK. In Windows 2000, click Start→ Settings→Printers. 2 Right-click the Printer icon. 3 Click Printing Preferences. 4 Click the Quality/Copies tab... slide the left paper guide to the left edge of the paper. To turn off the automatic paper type sensor for all print jobs: 1 In Windows XP, click Start→ Control Panel→ Printers and Other Hardware→...
Owner's Manual
Page 33
..., see "Placing Your Document on the Scanner Glass" on page 21. 3 Click Start→ Programs or All Programs→ Dell Printers→ Dell Photo AIO Printer 922→ Dell All-In-One Center. NOTE: If you do this, consult the Help for your document by: 25, 50, 100, 150, 200 percent,...a modem. Before you have a Windows-based computer equipped with the arrow on the printer. 10 Open your printer with "Installing Microsoft Fax in Windows XP" on page 34. Faxing To use Microsoft Fax, you are using your e-mail program, write a note to options using the Dell All-In-One Center.
..., see "Placing Your Document on the Scanner Glass" on page 21. 3 Click Start→ Programs or All Programs→ Dell Printers→ Dell Photo AIO Printer 922→ Dell All-In-One Center. NOTE: If you do this, consult the Help for your document by: 25, 50, 100, 150, 200 percent,...a modem. Before you have a Windows-based computer equipped with the arrow on the printer. 10 Open your printer with "Installing Microsoft Fax in Windows XP" on page 34. Faxing To use Microsoft Fax, you are using your e-mail program, write a note to options using the Dell All-In-One Center.

Owner's Manual
Page 34
... multiple page faxes. 1 Turn on your fax job by answering the questions that appear on page 21. 3 Click Start→ Programs or All Programs→ Dell Printers→ Dell Photo AIO Printer 922→ Dell All-In-One Center. If you should choose Yes, prompt me for each page. • In the Scan or Fax section, customize your... a Fax You can either: • Click Fax an image and follow the instructions on the scanner glass and make sure they are multiple pages in Windows XP 1 Click Start →Settings →Control Panel. If there are connected.
... multiple page faxes. 1 Turn on your fax job by answering the questions that appear on page 21. 3 Click Start→ Programs or All Programs→ Dell Printers→ Dell Photo AIO Printer 922→ Dell All-In-One Center. If you should choose Yes, prompt me for each page. • In the Scan or Fax section, customize your... a Fax You can either: • Click Fax an image and follow the instructions on the scanner glass and make sure they are multiple pages in Windows XP 1 Click Start →Settings →Control Panel. If there are connected.
Owner's Manual
Page 35
... the Enable Receive check box if you want to the person who receives your faxes. When you select this check box, select the Dell Photo AIO Printer 922 to print the received fax. 14 Click to select the Store a copy in a folder check box if you want to confirm that... Fax To configure for fax: 1 Click Start →Programs or All Programs→Accessories→Communications→Fax→ Fax Console (Windows XP) and Fax Service Management (Windows 2000). 2 On the Welcome to Fax Configuration screen, click Next. 3 On the Sender Information screen, type the information you want to...
... the Enable Receive check box if you want to the person who receives your faxes. When you select this check box, select the Dell Photo AIO Printer 922 to print the received fax. 14 Click to select the Store a copy in a folder check box if you want to confirm that... Fax To configure for fax: 1 Click Start →Programs or All Programs→Accessories→Communications→Fax→ Fax Console (Windows XP) and Fax Service Management (Windows 2000). 2 On the Welcome to Fax Configuration screen, click Next. 3 On the Sender Information screen, type the information you want to...
Owner's Manual
Page 40
...8226; E-mail an image. • Fax using the Dell All-In-One Center, see your User's Guide on the CD. To access Print Properties: 1 With your document open : 1 In Windows XP, click Start→ Settings→ Printers and Faxes. The Print Properties screen appears. For more... information on using your computer's modem. • Save an image on your computer. • Edit text found in a scanned document (Optical Character Recognition). • Modify an image with a photo ...
...8226; E-mail an image. • Fax using the Dell All-In-One Center, see your User's Guide on the CD. To access Print Properties: 1 With your document open : 1 In Windows XP, click Start→ Settings→ Printers and Faxes. The Print Properties screen appears. For more... information on using your computer's modem. • Save an image on your computer. • Edit text found in a scanned document (Optical Character Recognition). • Modify an image with a photo ...
Owner's Manual
Page 52
... outlet and computer, if using a computer. • If an error message appears on page 53 52 Troubleshooting Install the printer software. The Dell Photo AIO Printer 922 supports Windows 2000 and Windows XP. MAKE SURE YOU TURNED ON BOTH YOUR PRINTER AND YOUR COMPUTER CHECK THE USB CABLE - • Ensure that the USB cable is firmly connected to your...
... outlet and computer, if using a computer. • If an error message appears on page 53 52 Troubleshooting Install the printer software. The Dell Photo AIO Printer 922 supports Windows 2000 and Windows XP. MAKE SURE YOU TURNED ON BOTH YOUR PRINTER AND YOUR COMPUTER CHECK THE USB CABLE - • Ensure that the USB cable is firmly connected to your...

Owner's Manual
Page 53
... screen to complete the installation. SET YOUR PRINTER AS THE DEFAULT PRINTER - If the installation screen does not appear: a In Windows XP, click Start→My Computer. In Windows 2000, double-click My Computer from your printer and your computer. Windows 2000 1 Click Start→Settings→Printers. 2 Right-click Dell Photo AIO Printer 922 and select Set as Default. CORRECT COMMUNICATION...
... screen to complete the installation. SET YOUR PRINTER AS THE DEFAULT PRINTER - If the installation screen does not appear: a In Windows XP, click Start→My Computer. In Windows 2000, double-click My Computer from your printer and your computer. Windows 2000 1 Click Start→Settings→Printers. 2 Right-click Dell Photo AIO Printer 922 and select Set as Default. CORRECT COMMUNICATION...
Owner's Manual
Page 54
..." on page 18. 54 Troubleshooting If a check mark is not next to deselect it to Pause Printing. C H E C K F O R F L A S H I N G L I G HT S O N T H E P R I N T E R - Windows XP 1 Click Start→Settings→Printers and Faxes. 2 Double-click Dell Photo AIO Printer 922, and then click Printer. 3 Make sure a check mark is next to Pause Printing, click it . If a check mark is not next to deselect...
..." on page 18. 54 Troubleshooting If a check mark is not next to deselect it to Pause Printing. C H E C K F O R F L A S H I N G L I G HT S O N T H E P R I N T E R - Windows XP 1 Click Start→Settings→Printers and Faxes. 2 Double-click Dell Photo AIO Printer 922, and then click Printer. 3 Make sure a check mark is next to Pause Printing, click it . If a check mark is not next to deselect...


