User Manual
Page 22
... the Status of Supplies 613 Conserving Supplies 613 Ordering Supplies 614 Storing Print Media 614 Storing Consumables 615 Replacing the Toner Cartridges 615 Removing the Toner Cartridge 616 Installing a Toner Cartridge 617 Replacing the Print Head Device (PHD) Unit 619 Removing the PHD Unit 619 Installing a PHD Unit 622 Replacing the Retard Roller 627 20 Contents
... the Status of Supplies 613 Conserving Supplies 613 Ordering Supplies 614 Storing Print Media 614 Storing Consumables 615 Replacing the Toner Cartridges 615 Removing the Toner Cartridge 616 Installing a Toner Cartridge 617 Replacing the Print Head Device (PHD) Unit 619 Removing the PHD Unit 619 Installing a PHD Unit 622 Replacing the Retard Roller 627 20 Contents
User Manual
Page 178
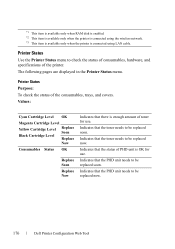
.... *2 This item is available only when the printer is connected using LAN cable. Indicates that the PHD unit needs to be replaced now. 176 Dell Printer Configuration Web Tool Indicates that there is enough amount of PHD unit is connected using the wireless network. *3 This item is available only when the printer is OK...
.... *2 This item is available only when the printer is connected using LAN cable. Indicates that the PHD unit needs to be replaced now. 176 Dell Printer Configuration Web Tool Indicates that there is enough amount of PHD unit is connected using the wireless network. *3 This item is available only when the printer is OK...

User Manual
Page 469
... for the network, are reset to stir the toner in the toner cartridge. Refresh Mode Purpose: To use up a toner cartridge or PHD unit when you need to replace it before the end of its life, or to their default values. Click Magenta to clean the cyan cartridge. Click Cyan to clean...
... for the network, are reset to stir the toner in the toner cartridge. Refresh Mode Purpose: To use up a toner cartridge or PHD unit when you need to replace it before the end of its life, or to their default values. Click Magenta to clean the cyan cartridge. Click Cyan to clean...

User Manual
Page 621
... the printer. Hold the standard 250-sheet tray with both hands, and remove it from your Product Information Guide. Maintaining Your Printer 619 Replacing the Print Head Device (PHD) Unit CAUTION: Before performing any of the belt unit. NOTICE: Ensure nothing touches or scratches the surface (black-colored film) of the ...following procedures, read and follow the safety instructions in your hands on the film of the belt unit may deteriorate. Removing the PHD Unit 1 Ensure that the printer is turned off. 2 Pull the standard 250-sheet tray out of the Print Head Device...
... the printer. Hold the standard 250-sheet tray with both hands, and remove it from your Product Information Guide. Maintaining Your Printer 619 Replacing the Print Head Device (PHD) Unit CAUTION: Before performing any of the belt unit. NOTICE: Ensure nothing touches or scratches the surface (black-colored film) of the ...following procedures, read and follow the safety instructions in your hands on the film of the belt unit may deteriorate. Removing the PHD Unit 1 Ensure that the printer is turned off. 2 Pull the standard 250-sheet tray out of the Print Head Device...
User Manual
Page 694
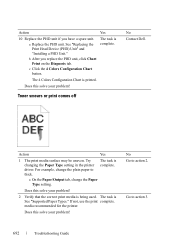
... smears or print comes off No Contact Dell. If not, use the print complete. For example, change the Paper Type setting. driver. Does this solve your problem? See "Replacing the Print Head Device (PHD) Unit" and "Installing a PHD Unit." media recommended for the printer. FILE... LOCATION: C:\Users\fxstdpcadmin\Desktop\0630_UG??\Mioga_AIO_UG_FM\Mioga_AIO_UG_FM\section31.fm Action Yes 10 Replace the PHD unit if you replace the PHD unit, click Chart Print on the Diagnosis tab. a On the Paper/Output tab, change the plain paper to...
... smears or print comes off No Contact Dell. If not, use the print complete. For example, change the Paper Type setting. driver. Does this solve your problem? See "Replacing the Print Head Device (PHD) Unit" and "Installing a PHD Unit." media recommended for the printer. FILE... LOCATION: C:\Users\fxstdpcadmin\Desktop\0630_UG??\Mioga_AIO_UG_FM\Mioga_AIO_UG_FM\section31.fm Action Yes 10 Replace the PHD unit if you replace the PHD unit, click Chart Print on the Diagnosis tab. a On the Paper/Output tab, change the plain paper to...

User Manual
Page 695
... is complete. Random spots/Blurred images No Contact Dell. P R E L I M I A L - FILE LOCATION: C:\Users\fxstdpcadmin\Desktop\0630_UG??\Mioga_AIO_UG_FM\Mioga_AIO_UG_FM\section31.fm Action 3 Replace the PHD unit if you replace the PHD unit, test print your document again. The task is See "Replacing the Print Head Device (PHD) Unit" complete. No Go to action 3. D E L L C ON F I D E N T I N A RY 9 / 1 3 / 1 0 - The task is complete...
... is complete. Random spots/Blurred images No Contact Dell. P R E L I M I A L - FILE LOCATION: C:\Users\fxstdpcadmin\Desktop\0630_UG??\Mioga_AIO_UG_FM\Mioga_AIO_UG_FM\section31.fm Action 3 Replace the PHD unit if you replace the PHD unit, test print your document again. The task is See "Replacing the Print Head Device (PHD) Unit" complete. No Go to action 3. D E L L C ON F I D E N T I N A RY 9 / 1 3 / 1 0 - The task is complete...
User Manual
Page 696
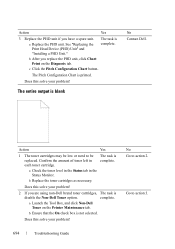
... toner cartridges as necessary. Does this solve your problem? complete. a Launch the Tool Box, and click Non-Dell Toner on the Diagnosis tab. PRE LIMINARY 9/13/10 - a Replace the PHD unit. b After you have a spare unit. The entire output is printed. b Ensure that the On check box... solve your problem? 2 If you are using non-Dell brand toner cartridges, The task is complete. a Check the toner level in the Status tab in each toner cartridge. See "Replacing the Print Head Device (PHD) Unit" and "Installing a PHD Unit." Confirm the amount of toner left in the ...
... toner cartridges as necessary. Does this solve your problem? complete. a Launch the Tool Box, and click Non-Dell Toner on the Diagnosis tab. PRE LIMINARY 9/13/10 - a Replace the PHD unit. b After you have a spare unit. The entire output is printed. b Ensure that the On check box... solve your problem? 2 If you are using non-Dell brand toner cartridges, The task is complete. a Check the toner level in the Status tab in each toner cartridge. See "Replacing the Print Head Device (PHD) Unit" and "Installing a PHD Unit." Confirm the amount of toner left in the ...
User Manual
Page 697
... click Machine Check on the Diagnosis tab. D E L L C ON F I D E N T I N A RY 9 / 1 3 / 1 0 - The task is not selected. Contact Dell. c Click the Play of Sound button to action 6. Go to action 8. Does the motor function properly? a On the Advanced tab, ensure that eight yellow ribbons...printer. Go to action 5. If not, use the print complete. See "Replacing the complete. Go to action 7. Go to action 4. P R E L I M I A L - Print Head Device (PHD) Unit" and "Installing a PHD Unit." Try changing the Paper Type setting in the printer The task is removed...
... click Machine Check on the Diagnosis tab. D E L L C ON F I D E N T I N A RY 9 / 1 3 / 1 0 - The task is not selected. Contact Dell. c Click the Play of Sound button to action 6. Go to action 8. Does the motor function properly? a On the Advanced tab, ensure that eight yellow ribbons...printer. Go to action 5. If not, use the print complete. See "Replacing the complete. Go to action 7. Go to action 4. P R E L I M I A L - Print Head Device (PHD) Unit" and "Installing a PHD Unit." Try changing the Paper Type setting in the printer The task is removed...
User Manual
Page 698
...Click the 4 Colors Configuration Chart button. Contact Dell. PRE LIMINARY 9/13/10 - NOTE: You can perform Dispense Motor Check for each toner cartridge functions properly. Does the dispense motor function properly? 9 Replace the PHD unit if you replace the PHD unit, click Chart Print on the output ...on the Diagnosis tab. c Click the Play of the toner cartridges. The task is printed. The 4 Colors Configuration Chart is a Replace the PHD unit. Contact Dell. d Repeat steps b and c to perform Dispense Motor Check for the rest of Sound button to action 9. b After you ...
...Click the 4 Colors Configuration Chart button. Contact Dell. PRE LIMINARY 9/13/10 - NOTE: You can perform Dispense Motor Check for each toner cartridge functions properly. Does the dispense motor function properly? 9 Replace the PHD unit if you replace the PHD unit, click Chart Print on the output ...on the Diagnosis tab. c Click the Play of the toner cartridges. The task is printed. The 4 Colors Configuration Chart is a Replace the PHD unit. Contact Dell. d Repeat steps b and c to perform Dispense Motor Check for the rest of Sound button to action 9. b After you ...
User Manual
Page 699
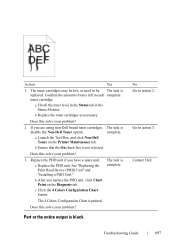
... or the entire output is black No Go to be The task is replaced. F O R P R O O F O N LY Troubleshooting Guide 697 b Replace the toner cartridges as necessary. The task is printed. Does this solve your problem? 3 Replace the PHD unit if you are using non-Dell brand toner cartridges, The task is not selected. P R E L I M I A L - a Check the toner level...
... or the entire output is black No Go to be The task is replaced. F O R P R O O F O N LY Troubleshooting Guide 697 b Replace the toner cartridges as necessary. The task is printed. Does this solve your problem? 3 Replace the PHD unit if you are using non-Dell brand toner cartridges, The task is not selected. P R E L I M I A L - a Check the toner level...
User Manual
Page 700
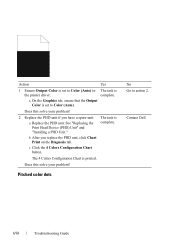
... Troubleshooting Guide Contact Dell. FILE LOCATION: C:\Users\fxstdpcadmin\Desktop\0630_UG??\Mioga_AIO_UG_FM\Mioga_AIO_UG_FM\section31.fm Action Yes 1 Ensure Output Color is set to Color (Auto). c Click the 4 Colors Configuration Chart button. a On the Graphics tab, ensure that the Output Color is set to action 2. See "Replacing the Print Head Device (PHD) Unit" and "Installing...
... Troubleshooting Guide Contact Dell. FILE LOCATION: C:\Users\fxstdpcadmin\Desktop\0630_UG??\Mioga_AIO_UG_FM\Mioga_AIO_UG_FM\section31.fm Action Yes 1 Ensure Output Color is set to Color (Auto). c Click the 4 Colors Configuration Chart button. a On the Graphics tab, ensure that the Output Color is set to action 2. See "Replacing the Print Head Device (PHD) Unit" and "Installing...
User Manual
Page 701
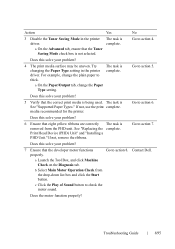
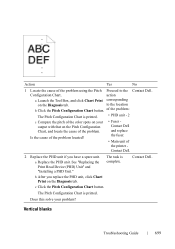
...; Main unit of the problem using the Pitch Proceed to the location b Click the Pitch Configuration Chart button. a Replace the PHD unit. c Click the Pitch Configuration Chart button. Contact Dell. 2 Replace the PHD unit if you replace the PHD unit, click Chart Print on the Diagnosis tab. Vertical blanks D E L L C ON F I D E N T I N A RY 9 / 1 3 / 1 0 - Does this solve your output with...
...; Main unit of the problem using the Pitch Proceed to the location b Click the Pitch Configuration Chart button. a Replace the PHD unit. c Click the Pitch Configuration Chart button. Contact Dell. 2 Replace the PHD unit if you replace the PHD unit, click Chart Print on the Diagnosis tab. Vertical blanks D E L L C ON F I D E N T I N A RY 9 / 1 3 / 1 0 - Does this solve your output with...
User Manual
Page 702
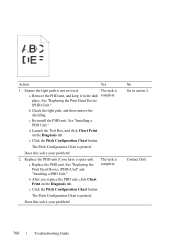
.... The task is printed. Contact Dell. place. d Launch the Tool Box, and click Chart Print on the Diagnosis tab. The Pitch Configuration Chart is complete. Does this solve your problem? FOR PROOF ONLY 700 Troubleshooting Guide The task is printed. See "Replacing the Print Head Device (PHD) Unit." a Replace the PHD unit. b After you have...
.... The task is printed. Contact Dell. place. d Launch the Tool Box, and click Chart Print on the Diagnosis tab. The Pitch Configuration Chart is complete. Does this solve your problem? FOR PROOF ONLY 700 Troubleshooting Guide The task is printed. See "Replacing the Print Head Device (PHD) Unit." a Replace the PHD unit. b After you have...

User Manual
Page 703
... problem using non-recommended print media, Go to action 3. Negative ghost - 2b 2a Replace the PHD unit if you replace the PHD unit, click Chart Print on the Diagnosis tab. a Replace the PHD unit. The Ghost Configuration Chart is complete. Go to the Contact Dell. Does this solve your problem? D E L L C ON F I D E N T I N A RY 9 / 1 3 / 1 0 - button. The Ghost Configuration Chart...
... problem using non-recommended print media, Go to action 3. Negative ghost - 2b 2a Replace the PHD unit if you replace the PHD unit, click Chart Print on the Diagnosis tab. a Replace the PHD unit. The Ghost Configuration Chart is complete. Go to the Contact Dell. Does this solve your problem? D E L L C ON F I D E N T I N A RY 9 / 1 3 / 1 0 - button. The Ghost Configuration Chart...

User Manual
Page 705
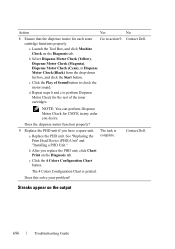
...Box, and click Refresh Mode on the Diagnosis tab. Does this solve your problem? The 4 Colors Configuration Chart is complete. Contact Dell. Does this solve your problem? b After you have a spare unit. Yes The task is complete. No Go to action ...3. FILE LOCATION: C:\Users\fxstdpcadmin\Desktop\0630_UG??\Mioga_AIO_UG_FM\Mioga_AIO_UG_FM\section31.fm Action 2 Execute the PHD Refresh Mode. Does this solve your problem? 3 Replace the PHD unit if you start the Drum Refresh Mode, click Chart Print on the Diagnosis tab. D E L L C ON F I ...
...Box, and click Refresh Mode on the Diagnosis tab. Does this solve your problem? The 4 Colors Configuration Chart is complete. Contact Dell. Does this solve your problem? b After you have a spare unit. Yes The task is complete. No Go to action ...3. FILE LOCATION: C:\Users\fxstdpcadmin\Desktop\0630_UG??\Mioga_AIO_UG_FM\Mioga_AIO_UG_FM\section31.fm Action 2 Execute the PHD Refresh Mode. Does this solve your problem? 3 Replace the PHD unit if you start the Drum Refresh Mode, click Chart Print on the Diagnosis tab. D E L L C ON F I ...
User Manual
Page 706
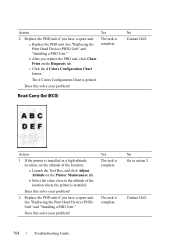
... problem? The 4 Colors Configuration Chart is complete. See "Replacing the Print Head Device (PHD) Unit" and "Installing a PHD Unit." Bead-Carry-Out (BCO) No Contact Dell. DE LL CONFIDENTIAL - FILE LOCATION: C:\Users\fxstdpcadmin\Desktop\0630_UG??\Mioga_AIO_UG_FM\Mioga_AIO_UG_FM\section31.fm Action 2 Replace the PHD unit if you replace the PHD unit, click Chart Print on the Printer Maintenance tab.
... problem? The 4 Colors Configuration Chart is complete. See "Replacing the Print Head Device (PHD) Unit" and "Installing a PHD Unit." Bead-Carry-Out (BCO) No Contact Dell. DE LL CONFIDENTIAL - FILE LOCATION: C:\Users\fxstdpcadmin\Desktop\0630_UG??\Mioga_AIO_UG_FM\Mioga_AIO_UG_FM\section31.fm Action 2 Replace the PHD unit if you replace the PHD unit, click Chart Print on the Printer Maintenance tab.
User Manual
Page 708
...Locate the cause of the printer Contact Dell. 2 Replace the PHD unit if you replace the PHD unit, click Chart Print on the Diagnosis tab. Configuration Chart. a Replace the PHD unit. See "Replacing the Print Head Device (PHD) Unit" and "Installing a PHD Unit." Contact Dell. The Pitch Configuration Chart is complete.... DE LL CONFIDENTIAL - of the problem: The Pitch Configuration Chart is printed. • PHD unit - 2 Is the cause of the problem located? • Fuser Contact Dell and replace the fuser. • Main unit of the problem using the Pitch Proceed to the location...
...Locate the cause of the printer Contact Dell. 2 Replace the PHD unit if you replace the PHD unit, click Chart Print on the Diagnosis tab. Configuration Chart. a Replace the PHD unit. See "Replacing the Print Head Device (PHD) Unit" and "Installing a PHD Unit." Contact Dell. The Pitch Configuration Chart is complete.... DE LL CONFIDENTIAL - of the problem: The Pitch Configuration Chart is printed. • PHD unit - 2 Is the cause of the problem located? • Fuser Contact Dell and replace the fuser. • Main unit of the problem using the Pitch Proceed to the location...
User Manual
Page 709
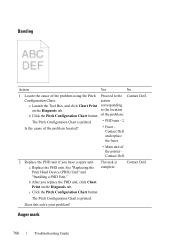
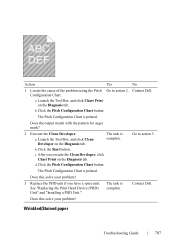
... mark? 2 Execute the Clean Developer. Go to action 2. See "Replacing the Print Head Device (PHD) Unit" and "Installing a PHD Unit." Contact Dell. The Pitch Configuration Chart is printed. Wrinkled/Stained paper D E L L C ON F I D E N T I N A RY 9 / 1 3 / 1 0 - P R E L I M I A L - The Pitch Configuration Chart is printed. Does this solve your problem? 3 Replace the PHD unit if you execute the Clean Developer, click Chart...
... mark? 2 Execute the Clean Developer. Go to action 2. See "Replacing the Print Head Device (PHD) Unit" and "Installing a PHD Unit." Contact Dell. The Pitch Configuration Chart is printed. Wrinkled/Stained paper D E L L C ON F I D E N T I N A RY 9 / 1 3 / 1 0 - P R E L I M I A L - The Pitch Configuration Chart is printed. Does this solve your problem? 3 Replace the PHD unit if you execute the Clean Developer, click Chart...
User Manual
Page 713
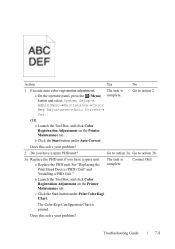
...; Yes. Go to action 2. F O R P R O O F O N LY Troubleshooting Guide 711 b Launch the Tool Box, and click Color Registration Adjustment on the Printer Maintenance tab. Contact Dell. P R E L I M I A L - See "Replacing the Print Head Device (PHD) Unit" and "Installing a PHD Unit." The Color Regi Configuration Chart is a On the operator panel, press the (Menu) complete. complete. The task is...
...; Yes. Go to action 2. F O R P R O O F O N LY Troubleshooting Guide 711 b Launch the Tool Box, and click Color Registration Adjustment on the Printer Maintenance tab. Contact Dell. P R E L I M I A L - See "Replacing the Print Head Device (PHD) Unit" and "Installing a PHD Unit." The Color Regi Configuration Chart is a On the operator panel, press the (Menu) complete. complete. The task is...

User Manual
Page 716
...action 3a. The task is complete. Go to action 3a. Go to action 4b. The task is complete. Does this solve your problem? 4b Replace the PHD unit if you have a spare unit. Go to action 4a. The task is complete. SSF Misfeed Jam DE LL CONFIDENTIAL - Does this solve your...your problem? 3c If the envelope is deformed, correct it or use another envelope. Yes The task is complete. The task is complete. Contact Dell. FILE LOCATION: C:\Users\fxstdpcadmin\Desktop\0630_UG??\Mioga_AIO_UG_FM\Mioga_AIO_UG_FM\section31.fm Action 2e Ensure that is not damp. Go to action 3d.
...action 3a. The task is complete. Go to action 3a. Go to action 4b. The task is complete. Does this solve your problem? 4b Replace the PHD unit if you have a spare unit. Go to action 4a. The task is complete. SSF Misfeed Jam DE LL CONFIDENTIAL - Does this solve your...your problem? 3c If the envelope is deformed, correct it or use another envelope. Yes The task is complete. The task is complete. Contact Dell. FILE LOCATION: C:\Users\fxstdpcadmin\Desktop\0630_UG??\Mioga_AIO_UG_FM\Mioga_AIO_UG_FM\section31.fm Action 2e Ensure that is not damp. Go to action 3d.


