User Guide
Page 3
...Ports 2 SRW2008P/SRW2008MP - Table of Contents Chapter 1: Introduction 1 Welcome 1 Chapter 2: Product Overview 2 SRW2008 - Front Panel 2 LEDs 2 Ports 2 Back Panel 3 Chapter 3: Installation 4 Overview 4 Positioning the Switch 4 Placement Options 4 Desktop Placement 4 Rack-Mount Placement 5 Wall-Mount Placement 6 Chapter 4: Configuration Using the Console Interface 8 Overview 8 Configuring the HyperTerminal Application 8 Connecting to the Switch... 18 Setup > Time 19 Set Time 19 Local Time 19 Daylight Saving 19 8-Port 10/100/1000 Gigabit Switch with Webview ii
...Ports 2 SRW2008P/SRW2008MP - Table of Contents Chapter 1: Introduction 1 Welcome 1 Chapter 2: Product Overview 2 SRW2008 - Front Panel 2 LEDs 2 Ports 2 Back Panel 3 Chapter 3: Installation 4 Overview 4 Positioning the Switch 4 Placement Options 4 Desktop Placement 4 Rack-Mount Placement 5 Wall-Mount Placement 6 Chapter 4: Configuration Using the Console Interface 8 Overview 8 Configuring the HyperTerminal Application 8 Connecting to the Switch... 18 Setup > Time 19 Set Time 19 Local Time 19 Daylight Saving 19 8-Port 10/100/1000 Gigabit Switch with Webview ii
User Guide
Page 4
... 33 Security > 802.1x Settings 34 Setting Timer 34 Security > Ports Security 34 Security > Multiple Hosts 35 Security > Storm Control 36 QoS 36 QoS > CoS Settings 36 CoS Default 37 QoS > Queue Settings 37 QoS > DSCP Settings 37 QoS > Bandwidth 37 QoS > Basic Mode 38 8-Port 10/100/1000 Gigabit Switch with Webview iii
... 33 Security > 802.1x Settings 34 Setting Timer 34 Security > Ports Security 34 Security > Multiple Hosts 35 Security > Storm Control 36 QoS 36 QoS > CoS Settings 36 CoS Default 37 QoS > Queue Settings 37 QoS > DSCP Settings 37 QoS > Bandwidth 37 QoS > Basic Mode 38 8-Port 10/100/1000 Gigabit Switch with Webview iii
User Guide
Page 5
...40 Spanning Tree > STP Status 40 Spanning Tree > Global STP 41 Global Setting 41 Bridge Settings 41 Spanning Tree > STP Port Settings 42 Spanning Tree > RSTP Port Settings 42 Spanning Tree > MSTP Properties 43 Spanning Tree > MSTP Instance Settings 44 Spanning Tree > MSTP Interface Settings 44 ... 52 Admin > Logging 52 Admin > Port Mirroring 53 Admin > Cable Test 53 Admin > Save Configuration 54 Via TFTP 54 Via HTTP 54 Backup 54 Admin > Firmware Upgrade 54 Admin > Reboot 55 Admin > Factory Defaults 55 Admin > Server Logs 55 8-Port 10/100/1000 Gigabit Switch with Webview iv
...40 Spanning Tree > STP Status 40 Spanning Tree > Global STP 41 Global Setting 41 Bridge Settings 41 Spanning Tree > STP Port Settings 42 Spanning Tree > RSTP Port Settings 42 Spanning Tree > MSTP Properties 43 Spanning Tree > MSTP Instance Settings 44 Spanning Tree > MSTP Interface Settings 44 ... 52 Admin > Logging 52 Admin > Port Mirroring 53 Admin > Cable Test 53 Admin > Save Configuration 54 Via TFTP 54 Via HTTP 54 Backup 54 Admin > Firmware Upgrade 54 Admin > Reboot 55 Admin > Factory Defaults 55 Admin > Server Logs 55 8-Port 10/100/1000 Gigabit Switch with Webview iv
User Guide
Page 6
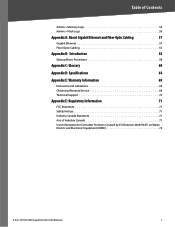
Table of Contents Admin > Memory Logs 56 Admin > Flash Logs 56 Appendix A: About Gigabit Ethernet and Fiber Optic Cabling 57 Gigabit Ethernet 57 Fiber Optic Cabling 57 Appendix B: Introduction 58 Startup Menu Procedures 58 Appendix C: Glossary 60 Appendix D: Specifications 64 Appendix E: Warranty Information 69 Exclusions and ... 71 Avis d' Industrie Canada 71 User Information for Consumer Products Covered by EU Directive 2002/96/EC on Waste Electric and Electronic Equipment (WEEE 72 8-Port 10/100/1000 Gigabit Switch with Webview v
Table of Contents Admin > Memory Logs 56 Admin > Flash Logs 56 Appendix A: About Gigabit Ethernet and Fiber Optic Cabling 57 Gigabit Ethernet 57 Fiber Optic Cabling 57 Appendix B: Introduction 58 Startup Menu Procedures 58 Appendix C: Glossary 60 Appendix D: Specifications 64 Appendix E: Warranty Information 69 Exclusions and ... 71 Avis d' Industrie Canada 71 User Information for Consumer Products Covered by EU Directive 2002/96/EC on Waste Electric and Electronic Equipment (WEEE 72 8-Port 10/100/1000 Gigabit Switch with Webview v
User Guide
Page 7
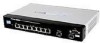
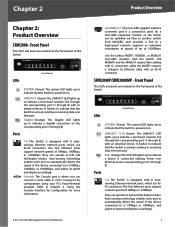
...minimizes and contain the effect of these devices in that model. The Linksys WebView Managed switch allows you to expand and grow your network securely. The 4 priority queues together...needs. The SRW2008MP can also be referenced as SRW2008x. Includes 8 10/100/1000 RJ-45 ports and 2 shared MiniGBIC slots. •• SRW2008MP 8-port 10/100/1000 Ethernet Switch with WebView and... output power per PoE port up to all models, the model number will be controlled using various Class of the system. 8-Port 10/100/1000 Gigabit Switch with WebView. by port, layer 2 priority (802...
...minimizes and contain the effect of these devices in that model. The Linksys WebView Managed switch allows you to expand and grow your network securely. The 4 priority queues together...needs. The SRW2008MP can also be referenced as SRW2008x. Includes 8 10/100/1000 RJ-45 ports and 2 shared MiniGBIC slots. •• SRW2008MP 8-port 10/100/1000 Ethernet Switch with WebView and... output power per PoE port up to all models, the model number will be controlled using various Class of the system. 8-Port 10/100/1000 Gigabit Switch with WebView. by port, layer 2 priority (802...
User Guide
Page 8
... Power over that the Switch is equipped with the Switch. Ports 1-8 The Switch is actively sending or receiving data over Ethernet on the front panel of up to it (10Mbps, 100Mbps, or 1000Mbps), and adjust its speed and duplex accordingly. 2 SRW2008P/SRW2008MP - They can connect ... individual workstation at speeds of the Switch. They can be uplinked via fiber to indicate that the Switch is a connection point for more information. 8-Port 10/100/1000 Gigabit Switch with Webview miniGBIC1/2 The mini-GBIC (gigabit interface converter) port is powered on the front panel ...
... Power over that the Switch is equipped with the Switch. Ports 1-8 The Switch is actively sending or receiving data over Ethernet on the front panel of up to it (10Mbps, 100Mbps, or 1000Mbps), and adjust its speed and duplex accordingly. 2 SRW2008P/SRW2008MP - They can connect ... individual workstation at speeds of the Switch. They can be uplinked via fiber to indicate that the Switch is a connection point for more information. 8-Port 10/100/1000 Gigabit Switch with Webview miniGBIC1/2 The mini-GBIC (gigabit interface converter) port is powered on the front panel ...
User Guide
Page 9
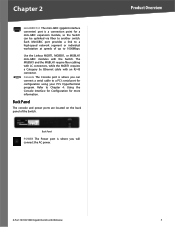
... your PC's HyperTerminal program. Chapter 2 miniGBIC1/2 The mini-GBIC (gigabit interface converter) port is a connection point for more information. Console The Console port is where you will connect the AC power. Use the Linksys MGBT1, MGBSX1, or MGBLH1 mini-GBIC modules with an RJ-45 connector. Product Overview 8-Port 10/100/1000 Gigabit Switch with Webview 3
... your PC's HyperTerminal program. Chapter 2 miniGBIC1/2 The mini-GBIC (gigabit interface converter) port is a connection point for more information. Console The Console port is where you will connect the AC power. Use the Linksys MGBT1, MGBSX1, or MGBLH1 mini-GBIC modules with an RJ-45 connector. Product Overview 8-Port 10/100/1000 Gigabit Switch with Webview 3
User Guide
Page 10
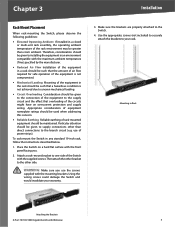
... moisture sources. •• To ensure adequate air flow around the Switch, be sure to Switch Notebook 1U high rack for the Switch and check the environmental restrictions mentioned in a standard-sized, 19-inch 8-Port 10/100/1000 Gigabit Switch with Webview 4 Place the Switch on the wall. Cable/ DSL Internet Modem Router Uplink via Fiber Administrator...
... moisture sources. •• To ensure adequate air flow around the Switch, be sure to Switch Notebook 1U high rack for the Switch and check the environmental restrictions mentioned in a standard-sized, 19-inch 8-Port 10/100/1000 Gigabit Switch with Webview 4 Place the Switch on the wall. Cable/ DSL Internet Modem Router Uplink via Fiber Administrator...
User Guide
Page 11
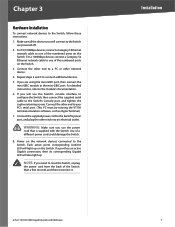
... and supply wiring. Then attach the other bracket to the other than room ambient. To rack-mount the Switch in Rack Attaching the Brackets 8-Port 10/100/1000 Gigabit Switch with the front panel facing you use of power strips). Use the appropriate screws (not included) to securely...of the equipment to your warranty. 3. WARNING: Make sure you . 2. Make sure the brackets are properly attached to one side of the Switch with the maximum ambient temperature (Tma) specified by the manufacturer. •• Reduced Air Flow Installation of the equipment in a rack should ...
... and supply wiring. Then attach the other bracket to the other than room ambient. To rack-mount the Switch in Rack Attaching the Brackets 8-Port 10/100/1000 Gigabit Switch with the front panel facing you use of power strips). Use the appropriate screws (not included) to securely...of the equipment to your warranty. 3. WARNING: Make sure you . 2. Make sure the brackets are properly attached to one side of the Switch with the maximum ambient temperature (Tma) specified by the manufacturer. •• Reduced Air Flow Installation of the equipment in a rack should ...
User Guide
Page 12
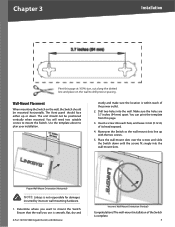
... into the wall-mount slots. Insert a screw into each hole, and leave 3 mm (0.12 in) of the Switch is smooth, flat, dry and 8-Port 10/100/1000 Gigabit Switch with the two screws. 5. Maneuver the Switch so the wall-mount slots line up or down until the screws fit snugly into the wall. Place... the wall-mount slots over the screws and slide the Switch down . The front panel should be positioned ...
... into the wall-mount slots. Insert a screw into each hole, and leave 3 mm (0.12 in) of the Switch is smooth, flat, dry and 8-Port 10/100/1000 Gigabit Switch with the two screws. 5. Maneuver the Switch so the wall-mount slots line up or down until the screws fit snugly into the wall. Place... the wall-mount slots over the screws and slide the Switch down . The front panel should be positioned ...
User Guide
Page 13
... cord that is supplied with Webview Installation 7 If a port has an active Gigabit connection, then its corresponding Gigabit LED will connect to reset the Switch, unplug the power cord from the back of a different power cord could damage the Switch. 8. Connect the other end into an electrical outlet....to the Switch are using the mini-GBIC port, then connect the mini-GBIC module to a PC or other end to the Switch, follow these instructions: 1. NOTE: If you will also light up on the Switch. 3. Wait a few seconds and then reconnect it. 8-Port 10/100/1000 Gigabit Switch with ...
... cord that is supplied with Webview Installation 7 If a port has an active Gigabit connection, then its corresponding Gigabit LED will connect to reset the Switch, unplug the power cord from the back of a different power cord could damage the Switch. 8. Connect the other end into an electrical outlet....to the Switch are using the mini-GBIC port, then connect the mini-GBIC module to a PC or other end to the Switch, follow these instructions: 1. NOTE: If you will also light up on the Switch. 3. Wait a few seconds and then reconnect it. 8-Port 10/100/1000 Gigabit Switch with ...
User Guide
Page 14
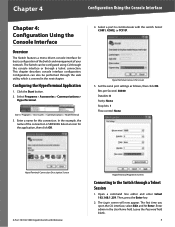
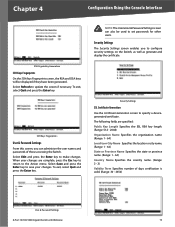
... Using the Console Interface Chapter 4: Configuration Using the Console Interface Overview The Switch features a menu-driven console interface for basic configuration of the Switch and management of the connection is covered in the User Name field. Open a command...Databits: 8 Parity: None Stop bits: 1 Flow control: None HyperTerminal Connection Description Screen 8-Port 10/100/1000 Gigabit Switch with Webview HyperTerminal Properties Screen Connecting to communicate with the switch. Enter a name for the application, then click OK. 4. Configuring the HyperTerminal Application ...
... Using the Console Interface Chapter 4: Configuration Using the Console Interface Overview The Switch features a menu-driven console interface for basic configuration of the Switch and management of the connection is covered in the User Name field. Open a command...Databits: 8 Parity: None Stop bits: 1 Flow control: None HyperTerminal Connection Description Screen 8-Port 10/100/1000 Gigabit Switch with Webview HyperTerminal Properties Screen Connecting to communicate with the switch. Enter a name for the application, then click OK. 4. Configuring the HyperTerminal Application ...
User Guide
Page 15
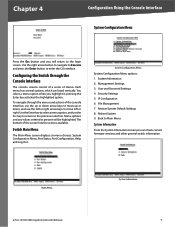
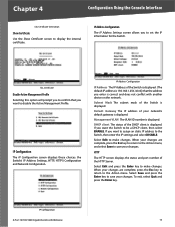
... and any values entered or present will return to the login screen. Switch Main Menu The Main Menu screen displays six menu choices: System Configuration Menu, Port Status, Port Configuration, Help, and Log Out. User and Password Settings 4. Use the...Main Menu 8-Port 10/100/1000 Gigabit Switch with Webview System Information 9 System Information From the System Information screen you can check current firmware versions and other general switch information. Each menu has several options, which are listed vertically. Management Settings 3. File Management 7. pressing...
... and any values entered or present will return to the login screen. Switch Main Menu The Main Menu screen displays six menu choices: System Configuration Menu, Port Status, Port Configuration, Help, and Log Out. User and Password Settings 4. Use the...Main Menu 8-Port 10/100/1000 Gigabit Switch with Webview System Information 9 System Information From the System Information screen you can check current firmware versions and other general switch information. Each menu has several options, which are listed vertically. Management Settings 3. File Management 7. pressing...
User Guide
Page 16
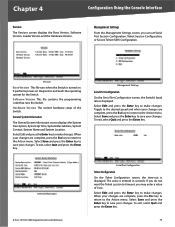
... press the Enter key. Select Save and press the Enter key to the Action menu. Management Settings Serial Port Configuration On the Serial Port Configuration screen, the Switch's baud rate is displayed. Toggle to the desired speed and when your changes are complete,...Action menu. General Information 8-Port 10/100/1000 Gigabit Switch with Webview Serial Port Configuration Telnet Configuration On the Telnet Configuration screen, the time-out is displayed. Management Settings From the Management Settings screen, you may enter a value of the Switch. General System Information The ...
... press the Enter key. Select Save and press the Enter key to the Action menu. Management Settings Serial Port Configuration On the Serial Port Configuration screen, the Switch's baud rate is displayed. Toggle to the desired speed and when your changes are complete,...Action menu. General Information 8-Port 10/100/1000 Gigabit Switch with Webview Serial Port Configuration Telnet Configuration On the Telnet Configuration screen, the time-out is displayed. Management Settings From the Management Settings screen, you may enter a value of the Switch. General System Information The ...
User Guide
Page 17
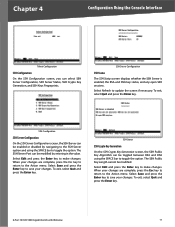
... On the SSH Configuration screen, you can be enabled or disabled by entering in the value. Select Refresh to toggle the option. The SSH Server Port can be toggled between RSA and DSA using the SPACE bar to update the screen if necessary. SSH Status SSH Crypto Key Generation On the... to toggle the option. Select Save and press the Enter key to make changes. To exit, select Quit and press the Enter key. 8-Port 10/100/1000 Gigabit Switch with Webview 11 Select Edit and press the Enter key to save your changes are complete, press the Esc key to return to the...
... On the SSH Configuration screen, you can be enabled or disabled by entering in the value. Select Refresh to toggle the option. The SSH Server Port can be toggled between RSA and DSA using the SPACE bar to update the screen if necessary. SSH Status SSH Crypto Key Generation On the... to toggle the option. Select Save and press the Enter key to make changes. To exit, select Quit and press the Enter key. 8-Port 10/100/1000 Gigabit Switch with Webview 11 Select Edit and press the Enter key to save your changes are complete, press the Esc key to return to the...
User Guide
Page 18
...: The Username & Password Settings screen can administer the user names and passwords of days certification is valid. (Range: 30 - 3650) User & Password Settings 8-Port 10/100/1000 Gigabit Switch with Webview 12 The following fields are complete, press the Esc key to return to the Action menu. Select Refresh to make changes. SSH...
...: The Username & Password Settings screen can administer the user names and passwords of days certification is valid. (Range: 30 - 3650) User & Password Settings 8-Port 10/100/1000 Gigabit Switch with Webview 12 The following fields are complete, press the Esc key to return to the Action menu. Select Refresh to make changes. SSH...
User Guide
Page 19
...IP settings and select DISABLE. Select Save and press the Enter key to display the internal certificate. IP Configuration 8-Port 10/100/1000 Gigabit Switch with another device on the network. Chapter 4 Configuration Using the Console Interface SSL Certificate Generation Show Certificate Use the ...is displayed. IP Address Configuration IP Address The IP Address of the Switch is displayed. Management VLAN The VLAN ID number is 192.168.1.254.) Verify that you want to disable the Active Management Profile. Select Edit to the Action menu. When your changes are ...
...IP settings and select DISABLE. Select Save and press the Enter key to display the internal certificate. IP Configuration 8-Port 10/100/1000 Gigabit Switch with another device on the network. Chapter 4 Configuration Using the Console Interface SSL Certificate Generation Show Certificate Use the ...is displayed. IP Address Configuration IP Address The IP Address of the Switch is displayed. Management VLAN The VLAN ID number is 192.168.1.254.) Verify that you want to disable the Active Management Profile. Select Edit to the Action menu. When your changes are ...
User Guide
Page 20
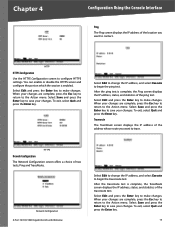
... which the session is complete, the TraceRoute screen displays the IP address, status, and statistics of the traceroute test. Network Configuration 8-Port 10/100/1000 Gigabit Switch with Webview Select Edit to change the IP address, and select Execute to begin the traceroute test. After the ping test is complete, the Ping ...
... which the session is complete, the TraceRoute screen displays the IP address, status, and statistics of the traceroute test. Network Configuration 8-Port 10/100/1000 Gigabit Switch with Webview Select Edit to change the IP address, and select Execute to begin the traceroute test. After the ping test is complete, the Ping ...
User Guide
Page 21
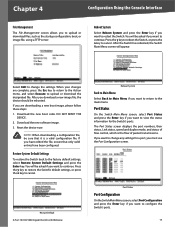
... file. You will appear. If you want to view the status information for a port, you to restart the Switch. You will be rebooted. Restore Default 8-Port 10/100/1000 Gigabit Switch with Webview Reboot System Back to Main Menu Select Back to Main Menu if you want...key to cancel. Restore System Default Settings To restore the Switch back to change any settings for the Switch's ports. Chapter 4 Configuration Using the Console Interface File Management The File Management screen allows you must use the Port Configuration screen. Select Edit to the factory default settings, ...
... file. You will appear. If you want to view the status information for a port, you to restart the Switch. You will be rebooted. Restore Default 8-Port 10/100/1000 Gigabit Switch with Webview Reboot System Back to Main Menu Select Back to Main Menu if you want...key to cancel. Restore System Default Settings To restore the Switch back to change any settings for the Switch's ports. Chapter 4 Configuration Using the Console Interface File Management The File Management screen allows you must use the Port Configuration screen. Select Edit to the factory default settings, ...
User Guide
Page 22
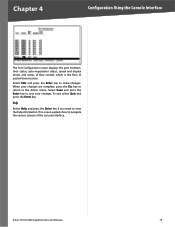
..., their status, auto-negotiation status, speed and duplex mode, and status of flow control, which is the flow of the console interface. 8-Port 10/100/1000 Gigabit Switch with Webview 16 Select Save and press the Enter key to save your changes are complete, press the Esc key to return to navigate the...
..., their status, auto-negotiation status, speed and duplex mode, and status of flow control, which is the flow of the console interface. 8-Port 10/100/1000 Gigabit Switch with Webview 16 Select Save and press the Enter key to save your changes are complete, press the Esc key to return to navigate the...


