

User Guide
Page 5
...Lists Calling from the Call History Lists Deleting a Number from the Call History Lists Saving a Call History List Number to Your Directory Setting or Changing a Phone Password Accessing Voicemail Chapter 4: Using Advanced Phone Features Configuring Privacy and Security Features Blocking Caller ID Blocking Anonymous Calls Using Secure Call ...Speed Dials on Unused Line Buttons Creating Numerical Speed Dials Using Speed Dials Using the Paging Feature Paging Another Phone Cisco Small Business Pro IP Phone SPA 50X User Guide (SIP) Contents 38 38 39 39 40 41 42 43 44 44 45 46 46 47 47 47 48 48...
...Lists Calling from the Call History Lists Deleting a Number from the Call History Lists Saving a Call History List Number to Your Directory Setting or Changing a Phone Password Accessing Voicemail Chapter 4: Using Advanced Phone Features Configuring Privacy and Security Features Blocking Caller ID Blocking Anonymous Calls Using Secure Call ...Speed Dials on Unused Line Buttons Creating Numerical Speed Dials Using Speed Dials Using the Paging Feature Paging Another Phone Cisco Small Business Pro IP Phone SPA 50X User Guide (SIP) Contents 38 38 39 39 40 41 42 43 44 44 45 46 46 47 47 47 48 48...

User Guide
Page 6
... Configuring the Phone Screen Saver 57 Turning on the Screen Saver 59 Using Ring Tones 59 Changing Your Ring Tone 59 Configuring Date and Time Parameters on Your Phone 60 Setting Your Phone...'s Date and Time 60 Using Star Codes 60 Using the Interactive Voice Response Menu on the Cisco SPA 501G 62 Advanced Procedures for Technical Support Personnel 65 Rebooting Your Phone 66 Chapter 5: Using the Web...Creating Speed Dials 73 Accepting Text Messages 73 Adjusting Audio Volume 74 Changing the LCD Contrast 75 Cisco Small Business Pro IP Phone SPA 50X User Guide...
... Configuring the Phone Screen Saver 57 Turning on the Screen Saver 59 Using Ring Tones 59 Changing Your Ring Tone 59 Configuring Date and Time Parameters on Your Phone 60 Setting Your Phone...'s Date and Time 60 Using Star Codes 60 Using the Interactive Voice Response Menu on the Cisco SPA 501G 62 Advanced Procedures for Technical Support Personnel 65 Rebooting Your Phone 66 Chapter 5: Using the Web...Creating Speed Dials 73 Accepting Text Messages 73 Adjusting Audio Volume 74 Changing the LCD Contrast 75 Cisco Small Business Pro IP Phone SPA 50X User Guide...

User Guide
Page 14
... forwarding. Allows you unpark it or the caller disconnects. Clears call .) Cancels any changes you can edit numbers or letters, or enable or disable a feature. Provides access to a specified number. Cisco Small Business Pro IP Phone SPA 50X User Guide (SIP) 7 Performs a blind call transfer (transferring a call without deleting characters. Deletes an entire...
... forwarding. Allows you unpark it or the caller disconnects. Clears call .) Cancels any changes you can edit numbers or letters, or enable or disable a feature. Provides access to a specified number. Cisco Small Business Pro IP Phone SPA 50X User Guide (SIP) 7 Performs a blind call transfer (transferring a call without deleting characters. Deletes an entire...
User Guide
Page 15
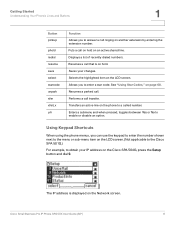
.... Selects the highlighted item on page 60. Resumes a parked call transfer. Saves your IP address on the Cisco SPA 504G, press the Setup button and dial 9. Cisco Small Business Pro IP Phone SPA 50X User Guide (SIP) 8 Displays a list of recently dialed numbers. Resumes a call that is displayed on hold . Performs a call . Using... an active line on another extension by entering the extension number. The IP address is on hold on the LCD screen. (Not applicable to the Cisco SPA 501G.) For example, to obtain your changes.
.... Selects the highlighted item on page 60. Resumes a parked call transfer. Saves your IP address on the Cisco SPA 504G, press the Setup button and dial 9. Cisco Small Business Pro IP Phone SPA 50X User Guide (SIP) 8 Displays a list of recently dialed numbers. Resumes a call that is displayed on hold . Performs a call . Using... an active line on another extension by entering the extension number. The IP address is on hold on the LCD screen. (Not applicable to the Cisco SPA 501G.) For example, to obtain your changes.
User Guide
Page 33
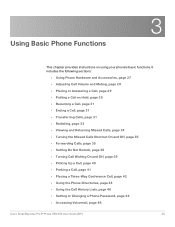
...; Placing a Three-Way Conference Call, page 42 • Using the Phone Directories, page 44 • Using the Call History Lists, page 46 • Setting or Changing a Phone Password, page 48 • Accessing Voicemail, page 48 Cisco Small Business Pro IP Phone SPA 50X User Guide...
...; Placing a Three-Way Conference Call, page 42 • Using the Phone Directories, page 44 • Using the Call History Lists, page 46 • Setting or Changing a Phone Password, page 48 • Accessing Voicemail, page 48 Cisco Small Business Pro IP Phone SPA 50X User Guide...

User Guide
Page 36
...button. Press Save (except on the phone and the speaker button is on the Cisco SPA 501G model). When switching from your phone administrator. Cisco Small Business Pro IP Phone SPA 50X User Guide (SIP) 29 Using Basic Phone Functions Adjusting Call Volume and Muting 3 Adjusting Call Volume... and Muting You can also change call , do one of the handset or speaker, lift ...
...button. Press Save (except on the phone and the speaker button is on the Cisco SPA 501G model). When switching from your phone administrator. Cisco Small Business Pro IP Phone SPA 50X User Guide (SIP) 29 Using Basic Phone Functions Adjusting Call Volume and Muting 3 Adjusting Call Volume... and Muting You can also change call , do one of the handset or speaker, lift ...
User Guide
Page 39
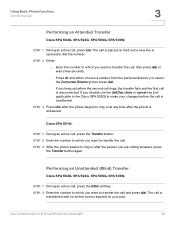
...the number to which you want to dial the number. The call and press dial. Cisco Small Business Pro IP Phone SPA 50X User Guide (SIP) 32 Using Basic Phone Functions Transferring Calls 3 Performing an Attended Transfer Cisco SPA 502G, SPA 504G, SPA 508G, SPA 509G: STEP 1 During an active call... xfer. STEP 3 Press xfer after the phone is disconnected. If you want to transfer the call . Cisco SPA 501G: STEP 1 During an active call is answered. The call is placed on your changes before the second call rings, the transfer fails and the first call , press the Transfer button. STEP ...
...the number to which you want to dial the number. The call and press dial. Cisco Small Business Pro IP Phone SPA 50X User Guide (SIP) 32 Using Basic Phone Functions Transferring Calls 3 Performing an Attended Transfer Cisco SPA 502G, SPA 504G, SPA 508G, SPA 509G: STEP 1 During an active call... xfer. STEP 3 Press xfer after the phone is disconnected. If you want to transfer the call . Cisco SPA 501G: STEP 1 During an active call is answered. The call is placed on your changes before the second call rings, the transfer fails and the first call , press the Transfer button. STEP ...

User Guide
Page 52
... softkey, or press the Setup button and select Directories. Press the option softkey. Press cancel to save the entry. Cisco Small Business Pro IP Phone SPA 50X User Guide (SIP) 45 STEP 2 Select Corporate Directory. Press the play softkey to play the selected ring tone or the select softkey... to assign that ringtone to the person whose number you are adding to the LDAP Directory Name and press Select. STEP 2 Scroll to the directory. STEP 4 (Optional) To change ...
... softkey, or press the Setup button and select Directories. Press the option softkey. Press cancel to save the entry. Cisco Small Business Pro IP Phone SPA 50X User Guide (SIP) 45 STEP 2 Select Corporate Directory. Press the play softkey to play the selected ring tone or the select softkey... to assign that ringtone to the person whose number you are adding to the LDAP Directory Name and press Select. STEP 2 Scroll to the directory. STEP 4 (Optional) To change ...
User Guide
Page 55
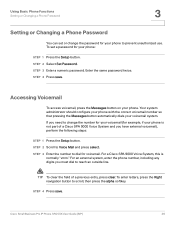
... 3 Setting or Changing a Phone Password You can set a password for your phone. Accessing Voicemail To access voicemail, press the Messages button on your phone: STEP 1 Press the Setup button. STEP 3 Enter the number to Voice Mail and press select. Cisco Small Business Pro IP Phone SPA 50X User Guide (SIP) 48 STEP 2 Select...
... 3 Setting or Changing a Phone Password You can set a password for your phone. Accessing Voicemail To access voicemail, press the Messages button on your phone: STEP 1 Press the Setup button. STEP 3 Enter the number to Voice Mail and press select. Cisco Small Business Pro IP Phone SPA 50X User Guide (SIP) 48 STEP 2 Select...
User Guide
Page 63
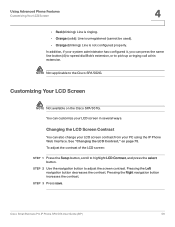
... Interface. To adjust the contrast of the LCD screen: STEP 1 Press the Setup button, scroll to the Cisco SPA 502G. Pressing the Right navigation button increases the contrast. Changing the LCD Screen Contrast You can press the same line button (4) to speed dial Bob's extension, or to... the screen contrast. STEP 2 Use the navigation button to pick up a ringing call at his extension. See "Changing the LCD Contrast," on the Cisco SPA 501G. Cisco Small Business Pro IP Phone SPA 50X User Guide (SIP) 56 In addition, if your system administrator has configured it, you can also...
... Interface. To adjust the contrast of the LCD screen: STEP 1 Press the Setup button, scroll to the Cisco SPA 502G. Pressing the Right navigation button increases the contrast. Changing the LCD Screen Contrast You can press the same line button (4) to speed dial Bob's extension, or to... the screen contrast. STEP 2 Use the navigation button to pick up a ringing call at his extension. See "Changing the LCD Contrast," on the Cisco SPA 501G. Cisco Small Business Pro IP Phone SPA 50X User Guide (SIP) 56 In addition, if your system administrator has configured it, you can also...

User Guide
Page 64
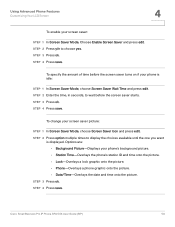
... on STEP 5 Press ok. Some of time. STEP 3 Choose Back Light Timer and press edit. STEP 2 Select Screen Saver Mode. You can change this time period so that the screen backlight is on for the phone to choose the desired setting: • 10 seconds • 20 seconds ...on page 75. To configure your PC using the IP Phone Web Interface. Cisco Small Business Pro IP Phone SPA 50X User Guide (SIP) 57 STEP 2 Select Preferences. Using Advanced Phone Features Customizing Your LCD Screen 4 Changing the Screen Backlight Settings The screen backlight turns off after a specified period of...
... on STEP 5 Press ok. Some of time. STEP 3 Choose Back Light Timer and press edit. STEP 2 Select Screen Saver Mode. You can change this time period so that the screen backlight is on for the phone to choose the desired setting: • 10 seconds • 20 seconds ...on page 75. To configure your PC using the IP Phone Web Interface. Cisco Small Business Pro IP Phone SPA 50X User Guide (SIP) 57 STEP 2 Select Preferences. Using Advanced Phone Features Customizing Your LCD Screen 4 Changing the Screen Backlight Settings The screen backlight turns off after a specified period of...
User Guide
Page 65
...save . Options are: • Background Picture-Displays your screen saver picture: STEP 1 In Screen Saver Mode, choose Screen Saver Icon and press edit. To change your phone's background picture. • Station Time-Overlays the phone's station ID and time onto the picture. • Lock-Overlays a lock graphic onto ...the one you want is idle: STEP 1 In Screen Saver Mode, choose Screen Saver Wait Time and press edit. Cisco Small Business Pro IP Phone SPA 50X User Guide (SIP) 58 STEP 4 Press save. To specify the amount of time before the screen saver starts. Using Advanced Phone ...
...save . Options are: • Background Picture-Displays your screen saver picture: STEP 1 In Screen Saver Mode, choose Screen Saver Icon and press edit. To change your phone's background picture. • Station Time-Overlays the phone's station ID and time onto the picture. • Lock-Overlays a lock graphic onto ...the one you want is idle: STEP 1 In Screen Saver Mode, choose Screen Saver Wait Time and press edit. Cisco Small Business Pro IP Phone SPA 50X User Guide (SIP) 58 STEP 4 Press save. To specify the amount of time before the screen saver starts. Using Advanced Phone ...
User Guide
Page 66
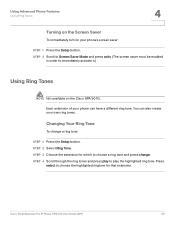
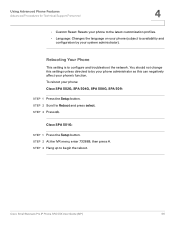
... 4 Scroll through the ring tones and press play to choose a ring tone and press change a ring tone: STEP 1 Press the Setup button. You can have a different ring tone. STEP 2 Scroll to Screen Saver Mode and press activ. (The screen saver ... your own ring tones. Press select to choose the highlighted ringtone for which to play the highlighted ring tone. STEP 2 Select Ring Tone. Cisco Small Business Pro IP Phone SPA 50X User Guide (SIP) 59 Using Advanced Phone Features Using Ring Tones 4 Turning on the Screen Saver To immediately turn on the...
... 4 Scroll through the ring tones and press play to choose a ring tone and press change a ring tone: STEP 1 Press the Setup button. You can have a different ring tone. STEP 2 Scroll to Screen Saver Mode and press activ. (The screen saver ... your own ring tones. Press select to choose the highlighted ringtone for which to play the highlighted ring tone. STEP 2 Select Ring Tone. Cisco Small Business Pro IP Phone SPA 50X User Guide (SIP) 59 Using Advanced Phone Features Using Ring Tones 4 Turning on the Screen Saver To immediately turn on the...
User Guide
Page 67
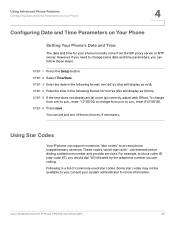
...you ; consult your system administrator for your phone normally come from the SIP proxy server or NTP server. To change from a.m. However, if you need to change some date and time parameters, you can support numerous "star codes" to change from p.m. STEP 5 If the time does not display am (a) or ... for more information. STEP 2 Select Time/Date. to p.m., enter *12*00*00, to access phone supplementary services. Cisco Small Business Pro IP Phone SPA 50X User Guide (SIP) 60 Some star codes may not be available to a.m., enter #12*00*00. to you are entered before dialing ...
...you ; consult your system administrator for your phone normally come from the SIP proxy server or NTP server. To change from a.m. However, if you need to change some date and time parameters, you can support numerous "star codes" to change from p.m. STEP 5 If the time does not display am (a) or ... for more information. STEP 2 Select Time/Date. to p.m., enter *12*00*00, to access phone supplementary services. Cisco Small Business Pro IP Phone SPA 50X User Guide (SIP) 60 Some star codes may not be available to a.m., enter #12*00*00. to you are entered before dialing ...
User Guide
Page 72
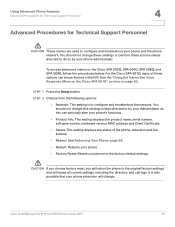
...settings. ! To access advanced menus on page 62. It is to by your phone and the phone network. Cisco Small Business Pro IP Phone SPA 50X User Guide (SIP) 65 For the Cisco SPA 501G, many of the phone, extension and line buttons. • Reboot: See Rebooting Your Phone, page... 66. • Restart: Restarts your phone. • Factory Reset: Resets your phone extension will erase all current settings, including the directory and call logs. You should not change...
...settings. ! To access advanced menus on page 62. It is to by your phone and the phone network. Cisco Small Business Pro IP Phone SPA 50X User Guide (SIP) 65 For the Cisco SPA 501G, many of the phone, extension and line buttons. • Reboot: See Rebooting Your Phone, page... 66. • Restart: Restarts your phone. • Factory Reset: Resets your phone extension will erase all current settings, including the directory and call logs. You should not change...
User Guide
Page 73
... and troubleshoot the network. STEP 3 Press ok. STEP 2 At the IVR menu, enter 732668, then press #. Cisco Small Business Pro IP Phone SPA 50X User Guide (SIP) 66 Using Advanced Phone Features Advanced Procedures for Technical Support Personnel 4 • Custom Reset: Resets your phone to ...phone (subject to availability and configuration by your phone administrator as this settings unless directed to begin the reboot. You should not change this can negatively affect your system administrator). Rebooting Your Phone This setting is to Reboot and press select. STEP 3 Hang ...
... and troubleshoot the network. STEP 3 Press ok. STEP 2 At the IVR menu, enter 732668, then press #. Cisco Small Business Pro IP Phone SPA 50X User Guide (SIP) 66 Using Advanced Phone Features Advanced Procedures for Technical Support Personnel 4 • Custom Reset: Resets your phone to ...phone (subject to availability and configuration by your phone administrator as this settings unless directed to begin the reboot. You should not change this can negatively affect your system administrator). Rebooting Your Phone This setting is to Reboot and press select. STEP 3 Hang ...
User Guide
Page 74
5 Using the Web Interface Your Cisco IP Phone provides a web interface to the phone that allows you to the Web Interface, page 68 • Setting Do Not Disturb, page 69 • ... 73 • Accepting Text Messages, page 73 • Adjusting Audio Volume, page 74 • Changing the LCD Contrast, page 75 • Configuring the Phone Screen Saver, page 75 Cisco Small Business Pro IP Phone SPA 50X User Guide (SIP) 67 This chapter contains the following sections: • Logging in to configure some features...
5 Using the Web Interface Your Cisco IP Phone provides a web interface to the phone that allows you to the Web Interface, page 68 • Setting Do Not Disturb, page 69 • ... 73 • Accepting Text Messages, page 73 • Adjusting Audio Volume, page 74 • Changing the LCD Contrast, page 75 • Configuring the Phone Screen Saver, page 75 Cisco Small Business Pro IP Phone SPA 50X User Guide (SIP) 67 This chapter contains the following sections: • Logging in to configure some features...
User Guide
Page 76
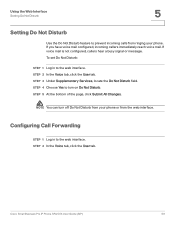
... Do Not Disturb Use the Do Not Disturb feature to prevent incoming calls from ringing your phone or from your phone. Cisco Small Business Pro IP Phone SPA 50X User Guide (SIP) 69 STEP 4 Choose Yes to turn off Do Not Disturb from the web interface. STEP 5 At the bottom of the... page, click Submit All Changes. NOTE You can turn on Do Not Disturb. STEP 2 In the Voice tab, click the User tab. STEP...
... Do Not Disturb Use the Do Not Disturb feature to prevent incoming calls from ringing your phone or from your phone. Cisco Small Business Pro IP Phone SPA 50X User Guide (SIP) 69 STEP 4 Choose Yes to turn off Do Not Disturb from the web interface. STEP 5 At the bottom of the... page, click Submit All Changes. NOTE You can turn on Do Not Disturb. STEP 2 In the Voice tab, click the User tab. STEP...

User Guide
Page 77
... seconds to enable or disable. STEP 5 At the bottom of the page, click Submit All Changes. STEP 3 Under Supplementary Services, locate the CW Setting field. Cisco Small Business Pro IP Phone SPA 50X User Guide (SIP) 70 Using the Web Interface Configuring Call Waiting 5 STEP 3 Under Call Forward, you can... interface. To turn call , and the caller hears a busy signal or message. STEP 4 At the bottom of the page, click Submit All Changes. Enter the number to which to forward calls. • CFWD No Ans Dest-Forwards calls to another number if there's no to delay forwarding ...
... seconds to enable or disable. STEP 5 At the bottom of the page, click Submit All Changes. STEP 3 Under Supplementary Services, locate the CW Setting field. Cisco Small Business Pro IP Phone SPA 50X User Guide (SIP) 70 Using the Web Interface Configuring Call Waiting 5 STEP 3 Under Call Forward, you can... interface. To turn call , and the caller hears a busy signal or message. STEP 4 At the bottom of the page, click Submit All Changes. Enter the number to which to forward calls. • CFWD No Ans Dest-Forwards calls to another number if there's no to delay forwarding ...

User Guide
Page 78
...5 At the bottom of the page, click Submit All Changes. To block Caller ID: STEP 1 Log in to the web interface. To block anonymous calls: STEP 1 Log in to the web interface. Cisco Small Business Pro IP Phone SPA 50X User Guide (SIP) 71 STEP 2 In the Voice tab, click the ...disable. STEP 4 Choose yes or no to not display Caller ID, the call . STEP 5 At the bottom of the page, click Submit All Changes. STEP 3 Under Supplementary Services, locate the Block ANC Setting field. Blocking Anonymous Calls Blocking anonymous calls prevents calls with unknown Caller ID from your ...
...5 At the bottom of the page, click Submit All Changes. To block Caller ID: STEP 1 Log in to the web interface. To block anonymous calls: STEP 1 Log in to the web interface. Cisco Small Business Pro IP Phone SPA 50X User Guide (SIP) 71 STEP 2 In the Voice tab, click the ...disable. STEP 4 Choose yes or no to not display Caller ID, the call . STEP 5 At the bottom of the page, click Submit All Changes. STEP 3 Under Supplementary Services, locate the Block ANC Setting field. Blocking Anonymous Calls Blocking anonymous calls prevents calls with unknown Caller ID from your ...


