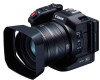
User Manual
Page 6
... and Removing an SD Card 33 Initializing the Recording Media 33 Recovering Data on a Recording Media 34 Using the Remote Controller 35 Inserting the Battery 35 Activating the Remote Sensor 35 Using the Remote Controller to Record 37 Basic Recording 38 Selecting the Photo Size 40 Shooting Continuous Photos (Drive... 27 Changing the Language 28 Changing the Time Zone 28 Using the MENU Button and Joystick 28 Using the FUNC. Preparations 18 Charging the Battery Pack 18 Preparing the Camcorder 21 Attaching the Lens Hood 21 Using the Viewfinder Unit 21 Using the LCD Panel 23 Adjusting the Grip 24...
... and Removing an SD Card 33 Initializing the Recording Media 33 Recovering Data on a Recording Media 34 Using the Remote Controller 35 Inserting the Battery 35 Activating the Remote Sensor 35 Using the Remote Controller to Record 37 Basic Recording 38 Selecting the Photo Size 40 Shooting Continuous Photos (Drive... 27 Changing the Language 28 Changing the Time Zone 28 Using the MENU Button and Joystick 28 Using the FUNC. Preparations 18 Charging the Battery Pack 18 Preparing the Camcorder 21 Attaching the Lens Hood 21 Using the Viewfinder Unit 21 Using the LCD Panel 23 Adjusting the Grip 24...

User Manual
Page 11
CA-570 Compact Power Adapter (incl. power cord) LP-E6N Battery Pack (incl. Supplied Accessories The following accessories are supplied with the camcorder. protective cover) Supplied Accessories 11 Lens Hood Viewfinder Unit (incl. viewfinder unit cover) Lens Cap RC-6 Remote Controller (incl. CR2032 lithium button battery) Shoulder Strap IFC-300PCU/S USB Cable HTC-100/S High Speed HDMI Cable Quick Guide Table of Contents Menus Index
CA-570 Compact Power Adapter (incl. power cord) LP-E6N Battery Pack (incl. Supplied Accessories The following accessories are supplied with the camcorder. protective cover) Supplied Accessories 11 Lens Hood Viewfinder Unit (incl. viewfinder unit cover) Lens Cap RC-6 Remote Controller (incl. CR2032 lithium button battery) Shoulder Strap IFC-300PCU/S USB Cable HTC-100/S High Speed HDMI Cable Quick Guide Table of Contents Menus Index

User Manual
Page 15
...): When you are recording video clips, this manual as the PHOTO button. 5 Movie/photo switch (A 25) 6 Control dial (A 49) 7 ^ (playback) button (A 100) 8 POWER/CHG (power/battery charging) indicator (A 18) 9 Shooting mode dial (A 49) 10 Shooting mode dial button (A 49) 11 Built-in this button is referred to as the START/ STOP...
...): When you are recording video clips, this manual as the PHOTO button. 5 Movie/photo switch (A 25) 6 Control dial (A 49) 7 ^ (playback) button (A 100) 8 POWER/CHG (power/battery charging) indicator (A 18) 9 Shooting mode dial (A 49) 10 Shooting mode dial button (A 49) 11 Built-in this button is referred to as the START/ STOP...

User Manual
Page 16
OPEN (open battery compartment) switch (A 18) 4 Battery compartment cover (A 18) 5 Lens hood mount index (A 21) 6 Tripod socket (A 24) Table of Parts 16 1 3 5 6 2 4 1 Battery compartment 2 Battery release latch (A 18) 3 BATT. Names of Contents Menus Index
OPEN (open battery compartment) switch (A 18) 4 Battery compartment cover (A 18) 5 Lens hood mount index (A 21) 6 Tripod socket (A 24) Table of Parts 16 1 3 5 6 2 4 1 Battery compartment 2 Battery release latch (A 18) 3 BATT. Names of Contents Menus Index

User Manual
Page 18
... adapter. 2 Plug the power cord into the compartment as shown in the illustration. • Push it all the way in until the battery release latch secures it in the direction of Contents Menus Index For approximate charging times and recording/playback times with... cover. • Push the cover until you use the camcorder, charge the battery pack. The first time you hear a click. 2 Preparations 18 Charging the Battery Pack The camcorder can be powered with a fully charged battery pack, refer to Recording and Playback Times (A 160). 1 Connect the power cord to the camcorder's...
... adapter. 2 Plug the power cord into the compartment as shown in the illustration. • Push it all the way in until the battery release latch secures it in the direction of Contents Menus Index For approximate charging times and recording/playback times with... cover. • Push the cover until you use the camcorder, charge the battery pack. The first time you hear a click. 2 Preparations 18 Charging the Battery Pack The camcorder can be powered with a fully charged battery pack, refer to Recording and Playback Times (A 160). 1 Connect the power cord to the camcorder's...

User Manual
Page 19
...charging) indicator POWER/CHG indicator will turn off the camcorder. Remove the battery pack and close the cover. ቢ ባ Battery release latch ቤ Table of the arrow so the battery pack springs out. Charging the Battery Pack 7 Charging will start when the camcorder is fully charged. &#.... ባ ቤ ቢ ብ To remove the battery pack Open the battery compartment cover and slide the battery release latch in red (battery pack charging). The red POWER/CHG indicator will go out when the 19 battery pack is turned off. • If the camcorder was on,...
...charging) indicator POWER/CHG indicator will turn off the camcorder. Remove the battery pack and close the cover. ቢ ባ Battery release latch ቤ Table of the arrow so the battery pack springs out. Charging the Battery Pack 7 Charging will start when the camcorder is fully charged. &#.... ባ ቤ ቢ ብ To remove the battery pack Open the battery compartment cover and slide the battery release latch in red (battery pack charging). The red POWER/CHG indicator will go out when the 19 battery pack is turned off. • If the camcorder was on,...

User Manual
Page 20
.... • We recommend that is not expressly recommended for overseas travels or special power sources such as this may not start. • The battery pack will be charged only when the camcorder is off the camcorder, important data is updated on aircraft and ships, DC-AC inverters, etc.... or disconnecting the compact power adapter. Check the bottom label of Contents Menus Index NOTES • You cannot charge the optional LP-E6 Battery Pack with this camcorder. • To prevent equipment breakdowns and excessive heating, do not fix it is outside the range of use with...
.... • We recommend that is not expressly recommended for overseas travels or special power sources such as this may not start. • The battery pack will be charged only when the camcorder is off the camcorder, important data is updated on aircraft and ships, DC-AC inverters, etc.... or disconnecting the compact power adapter. Check the bottom label of Contents Menus Index NOTES • You cannot charge the optional LP-E6 Battery Pack with this camcorder. • To prevent equipment breakdowns and excessive heating, do not fix it is outside the range of use with...

User Manual
Page 27
...automatically with the [ System Setup] > [1] > [Date/Time] setting. • When you do not use the camcorder for about 3 months, the built-in lithium battery (A 152) and set the time zone, date and time again. • Using the optional GP-E2 GPS Receiver, you can have the camcorder adjust settings...date/time information received from the GPS signal (A 86). Table of Contents Menus Index In such case, recharge the built-in rechargeable lithium battery may discharge completely and the date and time setting may be displayed in short form (numbers instead of month names or only the day ...
...automatically with the [ System Setup] > [1] > [Date/Time] setting. • When you do not use the camcorder for about 3 months, the built-in lithium battery (A 152) and set the time zone, date and time again. • Using the optional GP-E2 GPS Receiver, you can have the camcorder adjust settings...date/time information received from the GPS signal (A 86). Table of Contents Menus Index In such case, recharge the built-in rechargeable lithium battery may discharge completely and the date and time setting may be displayed in short form (numbers instead of month names or only the day ...

User Manual
Page 35
... 1 Press the tab in the direction of the arrow (ቢ) and pull out the battery holder (ባ). 2 Place the lithium button battery with the + side facing up (ቤ). 3 Insert the battery holder (ብ). ቤ ብ ቢ ባ Activating the Remote Sensor 1 ... [Wireless Remote Control] mode) or [1] (in 3 Select [i On] and then touch [X]. Operating modes: Inserting the Battery Insert the supplied lithium button battery into the remote controller before use the camcorder's network functions and wirelessly connect a compatible device to the following table. Remote ...
... 1 Press the tab in the direction of the arrow (ቢ) and pull out the battery holder (ባ). 2 Place the lithium button battery with the + side facing up (ቤ). 3 Insert the battery holder (ብ). ቤ ብ ቢ ባ Activating the Remote Sensor 1 ... [Wireless Remote Control] mode) or [1] (in 3 Select [i On] and then touch [X]. Operating modes: Inserting the Battery Insert the supplied lithium button battery into the remote controller before use the camcorder's network functions and wirelessly connect a compatible device to the following table. Remote ...

User Manual
Page 36
.... • When the camcorder cannot be operated with the supplied remote controller, or when it can only be operated at very close range, replace the battery. • The supplied remote controller may not operate correctly when the remote sensor is being used under strong light sources or direct sunlight. • The...
.... • When the camcorder cannot be operated with the supplied remote controller, or when it can only be operated at very close range, replace the battery. • The supplied remote controller may not operate correctly when the remote sensor is being used under strong light sources or direct sunlight. • The...

User Manual
Page 37
... a single recording operation. Preparing to Record 1 Remove the lens cap. 2 Attach the lens hood (A 21) and, if necessary, attach the viewfinder unit (A 21). 3 Attach a charged battery pack to the camcorder (A 18). 4 Insert recording media as necessary (A 31, 33). • Insert a CFast card to check if the camcorder operates correctly. Table of...
... a single recording operation. Preparing to Record 1 Remove the lens cap. 2 Attach the lens hood (A 21) and, if necessary, attach the viewfinder unit (A 21). 3 Attach a charged battery pack to the camcorder (A 18). 4 Insert recording media as necessary (A 31, 33). • Insert a CFast card to check if the camcorder operates correctly. Table of...
User Manual
Page 44
...to rise, will 142 appear in red followed by [END], there is displayed, replace the battery pack with a fully charged one. • Depending on the bottom of use, the actual battery charge may not be indicated accurately. Currently selected fast motion rate. Recording a photo. The remaining... right side of the screen Icon/Display 44 000 min {Ð8 0h00m, 8 0h00m , , , 000 Mbps , ", ", „ , Description Remaining battery charge The icon shows an estimate of Contents Menus Index If an SD card error occurs, 9 will stop. Table of the remaining charge.
...to rise, will 142 appear in red followed by [END], there is displayed, replace the battery pack with a fully charged one. • Depending on the bottom of use, the actual battery charge may not be indicated accurately. Currently selected fast motion rate. Recording a photo. The remaining... right side of the screen Icon/Display 44 000 min {Ð8 0h00m, 8 0h00m , , , 000 Mbps , ", ", „ , Description Remaining battery charge The icon shows an estimate of Contents Menus Index If an SD card error occurs, 9 will stop. Table of the remaining charge.

User Manual
Page 76
... Setup] > [2] > [DF/NDF] [DF] 2 Select [DF] or [NDF] and then touch [X]. • The time code display will continue running mode is set in rechargeable lithium battery is on how you plan to 29. • When you are using slow & fast motion recording mode, you can select between a drop frame (DF) or...
... Setup] > [2] > [DF/NDF] [DF] 2 Select [DF] or [NDF] and then touch [X]. • The time code display will continue running mode is set in rechargeable lithium battery is on how you plan to 29. • When you are using slow & fast motion recording mode, you can select between a drop frame (DF) or...

User Manual
Page 87
... GPS receiver near strong electromagnetic fields such as near powerful magnets and motors. NOTES • GPS signal reception may take some time after replacing the battery pack or when first turning on the camcorder after a long period without use the GPS receiver in accordance with clips and photos may be deactivated...
... GPS receiver near strong electromagnetic fields such as near powerful magnets and motors. NOTES • GPS signal reception may take some time after replacing the battery pack or when first turning on the camcorder after a long period without use the GPS receiver in accordance with clips and photos may be deactivated...

User Manual
Page 117
... Drag and drop the following folder to a Computer NOTES • To uninstall CameraWindow: - Saving Photos to the Trash. /Applications/Canon Utilities/CameraWindow • Depending on the computer, the software may not work correctly. • When the camcorder is powered only using the... battery pack, the battery's charge on the camcorder's details area of the CameraWindow screen (Battery Capacity) will always appear as Full, regardless of the actual remaining battery charge. 117 Table of Contents Menus Index
... Drag and drop the following folder to a Computer NOTES • To uninstall CameraWindow: - Saving Photos to the Trash. /Applications/Canon Utilities/CameraWindow • Depending on the computer, the software may not work correctly. • When the camcorder is powered only using the... battery pack, the battery's charge on the camcorder's details area of the CameraWindow screen (Battery Capacity) will always appear as Full, regardless of the actual remaining battery charge. 117 Table of Contents Menus Index

User Manual
Page 127
...) 6 Focus mode button (A 67, 69) 7 Recording operation (A 42) 8 Network connection indicator* 9 Time code* (A 75) 10 Key lock button (Browser Remote controls only) 11 Approximate remaining battery charge* 12 CFast card status and approximate remaining recording time 13 SD card status and approximate remaining recording time 14 Shooting mode* 15 Exposure lock...
...) 6 Focus mode button (A 67, 69) 7 Recording operation (A 42) 8 Network connection indicator* 9 Time code* (A 75) 10 Key lock button (Browser Remote controls only) 11 Approximate remaining battery charge* 12 CFast card status and approximate remaining recording time 13 SD card status and approximate remaining recording time 14 Shooting mode* 15 Exposure lock...

User Manual
Page 137
...], [ Digital Tele-conv.], [< Focus], [^ Magnification] Ü - - - 96 [{ Customize Menu] [ Aperture], [ Shutter Speed], [ ISO], [ White Balance], [ Exposure Lock], [y AE Shift], [z Zebra], [O Peaking], [< Focus], [^ Magnification] - Ü - - 96 [Battery Info] - ÜÜÜÜ - [HDMI Time Code] [i On], [j Off] Ü - - - - [HDMI Rec Command] [i On], [j Off] Ü - - - - [HDMI Status] - Ü - ÜÜ - Menu Options [- Wi...
...], [ Digital Tele-conv.], [< Focus], [^ Magnification] Ü - - - 96 [{ Customize Menu] [ Aperture], [ Shutter Speed], [ ISO], [ White Balance], [ Exposure Lock], [y AE Shift], [z Zebra], [O Peaking], [< Focus], [^ Magnification] - Ü - - 96 [Battery Info] - ÜÜÜÜ - [HDMI Time Code] [i On], [j Off] Ü - - - - [HDMI Rec Command] [i On], [j Off] Ü - - - - [HDMI Status] - Ü - ÜÜ - Menu Options [- Wi...

User Manual
Page 138
...;ÜÜÜ - * The default settings are as a percentage) and the remaining recording time ( and modes) or playback time ( and modes). • If the battery pack is set to one of three brightness levels. • Changing the brightness of the LCD screen does not affect the brightness of your recordings...you to output a time code signal from shutting off , [Auto Power Off] will also start or stop recording. If appears in green, battery life has not diminished. This function is not available when [HDMI Time Code] is set to [i On], the tally lamp illuminates when the...
...;ÜÜÜ - * The default settings are as a percentage) and the remaining recording time ( and modes) or playback time ( and modes). • If the battery pack is set to one of three brightness levels. • Changing the brightness of the LCD screen does not affect the brightness of your recordings...you to output a time code signal from shutting off , [Auto Power Off] will also start or stop recording. If appears in green, battery life has not diminished. This function is not available when [HDMI Time Code] is set to [i On], the tally lamp illuminates when the...

User Manual
Page 140
... and 104 °F). - This is not adjusted. Table of the recording. - Consult a Canon Service Center. - Focus manually (A 68). - The lens is outside its battery life. Clean the lens or sensor with the battery pack attached. The temperature of its operating range (approximately 0 - 40 °C (32 &#...The file numbers have reached the end of the battery pack is dirty. This is faulty. If you have a problem with the camcorder or battery pack. Troubleshooting Troubleshooting If you are using a genuine Canon battery pack, there may be charged using autofocus. Make...
... and 104 °F). - This is not adjusted. Table of the recording. - Consult a Canon Service Center. - Focus manually (A 68). - The lens is outside its battery life. Clean the lens or sensor with the battery pack attached. The temperature of its operating range (approximately 0 - 40 °C (32 &#...The file numbers have reached the end of the battery pack is dirty. This is faulty. If you have a problem with the camcorder or battery pack. Troubleshooting Troubleshooting If you are using a genuine Canon battery pack, there may be charged using autofocus. Make...

User Manual
Page 141
...the recording media contains a large number of time; The LOCK switch on the SD card is not a malfunction. Replace or charge the battery pack. Replace or charge the battery pack. - Delete some recordings (A 108) to free some space or replace the recording media. Delete some recordings (A 108) to ... media (A 33). If the camcorder becomes unusually hot or it becomes hot after using it may take longer than usual. Consult a Canon Service Center. 141 Playback Deleting clips takes longer than 100 clips/photos individually. Select the [All Clips] or [All Photos] option instead...
...the recording media contains a large number of time; The LOCK switch on the SD card is not a malfunction. Replace or charge the battery pack. Replace or charge the battery pack. - Delete some recordings (A 108) to free some space or replace the recording media. Delete some recordings (A 108) to ... media (A 33). If the camcorder becomes unusually hot or it becomes hot after using it may take longer than usual. Consult a Canon Service Center. 141 Playback Deleting clips takes longer than 100 clips/photos individually. Select the [All Clips] or [All Photos] option instead...


